Finally put a full day aside to get some interior work done.
Got the clock spring in and YUP, it was bad...rotated endlessly without stopping. New one went in fairly easily. Had FIVE airbag codes to clear, but they all cleared. Replaced torque pins in power window motor to fix 'shutter'...works fine. Got the new black carpet in...kinda tough. Got the new FR500 steering wheel in fairly easily. Got several plastic parts painted, and so far so good.
Here are some pics:
Nasty Old Carpet:

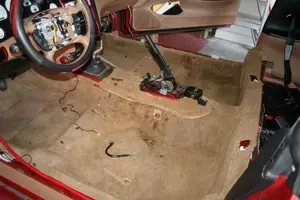
NO CARPET:

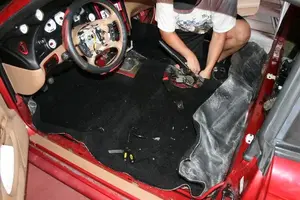
WORKING on Carpet:

Cleaned Console Before Painting:

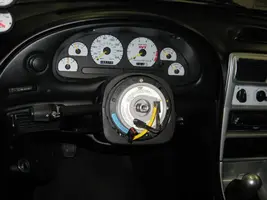
OLD Airbag (Color)

Painted Airbag:

Wide View (not quite finished)

Steering Wheel Close up:

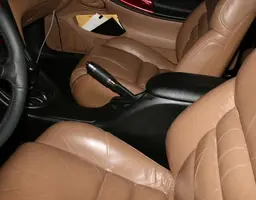
Center Console:

The front Side kick panels and the door sills were picked up from a junk yard in black. I painted the bottom halves of the rear side panels (they are one solid piece with top half black and bottom half the interior color). Still have to paint the 2 doors and the dash. Will try to pick up a glove box door from the junkyard in black also.
All in all a good day for only 7 hours work on a not-so-hot day.
Enjoy!
RC
Got the clock spring in and YUP, it was bad...rotated endlessly without stopping. New one went in fairly easily. Had FIVE airbag codes to clear, but they all cleared. Replaced torque pins in power window motor to fix 'shutter'...works fine. Got the new black carpet in...kinda tough. Got the new FR500 steering wheel in fairly easily. Got several plastic parts painted, and so far so good.
Here are some pics:
Nasty Old Carpet:
NO CARPET:
WORKING on Carpet:
Cleaned Console Before Painting:
OLD Airbag (Color)
Painted Airbag:
Wide View (not quite finished)
Steering Wheel Close up:
Center Console:
The front Side kick panels and the door sills were picked up from a junk yard in black. I painted the bottom halves of the rear side panels (they are one solid piece with top half black and bottom half the interior color). Still have to paint the 2 doors and the dash. Will try to pick up a glove box door from the junkyard in black also.
All in all a good day for only 7 hours work on a not-so-hot day.
Enjoy!
RC
Attachments
-
 2359569IMG0724.webp34 KB · Views: 196
 -
 2359570IMG0725a.webp42.7 KB · Views: 162
 -
 2359571IMG0726a.webp45.6 KB · Views: 181
 -
 2359572IMG0728.webp31.4 KB · Views: 201
 -
 2359567IMG0716.webp9.2 KB · Views: 167
 -
 2359568IMG0721.webp21.3 KB · Views: 165
 -
 2359573IMG0729a.webp33.7 KB · Views: 177
 -
 2359574IMG0730.webp44.1 KB · Views: 180
 -
 2359575IMG0731a.webp29.6 KB · Views: 161


")