(Note: posting multiple replies because of image-per-post limit… couldn’t find any mention of this in the FAQ section though)
Hey all. I dont think I've ever really done a progress pic, but I'm sick home from work today so I figured it'd be a good time to burn a few hours prepping this to show everyone. So here... is my story.
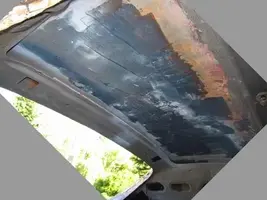
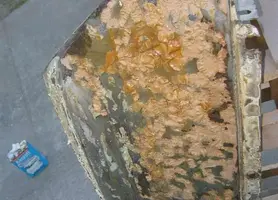
Alas, I have no pics of when I very first got her, but she was very nasty. From the outside, the hood was blistered, and rust holes mared the surface of the car in usual places... but not terrible. Inside is where it was bad. Rats and mice had completely infested this car. By the time I got it they were all dead, but had definatly left their mark. The Trunk was covered in rat poop.. like little Vitamin-E Gel pills.. but poop. .. in the cabin there were a few dead mice layin around, poop all over mixed with some rat poop.. When I pulled the headliner out, tons of mouse poop came raining down. It was absolutely disgusting. The smell was in my nose for a freaking week. oh oh! and under the backseat was a cute mummified family of rats all curled up together... Momma and some babies.. totally dried up and crusty thankfully. Actually I may have a pic of that on a roll of film somewhere but I dont know.
Here is where my picture chronicals begin:
In the barn she sits. After I got her and her counterpart(another 69 coupe in a little better shape) I put them both in the barn to give myself time to prepare mentally for the oncoming challenge... and to give the birds something to poop on.

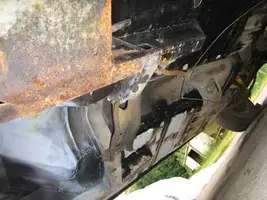
Both floors need to be replaced so I went to work wire wheelin and did a bit'O'cuttin... .. I ended up using a spot weld remover.. that worked with moderate success.. Plus a sawzall, hammer & chisels(critical), cutting tool, grinder, etc.. the usual. Also, be carefull about your glass when grinding inside. I got metal grindies melted into EVERY window of my car... wait wait, the doors were off so they were safe.. okay, ALMOST every window of my car. The windshield is beyond usability, but the others I think I can use for now. they arent too bad... plus the windshield cracked somehow a few months later anyway.. yeesh.

and with one floor out...

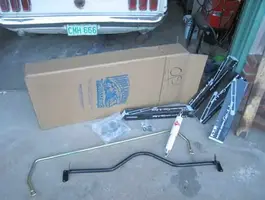
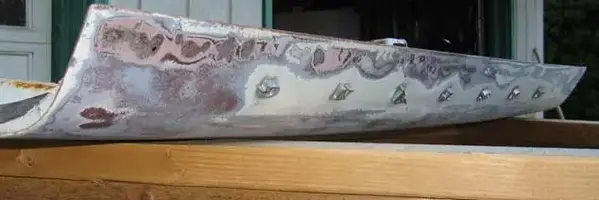
My new floors! Yay! .. one came painted, one came bare with a little oil on it.. so I primed it after a thurough cleaning.

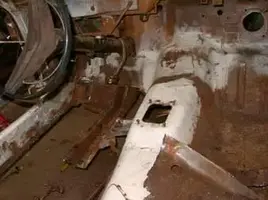
I got a little too excited with the cutting wheel and had to put in a little extra strip of metal to fill the void... *sigh*.. that and the super quality welds.. this picture is just embarassing... My buddy who's shop I was using at the time was thuroughly impressed.. lol.. he's a welder.

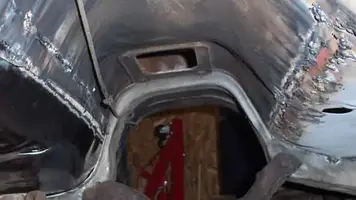
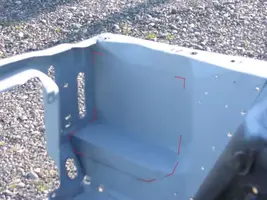
Patches went into the inside front corners of each floorpan.. my buddy did most of the work getting this one in...

Some custom seat mounts there.. the old risers were too rust on the bottom and I didnt wanna deal with welding on more rust.. a bit overkill in the thickness dept. but the'll work.

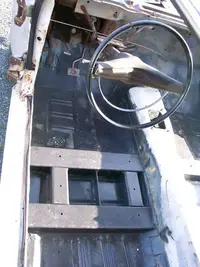
Drivers side seat mounts... Beefier than passenger side because of gizmos we made in the pic after this. Also, you can see in this I POR15'd the floors.

For the driver's side we made rails to move the seat back 6" ... they can unbolted and the seat will mount back in the stock position.. I dont remember where I put those rails though unfortunatly... crap. This is my only picture unfortunatly.

Hey all. I dont think I've ever really done a progress pic, but I'm sick home from work today so I figured it'd be a good time to burn a few hours prepping this to show everyone. So here... is my story.
Alas, I have no pics of when I very first got her, but she was very nasty. From the outside, the hood was blistered, and rust holes mared the surface of the car in usual places... but not terrible. Inside is where it was bad. Rats and mice had completely infested this car. By the time I got it they were all dead, but had definatly left their mark. The Trunk was covered in rat poop.. like little Vitamin-E Gel pills.. but poop. .. in the cabin there were a few dead mice layin around, poop all over mixed with some rat poop.. When I pulled the headliner out, tons of mouse poop came raining down. It was absolutely disgusting. The smell was in my nose for a freaking week. oh oh! and under the backseat was a cute mummified family of rats all curled up together... Momma and some babies.. totally dried up and crusty thankfully. Actually I may have a pic of that on a roll of film somewhere but I dont know.
Here is where my picture chronicals begin:
In the barn she sits. After I got her and her counterpart(another 69 coupe in a little better shape) I put them both in the barn to give myself time to prepare mentally for the oncoming challenge... and to give the birds something to poop on.
Both floors need to be replaced so I went to work wire wheelin and did a bit'O'cuttin... .. I ended up using a spot weld remover.. that worked with moderate success.. Plus a sawzall, hammer & chisels(critical), cutting tool, grinder, etc.. the usual. Also, be carefull about your glass when grinding inside. I got metal grindies melted into EVERY window of my car... wait wait, the doors were off so they were safe.. okay, ALMOST every window of my car. The windshield is beyond usability, but the others I think I can use for now. they arent too bad... plus the windshield cracked somehow a few months later anyway.. yeesh.
and with one floor out...
My new floors! Yay! .. one came painted, one came bare with a little oil on it.. so I primed it after a thurough cleaning.
I got a little too excited with the cutting wheel and had to put in a little extra strip of metal to fill the void... *sigh*.. that and the super quality welds.. this picture is just embarassing... My buddy who's shop I was using at the time was thuroughly impressed.. lol.. he's a welder.
Patches went into the inside front corners of each floorpan.. my buddy did most of the work getting this one in...
Some custom seat mounts there.. the old risers were too rust on the bottom and I didnt wanna deal with welding on more rust.. a bit overkill in the thickness dept. but the'll work.
Drivers side seat mounts... Beefier than passenger side because of gizmos we made in the pic after this. Also, you can see in this I POR15'd the floors.
For the driver's side we made rails to move the seat back 6" ... they can unbolted and the seat will mount back in the stock position.. I dont remember where I put those rails though unfortunatly... crap. This is my only picture unfortunatly.
Attachments
-
 BirdTarget01.webp22.5 KB · Views: 121
 -
 HolyFloor01.webp20.5 KB · Views: 119
 -
 DeFloored01.webp9.3 KB · Views: 110
 -
 New-Floors01.webp9.6 KB · Views: 116
 -
 DriverFloore.webp41.1 KB · Views: 107
 -
 NewSeatRisers01.webp12 KB · Views: 103
 -
 CornerFloorPatch01.webp14.3 KB · Views: 103
 -
 Embarassing01.webp15.9 KB · Views: 100
 -
 SeatRails01.webp27.5 KB · Views: 102
 Its one piece with two bend in it. I bent the sheet metal by grinding a slight groove where I want the corners(inside of the corners) and then just bent it over a counter edge or somethin.


 .. but he says, "Dude, dont research everything for 5 years, just do it!" so I'm all like... "K!"