

So I decided to install Homelink in my 2011 Mustang. It's not an option (crazy!) so I put it in myself. Also took lots of pics to show everyone the install.
First, you can find the Homelink Transmitter on Ebay in most factory interior colors. I know I didn't order the right color for mine. My mistake. I will just dye it sooner or later.
You'll need a T-10 torx bit for the active security sensors and the Pass airbag off light. Also something to do all the cutting and trimming with. I used a pair of side cutters and my small die grinder with sanding pad and reamer. Also, a soldering iron, solder, wire (I just used what came attached to the pigtail), and some scotch locks to wire it to the car.
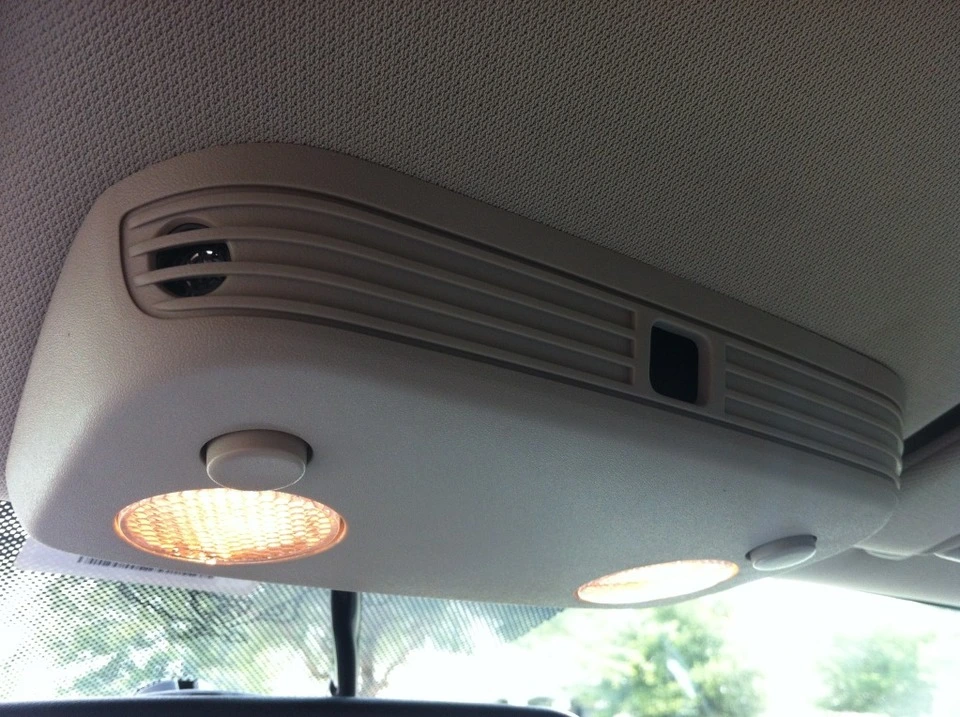
First off you start by taking out the overhead light fixture. All you do it pull straight down. It might feel like it's gonna break, but it won't.
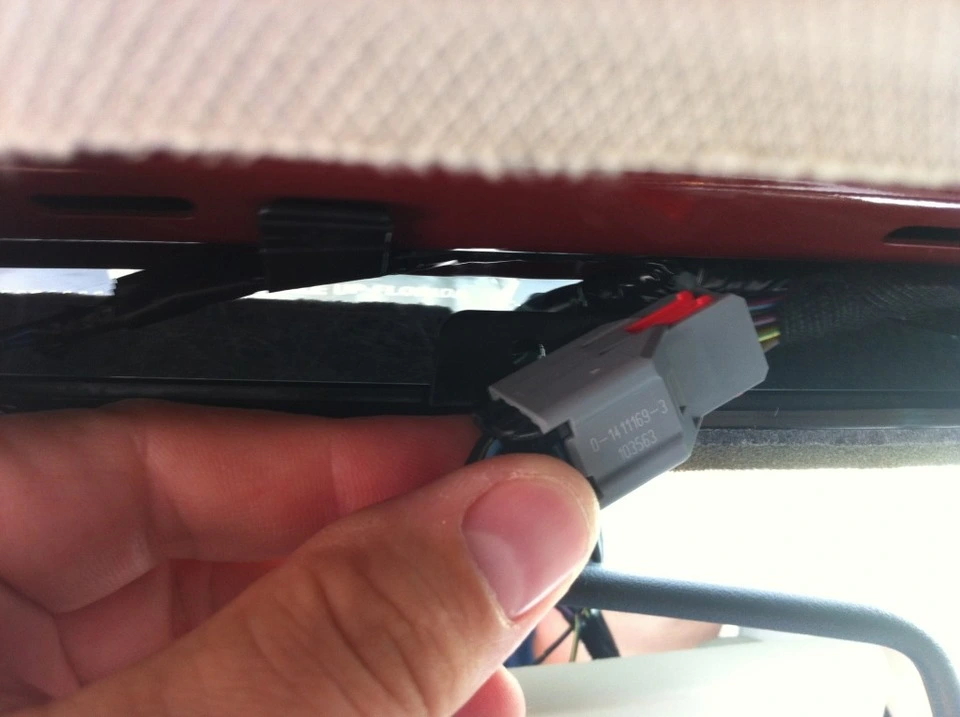
Then you unplug the connector.
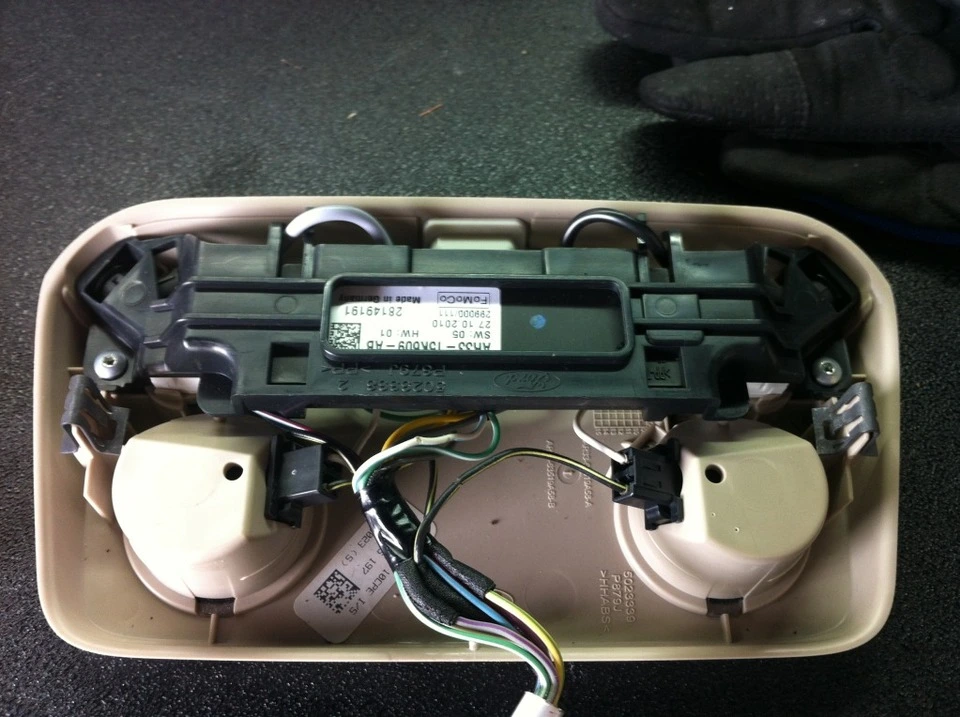
Here's what it looks like on the inside. I have the active security, so there is more in the way.
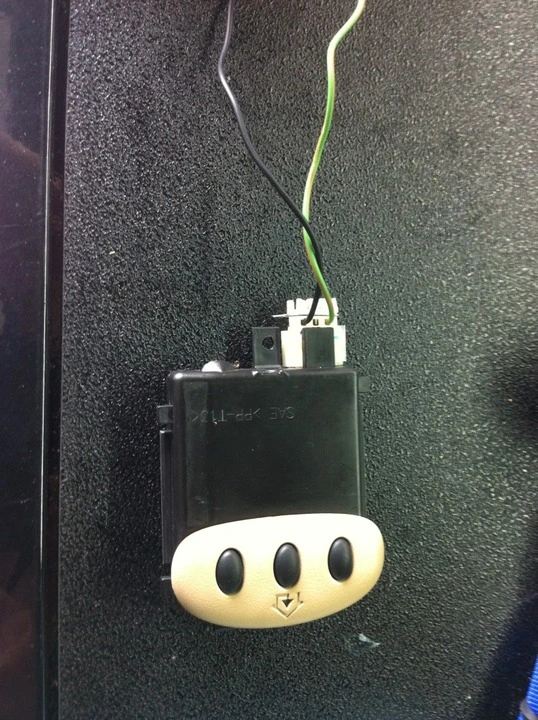
Here's what the Homelink looks like. Again... I know it's the wrong color (I'm color blind, lol)
Put a small screw driver under the trim cover and pop it off.
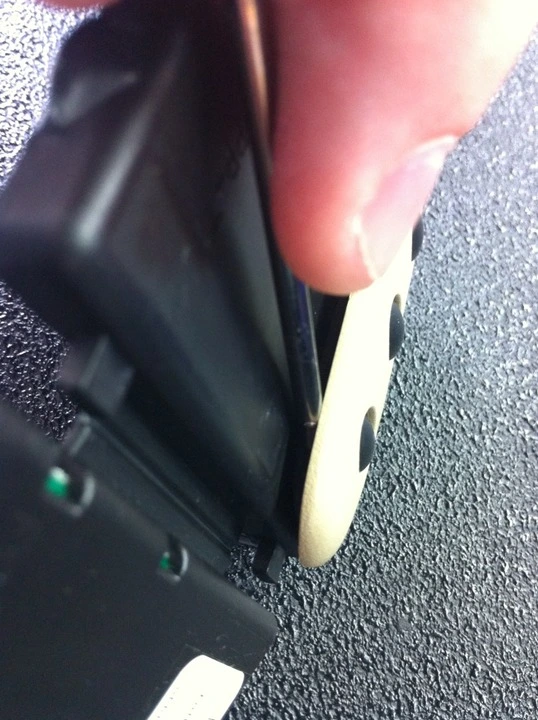
Here's what the Homelink look like from the inside. There will be some cutting and modifying of the case and overhead light fixture to make this fit.
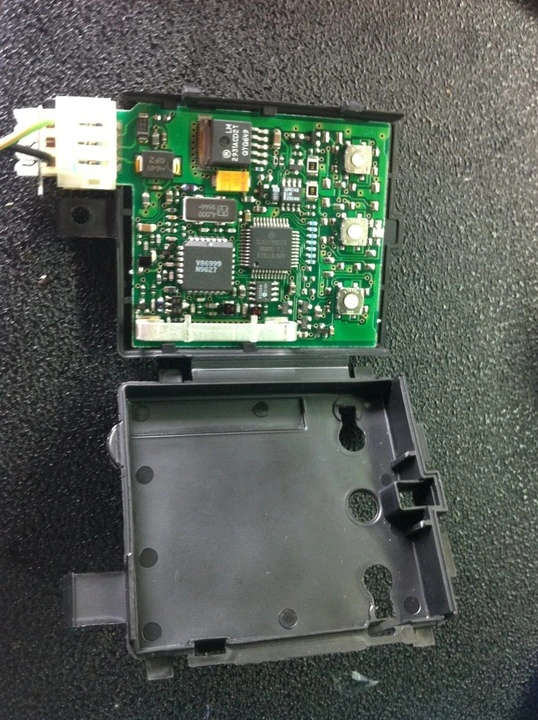
Now pull out the guts of the overhead fixture. The buttons for the lights are a little confusing to get out. All you do is push them toward the middle of the fixture and they come out.
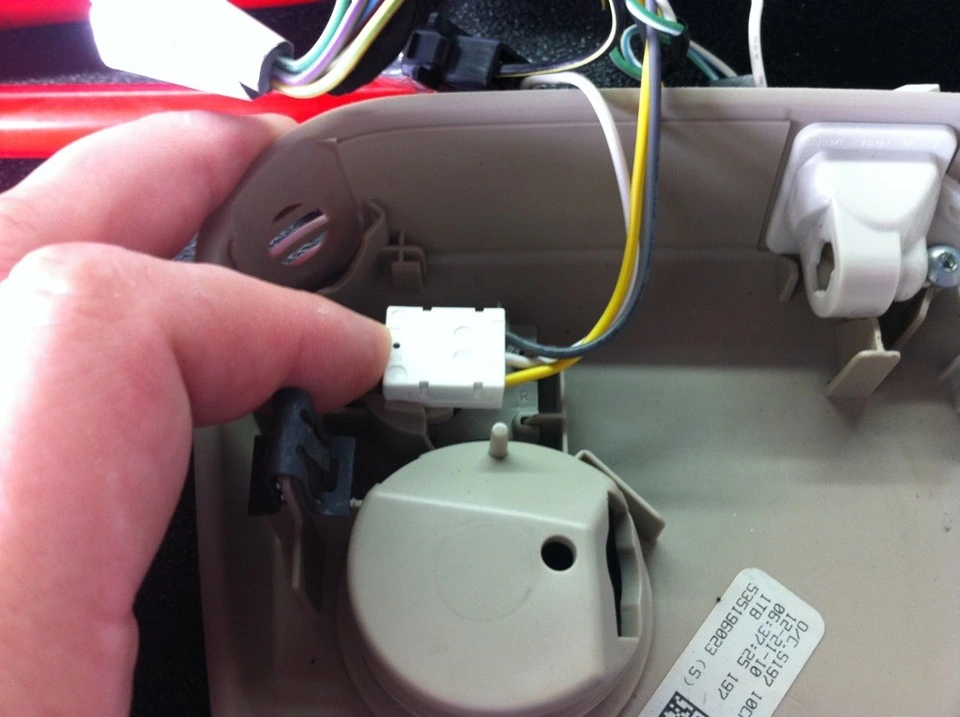
This is where the Passenger Air Bag Off Light goes. Some of these supports will need to be trimmed off in order to get the Homelink to fit.
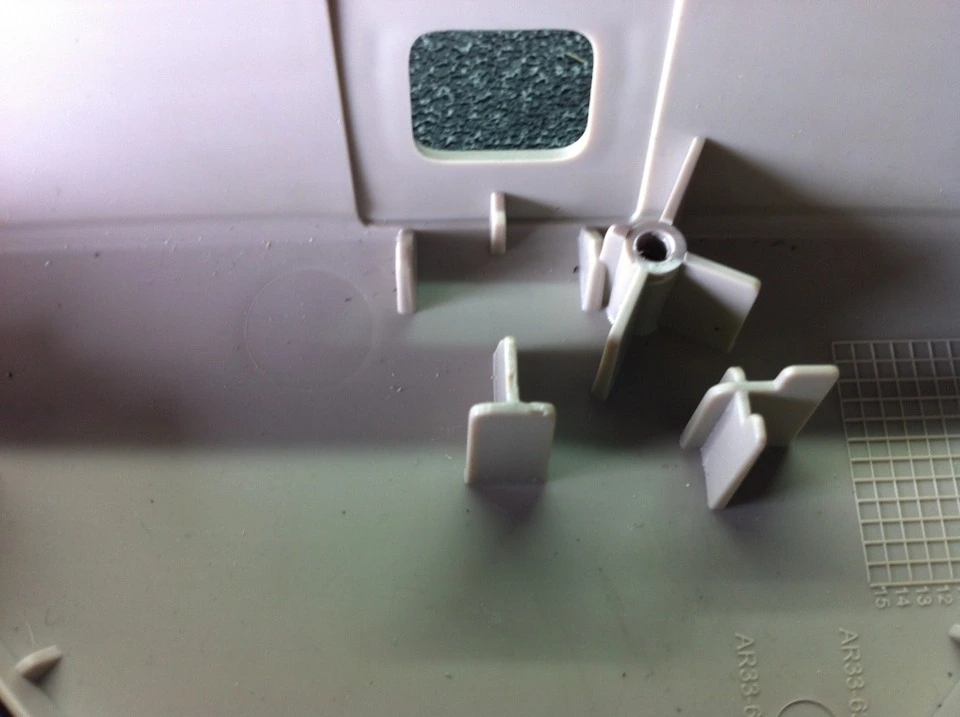
Here's showing how everything will interfere. The small tabs on the top of the Homelink will need to be trimmed off (they serve no purpose in this retrofit).
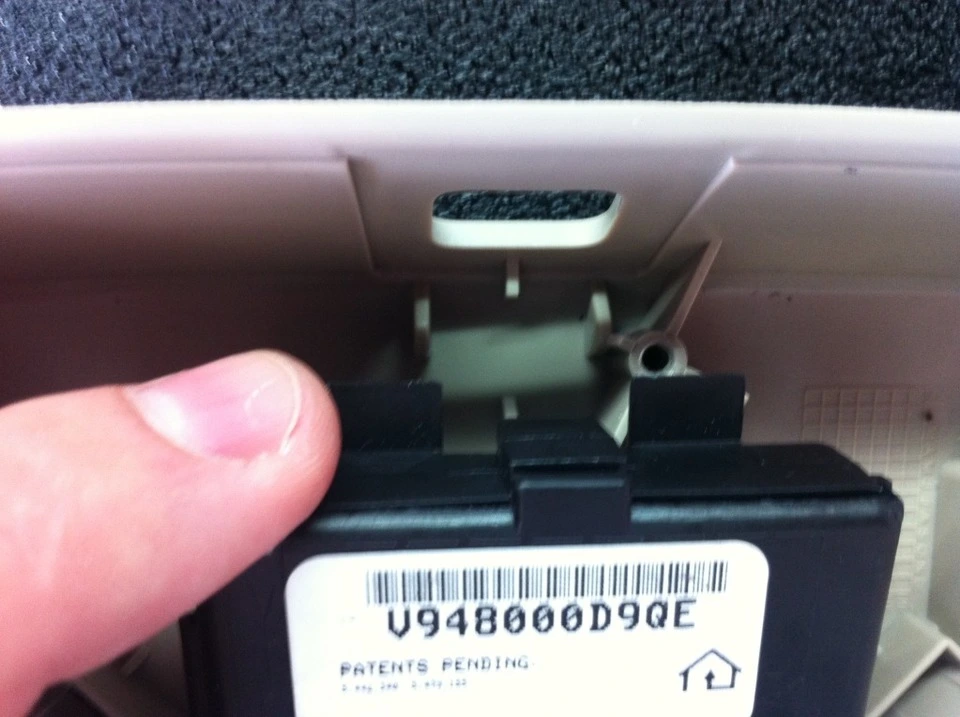
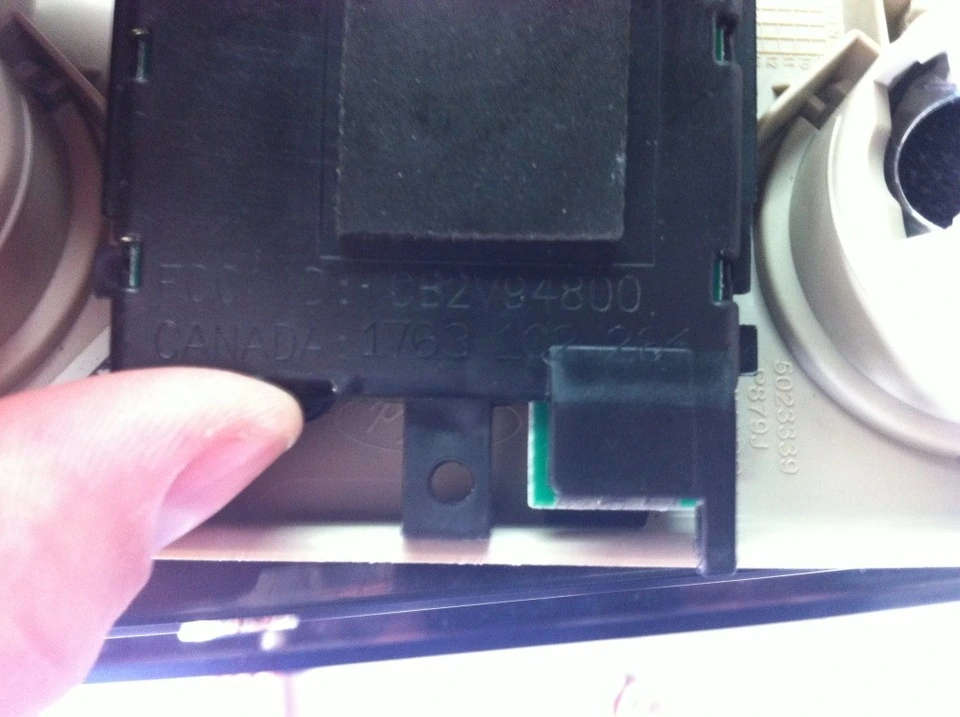
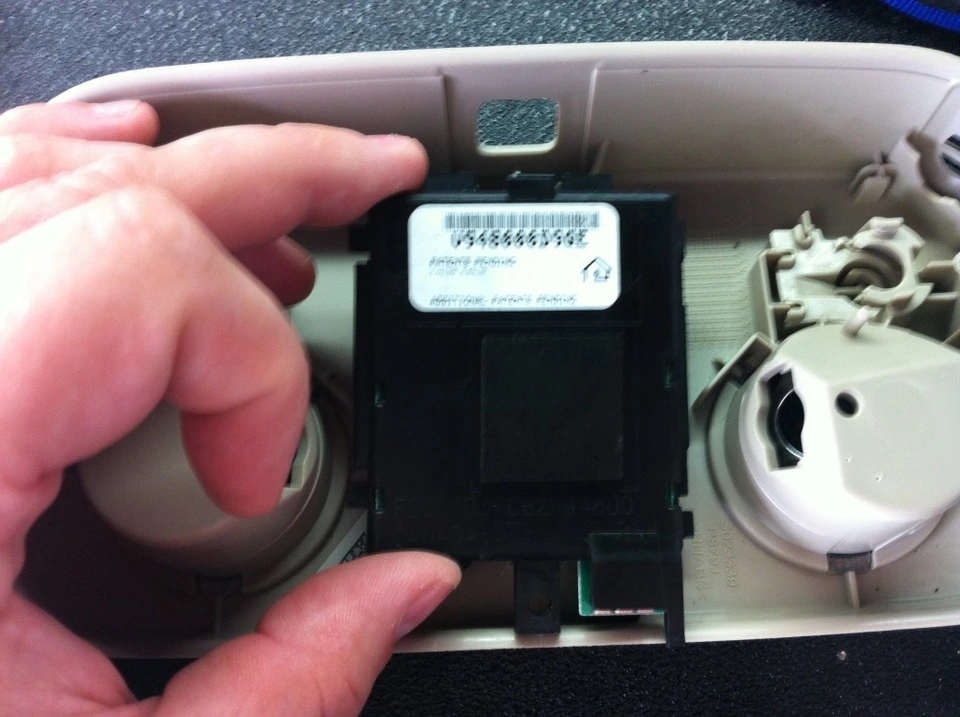
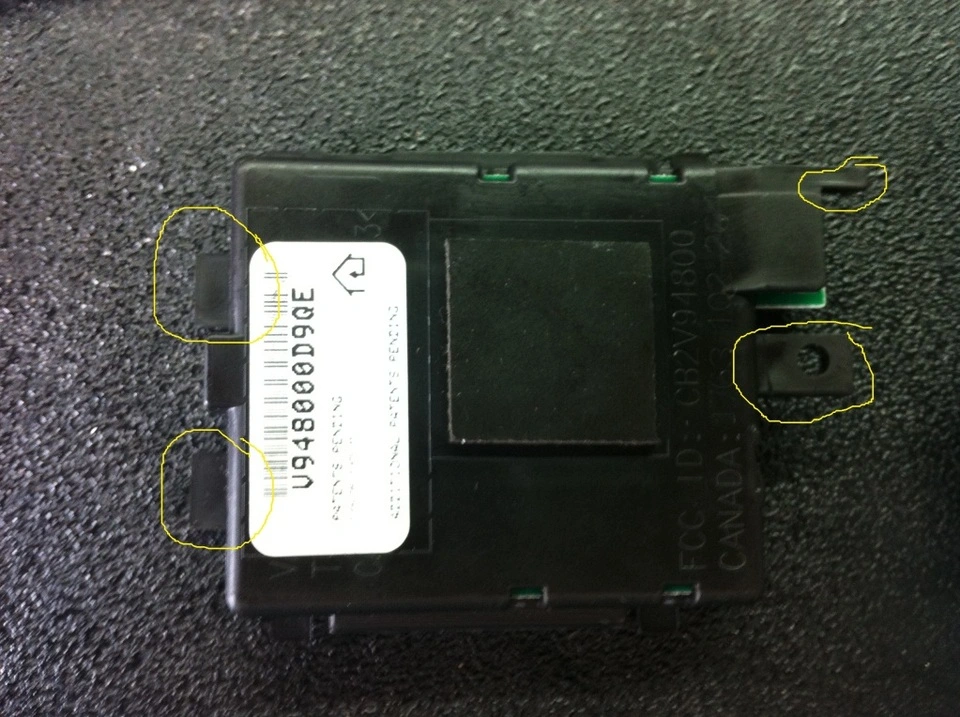
These are the parts the need to be trimmed to fit.
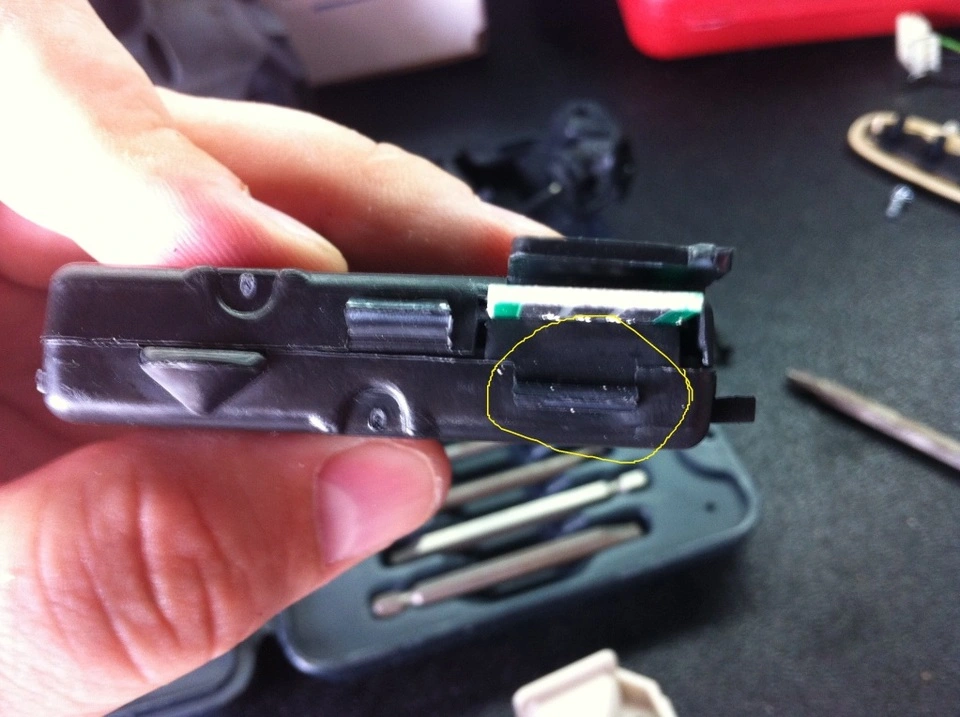
This is what it looks like when the overhead fixture is trimmed to fit the Homelink.
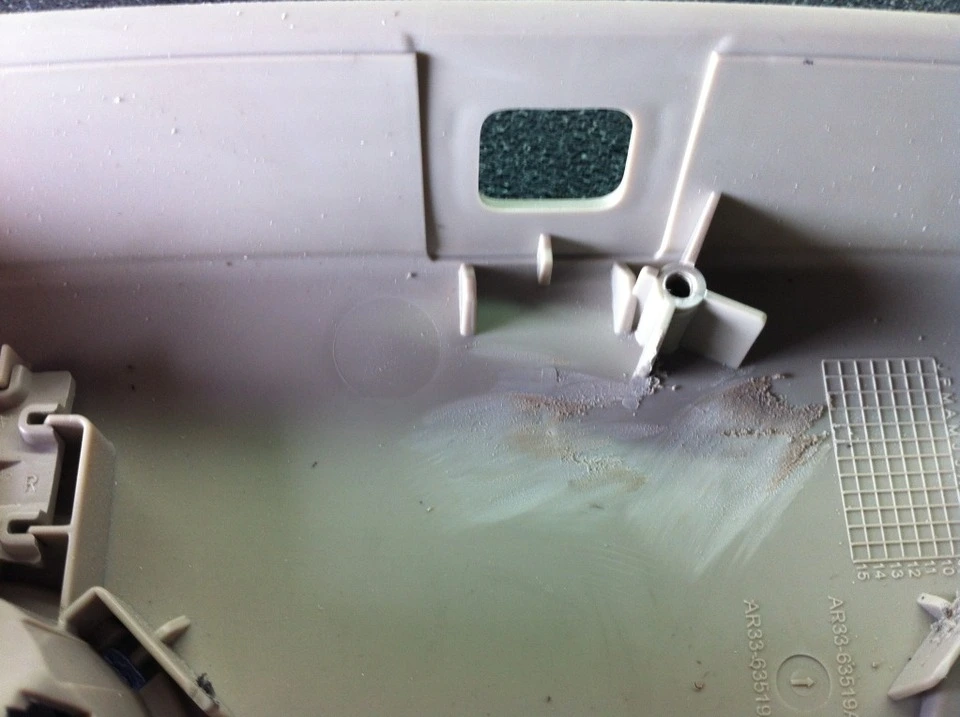
You also need to trim this part of the Homelink to make it fit around the Pass Air Bag Off Light.
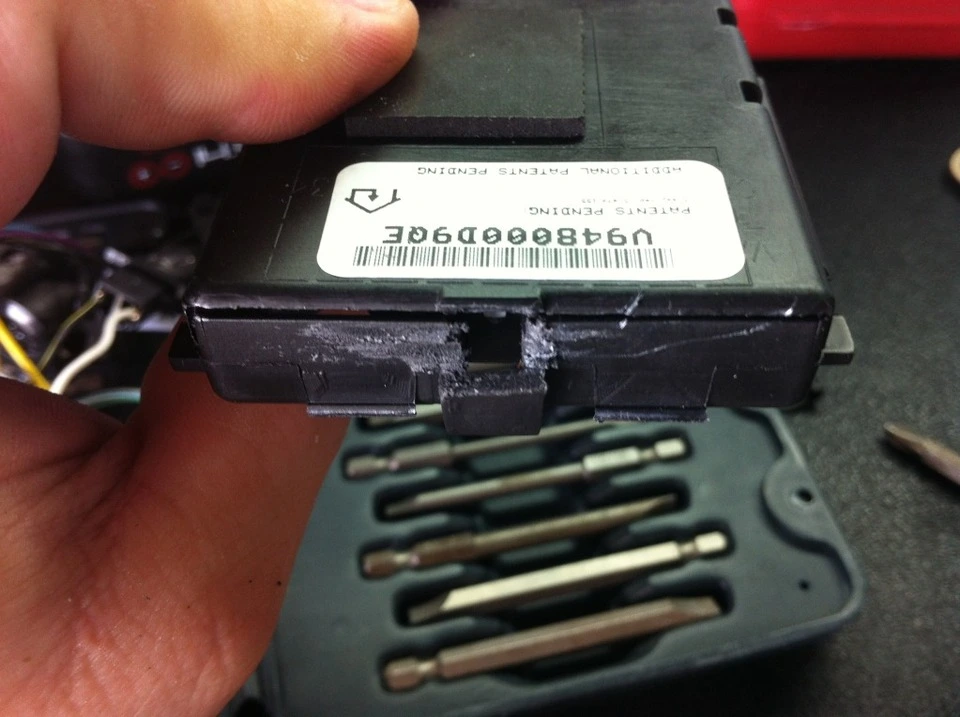
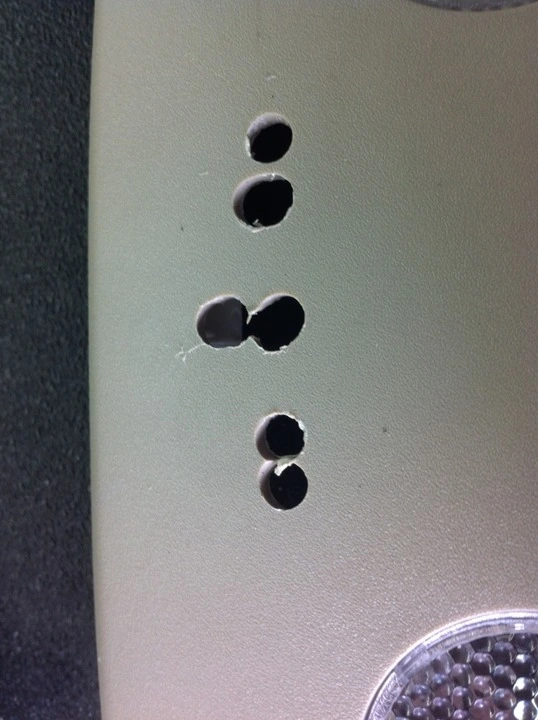
Now to drill holes for the buttons, attaching stubs, and LED for the Homelink. Just open the Homelink and use the case as a template. I used a 17/64 drill bit. The three in the middle are for the buttons, the two on the very outside on each side are for the stubs that snap the faceplate onto the case, and the one on the left is for the LED. It's gonna look like crap no matter what, and the faceplate of the Homelink will cover it anyway.
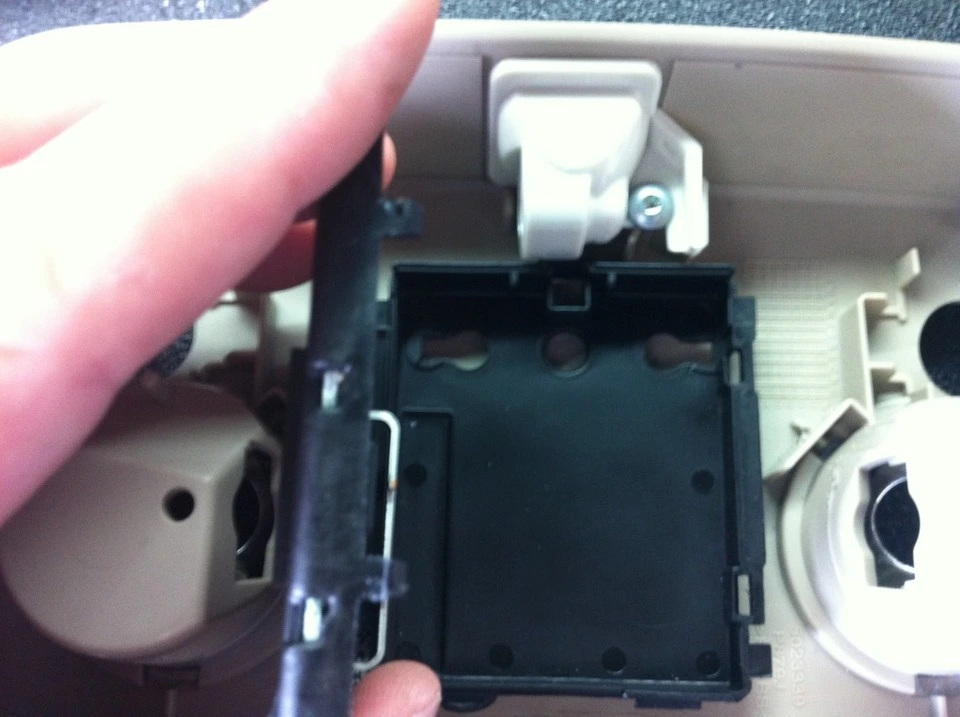
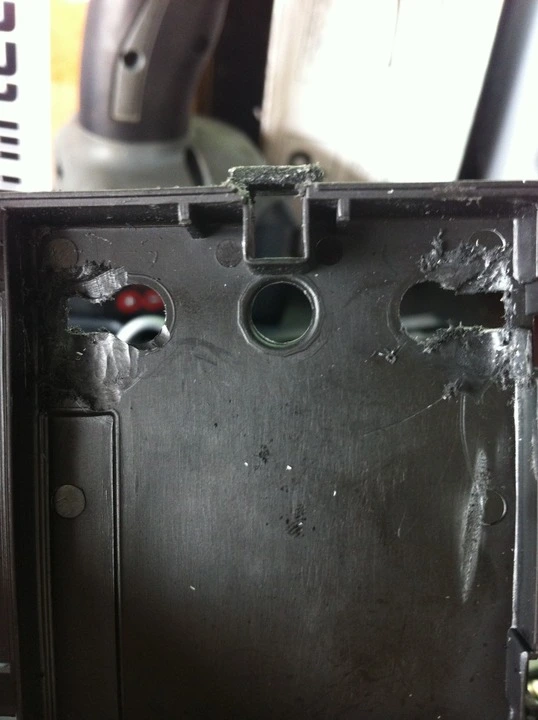
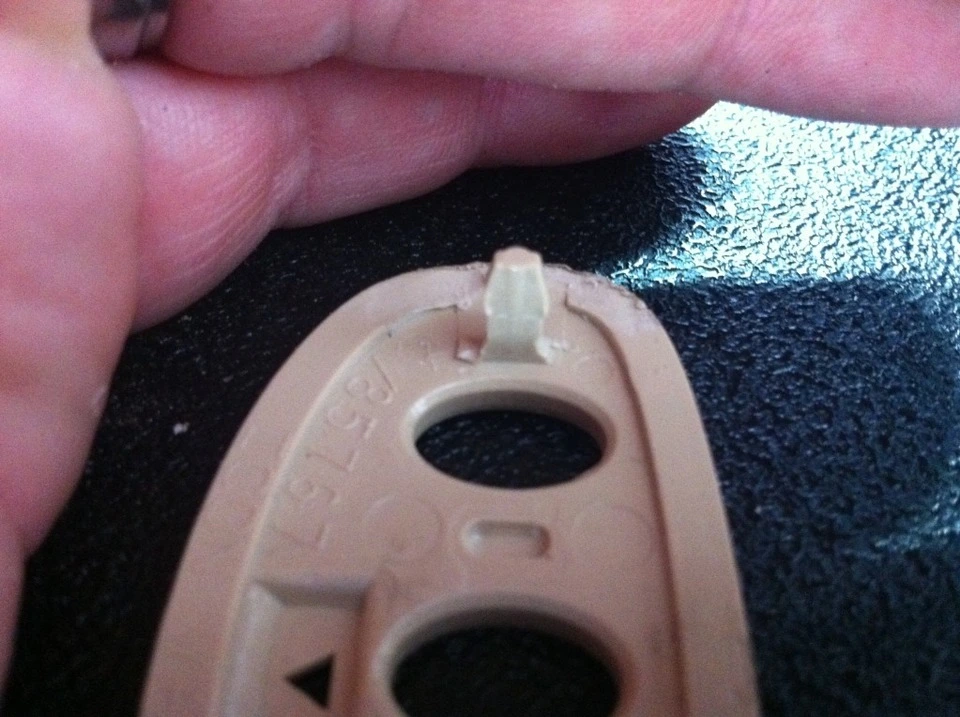
You also need to make the case of the Homelink a little thinner on the inside for the stubs of the faceplate to “click” into the case. I also sanded down the sides of the “stubs” to make them fit better.
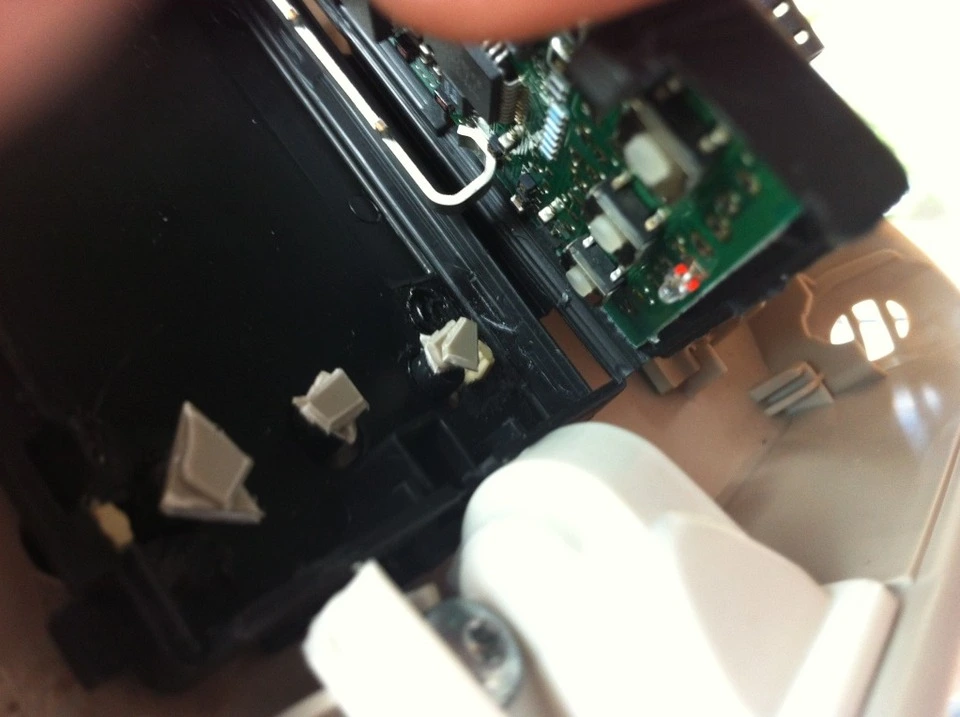
I ended up using my soldering iron afterward and melting the tan tabs into the case where they go through to securely hold everything together. Because the overhead light fixture is so thick, it wouldn't snap securely together.
After getting the Homelink all together, I noticed because of the overhead fixtures thickness, when you push the Homelink buttons, it didn't translate into hitting the buttons on the board. So I ended up using pieces of the tabs I cut off of the overhead fixture and super glued them to the push buttons. The two on the right only took two stacked, but the third (farthest) took three to work.
You might be wondering how the pigtail is going to fit to power the Homelink, well it won't. You'll have to solder wires onto the protruding board to make this work. Don't laugh at my soldering skills. It works. LOL
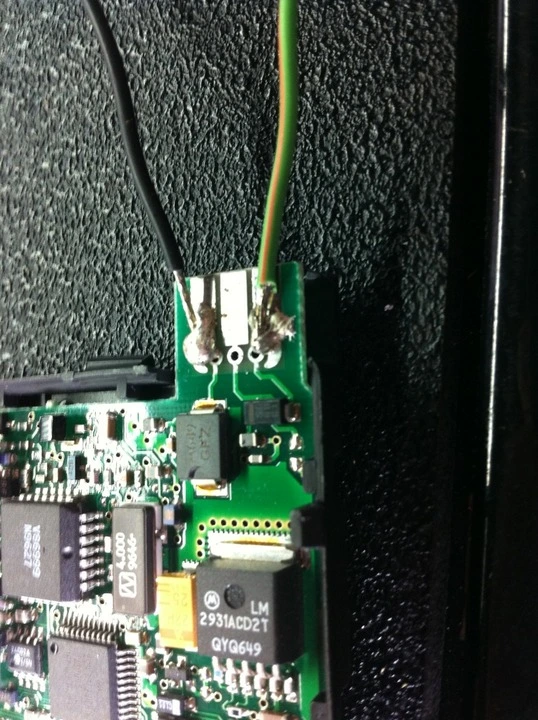
Once everything is back together, this is what it looks like...
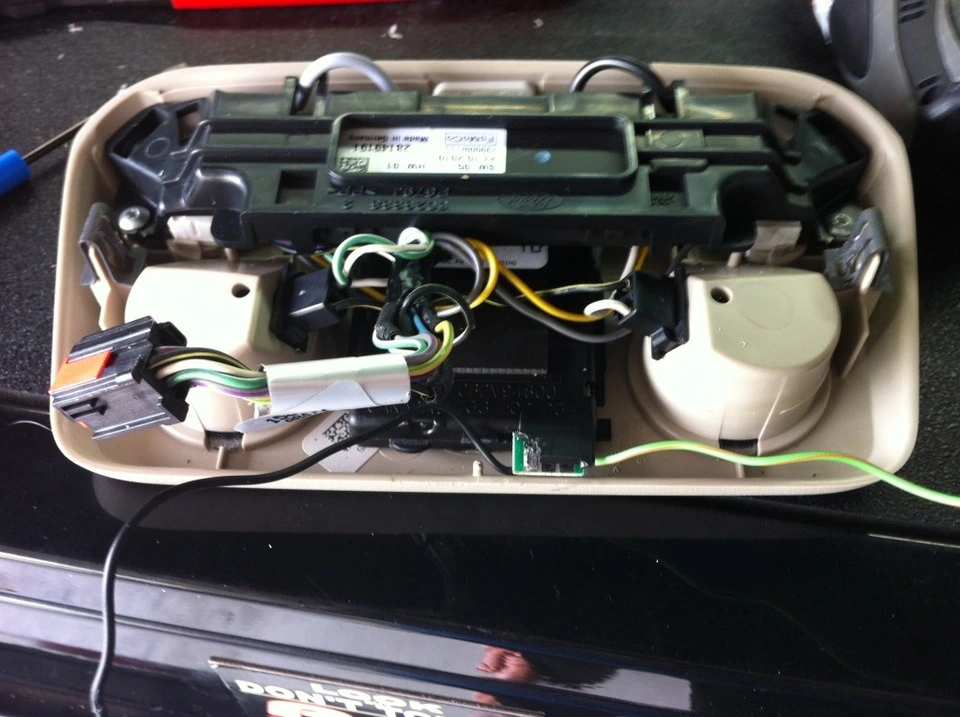
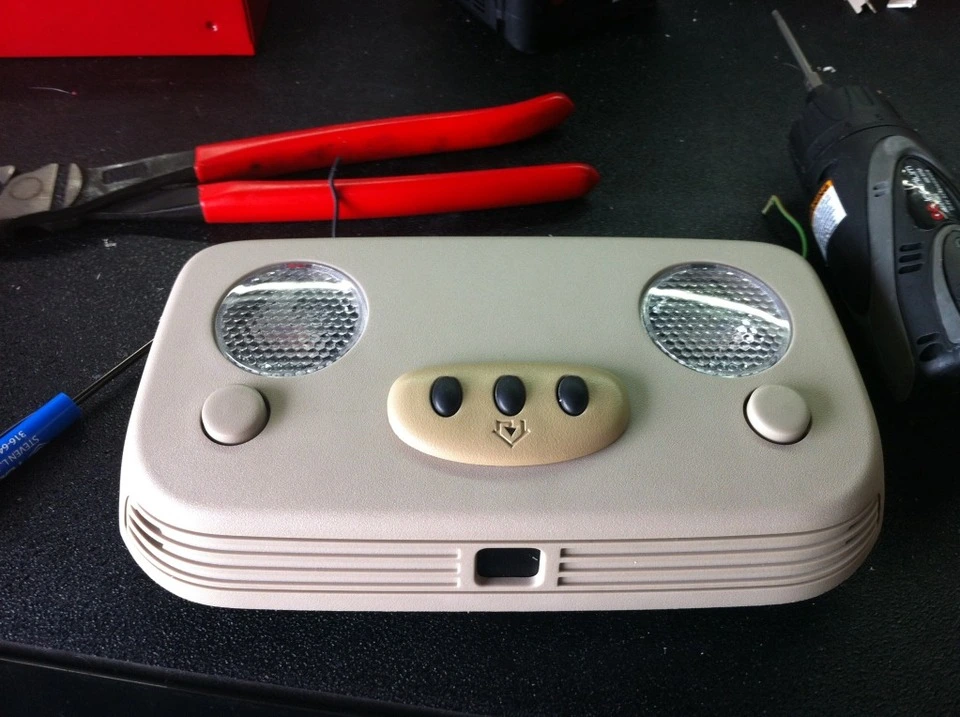
Next, just find you a power and ground when ignition is on (I used two wires under the fixture, one to the Pass Airbag Off light, and one to one of the overhead lights, I don't remember which was power or ground).
This is what it looks like when it's all done. It would look completely factory if it was the right color! Haha! Oh well! Because the faceplate doesn't snap together really tight, there is a small gap around the faceplate and overhead light fixture, but only noticeable if you're looking at it or really picky (like me, it will drive me crazy... The problem is the faceplate for the Homelink is flat, and the overhead light fixture is slightly curved)
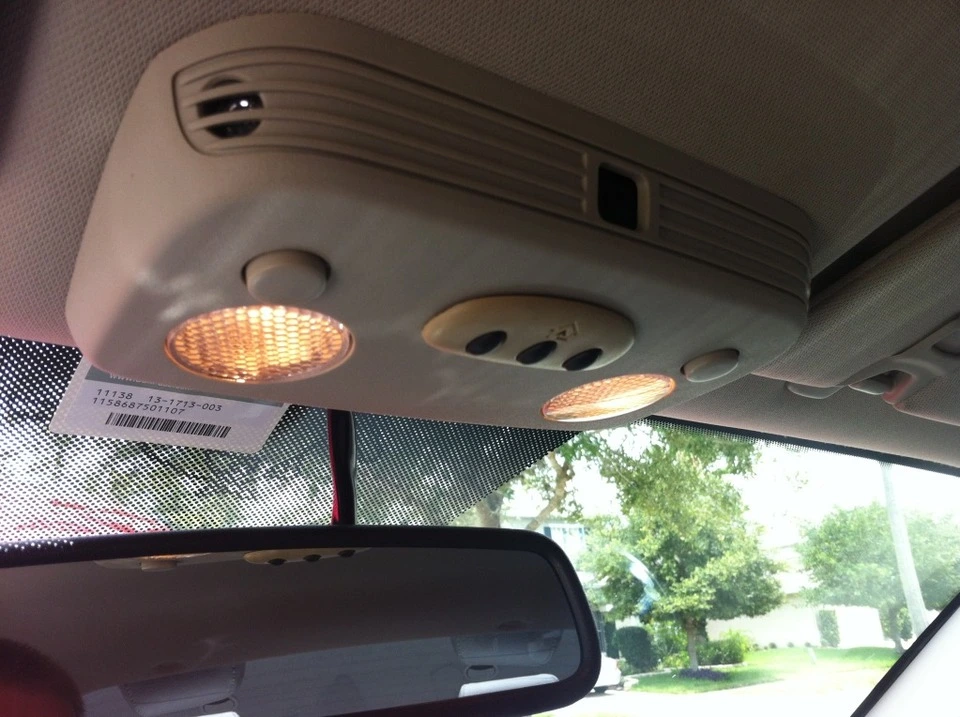
Hope this helps everyone if you wanna install a Homelink! Here is a link on how to program the Homelink, also...
http://www.lilocksmith.com/instructions/cars_openers.htm
Nick
First, you can find the Homelink Transmitter on Ebay in most factory interior colors. I know I didn't order the right color for mine. My mistake. I will just dye it sooner or later.
You'll need a T-10 torx bit for the active security sensors and the Pass airbag off light. Also something to do all the cutting and trimming with. I used a pair of side cutters and my small die grinder with sanding pad and reamer. Also, a soldering iron, solder, wire (I just used what came attached to the pigtail), and some scotch locks to wire it to the car.
First off you start by taking out the overhead light fixture. All you do it pull straight down. It might feel like it's gonna break, but it won't.
Then you unplug the connector.
Here's what it looks like on the inside. I have the active security, so there is more in the way.
Here's what the Homelink looks like. Again... I know it's the wrong color (I'm color blind, lol)
Put a small screw driver under the trim cover and pop it off.
Here's what the Homelink look like from the inside. There will be some cutting and modifying of the case and overhead light fixture to make this fit.
Now pull out the guts of the overhead fixture. The buttons for the lights are a little confusing to get out. All you do is push them toward the middle of the fixture and they come out.
This is where the Passenger Air Bag Off Light goes. Some of these supports will need to be trimmed off in order to get the Homelink to fit.
Here's showing how everything will interfere. The small tabs on the top of the Homelink will need to be trimmed off (they serve no purpose in this retrofit).
These are the parts the need to be trimmed to fit.
This is what it looks like when the overhead fixture is trimmed to fit the Homelink.
You also need to trim this part of the Homelink to make it fit around the Pass Air Bag Off Light.
Now to drill holes for the buttons, attaching stubs, and LED for the Homelink. Just open the Homelink and use the case as a template. I used a 17/64 drill bit. The three in the middle are for the buttons, the two on the very outside on each side are for the stubs that snap the faceplate onto the case, and the one on the left is for the LED. It's gonna look like crap no matter what, and the faceplate of the Homelink will cover it anyway.
You also need to make the case of the Homelink a little thinner on the inside for the stubs of the faceplate to “click” into the case. I also sanded down the sides of the “stubs” to make them fit better.
I ended up using my soldering iron afterward and melting the tan tabs into the case where they go through to securely hold everything together. Because the overhead light fixture is so thick, it wouldn't snap securely together.
After getting the Homelink all together, I noticed because of the overhead fixtures thickness, when you push the Homelink buttons, it didn't translate into hitting the buttons on the board. So I ended up using pieces of the tabs I cut off of the overhead fixture and super glued them to the push buttons. The two on the right only took two stacked, but the third (farthest) took three to work.
You might be wondering how the pigtail is going to fit to power the Homelink, well it won't. You'll have to solder wires onto the protruding board to make this work. Don't laugh at my soldering skills. It works. LOL
Once everything is back together, this is what it looks like...
Next, just find you a power and ground when ignition is on (I used two wires under the fixture, one to the Pass Airbag Off light, and one to one of the overhead lights, I don't remember which was power or ground).
This is what it looks like when it's all done. It would look completely factory if it was the right color! Haha! Oh well! Because the faceplate doesn't snap together really tight, there is a small gap around the faceplate and overhead light fixture, but only noticeable if you're looking at it or really picky (like me, it will drive me crazy... The problem is the faceplate for the Homelink is flat, and the overhead light fixture is slightly curved)
Hope this helps everyone if you wanna install a Homelink! Here is a link on how to program the Homelink, also...
http://www.lilocksmith.com/instructions/cars_openers.htm
Nick


