
Hi All,
I've been working on this project for the last 16 months and thought I'd share. I know how you all like pictures so I'll include a few. Many of the modifications have been discussed here from time to time and I've found much info in the forum. There is no way to justify the amount of time and money that I have invested in this car but it sure is fun. Along the way I have learned a few things too.
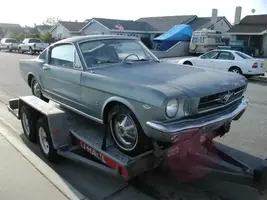
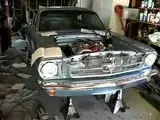
Object: completely rebuild and modernize a 40 year old rust bucket. Here is the beast as purchased and for which I paid too much (I'm not telling how much).

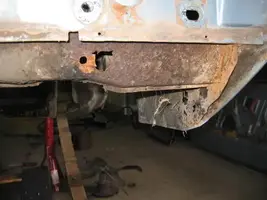
First nugget of wisdom: There will always be more rust than you expect.
Somewhere along the way somebody put fiberglass over rust and painted. This was typical of both rear quarter panels, both wheel housings, both doors, both front fenders and the trunk floor.

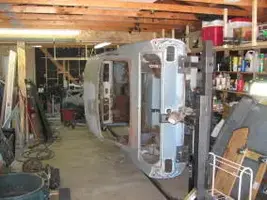
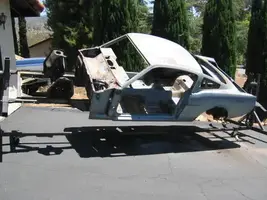
In the end I replaced both rear quarter panels, full trunk, one rocker panel both doors, full front aprons, both front fenders, partial rear frames, one partial front frame, full floor pans, firewall and of course the cowl area. What does that leave? The roof and little else. As I said this was a learning experience as in I learned to weld sheet metal pretty well.

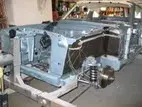
Next up: the world of rotisseries.
Brad
I've been working on this project for the last 16 months and thought I'd share. I know how you all like pictures so I'll include a few. Many of the modifications have been discussed here from time to time and I've found much info in the forum. There is no way to justify the amount of time and money that I have invested in this car but it sure is fun. Along the way I have learned a few things too.
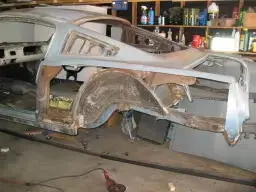
Object: completely rebuild and modernize a 40 year old rust bucket. Here is the beast as purchased and for which I paid too much (I'm not telling how much).
First nugget of wisdom: There will always be more rust than you expect.
Somewhere along the way somebody put fiberglass over rust and painted. This was typical of both rear quarter panels, both wheel housings, both doors, both front fenders and the trunk floor.
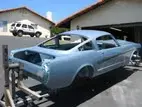
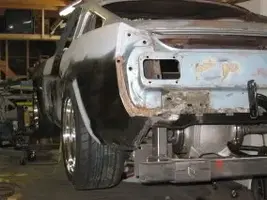
In the end I replaced both rear quarter panels, full trunk, one rocker panel both doors, full front aprons, both front fenders, partial rear frames, one partial front frame, full floor pans, firewall and of course the cowl area. What does that leave? The roof and little else. As I said this was a learning experience as in I learned to weld sheet metal pretty well.
Next up: the world of rotisseries.
Brad


")


 I hate you..........that is all