

- Jan 21, 2012
- 12
- 0
- 1
I was not able to find “Detailed” instructions online, on how to remove/replace my Convertible Top Hydraulic Cylinders (referred to as “HC’s” for the rest of this post), so I will give detailed instructions with photos of how I did this repair.
1st I pulled the reservoir plug from the hydraulic motor located behind the back seat (Previously removed entire back seat). I used a syphon-pump ($6 at Harbor Freight) to remove the ATF (Dexron-II). I am doing a swap-out of my fluid with this repair, if your not changing your fluid then omit this step, but do remove the plug and place a rag under it to absorb the impending spillage.
Then I raised and lowered the top (by hand) several times to bleed the fluid out of the HC’s.
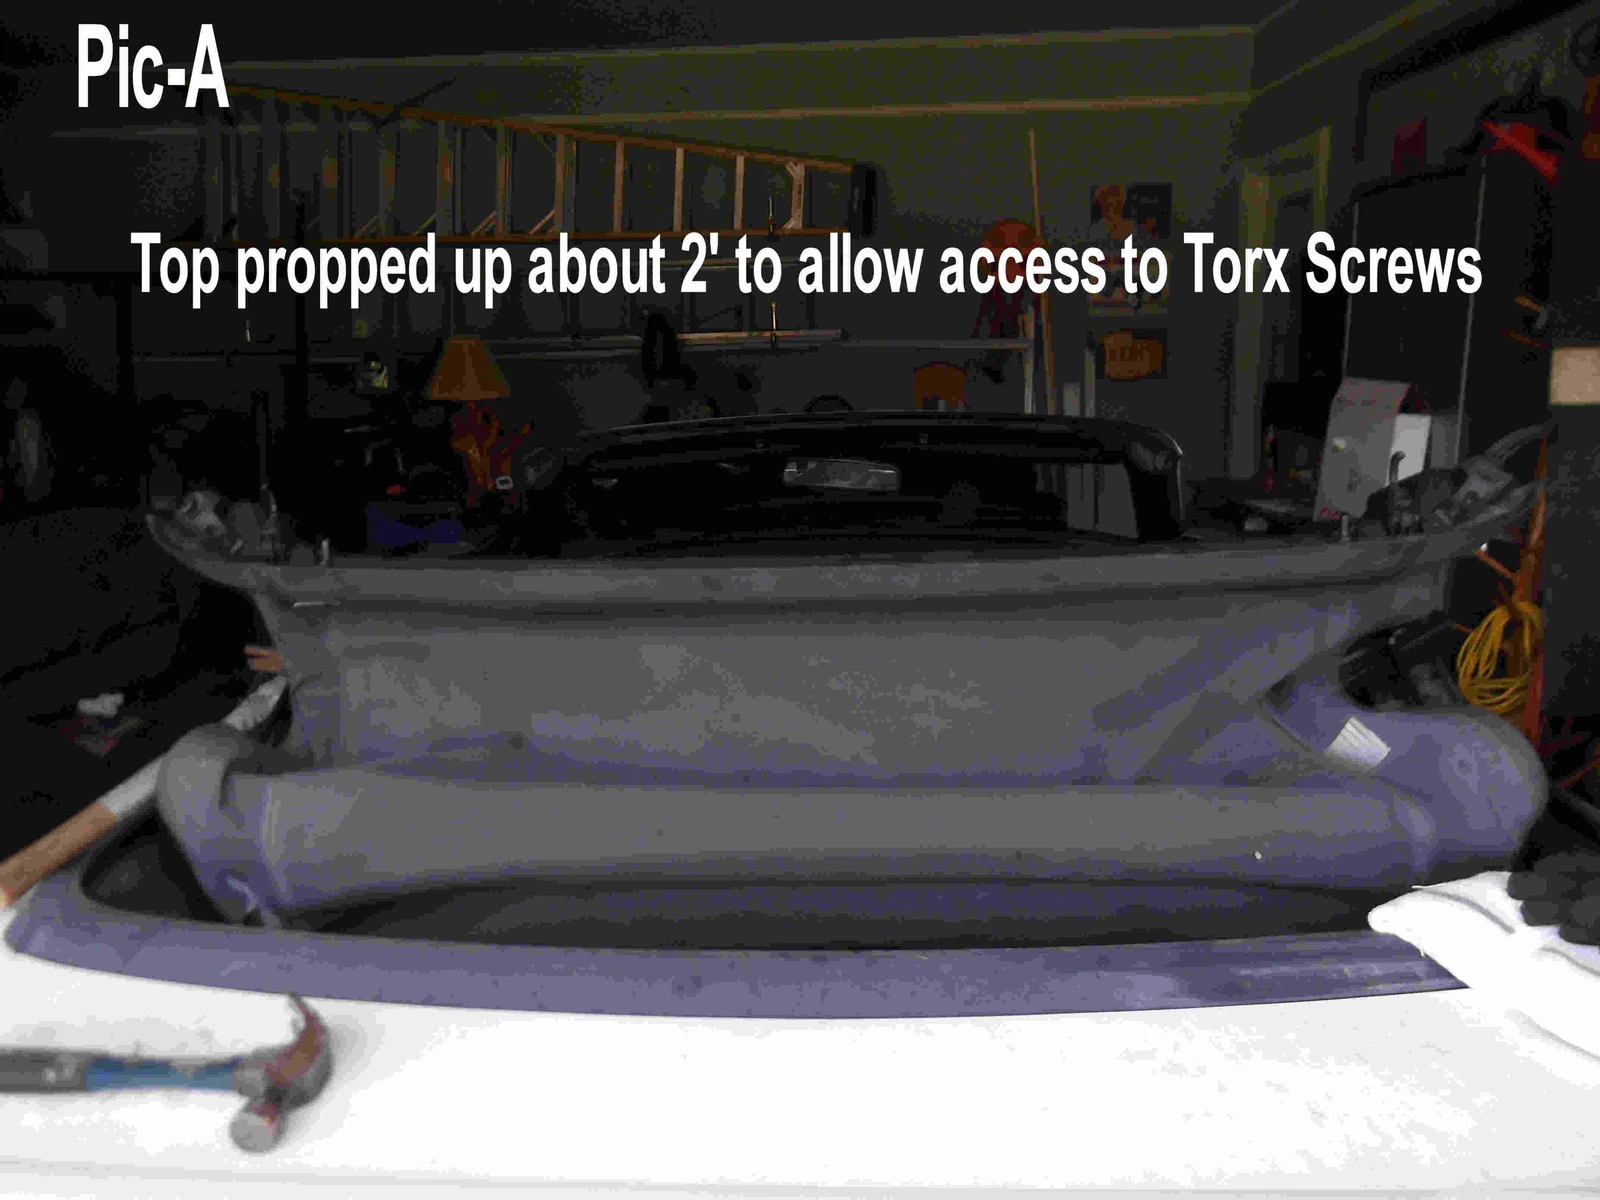
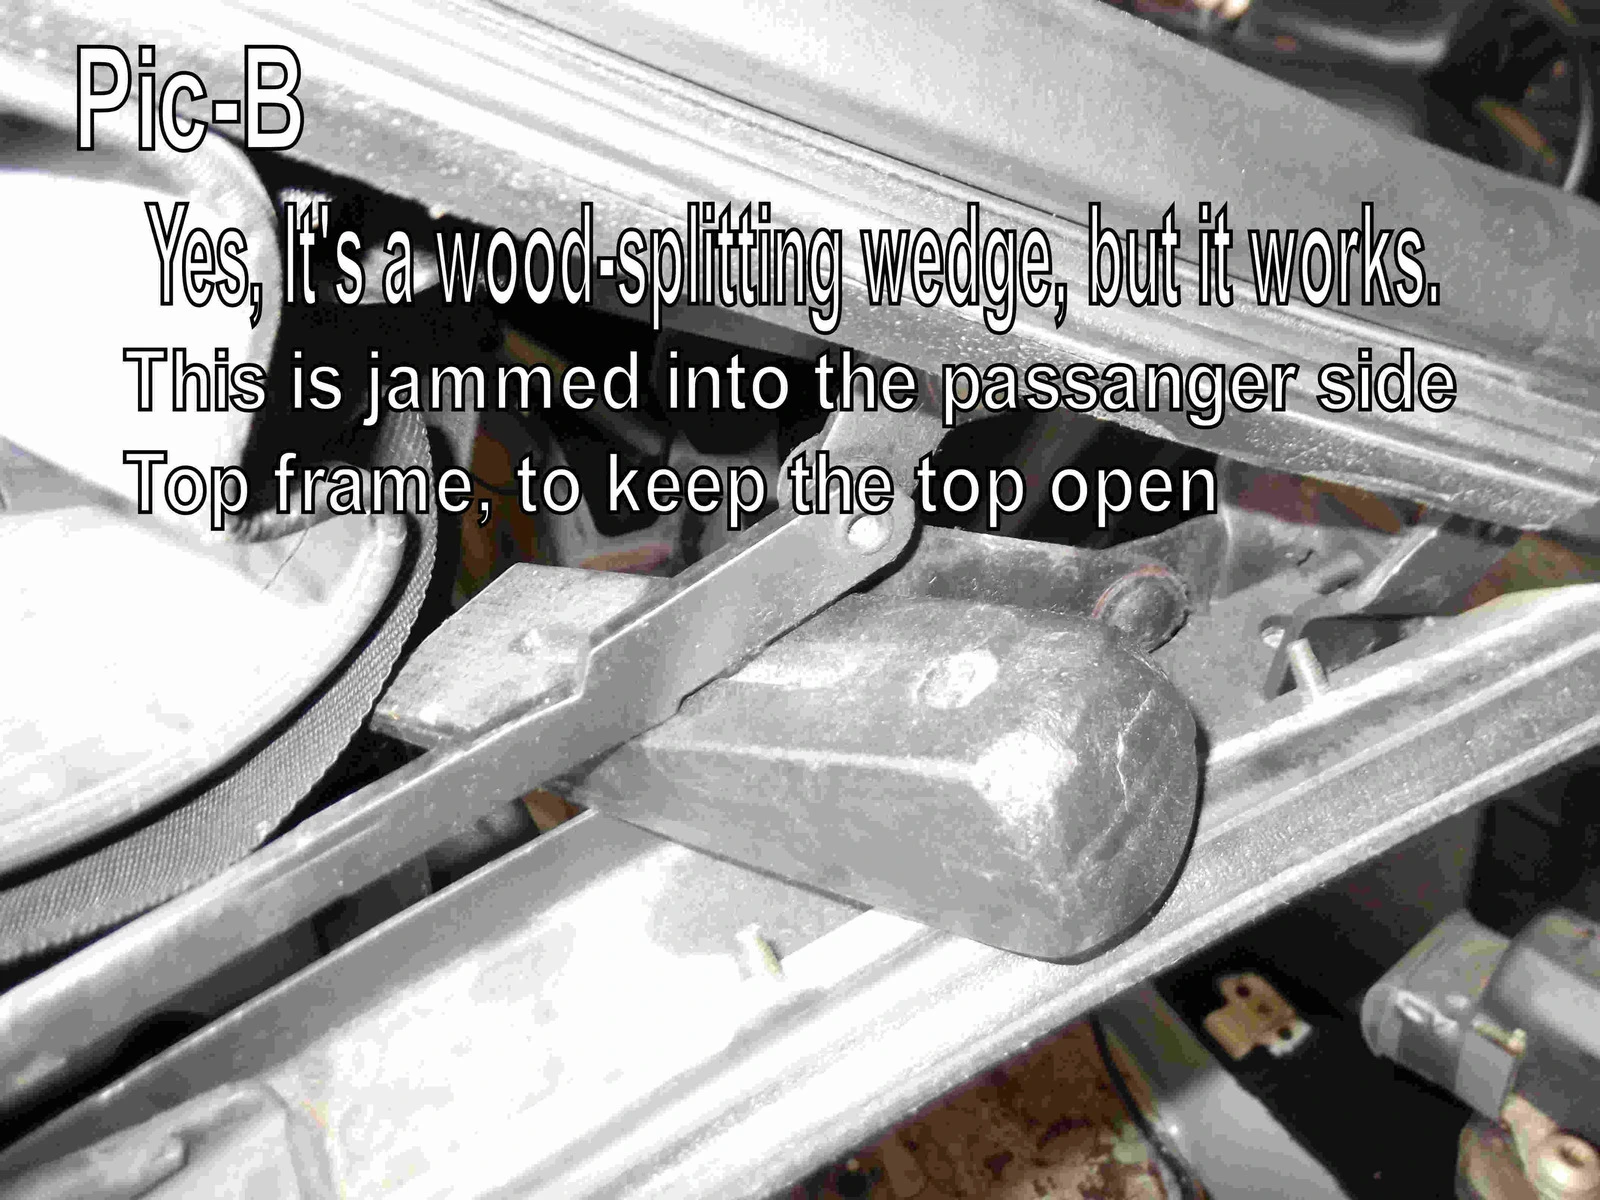
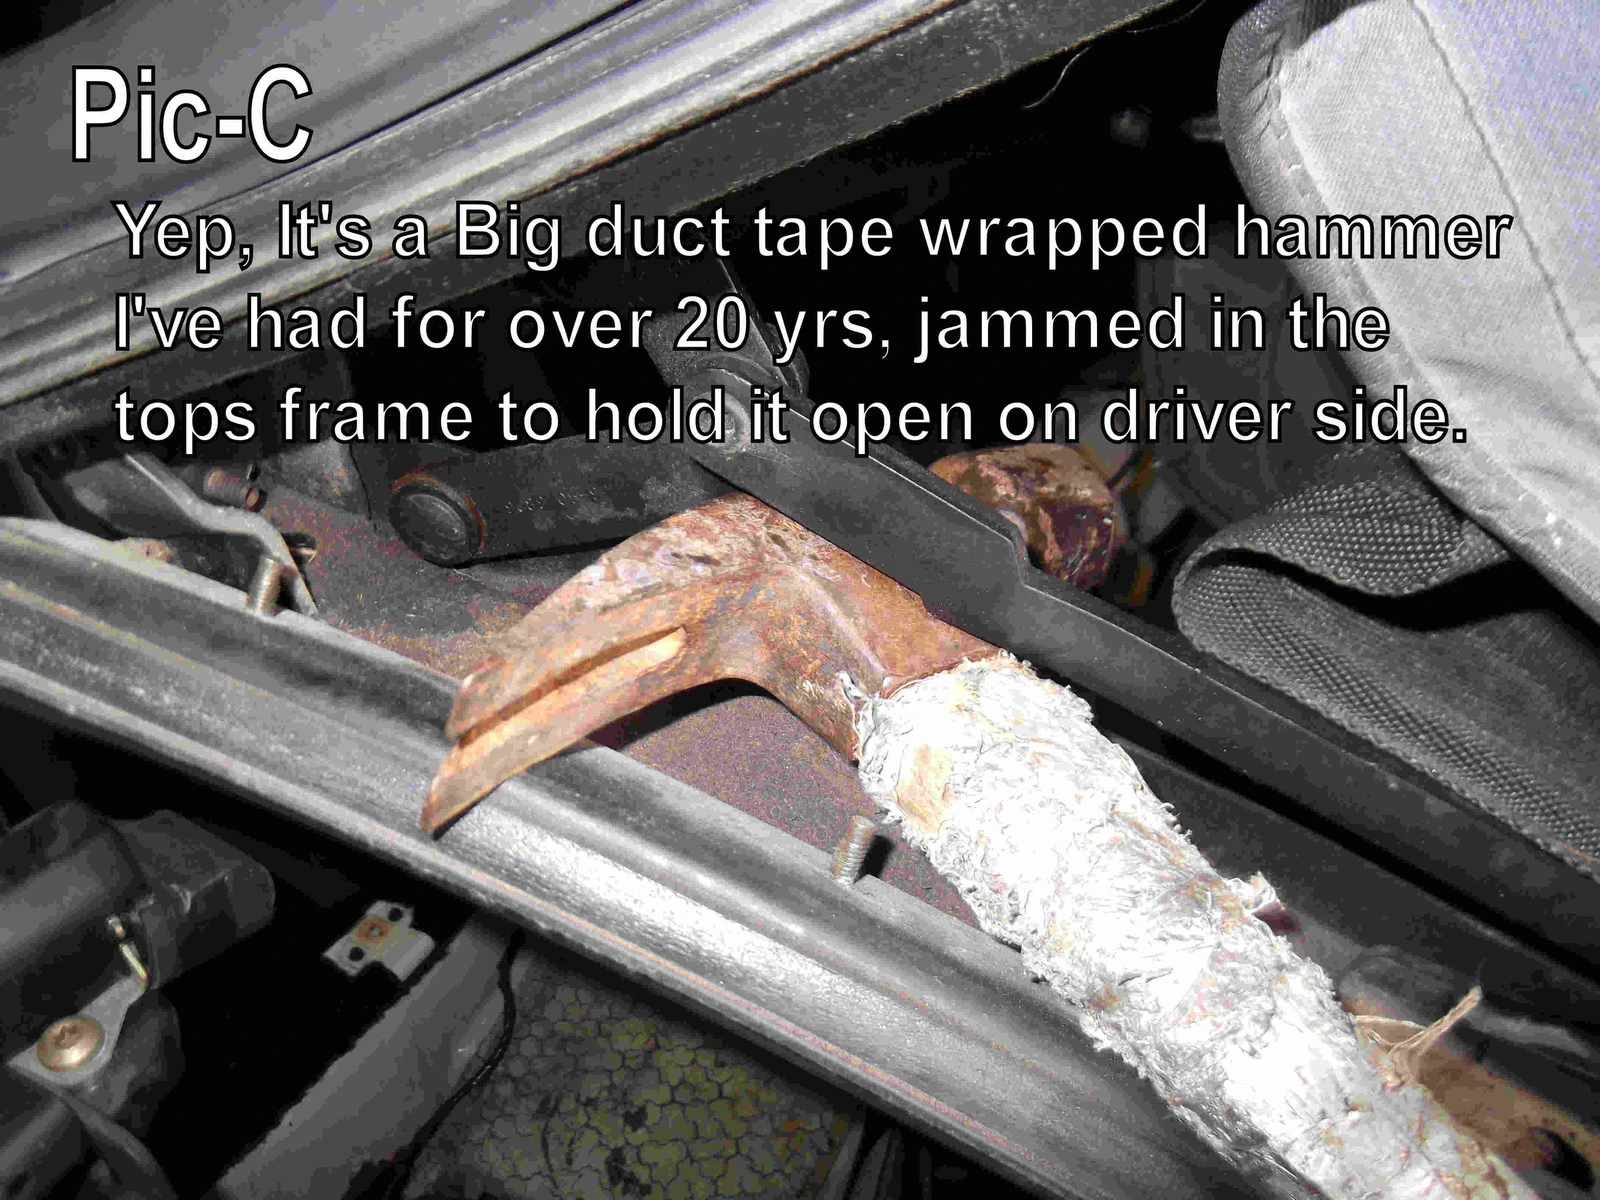
Now comes the tricky (and potentially dangerous) part – to access the Torx Screws (mine are T-40) to remove the HC’s push/pull rod end from the convertible top frame, you have to prop the top up about 2 feet (see Pic-A). This can be done by a partner willing to hold up the side your working on, long enough for you to get the screw out. I was working alone, so I rednecked it, I used what I have on hand, to hold the top up (see Pic-B & Pic-C). Be prepared, these Torx screws are Very Hard to turn.
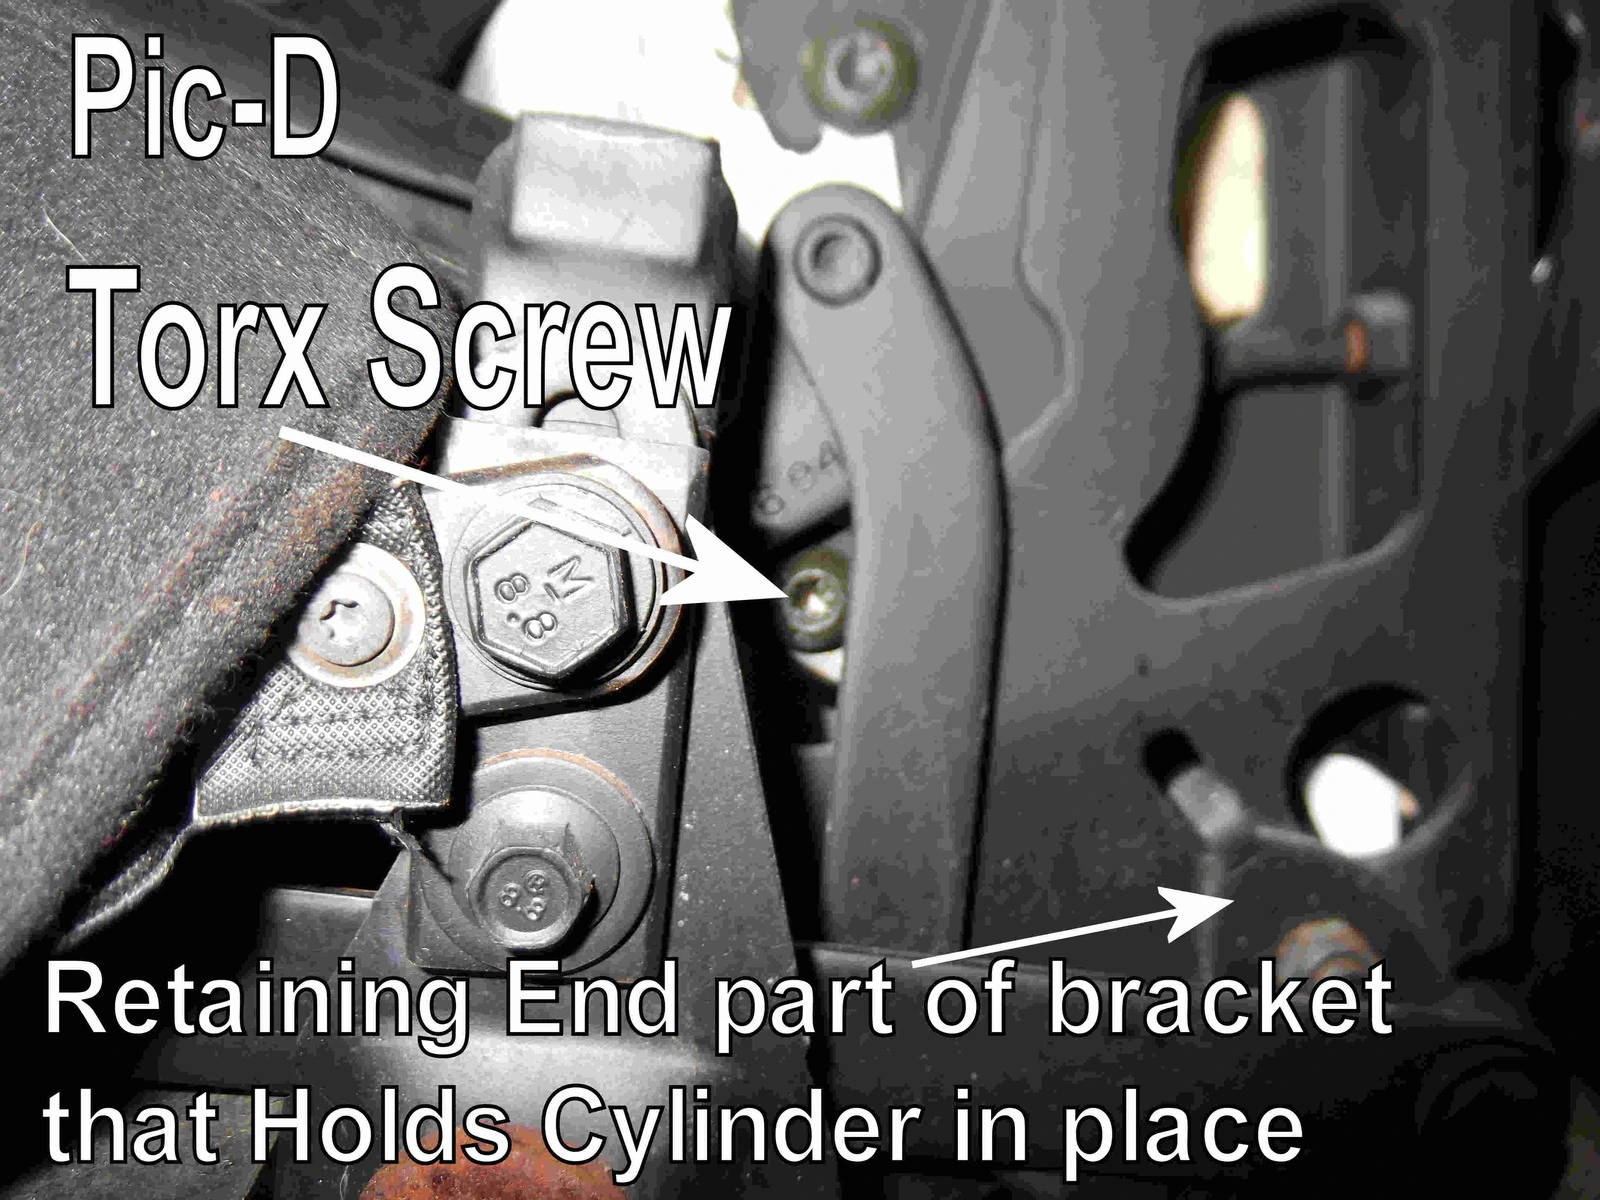
Your goal, by raising the top a bit, is to move the top frame into a position that will allow you access to the Torx Screws, it’s a very small window of access (see Pic-D). I used an extendible magnet to get the screws out after I loosened them. If you put your fingers in that space, and your top-support fails – You Will Loose Fingers!!!
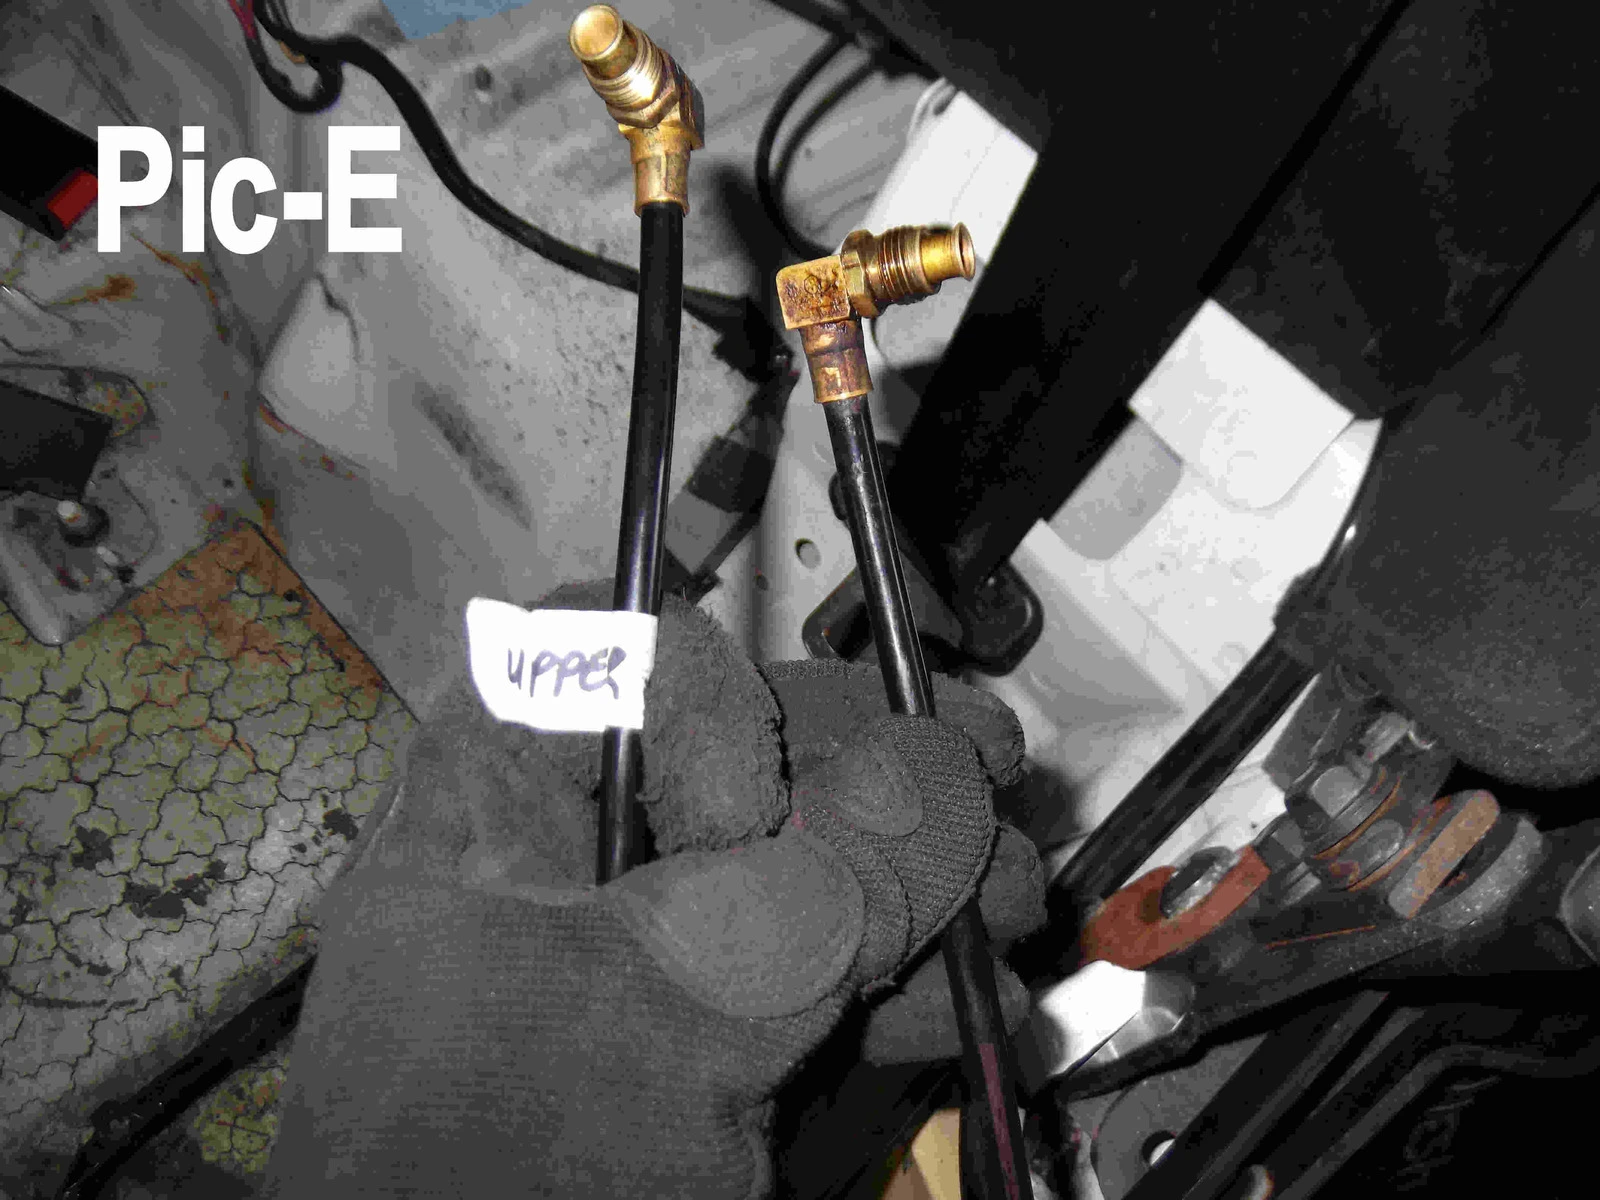
Next I removed the retaining-end part of the brackets (see Pic-D) this is ½” open end wrench on mine. Then I removed the upper and lower hydraulic hoses – 7/16” open end wrench on mine. I labeled my “Upper” hydraulic hoses (see Pic-E) to be sure I reconnect properly.
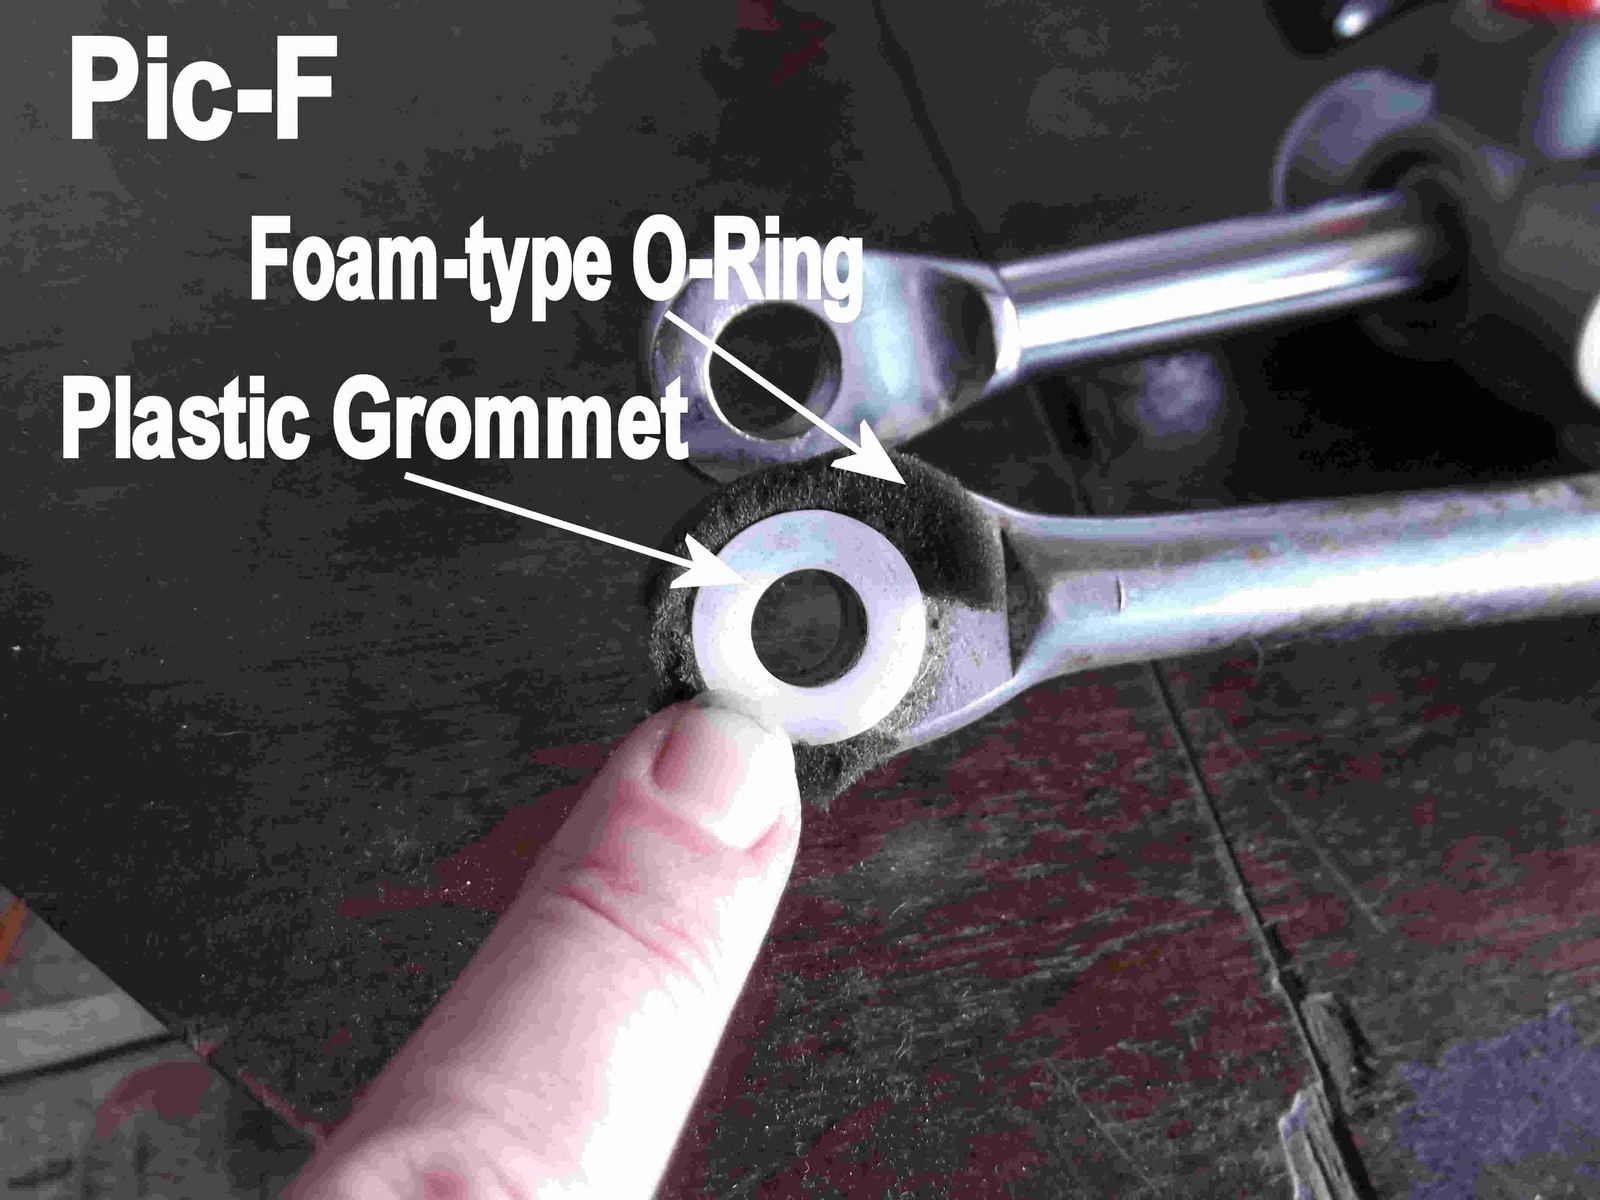
I found plastic grommets in the connection holes of the old push/pull rods (see Pic-F), I removed these and installed them on the new HC’s.
There are foam-type o-rings glued to the old push/pull rod ends (see Pic-F), I will try to locate those tomorrow so I can begin the reinstall of the HC’s.
1st I pulled the reservoir plug from the hydraulic motor located behind the back seat (Previously removed entire back seat). I used a syphon-pump ($6 at Harbor Freight) to remove the ATF (Dexron-II). I am doing a swap-out of my fluid with this repair, if your not changing your fluid then omit this step, but do remove the plug and place a rag under it to absorb the impending spillage.
Then I raised and lowered the top (by hand) several times to bleed the fluid out of the HC’s.
Now comes the tricky (and potentially dangerous) part – to access the Torx Screws (mine are T-40) to remove the HC’s push/pull rod end from the convertible top frame, you have to prop the top up about 2 feet (see Pic-A). This can be done by a partner willing to hold up the side your working on, long enough for you to get the screw out. I was working alone, so I rednecked it, I used what I have on hand, to hold the top up (see Pic-B & Pic-C). Be prepared, these Torx screws are Very Hard to turn.
Your goal, by raising the top a bit, is to move the top frame into a position that will allow you access to the Torx Screws, it’s a very small window of access (see Pic-D). I used an extendible magnet to get the screws out after I loosened them. If you put your fingers in that space, and your top-support fails – You Will Loose Fingers!!!
Next I removed the retaining-end part of the brackets (see Pic-D) this is ½” open end wrench on mine. Then I removed the upper and lower hydraulic hoses – 7/16” open end wrench on mine. I labeled my “Upper” hydraulic hoses (see Pic-E) to be sure I reconnect properly.
I found plastic grommets in the connection holes of the old push/pull rods (see Pic-F), I removed these and installed them on the new HC’s.
There are foam-type o-rings glued to the old push/pull rod ends (see Pic-F), I will try to locate those tomorrow so I can begin the reinstall of the HC’s.


