Best prep/paint for rearend?

I disassembled down to just the housing (bought a built/painted 3rd member to install so I didn't clean paint that). I started on the inside cleaning the housing and tubes, I bought 2 cans of oven cleaner from the dollar store and a toilet brush. Worked well, wear long dishwashing gloves so your arms/hands don't look like the Walking Dead and keep running water near. Sprayed down inner tubes, let soak and ran the toilet brush in from both sides until clean. That diff. lube is hard to get off so it takes a strong cleaner to do it, gunk would have taken hours of reapplying to get the same results as 2X with the oven cleaner but it's caustic so be careful, you'll feel the burn on your skin if some gets on you, just flush with water.
IMG_1630.webp

IMG_1772.webp


I cleaned the outside next, then wire wheeled what didn't come off the outside, primed and painted with Rustoleum semigloss black. Get brass wire wheels (Lowes, HD, etc.) that way the wires that come off don't rust where they land.
IMG_1805.webp


If I were to do it over again I would have used POR15 instead as I've already marred and scratched the black with jack/stands.

Jon
 

Attachments

  • IMG_1630.webp
    IMG_1630.webp
    28.2 KB · Views: 391
  • IMG_1772.webp
    IMG_1772.webp
    27.1 KB · Views: 408
  • IMG_1805.webp
    IMG_1805.webp
    34.7 KB · Views: 702
After I cleaned the housing in the parts washer (one end at a time) I used a wire wheel and then cleaned it with SPI pre-paint cleaner & degreaser, then SPI black epoxy. I recommend it, get a $15 gun at harbor freight and a quart of the black with a quart of the activator and you are set, it mixes 50/50 and is easy to use.

IMG00127-20110622-1158.webp
 

Attachments

  • IMG00127-20110622-1158.webp
    IMG00127-20110622-1158.webp
    37.4 KB · Views: 410
i completely disassembled mine, media blasted, sprayed two coats of epoxy primer then two coats of flattened black urethane, while the third member and pinion support were simply sprayed with various shades of epoxy.

IMG_2654.webp


IMG_2653.webp


IMG_5747.webp


IMG_5745.webp
 

Attachments

  • IMG_2654.webp
    IMG_2654.webp
    22.3 KB · Views: 248
  • IMG_2653.webp
    IMG_2653.webp
    32.3 KB · Views: 266
  • IMG_5747.webp
    IMG_5747.webp
    54.5 KB · Views: 393
  • IMG_5745.webp
    IMG_5745.webp
    77.3 KB · Views: 454
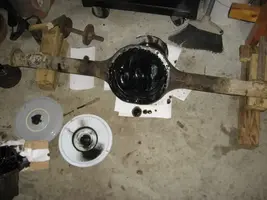
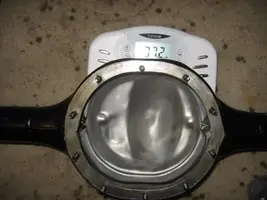
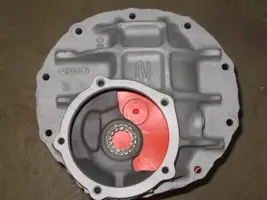
I'm fortunate enough to have access to a sandblaster, yanked out the rear, set it on a metal work table and blasted it, then went over the sanded areas with 180 grit sandpaper and then hit it with some commercial coatings (NAPA) black enamel out of my spray gun, good thick coat of paint. Unfortunately I am usually solo when it comes to working on my car and scratched up the diff pretty good installing it, but its a driver, not a show car.