

Has anyone removed and/or replaced their factory valve covers. These look like crap from the factory, and I want to pull and paint mine. If anyone who has done this can give the rest of us some pointers, please post up. I'm trying to figure out if the dipstick or any other item will make this job more trouble than it's worth.
You are using an out of date browser. It may not display this or other websites correctly.
You should upgrade or use an alternative browser.
You should upgrade or use an alternative browser.
Valve covers
- Thread starter White05GT
- Start date
nbk13nw
Member
White05GT said:Has anyone removed and/or replaced their factory valve covers. These look like crap from the factory, and I want to pull and paint mine. If anyone who has done this can give the rest of us some pointers, please post up. I'm trying to figure out if the dipstick or any other item will make this job more trouble than it's worth.
Once you have them off start with a good cleaning to cut the grease and dirt.
Then, a high speed wheel from a buffer or drill... Using maybe a wire wheel to remove and thing stuck to the surface.
I went from there to some 500 grit, then 1000 grit and finally 1500 grit to really smooth the surface. A buffing wheel on a drill and it was ready for paint.
Three coats of primer (Each wet sanded to smooth it out again) and then three coats of Ford Red engine paint (Again, wet sanded between coats)


you dont typically want a 1500 grit scratch before paint. the paint needs MECHANICAL ADHESION, meaning scratches to stick. the buffing does smooth out the covers, but the primer is for filling small scratches and also promotes adhesion. just sand the cover with 180 or 320 and prime. then sand the primer smooth with around 400-600 grit paper. then you are ready for paint.
sorry i cant give tips on removal, i have not done it yet.
sorry i cant give tips on removal, i have not done it yet.
nbk13nw said:Once you have them off start with a good cleaning to cut the grease and dirt.
Then, a high speed wheel from a buffer or drill... Using maybe a wire wheel to remove and thing stuck to the surface.
I went from there to some 500 grit, then 1000 grit and finally 1500 grit to really smooth the surface. A buffing wheel on a drill and it was ready for paint.
Three coats of primer (Each wet sanded to smooth it out again) and then three coats of Ford Red engine paint (Again, wet sanded between coats)
Nice job on the paint. Can you tell us what kind of difficulties, if any, you ran into during the valve cover removal process. My problem is that I don't yet have my own garage to work out of, so I need to use a friend's. If this job takes like four hours to do because of things like breaking motor mounts loose, jacking up the engine, and getting the dipstick out of the way, I'm not going to bother.
this is courtesy of thump_rrr, from this post:
http://forums.stangnet.com/showpost.php?p=5872467&postcount=16
hope this is what you are looking for
http://forums.stangnet.com/showpost.php?p=5872467&postcount=16
thump_rrr said:It takes 20-30 min each to get them off.
It looks intimidating but it's really quite simple.
I removed the first one, wet sanded it down with 320, 600, 1000, and and, 2000 then hand polished it with aluminum mag wheel cleaner (eagle one) and reinstalled it in about 3 hours one morning before going off to work. Next time I'll try using the Mothers Power Ball.
LH Removal
Remove the air cleaner assembly and outlet pipe.
Remove the LH ignition coils.
Remove the oil level indicator and tube.
Disconnect the evaporative emissions (EVAP) tube from the intake manifold.
Remove the positive crankcase ventilation (PCV) tube.
Disconnect the LH variable camshaft timing (VCT) solenoid electrical connector and detach the 2 wiring harness pin-type retainers.
Detach the 2 wiring harness retainers from the valve cover stud bolts.
Loosen the 15 fasteners and remove the LH valve cover and gasket.
RH Removal
Remove the RH ignition coils.
Detach the wiring harness retainer from the engine front cover stud bolt.
Disconnect the RH variable camshaft timing (VCT) solenoid electrical connector.
Disconnect the positive crankcase ventilation (PCV) tube from the RH valve cover.
Detach the 4 wiring harness retainers from the valve cover stud bolts.
Loosen the 14 fasteners and remove the RH valve cover and gasket.
No offense to anyone but the difficulty level is only one notch above replacing your intake.
hope this is what you are looking for
bigcat said:this is courtesy of thump_rrr, from this post:
http://forums.stangnet.com/showpost.php?p=5872467&postcount=16
hope this is what you are looking for
Thanks. I didn't find this thread using the search function.
i am pretty well aware of most posts on :SNSign: (at least S197), so i have a good idea of what is actually here and available. its all about how you word the search. some bring results, and some dont. glad that i could help you out.White05GT said:Thanks. I didn't find this thread using the search function.

I went with Ford Blue...thought it turned out good. Check it out...
http://www.cardomain.com/ride/1103214
http://www.cardomain.com/ride/1103214
Eibach Sportlines
nbk13nw
How do you like your Eibach Sportlines? What is the ride like? Any clearance problems with the 255/45/18 tires?
nbk13nw said:Once you have them off start with a good cleaning to cut the grease and dirt.
Then, a high speed wheel from a buffer or drill... Using maybe a wire wheel to remove and thing stuck to the surface.
I went from there to some 500 grit, then 1000 grit and finally 1500 grit to really smooth the surface. A buffing wheel on a drill and it was ready for paint.
Three coats of primer (Each wet sanded to smooth it out again) and then three coats of Ford Red engine paint (Again, wet sanded between coats)
nbk13nw
How do you like your Eibach Sportlines? What is the ride like? Any clearance problems with the 255/45/18 tires?

BandorConcepts
New Member
- Feb 11, 2007
- 4
- 0
- 0

lindseyquads
New Member
- Mar 30, 2007
- 2
- 0
- 0
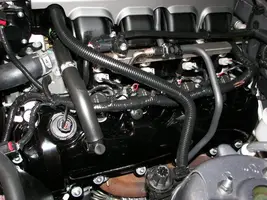

sonic blue roush
New Member
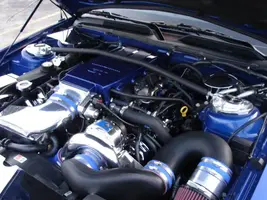
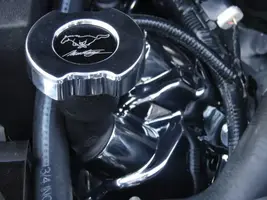
instead of spending so much time on the factory ones, what about some ford racing covers that just bolt on like i have install is really easy in fact easier than a 5.0 with a rusted ass egr tube lololol
those look nice, but i can play with the factory ones for a while until i find something i like before i come close to the price of replacement valve covers. IMO, they are overpriced.
lindseyquads
New Member
- Mar 30, 2007
- 2
- 0
- 0
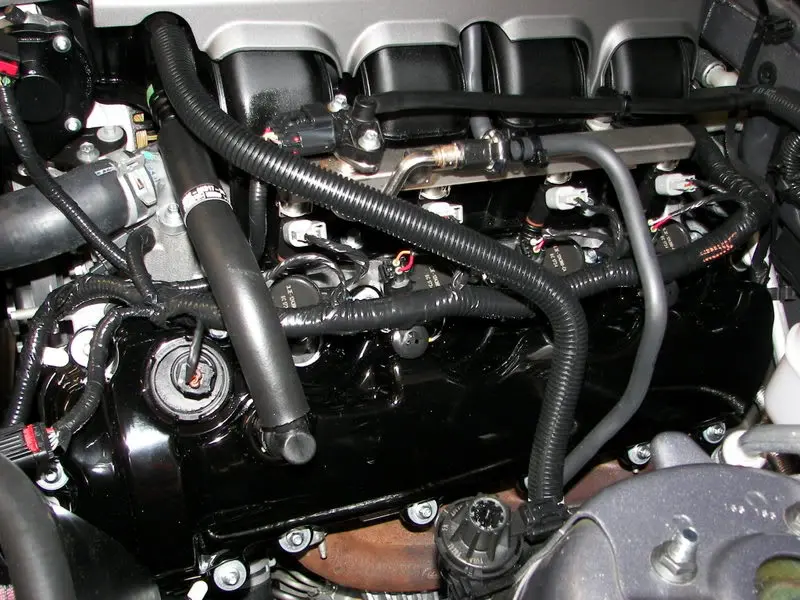

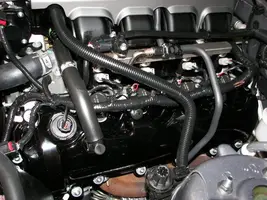
Here are a few pics of mine. I took them off and had them powdercoated black
It only cost me 70.00 to mine and all I had o do is take them off and go drop them off at my local powdercoater.
Attachments
Polish
For now I am going to polish mine right on the car. I tried it Sunday and it looked to be impossible because the cam covers are so ugly and rough finished.
However, I tried polishing the right cover and got some promising results using old wasted looking Mothers aluminum polish that was yellow and like soup instead of white paste ! I just used a old polishing pad to rub the stuff on and an old microfiber towel to take it off.
So far I have worked 30 minutes on it and thats what the pictures show. Im going to try a Mothers Power Ball on a drill and a Dremmel tool with a polishing wheel for the tight spots and see where that goes. I feel using some Mothers Billet or something like it, and some work will have the covers looking great.
I know a better easier job could be had by removing the covers, but that idea is lame to me due to fear I'll mess up something in the process. I can polish everything you can see though and for now that will be good.
For now I am going to polish mine right on the car. I tried it Sunday and it looked to be impossible because the cam covers are so ugly and rough finished.
However, I tried polishing the right cover and got some promising results using old wasted looking Mothers aluminum polish that was yellow and like soup instead of white paste ! I just used a old polishing pad to rub the stuff on and an old microfiber towel to take it off.
So far I have worked 30 minutes on it and thats what the pictures show. Im going to try a Mothers Power Ball on a drill and a Dremmel tool with a polishing wheel for the tight spots and see where that goes. I feel using some Mothers Billet or something like it, and some work will have the covers looking great.
I know a better easier job could be had by removing the covers, but that idea is lame to me due to fear I'll mess up something in the process. I can polish everything you can see though and for now that will be good.
NorthwestGT
New Member
Warlock, I think you are on the right track. That was one of the first things I thought of doing with my cam covers. I did use a little Flitz in one spot and it shined up pretty well in the area I did. However, I finally did break down and got the FRPP covers in chrome. Expensive, but pretty.
Yes Sir
Your's were the first chrome ones I have seen, and they are beautiful Im just too poor at the moment to buy some. Im just going to have to see what I can do with polish for now, but I like making things shine. 
Warlock, I think you are on the right track. That was one of the first things I thought of doing with my cam covers. I did use a little Flitz in one spot and it shined up pretty well in the area I did. However, I finally did break down and got the FRPP covers in chrome. Expensive, but pretty.
Your's were the first chrome ones I have seen, and they are beautiful
Im just too poor at the moment to buy some. Im just going to have to see what I can do with polish for now, but I like making things shine.
BandorConcepts
New Member
- Feb 11, 2007
- 4
- 0
- 0
I painted mine ford blue DE-1601. You can check them out at http://www.bryanandrus.com/camcovers. I also included the PDF with removal instructions if you need them.
Similar threads
- Replies
- 2
- Views
- 137
What's it Worth?
1997 Cobra, a ton of mods and restoration
- Replies
- 2
- Views
- 309
- Replies
- 16
- Views
- 505


- Replies
- 11
- Views
- 429

