Build Thread Want To Blow 5 Years And $50k On A Foxbody? Step By Step Instructions Inside!

What is your engine bore?
NM, searched the thread and saw its 4.030. Hopefully that's the case. If you happen to have a micrometer, wouldn't hurt for you to check one or two cylinders and see how close to that you are. The rings are for your bore size, it just seems like maybe someone might have been off by a couple thousands (.001 or .002) and the rings honed it out. At any rate, hopefully they get you fixed up really soon. During break in, make sure you add zinc additive to the motor.

Thanks for the info Micheal. I don't have a micrometer, but the one engine builder/machinist I spoke to said to bring the shortblock in without tearing it down. He would like to go over it in it's existing condition to see how everything checks out.

One would think you would have to wash the rings down pretty bad initially for the cylinders to look like that from such little run time... From my understanding, rick didnt do his own machine work so at this point it is anyones guess as to why the bore is in the shape it is in.

There was a ton of fuel in the oil. Everything wreaked of fuel. I believe you're right about the machine work. I'm pretty sure he just assembled everything as well.

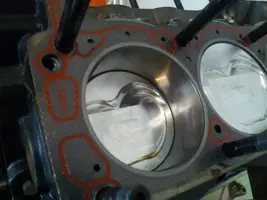
I found a picture I took of the engine before it ever ran. It's hard to deduce anything from this cell phone picture, but it could be that there wasn't much crosshatch in the walls to begin with. It's anyone's guess at this point.
7361ebf3e0a8e396d53d1847cbbb925e.webp
 

Attachments

  • 7361ebf3e0a8e396d53d1847cbbb925e.webp
    7361ebf3e0a8e396d53d1847cbbb925e.webp
    22.9 KB · Views: 314
looks pretty shiny to me, i'm not 100% on how theyre supposed to be, but i know when i did my 306 you could definitely tell the crosshatch, even with a pic like that, ill see if i can dig one up.

i do think that different ring packages do need different bore finishes though, dont quote me on it, but i seem to remember something about that. yours do seem a little to smooth either way though

alright, found a couple pics from when i picked my block up, note that its out in sunlight (not shoplights), but the cylinders seem to be much duller.

Picture 074.webp
Picture 076.webp
 
Last edited:
  • Like
Reactions: RacEoHolic330
I agree with you. Definitely looks like deeper hatch marks. My block could have been doomed from the beginning, it's only a guess at this point.
I'm bringing the engine down to the shop next Wednesday. I completely forgot how close I live to McCully Racing Motors. Tom has been doing machine work and engine building for 40 years. He'll be able to get things done for me at a fair price. Being 20 minutes away is nice too. I hope to have it back in a few weeks so I can get it back together. I need to order that twin disc clutch too.
 
Considering I wasn't planning on getting this work done, it's doing some wallet damage for sure. It's going to be a $1, 500 ordeal when it's all said and done. My OT at work was just cut yesterday too. How timely! I have a good amount of older parts in my basement that I've been lazy about getting on Craigslist. Looks like I have some motivation to sell that stuff now.
 
  • Like
Reactions: stangboy
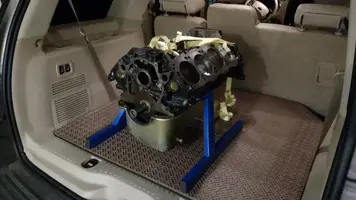
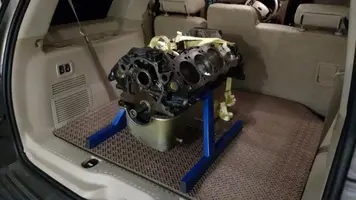
Mustang project is on hold. I'm in the middle of mocking up a rear engine setup for the Explorer.
IMG_20141124_181055378_zps80c92c39.webp


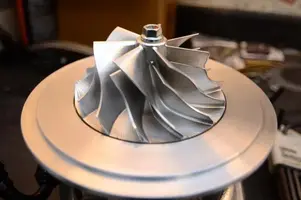
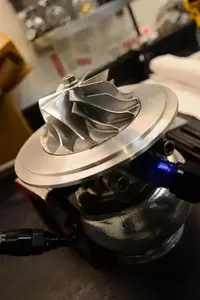
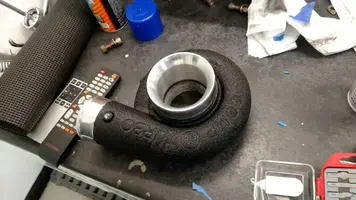
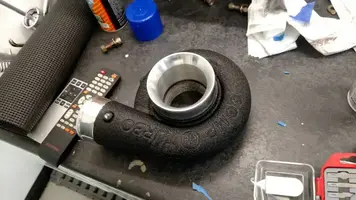
In other news, I took the compressor housing off the turbo to paint it. The billet wheel is so pretty. It's so light that it feels fragile spinning it by hand.
DSC_3158_zpsa45420a1.webp

DSC_3157_zpsca95843f.webp
 

Attachments

  • IMG_20141124_181055378_zps80c92c39.webp
    IMG_20141124_181055378_zps80c92c39.webp
    33 KB · Views: 323
  • DSC_3157_zpsca95843f.webp
    DSC_3157_zpsca95843f.webp
    19.7 KB · Views: 291
  • DSC_3158_zpsa45420a1.webp
    DSC_3158_zpsa45420a1.webp
    19.9 KB · Views: 277
Easy there noobz. All is well.

I shot the compressor housing with some wrinkle black. I'm digging it. I had a small run in one spot, but it's in an area that can't be seen. The paint was still somewhat wet in these pictures.
9a5f65d8ab8759379cabd5c264fe0217.webp


cfeccd94ce4d6ef3b14ccabb4107d650.webp


I'm over the whole polished look, so everything in my engine bay that is polished will become wrinkle black. The throttle body, IAC, intake pipe, and water pump will get the same treatment. I just won't be touching the accessory pullies or brackets. Those can stay the machined look to provide some contrast. The durability of the paint is all that remains to be seen.
 

Attachments

  • cfeccd94ce4d6ef3b14ccabb4107d650.webp
    cfeccd94ce4d6ef3b14ccabb4107d650.webp
    27.9 KB · Views: 313
  • 9a5f65d8ab8759379cabd5c264fe0217.webp
    9a5f65d8ab8759379cabd5c264fe0217.webp
    50.2 KB · Views: 359
Last edited:
Easy there noobz. All is well.

I shot the compressor housing with some wrinkle black. I'm digging it. I had a small run in one spot, but it's in an area that can't be seen. The paint was still somewhat wet in these pictures.
9a5f65d8ab8759379cabd5c264fe0217.webp


cfeccd94ce4d6ef3b14ccabb4107d650.webp


I'm over the whole polished look, so everything in my engine bay that is polished will become wrinkle black. The throttle body, IAC, intake pipe, and water pump will get the same treatment. I just won't be touching the accessory pullies or brackets. Those can stay the machined look to provide some contrast. The durability of the paint is all that remains to be seen.

And here I thought that I was gonna have to accept an "also ran" status because my engine compartment lacked the shiny..........now I'm a pro-dull pioneer.
Who knew? :shrug:
 

Attachments

  • 9a5f65d8ab8759379cabd5c264fe0217.webp
    9a5f65d8ab8759379cabd5c264fe0217.webp
    50.2 KB · Views: 345
  • cfeccd94ce4d6ef3b14ccabb4107d650.webp
    cfeccd94ce4d6ef3b14ccabb4107d650.webp
    27.9 KB · Views: 313
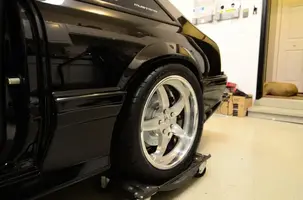
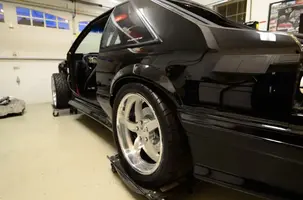
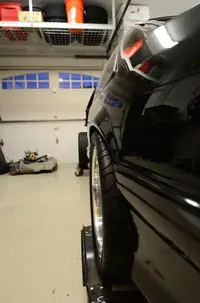
In other news, I finally got the tires put back on my wheels. Adjusting them to 6.75" of backspacing for the 18x9" wheels worked perfect. They fit great.
DSC_2988_zps22813adf.webp

DSC_2990_zps3352006e.webp

DSC_2986_zps52a6726b.webp

That is with almost all the camber available. There is about 1/4" of clearance to the upper subframe mount. I'm fine with that because the wheel moves towards the fender as the suspension compresses. I'll need to adjust the ride height as I add weight back to the car. It's sitting a bit low for my taste at the moment.

True Forged was great during the whole process. It did take a while to get the wheels back, but they were done right. They really are a stand up company. You certainly get what you pay for.


Hey Scott, if you get a chance, can you take a pic from behind/under the rear to show the clearance from the inside wheel/tire to the subframe mount, bolt, and coil over shock? I've got a lead on some 18" wheels that are 8" in front with a 38 offset and 9" in rear with a +45 offset which brings it to 6.77" BS (almost exactly like yours). I've got the same MM low profile bolt you have and plan to go coil over soon as well so I want to see how much clearance there should be with that setup.
 

Attachments

  • DSC_2990_zps3352006e.webp
    DSC_2990_zps3352006e.webp
    27.3 KB · Views: 270
  • DSC_2988_zps22813adf.webp
    DSC_2988_zps22813adf.webp
    29.2 KB · Views: 413
  • DSC_2986_zps52a6726b.webp
    DSC_2986_zps52a6726b.webp
    19.4 KB · Views: 270
I have a 1/4" of clearance to the subframe mount at my current ride height. I know I took a picture of it, I'll have to dig it up. When the suspension is in full droop on the lift, the 275 bfg tire does slightly rub the mount. As the suspension compresses, the wheel articulates out towards the fender, so the inner clearance only gets better.