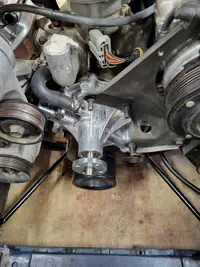
Ok, so I had a green puddle underneath my 86 gt hatchback and investigated it, finding that the water pump is leaking copiously.
Im really new to this, and this will be my first foray into the engine bay. I've watched multiple videos, and read the steps in the Haynes manual, yet I have some lingering questions before I begin ordering parts and working.
1: Other than the pump itself, what all will I need to have on hand to begin the job? So far I have new hoses and clamps, and a new set of bolts as well as the pump in my LMR shopping cart. What am I missing (the pump comes with a gasket, which a few people said in the reviews that they suck, should I spring for an aftermarket one? LMR only has it in a set with timing cover gasket and I'd rather not spend unless its really necessary). I know I will need some gasket sealant, and some thread sealant ... but what else am I missing? Tool wise, I was planning on getting a 3-m or scotch brite abrasive disc, is there something better? Or something I should absolutely avoid? One video has a guy cleaning the mating surfaces with a copper wire brush attachment on a drill or dremel, and another says to use a razor blade...
2. Do I need a high volume pump, is that just for racers? My intended use for the car is show and spirited street driving.
3. The belt tensioner: in the video the guy mentions it, and later I see him using a wrench to pull it back to remove the belt, but do I need to loosen the nut on it, or just pry it out of the way?
4. I have A/C and Power Steering ... The videos say to detach the brackets and swing them out of the way ... is it that easy? This step seems weird to me.
5. The big one -- several videos mention taking care to not break the bolts off in the block when I remove them. One guy says use a impact wrench on a low torque setting (i just got a new impact tool and am not sure of how to use it yet, although I am itching to) and another guy says definitely do NOT use impact tool cause it will increase chances of bolt breakage. So which is it? This is the part I'm terrified of: ruining my block or engine while performing this task.
Thanks in advance,
Boudreaux