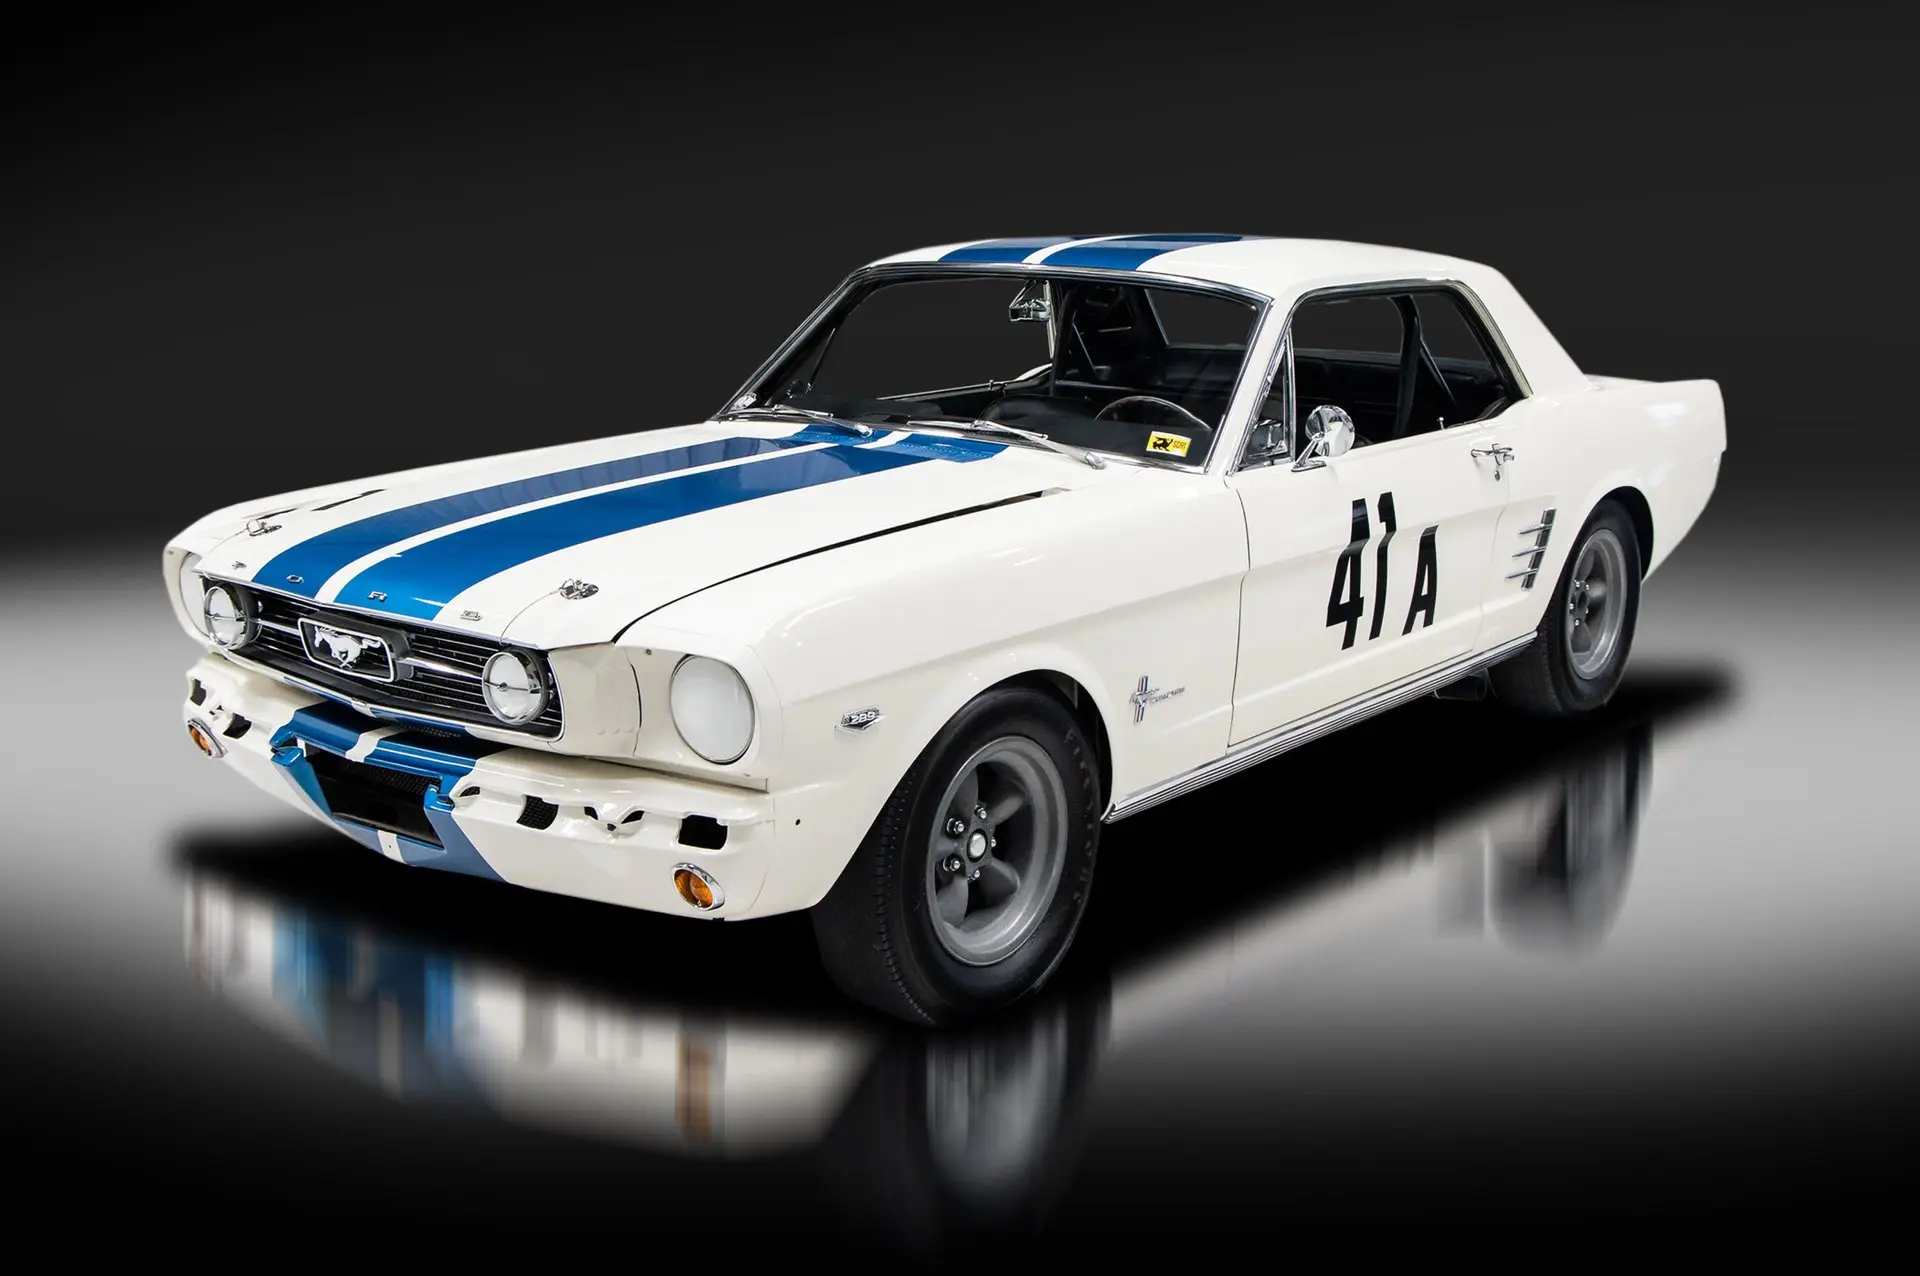
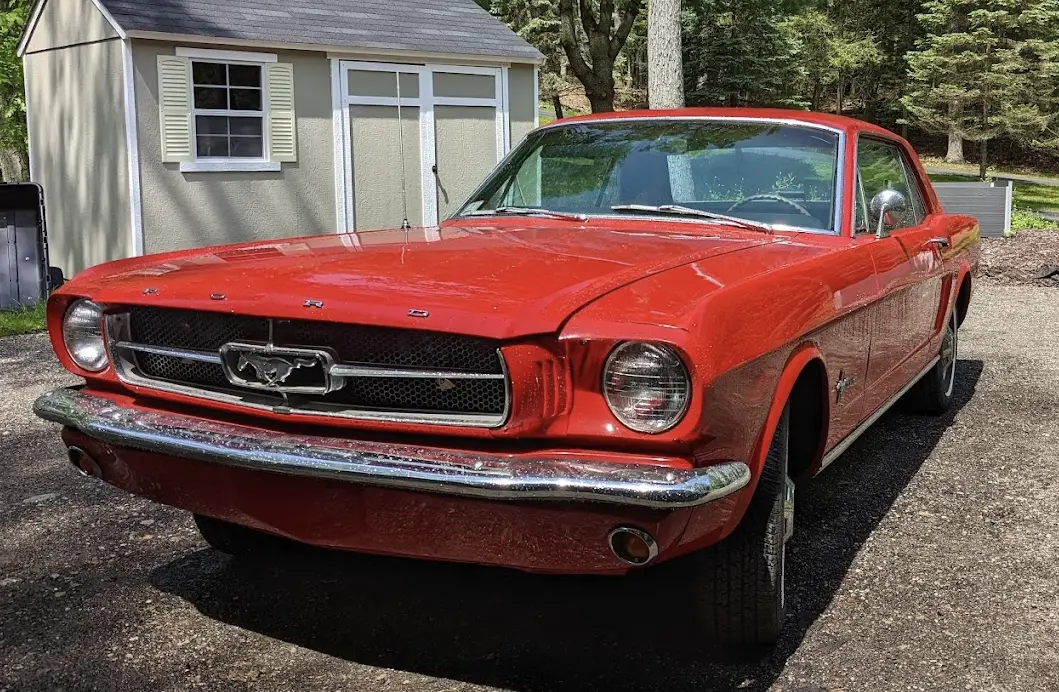
65 Coupe I6 Auto to 302 EFI 5 Speed Swap

Scuderia

Member
Nov 16, 2021
27
13
13
CT
Hi All

I decided to swap out my I6 with a V8. I wanted to post the thread so as I go I will update. The I6 was fine as a cruiser, I've driven it for a few years in it's current form but I decided I want some more fun. Im handy but have never done anything at this scale so you are going to tell really fast I am well in over my head. My garage is tight, I'm low on time and I live where it's cold for a good part of the year so this is going to be a challenge. And while budget always matters I'm going to try to put my money in the things that I believe will return the most value.

I started with the design, I didn't want to just throw parts at it so I wanted to be thoughtful of what I wanted. Im modeling it after the Ken Miles Trans-am coupe that he unfortunately never got to drive. Since it's a well documented car I could find the specs and use it as a template. I also wanted a few modern touches. I thought about a resto-mod but to me that becomes a slippery slope. Too many options and changes and "well why not spend X more and get Y". Using this as a template gave me focus. Plus it's freaking cool as hell, which helps. It's a lot of work so I wanted a clear vision to reach for.

This is mine and the Trans Am Spec Miles Car

Screenshot 2025-02-03 at 10.13.08 AM.webp


1738595639554.webp


I am not trying to do a clone - more a model to focus on.

In order to get the motor and Trans in, I need to:
Rebuild the front suspension with V8 spindles, Giving it the 1 inch shelby drop and period Koni's.
- lot of parts involved here - I will post the list below.
- For anyone following this be thoughtful of suspension, rearend, brakes and axle all matter. So ensure you are all compatible with each other. You can't just say it fits on a 65
Rebuild the rear suspension (keeping the leaf as I am aiming for period correct)
Change the rear end - going to a ford 9 with small bearing, detroit locker and 3.70 gear ratio
Source a Motor making at least 306 hp (Shelby spec)
Source manual transmission and linkages (I haven't decided on the Trans yet, I want 4 speed but everyone is telling me I am nuts)
driveshft, bell-housing clutch etc.
Disc Brakes - Drums suck and if Im upping the HP this is where I want to invest in non-period.
Wheels (4 lug won't work)
Exhaust

There is a lot more but that's the plan - I have a spreadsheet with costs, vendors and part numbers if anyone is interested.
 
Suspension, first parts I have to source - I needed two V8 spindles which I got gently used off of Ebay. Pretty straight forward. The rest of the suspension is less so as I wasn't sure what needed to go.

I determined I need what I listed below. I bought the Koni's I was mentioning earlier. I also got the springs that have the 1" Shelby drop because it just looks cooler.

The rest I sourced from a few places including Rock Auto, NPD and CJ Pony


[td]- Two upper control arms[/td] [td]- Two lower control arms[/td] [td]- Two shock tower bumpers[/td] [td]- Two coil spring saddles[/td] [td]- Two coil spring insulators[/td] [td]- Two coil springs[/td] [td]- Front sway bar with bushings[/td] [td]- Two front sway bar end links[/td] [td]- Two inner tie rods[/td] [td]- Two outer tie rods[/td] [td]- Two tie rod sleeves[/td] [td]- Idler arm[/td] [td]- Strut rod bushing kit[/td]

suspensionexplodedview.webp

Screenshot 2025-02-04 at 10.13.57 AM.webp


Side note - drum brakes suck. Not just a little but a whole lot. Getting these things off was a pain. I also don't need to pull them as it seems I can get to everything without removing the drum. I PB blasted everything but those drums were stubborn. I ended up torching it and it loosened enough with a dead blow hammer. ¯\_(ツ)_/¯

And thanks to https://onemanandhismustang.com/steering-suspension-diagrams/ for the diagrams - Hugely helpful.
 
Alright so parts are off and what a pain it was - just a lot of rusted stuck parts. Breaker bar, Torch and PB blaster were my friend. Also if you are doing this for the first time a Pickle Fork and spring compressors are really needed if you don't have it.


[td]
- Two upper control arms[/td] [td]- Two lower control arms[/td] [td]- Two shock tower bumpers[/td] [td]- Two coil spring saddles[/td] [td]- Two coil spring insulators[/td] [td]- Two coil springs[/td] [td]- Front sway bar with bushings[/td] [td]- Two front sway bar end links[/td] [td]- Two inner tie rods[/td] [td]- Two outer tie rods[/td] [td]- Two tie rod sleeves[/td] [td]- Idler arm[/td] [td]- Strut rod bushing kit[/td]


That's what's going back in along with Struts and springs. I went with the Koni struts and the Shelby Drop springs. I also split the buys between NPD/CJP Parts and RockAuto. Rockauto price was the best for things like Tie rods.
 
Last edited:
  • Like
Reactions: 89ripper
I also got the Transmission parts sorted - for all you creating a budget and think a $2k transmission costs 2k, its doesn't. But MDL was great company to work with

This is for

[td width="888pt"]TREMEC Super-Duty T5 5-Speed Transmission 2.95 first .63 OD[/td]

Screenshot 2025-03-31 at 9.50.23 AM.webp
 
Last edited:
One thing I had a hard time tracking down was torque numbers:

Idler arm to Frame 28-35
lower idler arm bolt 35-47
idler arm to center link 25-30
Inner and outter tie rods 30-40
upper and lower ball joints 60-90
centerlink to pitman 35-47
strutrod to frame bracket 40-55
lower a arm pivot to shock tower 35-50
coil spring to upper arm 17-25
patman to steering box shaft 85-110
 
  • Like
Reactions: 2Blue2 and 89ripper
I came across this which has been very helpful: https://averagejoerestoration.com/1965-66-mustang-6cyl-v8-conversion/


The following is a list of parts required to convert an I6 ’65-’66 Mustang to a V8. Unless otherwise noted, the parts listed are for V8 ‘Stang application. If you decide to cut corners, do not use the small 6 cylinder brakes. The V8 drums were barely adequate and the front discs only delayed the fade problem. Upgrade to the V8 spindles and rear axle assembly as neither 6 cylinder counterparts are going to last long when you get hooked on V8 power.

FRONT SUSPENSION:

  1. Drag (center) link. If changing to V8 with p/s from I6 with p/s, the drag link may be the same but I’m not sure. The power ram and pump are the same. For non-p/s, the I6/V8 drag links are different.

  2. Inner tie rods (LH and RH are the same for manual steering but LH different for p/s).
  3. Tie rod adjusters LH, RH (LH and RH are the same for manual steering but LH different for p/s) Note: For 6 cylinders with p/s, if you plan to retain p/s with your V8, these adjusters are the same, just don’t interchange LH with RH.
  4. Outer tie rods LH, RH (LH and RH are the same for manual steering but LH different for p/s).
  5. Idler arm
  6. Pitman Arm – Note: Steering boxes are the same whether I6 or V8 however, p/s equipped cars from the factory had higher ratio (lower numerically) steering boxes. The P/S boxes are typically designated with HCC-AW while manual boxes are HCC-AT. If you have HCC-AX it would be an oddity, since the handling suspension steering box was only available on V8 Mustangs.
  7. Spindle LH, RH
  8. Two front Hub and brake assemblies including hoses (Stainless Steel Brake Corp offers original Kelsey-Hayes 4-piston front disc brake set up using the same spindles the V8 drum brakes use).
  9. Pair of front coil springs
REAR SUSPENSION:

  1. Pair of leaf springs.

  2. Rear differential assembly (’65-’66 ‘Stang 8″ diff. is only one I know will exactly fit but a ’57-’59 9″ will fit, ’77-’80 Lincoln Versailles/Merc Monarch/Ford Granada (LMF) bolts in but a bit wide axle to axle face).
  3. Rear brake lines and hose that are attached to the rear differential assembly.
  4. Emergency brake cable. Note ’65s and ’66s are different. The ’66s use a single cable to both rear brakes while the ’65s have two separate cables. Choose wisely.
  5. Pair of 10″x 1-3/4″ (coupe or fastback for sure not sure with Convertibles) rear drum brake assembly (your on your own if you have a 9″, LMF have rear disc but parts are obsolete).
DRIVE TRAIN:

  1. Engine (duh!) Don’t forget the ground wire that goes from the passenger side cylinder head to the firewall.

  2. Radiator. If your V8 has a driver side output water pump you can bolt on a passenger side exit pump (late ’65 – ’66). Note: ‘64.5 and early ’65s used a slightly different style that won’t work on late ’65 on up timing covers. Then you will have to hassle with getting all the accessory pulleys to line up. An alternative is get a radiator shop to mod your radiator to accept the driver side outlet water pump. Don’t forget, if you have an automatic transmission, make sure the radiator has the ports for the trans fluid lines. I think the ’65s trans line thread directly into the radiator cooling tube while the ’66s used the rubber hose connection between radiator ports and trans fluid cooling lines.
  3. Upper and lower radiator hose.
  4. ’66 motor mounts LH, RH (if your ‘Stang’s a ’65, use the ’66 motor mounts, ’65 stuff is harder to get and the motor mounts have an extra bracket which is a bear to find).
  5. ’66 motor mount to frame bracket LH, RH (these are being reproduced and any friendly neighborhood Mustang parts place will have ’em. ).
  6. You can reuse the alternator but you will need to get the correct alternator brackets to mount it (depending on other engine accessories). Most folks seem to get the engine fully dressed so already have the alternator, water pump, pulleys, and fan parts. Depending on whether you’re installing a/c or p/s you will have to find appropriate pulleys that line up. Note that 289s and 302’s made ’69 and before had a three bolt crank pulley while 302s after ’69 had 4 bolts.
  7. ’65 or ’66 Fan and fan spacer if your engine didn’t come with them. Beware, later fans and fan spacers or clutch fans vary in length and diameter.
  8. Starter – match to transmission type
  9. Exhaust manifolds (or headers), exhaust pipe, muffler(s) and tail pipe(s)+ hangers.
TRANSMISSION

  1. If autotrans, you can use the 6 cylinder’s C4 (unless your V8 is modified for more power) but you must change the block plate and bell housing for one that will bolt to a V8. Note: Very early ’65 260-289s used 5 bolt bell housings and the ’65 and later engines were 6 bolt. You will also need the V8 flexplate and torque converter. Warning: After ’81 all 302s used 50 oz imbalance on their flexplate/flywheel and the harmonic balancer is different from the pre ’81 harmonic balancer. Also, ’70 and later C4s had larger input shafts so match the torque converter to the trans. Don’t forget the trans cooling lines, kick down linkage if ’65 or kick down cable if ’66. One last thing, if you’re changing to an C4, make sure it’s one from a car that had a floor shift selector and not one on the column. The shift lever on the trans (and I think the internal rod) are different. Don’t forget the Auto trans torque converter access plate.
If manual get a V8 3 speed or better yet a 4 spd toploader. You will need the engine block plate, clutch bell housing, flywheel, clutch disk, pressure plate, throw out bearing, pilot bearing, dust boot, clutch fork to fulcrum retainer, and clutch fork. Mechanical clutch linkage includes clutch pedal to equalizer bar (Z-bar) push rod, Z-bar, clutch pivot – engine side, clutch pivot – frame side, 2 felt washers, two clutch pivot balls, clutch return spring, clutch rod from Z-bar to clutch fork. Or you could chose clutch cable conversion. See Vintage-Mustang.com (www.Vintage-Mustang.com) and search their forum regarding clutch cable conversion. See above auto trans info regarding 5 bolt vs 6 bolt engine blocks and correct flywheel imbalance.

  1. Drive Shaft: If your I6 originally had the C4 auto trans Lucky You! You can reuse your existing drive shaft, trans yoke, and U-joints. If you had a three speed or the Dagenjam transmission, bummer. You get to either hunt for a ’65/’66 V8 drive shaft or have one made. If you are converting from manual to auto, you can use any auto trans driveshaft. If you had a manual trans, try to get the drive which matches the transmission of your choice. Granted, I managed to use a V8 auto trans driveshaft with a ’73 4spd toploader in a previous ’65 FB but I’m not sure if the length was exactly right. Be aware that some very early ’65 4spd toploaders had 25 spline output shafts so the trans Yoke must match. I suggest locating a drive shaft with the more common 26 spline trans yoke, it would be easier to find a transmission to match. Pay attention to the U-Joint type. If the rear U-joint is an external type, don’t try to match a trans yoke to it which uses an internal type U-joint. This is assuming you are using an 8″ rear end. If you are swapping in a 9″, you’re on your own (you’ll more than likely have to have one built – good excuse to go aluminum!).

  2. Set of tires (if converting a ’65) and a set of five lug rims (don’t forget the spare – Doh!). Grab 4 extra lug nuts, too.
ANNOYING STUFF:

  1. Engine wiring harness. This harness includes the oil and temp sending unit wiring plus the wires that go to the coil.
  2. Alternator wiring harness
  3. Starter cable from solenoid. The 6 cyl’s negative battery cable may be a bit long but may be useable on a V8 – critical part is the terminal lug that is bolted to the block. 6 cylinder’s may have a smaller bolt hole.
  4. Accelerator pedal linkage assembly. Suggest using the ’66 style with the extra arm on it for the kick down cable if you have an auto trans. The ’65 accelerator pedal assembly was the same irregardless of manual or automatic transmission. The ’66 manual transmission cars had the same accelerator pedal assy as the ’65’s. Only the auto equipped ’66’s had the extra arm on the Accelerator pedal assy for the kick down cable. The V8 throttle rod (The link between carb throttle shaft and the accelerator pedal assy) is different than the I6 bell crank linkages.
  5. That little arm on the autotrans that accepts the kickdown cable (’66 and up) or the kickdown linkage (’65 only)
  6. Fuel line. Yup the entire hard line. You’re going to get vapor lock if you use the 6 cylinder’s.
  7. If you have p/s, Hose, p/s pump to control valve and Hose, p/s pressure, control valve to pump . Match to type of p/s pump you have.
  8. 14″ wheel covers (if you have a ’65 and using stock V8 rims)
  9. Two (2) “289” badges for your fenders. Hey, if you went through all that trouble to drop in a V8 you might as well advertise it. If you dropped in a 302 or 351 you’ll have to make your own badges
 
Pushing in the studs was super annoying - The original studs I bought truly suck so I got a new set (thanks ARP). Once I sorted that the rear-end bolts. I got the LSD in and need to add the disc brakes. I shoulda just bought it all assembled, don't know what I was thinking.

BTW Leaf spring bolts are a giant PITA to get out.


Screenshot 2025-08-06 at 10.38.43 AM.webp
 
  • Like
Reactions: 2Blue2
One thing I forgot to mention is since I had to re-do almost all of the front suspension I needed to swap the dragbar. But for the life of me I couldn't get the damn steering box to disconnect. I tried and tried. My buddy said I should just replace the steering box anyway since im in there and it's a weird ratio box so I added that to the parts list.

Protip: you should pull the engine to get to the steering box.
 
There is a special purpose tool that you can rent for free at Autozone. It’s called a pitman arm puller. I think that’s what you’re referring to. It removes that arm from the steering box. If you don’t already have the 1965 Ford Service manual, you should get that. Doing this vehicle mod will be more difficult without it. Good luck.
 
There is a special purpose tool that you can rent for free at Autozone. It’s called a pitman arm puller. I think that’s what you’re referring to. It removes that arm from the steering box. If you don’t already have the 1965 Ford Service manual, you should get that. Doing this vehicle mod will be more difficult without it. Good luck.
I bought a cheap pullman arm puller and bent the hell outta it trying to get it out - but you are right I should have just rented a real one as the quality was just that, cheap
 
Last edited:
  • Like
Reactions: Mcmahst
Built the rear end - The press in studs I got from speedmaster sucked and I ended up getting ARP studs which were great. Generally the rear was straightforward to build but slow as I didn't want to make a mistake.

I did a Speedmaster 3.73 LSD
Currie small bearing rearend
Disc brakes all around
I also bought the lead=f springs with the 1 inch drop

Getting the old rear out wasn't as bad as I thought it was going to be. I was worried those bolts were going to be rusted in but it wasn't terrible. bunch of jack stands and jacks to help and it all came apart pretty easy.

I haven't thought about an exhaust yet so I need to start designing that out.

With the new leaf springs and all new hardware, getting that in should be easy, but the new rear weighs a whole lot so getting it into place may be tougher than I was thinking. I also need to run the new brake lines pretty soon.

The motor will hopefully come out this weekend and I can start cleaning up the engine bay.

The difference in size between the two rears is substantial. The 6 cyl one looks like it came off a mower.


Screenshot 2025-09-08 at 3.39.15 PM.webp


Screenshot 2025-09-08 at 3.39.49 PM.webp
 
  • Like
Reactions: Noobz347
You're going to need the weight of the car on the rear + leaf springs before measuring. Be sure to keep in mind a 3/4"-1" allowance for your slip yoke. As stated above, some manufacturers measure from different points, so it's best to get the vendor lined up. My local shop used the center of each U-Joint cap as the point of measurement.
 
  • Useful
Reactions: Noobz347
I came across these and for the life of me, could not recall who was doing a project in this direction.

Looks like they have 17 x 7-9.5 and a lot of other sizes too.


1757448429132.webp

1757448631240.webp