Build Thread '83 T-top Coupe - Cliff Notes Edition

Ok, to finish a thought on the rear seat covers. I've re-sprayed them and i will let them set for a week and put them back on the cushions. Once they're on them i will brush the cloth parts with a kitty brush to fluff up the nap. I will then take a bucket of warm water and a soft cloth and wipe them down really good. So, the back before
IMG_2229.webp

and after
IMG_2233.webp
IMG_2232.webp
 
Out of the blue, the yard owner sent me a text that he would be out there today. I talked to my boss and got off work about two hours early.

So I got the passenger seat, the center console and it's pieces, the interior trim around the windshield, the left kick panel, the cowel trim panel, and the glove compartment box.

What I've discovered, I need new seat studs and bolts, I only brought a 3/8 ratchet and sockets with me, that left rear bolt was a complete mf. I also need a console arm rest pad. As you'll see, I need a new package tray too.

Pictures:
IMG_2240.webp

I did NOT break ANY of those connector tabs! Who's your daddy? That's up at the front of the center console.
IMG_2235.webp

Center console and passenger seat out.
IMG_2236.webp

Took off that horrible dash pad. Do you see the two cracks i'll have to repair after i get the instrument panel next time?
IMG_2237.webp

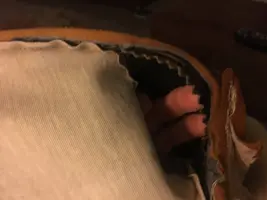
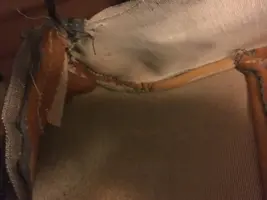
Oooooooohhhhh, lovely package tray, huh?
IMG_2238.webp

LOOK! I have a t-top coupe! The windshield wiper arms really, really didn't want to come off at first. I think i will paint them the accent color as well. The hose for the spray nozzle was still flexible!
IMG_2239.webp

Do you like that nice green in the rear passenger footwell?
IMG_2241.webp

So i finally ran my hands over the remaining panels that i have to paint. The roof has a fair sized dent immediately behind the right t-top. The left 1/4 close to the taillight. The right 1/4 kind of little all over, biggest at the bottom of the sail panel. The driver's door had a couple dings up high and one slightly bigger dent below the moulding.
 
Today I'm sanding down the center console. I have to remove the old dried up plastic so the new paint will have something solid to adhere to. This picture show the bad sun bleaching that needs to be knocked off.
image.webp


I also have a hairline crack by the rear ash tray that I'll fix sometime today. It's hardly noticeable......now. It will continue to grow and eat up my console if I don't fix it though. I'll repair it similarly to the repair on the driver's side 1/4 trim piece, just on a smaller scale.
image.webp
 
Repair day. I started earlier with the center console. I beveled out the crack and used the mesh tape on the backside. Then PBA.
IMG_2250.webp
IMG_2248.webp


Then decided I would get rid of those speakers from the kick panel, I'll start patching the other one on Monday. You can see I got the patch from a trashed bumper. I'm getting the backside first and will let the PBA harden over the weekend. Then I'll flip it and use more PBA on the front. I'll primer it Tuesday and follow the same procedure I did with the 1/4 trim.
IMG_2251.webp
IMG_2252.webp

IMG_2253.webp
IMG_2254.webp
IMG_2255.webp

And what the heck, it would only take a couple extra minutes, so I decided to fix the crack in the eb handle trim. I already beveled the crack out.
IMG_2256.webp
IMG_2258.webp
 
Back to the regularly scheduled program. I did a few things. One, I disassembled the passenger seat yesterday. the listings were almost completely rusted through! I'm going to get some piano wire from the hardware store tomorrow and make new ones. The problem i had with the seat sliding turns out to be simply a rusted up mechanism, easy fix there. I'll sand down the frame and seat rails and spray them flat black. I'll take the rails home and WD40 the crap out of them then.
IMG_2262.webp


IMG_2267.webp
IMG_2268.webp


I took the covers home last night and washed them, i was out of bleach. So i washed them twice thinking that this might defunk them. I was wrong. So i tried to dry them with a bounce dryer sheet. This gave them the smell of fresh spring mold.:nonono: So i stopped at Wally World on the way home from work tonight and got more bleach. Just one more washing and the mold smell is gone and i have some SUPER clean seat covers!:banana:

I also finished repairing the center console and e-brake cover and got them in primer. I will at least get them shot with the rocker chip guard (RCG) tomorrow. Hopefully painted by friday. There are a couple parts that actually didn't need repair that will go straight to RCG. Though the passenger windshield trim will need a bit of work. I'll show pictures of all the stuff on it tomorrow or the next day.
IMG_2265.webp

I finished patching both kick panels and have a light coat of polyflex on them that i still need to sand down. BTW, this brings up an interesting point. I had to sand down the right kick panel to get the repair to stick. Remember I had already done the paint job on it. The RCG and paint is freaking tough! Sort of yay! Great for the panels I have already finished.

I can't wait to put the seat back together, but i think i'll go ahead and get the bun warmers next week and then reassemble it. Toasty buns on a freezing morning is a good thing!:nice:
 
What did i do today?.........

Let's see, i finished disassembling the passenger seat. The bottom is yucky. I need to replace the springs and all of the listings in the seat.
IMG_2274.webp
IMG_2276.webp


I dropped of the seat frame bottom and sliders off at the sandblaster today. I'll paint it back to black and lithium lube the slide.

I bought same new high strength steel rod to trim to length to replace the listings.
IMG_2283.webp

I ordered the spring kit from LMR.

I also sanded down the primer on the center console, the eb handle cover and the interior trim that goes across the windshield and sprayed the rocker chip guard on them. I'll scuff that with 400 like i did with the other trim pieces and paint them. Maybe tomorrow i'll get the kick panels primered. I got to spend time with the interior side trim from the windshield too.
IMG_2278.webp
IMG_2281.webp
IMG_2282.webp
 

Attachments

  • IMG_2284.webp
    IMG_2284.webp
    267.4 KB · Views: 183
  • IMG_2285.webp
    IMG_2285.webp
    461.1 KB · Views: 185
Oh yeah, I started sowing the rear seat upper cover. The seams had split out on the upper corners and in the middle. I've sown the right side and one middle seam. I had to stop. My fingers HURT!

Upholstery thread is some strong stuff, btw. It's 50 pound test strength. You don't just snap this stuff.
IMG_2284.webp
IMG_2285.webp
 
Sanded my kick panels down and got them in primer this morning. Hopefully I'll have them sanded tonight and have the rocker guard on them before I go home. Look! No more holes!
image.webp
 
I did a couple more things today, first i sanded the kick panels and sprayed rocker chip guard (rcg) on them. I'll sand them tomorrow and paint them.
IMG_2288.webp


I sanded the rcg on the center console, eb handle cover and the windshield trim and painted them. Looks so much better now. I'll reassemble the console with all of it's brackets tomorrow. I need to get the chrome tape to redo the chrome piping on the console and console instrument cover too. EDIT: Before picture:
IMG_2240.webp
After:
IMG_2289.webp


IMG_2290.webp

I only have two vehicles to paint tomorrow, so maybe i'll get the seat cover shot too.
 
Ok, opinion time. I want to take the ashtray cigar lighter section and put the seat warmer switches in the ash tray area (while keeping the door) and a USB port in the cigar lighter hole. What do y'all think?
image.webp
 
Here's the center console "done". I will head up to hobby lobby tomorrow for the chrome stuff to put the piping trim back on the console and console instrument cluster.
B4:
IMG_0433.webp

After:
IMG_2297.webp


IMG_2296.webp
 
A guy on FEP had an idea to do the silver trim on his console with a silver Sharpie. Thought that sounded pretty good. So here's the offending Sharpie
image.webp
and the center console trimmed with it. I'm pleased with how it turned out.
IMG_2312.webp


What else did i do today, other than lusting after @95BlueStallion 's new wheels?

I hog ringed the lower cover on the rear seat foam, that's what i did. Easy peasy. I put three dryer sheets under the cover itself, just because.
IMG_2305.webp
IMG_2306.webp
After it was nice and tight, i took a scrub brush and scrubbed the crap out of the cloth to make it soft again.
IMG_2308.webp
I ran my vacuum cleaner over it to get the big dust. Then i wiped it down real good with a rag and a bucket of warm water to get rid of the small dust. All done. It now has the "Dave's Big Butt" seal of approval.
IMG_2309.webp


That's page sixty!
 
Last edited:
Ok, in keeping up with notifying y'all when I do absolutely anything, no matter how insignificant it might be. Here's some stuff I did so far today.

First, the cowel panel fix.
IMG_2317.webp
IMG_2318.webp
IMG_2322.webp
Next, the windshield trim fixes.
IMG_2315.webp
IMG_2316.webp
IMG_2321.webp
IMG_2325.webp