Can Fiberglass be heated?

68FBJJZ109

Member
May 2, 2005
357
0
17
Easton, PA
I was wonder if fiberglass can be heated and soften to masage it into a more suitable shape? I have a Upper side scopp which is twisted, and I can take an more off the the tail end of the scoop or build it up, you'll notice right away, that the top is thicker then the bottom portion. Just wondering i had heard it was possible, and that would pretty much allow the scoop to sti flush. I can't sand the scoop down any further to meet the body contour.
 
Fiberglass will "move" when heated. It will often move back when the temperature changes too.

Don't think you will be able to solve your sidescoop issue with heat.

Every piece of fiberglass I have ever used on a Mustang has required some sorta rework in order to get a good fit. Harwood stuff for Chevys fits great for the most part. Unfortunately most of the companies making Ford stuff don't offer that level of fit and finish.

With glass you just have to study the part and figure out where to cut, fill or grind the part to get the best fit.

If you don't have enough material to grind. Consider adding material. If that throws everything out of porportion consider pie cutting the piece somewhere to get it to conform to the proper shape. Once you have it sitting pretty, prep your seams and reglass.
 
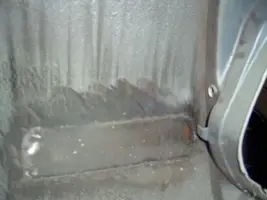
Lol, you and I think a lot alike! I tried the heat method on my hood. The thing sagged in the front center, so I propped it up, taped 40lbs of weight on each corner and set my shop heater on the area I wanted and left it for a week. I checked it several times a day and at the end of a week, I removed the weight and re-measured. I gained nothing. The hood didn't budge any measureable amount, which leads my to think that's an old wives tale spread by people that haven't tried it. I ended up cutting the skin loose from the inner bracing, putting the shape I wanted in the skin with a huge cabinet clamp across the front and 'glassing it back together. By doing that I only spent about two hours, plus letting it dry overnight and it was done. Once you get the hang of 'glass work, it's not that bad, just add 'glass where you want, grind it out of where you don't want and always wear a dust mask. Also, I was warned not to grind through the gel coat or I'd have to have it re-gel coated or the repairs would show. Not true. I used House of Kolor's epoxy primer to seal it, blocked it several times and although it's been nearly two years, you still can't see any signs of any repair anywhere. I credit mt brother with teaching me how to work with fiberglass so well. He's not a bodyman or anything, but he races a Thunder Roadster and has an aggressive driving style and I get to fix the broken 'glass parts. Week in and week out...
 
BTW, I can't seem to find the pics of the rear marker job before I painted it, but I snapped a couple pics so you can get an idea of what I did. Hope these help, and remember to make a bunch of small tack welds rather than trying to make a solid bead.
 

Attachments

  • rear quarter 1.webp
    rear quarter 1.webp
    26 KB · Views: 104
  • rear quarter 2.webp
    rear quarter 2.webp
    13.2 KB · Views: 109
Here's one of the outside of the quarter, there's very, very little filler in the whole panel, and if you take your time and do a bit of hammer and dolly work as you go, yours will come out fine.
 

Attachments

  • rear quarter outer.webp
    rear quarter outer.webp
    4.1 KB · Views: 99
Haha yeah I heard you could heat them so i figured i would give it a shot. The pics are are very helpfull and you dida great job. I just have alot of damage on the one side and i am worried about loosing the body line. I did infact cut the scoop in half and then got it to sit right and then used resin hold them in place. And it sits flat thanks for the advice. Once that cures i will kitty hair the back of it, and repair the inner scoop.
 
I suggest that you use glass mat and resin on the front and backsides of the repair instead of kitty hair.

You should feather the seam down on the front and back sides about 2" beyond the repair, tapering the edges.

Apply resin over the seam then lay in saturated mat that extends well beyond the seam. Do this on the front and backsides.

Block sand the top side flat with 60-120, apply filler or 2k glaze over the repaired area, finish sand to 180 and prime.