Engine Head Gasket Choices Help

darkfader

5 Year Member
Feb 16, 2017
240
321
83
Davis, WV
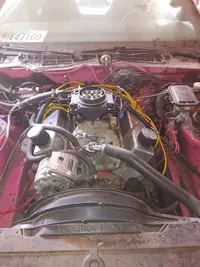
I'm about to degree my cam and then check piston to valve clearance. I have a few questions to be sure I do things right. If someone can help me out, I'd greatly appreciate it.

Do people actually use a head gasket during P/V clearance check or just add compressed thickness to the thickness of the modeling clay?

If I do actually use a gasket for the test, I assume I'm to torque head bolts to spec in order to get the proper compressed thickness?

If this is the case ^, is that head gasket now trash? And what about the head bolts, I'm using ARP studs for the final build, but still have the stock bolts that I removed during the teardown. I think the studs can be used more than once right?

And now gaskets, I see a FRPP Competition head gasket >

Item #M6051A302
  • Fits 1979-95 5.0L/5.8L Production Blocks With Production Type Cast Iron & Aluminum Heads
  • Bore Diameter 4.00"
  • Gasket Diameter 4.100"
  • Compressed Thickness 0.042"
  • Compressed Volume 9.1cc
and this one was the one I had originally planned >

Item #M6051C51
  • Ford Performance Racing
  • Composite Gasket
  • For Production Blocks With Performance Applications
  • Fits 1979-1995 5.0L/5.8L Production Blocks
  • Bore(in): 4.100"
  • Compressed Thickness: 0.047"
  • Compressed Volume(cc): 10.169cc
I'm not sure which one to get. I realize the differences will alter my original compression calculations but is it enough to affect the finished product? I need to remeasure to verify but I believe my pistons are 0.011" below the deck at TDC. I'm using the 331 Scat stroker kit with Icon pistons.

Thanks very much for any guidance. I just want to make sure I"m doing everything right. I'll probably pose this same question in my build thread but thought maybe the tech section would be a better place.
 
  • Sponsors (?)


Hi,
Yes, run the old gasket (if same compressed thickness, or offset your Piston to valve difference calculation by adding/subtracting compressed gasket for thickness). Felpro’s PermaTorque Cometic gaskets work quite well. Ford’s head gaskets are also very good, as well as their black intake gaskets.
You need only snug the heads) down to an equal torque, 15 Ft/lbs, no more.
Intake gaskets should be 1320’s, they work well, easy to cut if needed.
Blocks bored +.030 over, running the +0.100 gaskets is the preferred choice. Yes, 9cc’s will make a minute CR difference, offset that by running an (0.040) compressed thickness gasket.
What Cam are you running?
Heads, GT40, TrickFlow, AFR ? CC’s
Pistons. Reliefs, flattop. Inverted dome, etc? How many CC’s is the Chamber.
Heads, TrickFlow, AFR etc. salute ‘in-line’ type valves relocated to center of cylinders with the Piston reliefs allowing for running other heads with the same (chamber center relocated valves). What head’s are you running?
0.080 (Intake), (0.125) is the P/V clearance you’ll want to target. O.060 distance between Spring coils at FULL VALVE lift.(use a 1/-6th drill-bit, or dowel to check).
Shop setup your head’s, shim them, (if aluminum, a lower Spring cup, or Springs will eat through spacers, heads..). Installed height? Crucial to run proper seat pressure springs that utilize Lbs/inch the Cam is designed for. Most common (TrickFlow, Comp, Crane, Crower, etc.
Many street Hydraulic rollers are around 125lbs seat, around 330lbs at full valve lift.(Average 0.500)
Degree your Cam in running a 9 position lower timing gear, vs (3). Allowing for tighter controls when adjusting.
Some P/V clearance(s) too close by high lift and duration numbers with Cam timing will allow you to retard/advance & make it work.
Running 1.6:1 Rocker ratio (per CamCard specs) has the lobe and Advertised valve lift.. Running 1.7’s will increase valve lift. Cam LOBE lift, multiplied by the Rocker ratio. (Running a higher RR than on your Cam card) will increase VALVE lift. Example: 0.375 LOBE lift’x 1.6 R. Rockers= 0.600 valve lift.
Running 1.7:1 rockers with that same Cam to find modified VALVE lift by the LOBE lift.
Simple formula: .375 x 1.7= 0.6375 (0.638). Duration and ramp rates are ground into the specific Cam. There is also advance & retard ground into certain Cams.
Advanced Cam timing will focus lower end TQ/HP, Retarding will change #’s for mid to top end.
Yes, the studs, washers, nuts may be reused. Don’t torque the head studs, themselves. Finger tight with an 1/8th turn is fine. The outside studs (header side) will require a small permatex coating added before you drop so coolant and steam cannot run up the threads, water passages travel across them in the block.
Chase all your holes with a 4 flute tap, external threads chased with a Die.
If the motor is assembled to a Shortblock, you need to carefully close off any other areas from chasing threads (chips or media)..
Use ARP sealant on threads where the nuts install to give you the most accurate torque reading, sequences in early 2,000’s
This will start you off in selecting proper valve-train geometry. Running (2) solid lifters will help you get the accurate results. They sell them to purchase one lifter at a time at Summit, same dimensions, but solid. You may also disassemble hydraulic lifters innards, stack washers inside an old hydraulic lifter to make it “Solid”.
Have you setup valve geometry previously? If not, I’ll be happy to walk you through it step by step. It’s not difficult, but much easier to nail with help.
If you torqued down the new head gasket, yes, it needs to be replaced. Use an old one. Bolts/studs are not TTY (Torque to yield). Some stretch once, and must be replaced.). ARP Head studs are of a different alloy and may be reused.
If there’s any other concerns, and engine build expectations, please post them.
Any questions, feel free to ask!
Regards,
John
-The hydraulic roller Cams have the same inherent issues as any other hydraulic Cam, which with the most current technology will not reliably spin 6,800 RPM’s repeatedly. A Solid roller Cam, application specific, does not have these issues.
May cost a bit more, have but spin 9,000 RPM’s with no issues, providing the inner components are built for such. Again, this all falls on the goals you have. You’re running an internally balanced (0 Deg) forced and has been completely balanced, correct? Stockc CD
You’ll need Springs, Retainers, locks, and cups, full roller Rockers.
 
Last edited:
  • Like
Reactions: 1 user
John, thank you very much for the informative post! Here’s where I am so far:
The block was machined .030 over plus the clearance for the piston/cylinder wall relationship, which I don’t recall off the top of my head. Bottom end is the Scat 331 kit which came with Icon forged pistons and I believe they have an 11cc relief. Heads are TrickFlow 190 11R, with springs and valves included by TrickFlow. IIRC they are a 58cc chamber. The cam is a custom grind by Ed Curtis from FlowTech. He was supplied with all my wants and expectations before grinding. The cam card states 2* advance, but I don’t recall the other specs and I’m not at home. My timing kit is ford racing with the 9 position crank gear.
Rockers are TrickFlow 1.6 and lifters are new ford racing.
I haven’t purchased the intake yet, however I planned on the Holley Systemax II, as that was heavily suggested by other forum members when I started planning the build. I also stated that was the plan to Mr. Curtis so I better stick with that plan so that my cam works the best that it can.
Head studs are ordered and should be here in a couple days so I’ll be able to mock the heads at that point. I’m not looking to eek out every horse I can get here, but I want the car to run well, and I want this engine put together properly. This is my first performance build but definitely not the first time I’ve done engine work. I will be looking for help throughout the assembly. At this point, I’m verifying clearances so that the rotating assembly can go back to the machine shop for balancing.
Thanks again!
 
  • Like
Reactions: 1 user
Hi,
Is your Crank cast (Nodular Iron) or forged, steel? What exact year is this(?).
Many Cranks need to be balanced, some
Cast or Steel Crank?, Absolutely want it to be balanced, all parts weighted, Pistons, Rods, etc., A Steel Crank setup internally balanced requires a zero (neutral) balanced flywheel, and a damper up front (Fluidamper, Romac, etc).
A cast crank setup with a 28oz offset needs a 28oz weighted flywheel and a 28oz weighted harmonic balancer. 28oz is your stock offset, parts fit as if you were running a standard 302 H.O.Pony.(88-93’).
That’s the best you can do for your motor, running a Cast stroker Crank, it’s plenty solid. But parts like studs and a girdle, windage will help greatly. You’re running steel I beams
A Stud girdle shares the load of the other journals, keeping the reciprocating assemblances from twisting and cracking.
Converting the block into a (4) bolt will just weaken it, so you’re doing the best thing..
, like a head’s girdle does, helps strengthen the block..
What kit did you buy & from where? FMS, Summit, Skip White, Coast, DSS, etc?
All similar internal reciprocating assembly components are weighted very close to one another. Pistons, Rods, etc. Whether Cast or Steel, the components should be weighted, motor balanced..
Check out my media, similar 331 build, a progressive thread, may help you visualize. Plans are FI, but now running Holley’s Systemax TBI, with its MSD dizzy, have 3 on the shelf.. Since the 6-71 blower isn’t available. ( 3 months), lol.. I’d Raised CR with 68cc 11R 190cc TF Heads, to break the rings in.
The intake...The Victor EFI’ has injector holes are plugged when Carbureted, or running TBI, he injector holes easily be used for DP NOS injection.
Or, 89’-93’ motors can, bolting up a steel 90’ (3”) sweep on the flange,, bolt-up a throttle body, CAI, MAF & run OE’s EFI’. ...
Options.
Its a current Customer’s 302 build, Gt40’s stock springs, E-303 Cam w/1.7:1 Rockers. 0.527 lift, springs setup for 0.450 max. That wiped out the Cam bearings, rockers, 20Mi looked like 300K of wear. Circulating pieces within the oil helped wreck all oil essential components. Worst, was the guy running 90wt in it to quiet maladjusted.Rockers!!
/Rod.& Main bearings,
https://www.stangnet.com/mustang-forums/media/albums/ponycars.2261/

The Victor, jr and Super Victor EFI intakes are superb. .Victor, Jr is more street friendly, which would work well for you.

Speak to ED C about an EFI Victor, Jr. He’ll likely want to modify fuel Cam lift, duration, events. Something similar to a Ztrickflow stage 2 Cam will ylo
So, you’re plastigaging & mocking prior to final assembly, correct?
All requires things to be Hospital clean. I’d target 0.001.8-/“.0.0022 clearances for Crank & rod’ journals.
Play Doh is a cheap and effective way to verify Piston to Valve clearance, as well as oil pickup to Pan (3/8” to 1:2”) with pan gasket in place.
TrickFlow’s rockers are great, 11R heads are 7/16” diameter, work with them. I deal a lot with a lot of TrickFlow/AFR heads.
FYI, can’t trust any heads these days, pulling them apart & going through them isn’t a bad idea, at least pressure testing them is OK, too.. My 11R 20’s Comp ported, I’d replaced valves with Manley’s Severe Duty valves, one lower cup was missing.
had a chipped seat, brand new.2K heads
Peas post if any questions arise!
Best!
-Jojn
 
Last edited:
The car is a '93 GT, with original engine and trans.

The stroker kit is by SCAT. Crank is a 9000 series cast. Pro-stock I-beams with ARP hardware. Forged flat top pistons from ICON with floating pins. SCAT insists that the rotating assembly be balanced with my 28oz damper and flywheel. I will have it balanced once I know that all my clearances are within spec. I did not want to have a machine shop do anything to the rotating assembly if something was wrong with it. I've already put far too much time and cash into it to skip a proper balance.

The bottom end has been mocked for probably almost a year. I used plastigage and verified measurements with dial bore gauge and machine calipers. I had to step away from the project during the middle of the year last year because I was in a very demanding program that monopolized all my time. Now that is over and I want to get this project going again.

The cam is already in the block. Just didn't have time to degree it the other night. Hopefully get to that this weekend. Ed set the cam up to be street friendly, broad power band and set up for the 331 with the TrickFlow heads and Systemax intake. I don't want to change the cam now.

I have a build/mods thread here if you want to check it out:

 
  • Like
Reactions: 1 user
Hi,
Ok,
That build thread certainly enlightened me!! Very nice! Building it all vs only seeking HP.
I wasn’t suggesting changes, only to tell Cast/Forged Crank options to the thread, and how important balancing is.
Balancing with both balancer & flywheel makes the balancing process more accurate, and is easier by having the actual offset weights vs adding offset with other weight.
I’d posted a few DSS pistons made for inline valve heads, as I saw your uncertainty.
Running with TF 11R 190’s w/66cc (or 56cc) chambers, pistons are relieved 6cc’s, Pistons 0.011 in the hole, gaskets (.040-.047)
C.Ratio’s:
66cc chambers , Gasket 0.040 CR is 9.3:1
66cc chambers, 0.047 gasket=: 9.16:1
56cc chambers, 0.040 gasket= 10.46:1
56cc chambers, 0.047 gaskets= 10.27:1
Congrats on completing your EMT training!
On the balancing notes in posts above, I was listing options & why it’s crucial to do, and options between a cast and forged crank, not to suggest changing anything you’re doing. Sorry for the misunderstanding.
Inexpensive yet useful tool(s) to add to your machine shop are telescoping gauges. Great for measuring 1/2”-4” holes. Your Mic’s read them.
Nothing you can’t do if you have a lathe, mill, torches, a good welding machine, good set of tools. You’ll have all that as time passes, (in your cool new garage).
Your pistons should be fine for TF heads, I have a specific piston pic that’s made for inline chamber TF 11R’s, other Mfg’s heads with in-line valves can also be used, pic below..when you setup the geometry, I’ll
assist you if desired. Done many, easy, done correctly.
Aside from the link I’d listed showing the current 331 build “Crispy”, I’m Building another 4 bolt 331 for my own Fox which I don’t even have yet, lol.
Your build is exceptional, I like to build the car entirely as well, many drop a 450HP motor on a stock Trans with 100K+ on it, no additional suspension, braking, subframe supports. Weak points ID themselves, breaking one by one..
A Custom ground Cam is your best option, you’re doing that. TF rockers are great! Use them or Harland Sharp.
The .011 piston below deck height is as measured from the highest point on the piston, or on the flat surface on the edges?
I shoot for zero deck myself, but if the piston protrudes(at all), or they intended on decking the block & never did, for 0 ‘in the hole’.
You’ve gotten rid of the weak OE oil pump drive hex, and with new Rods, replaced the tiny 5/16” rod bolts with 3/8” ARP fasteners. Did you run a girdle, windage, main cap studs?
Injector sizing is around 325HP for 24lb injectors, 400HP for 30lb injectors; respectively, running @ an 85% duty cycle. Looks like a mid 370-385BHP build, go much above an 85%duty cycle fires them so rapidly the Electromagnetically driven pintle may not have time to open and close fully.
I don’t know your Cam spec’s, but 11R CNC ported 190’s Flow quite well, did you get the competition ported 11R’s, titanium retainers, then swap out springs/retainers/keepers for the Cam?
Was going to suggest running VITON oil seals for the 11/32” Valve stems.
It’s unfortunate you don’t have a trusted automotive machine shop that will take care of the balancing, and do a clearance check prior to that, without even being asked.
I need to start a build thread, never actually did one, countless entire engine machining, assembly, modification, tuning, etc. info that may help others (and have fun doing it at that). I do I-6 & V-12 XKE Jaguar restorations and builds, too. Don’t think that would be for SN, but have many documented Pony builds, lots of pics. It worth it?
Best!
-John
- DD190992-C37C-4527-A6B5-6F0A7D3DB8C5.jpeg
5cc’s, TW & other in-line centralized valve heads
BC1B1804-1D07-4B2E-A0B1-62A13D35938C.jpeg
Top/side view..note the oil passages milled into the outer skirts (zoom in), really keeps cylinder walls coated with oil
101298B3-2EC7-423E-AEAE-9A2B697D00A1.jpeg
Another top/side view.
F1B75FED-CE6C-4C3A-89E5-DEAE478BA1A4.jpeg
The intakes work really well, whether Carbureted, TBI, or with a 90’ pipe bolted to the flange & running the stock EFI. If the injectors are unused, a great spot to
add direct port NOS !
 
Awesome info John. Thanks a lot.

I do have a set of mics and a dial bore gauge to verify piston to cylinder wall clearance. It's been months since I looked at those measurements, so I don't exactly recall those figures, but as I recall, they were in spec for the pistons. I was assured that the Icon pistons would be fine for the heads I chose, however I would rather have had the matching trick flow pistons. Hopefully the P/V clearance works out ok when I finally get it measured. I was able to order the ARP Head studs, gaskets and some other miscellaneous small parts needed to mock the heads and valve train. I have the entire weekend off and at home next weekend so I plan to spend some quality time with the 331. :) I appreciate your comments and I'll definitely keep my build thread updated.
 
  • Like
Reactions: 1 user
With it being n/a, I’d use the thinner gasket - assuming your piston is at zero deck and not sticking out of the bore.

Reading through your setup that’s what I’d do. Little bump in compression is always nice, especially if you have 93 octane available.

Arp studs can pretty much be used as many times as you want, same for their bolts. Everything only needs to be snugged down for checking ptv.
 
  • Like
Reactions: 1 users
Hi,
Wanted to compliment you on that build thread, lots of good solid data exchanged, great reference for others as well as a permanent log of how much it takes to get through a project.
Piston to wall is generally 0.003-0.005 (in.), like other clearances, depends on how the motor is setup, materials used, whether FI or NA, how aggressively cylinder temperatures rise, Bearings run a little looser (few tenths) are good in a hot street motor, oil pressure.adjusted slightly by viscosity.
Since I spend a lot of time inside motors
maybe it would be useful to build a typical ground up 302 or maybe a stroker combo, a 331, 347, Dart block 363, possibly a 351W to 427, boring, honing with deck plates, align boring/honing- the whole process-slowed down a tad to help some new to it.
Head tear down, Cam selection, setting Valvetrain geometry & proper Cam Degreeing, easy to follow so folks are a bit more comfortable with engine internals.
Most importantly, may help some to self advocate and helpful when speaking to a machine shop, not be taken advantage of. Many shops are not like this, but quite a few are. I’m game, think it’s Worth it?
Best!
-John
 
Man, definitely. I’ll be turning my thread into more of an instructional as I start this phase. If there was a comprehensive “how to build a 331” I would certainly be consulting it. I think part of the confusion is the amount of possible combinations out there. Just no way for a “one-size-fits-all” setup. But I guess that’s a good thing so we can all have some individuality built into our cars. That’s what it’s all about right?

On a more fun note, I should have everything I need to complete these basic measurements by the end of the week, plus a new Ford Performance 28oz. damper and flywheel. I’m off all weekend so lots of time will be spent in the garage. I have mufflers to install on the corvette, need to do compression and leak down tests on my Impala 409, and of course work on the 331. My goal is to drop off the rotating assembly for balance next week. Pretty excited to get back to work on this thing.
 
I would love to see a thread on clearencing a 351w block for a stroker crank.I'd like to pick up a shortblock from my local picapart,clearance it and have machine shop clean check and bore it for me .Then i can put it together.
 
  • Like
Reactions: 1 user
I would love to see a thread on clearencing a 351w block for a stroker crank.I'd like to pick up a shortblock from my local picapart,clearance it and have machine shop clean check and bore it for me .Then i can put it together.

I had to mock up the bottom end in order to locate and measure for that. Through research it sounds like the clearance needs to be a minimum of 0.100”. I have the skirts marked now. Once I finish all my measurements and take it back down to a bare block, I’ll notch the skirts and smooth the notches. Then thoroughly clean before reassembly.
 
  • Like
Reactions: 1 users
I had to mock up the bottom end in order to locate and measure for that. Through research it sounds like the clearance needs to be a minimum of 0.100”. I have the skirts marked now. Once I finish all my measurements and take it back down to a bare block, I’ll notch the skirts and smooth the notches. Then thoroughly clean before reassembly.
Hi, Sorry for the delay...
Yes, agreed! You have to make a car “yours”, large part of the allure.
Piston to valve on exhaust side is 0.125 (Min.), Intake side 0.080 (Min). TrickFlow’s pistons are relieved unique, but many other heads are setup like TrickFlow’s (valves chamber centralized, canted). So, you’re not forever stuck with TW head’s only, you have options.
Do you have Cam spec’s?
The mid CR range you have via piston type, heads, gaskets yields you more options. If someday you want, An NA motor conversion to a FI mill consists of a larger chamber head-swap to drop CR & long duration, low/no overlap Cam install. Boost and go.
Block/reciprocating ass’y remains as-is.
The Holley TBI’s (Terminator, Systemax) work great. A BIG bonus is running their Dizzy as well, then you’ve got the whole package, ability to control spark timing, too.
Did you get the Dizzy, by chance?
Awesome thread!
Best!
-John
 
Hi,
Regarding the Systemax kit, I was first referring to the HolleyTBI setup on a typical flanged intake, not the 5.0’s Intake upper/lower setup, which IMO is a great setup for the components selected. Just installed one, and pulled another on a (PINK PANTHER PINK(!)) Gen 3 Z28’s 383 caked with varnish... yeeesh, lol! “Minor” intake coolant leak, too....omg.(pic!!) Didn’t mean to confuse.
That is one sweet 409 Impala, btw!!
Best!
-John
P.S. More wire nuts in this car than in a House! Gotta love these masterminds!
I’d asked him if he was running this in a boat in salt water previously after seeing that intake. Pull off T’stat housing & I saw a Connecting Rod. Not quite right!
 

Attachments

  • CE8DC694-2207-4921-9D1A-E3AB62C1D152.jpeg
    CE8DC694-2207-4921-9D1A-E3AB62C1D152.jpeg
    525.1 KB · Views: 111
  • 297DD505-6BCE-4DD8-B32E-EAE30BA299D4.jpeg
    297DD505-6BCE-4DD8-B32E-EAE30BA299D4.jpeg
    747.2 KB · Views: 116
Last edited: