M-2300-M Cobra Rear Brake Install.
Tools Needed.
1-Jack
2-Jack Stands
1-Brake Caliper piston Compressor
1-set Wheel Chocks or Wood Blocks
1-Foot pound torque Wrench (optional)
1-Inch Pound Torque Wrench (optional)
1-Lug wrench,or 1/2 Breaker bar w/proper Socket
1-3/8 Inch Ratchet
1-(of each) 15mm,9/16,and 1/2-3/8 Drive Socket
1-Short 3/8 Drive Extension
1-1/4 Ratchet
1-5/16-1/4 Drive Socket
1-E8-1/4 Drive Socket (external torx socket,for ABS Sensor)
1-1/2 Wrench
1-9/16 Wrench
1-5/16 Wrench
1-Large Plier
1-Needle Nose Plier
1-Magnet (to remove C-Clips)
1-Gasket Scraper
1-Rubber Mallet
Supplies Needed
1-M-2300-M Cobra Rear Brake Kit
- Ford Racing Rear Caliper Bracket Kit with Rotors (Rear Pair) at AmericanMuscle.com - Discontinued
1-Set Cobra Rear Brake Pads Of Your Choice
Duralast Gold Cmax/Brake Pads - Rear (DGC627) | Brake Pads - Reartrue | AutoZone.com
2-Quarts 80-90w Gear Oil Of Your Choice
1-Bottle Motorcraft Friction Modifier (if equipt with Traction Loc Diff)
1-Can Brake Cleaner
1-Rear End Cover Gasket,or RTV Sealant
1-Tube Anti-Seize
1-Tube or Pack Brake Lube
?-Supply Of Shop Rags,Or Paper Towels
Optional Supplies
-The stock GT/V6 Rear Caliper Brackets can be used.
But,i decided to use the proper Cobra Rear Caliper Brackets.
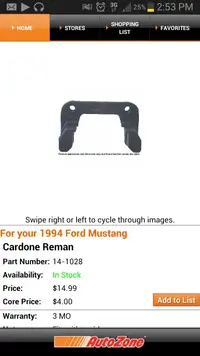
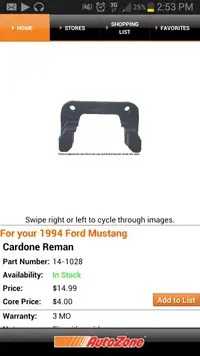
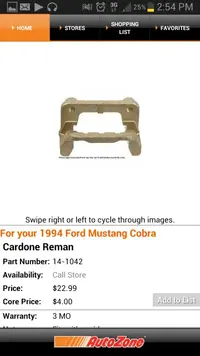
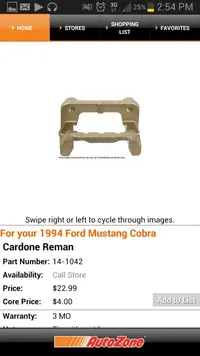
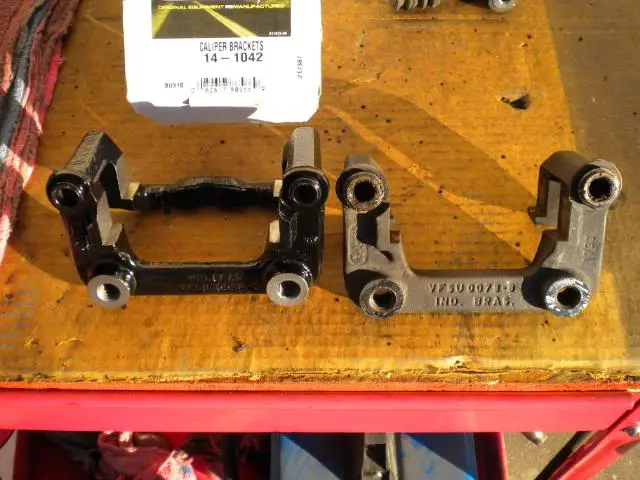
2-Cobra Rear Caliper Brackets (Cardone #14-1042,$20.00 each @ Autozone)
Cardone Reman/Brake Caliper Bracket - Rear (14-1042) | Brake Caliper Bracket - Reartrue | AutoZone.com
2-Sets Of Caliper Slider Pins (Duralast #H15009,$4.00 per set @ Autozone)
Duralast/Brake Caliper Bolt/Pin (H15009) | Brake Caliper Bolt/Pintrue | AutoZone.com
1-Brake Hardware Kit (Duralast #H5991,$10.00 @ Autozone)
Duralast/Brake Disc Hardware Kit - Rear (H5991) | Brake Disc Hardware Kit - Reartrue | AutoZone.com
REMOVAL
Left (Driver Side) Shown For All Pics.
1.Place blocks in front of Front Wheels.
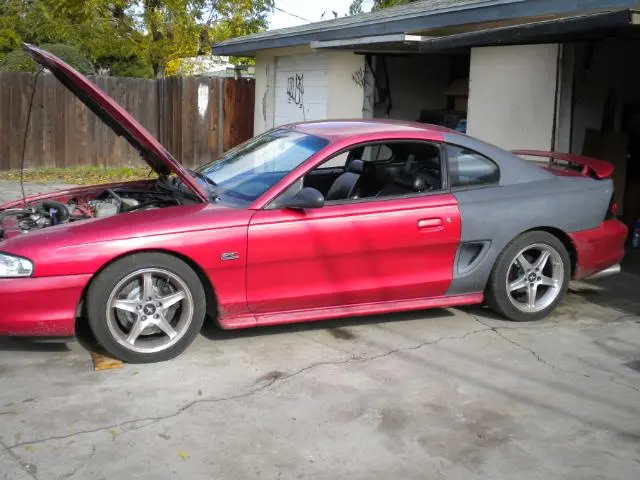
2.With Lug Wrench,or Breaker bar w/proper Socket,loosen Lug Nuts.
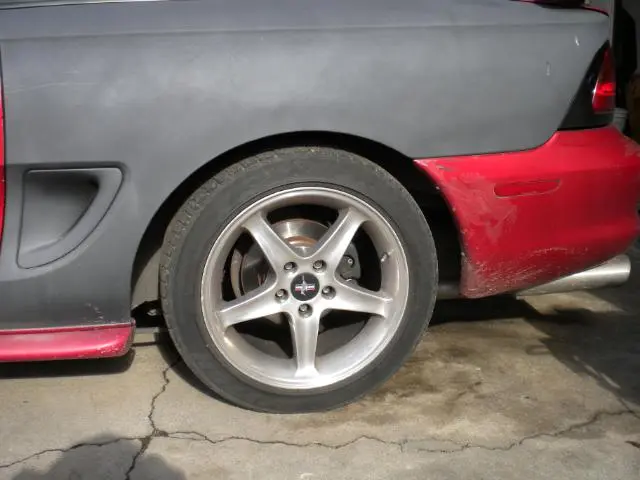
3.With Jack,raise car and place on 2 Jack Stands.
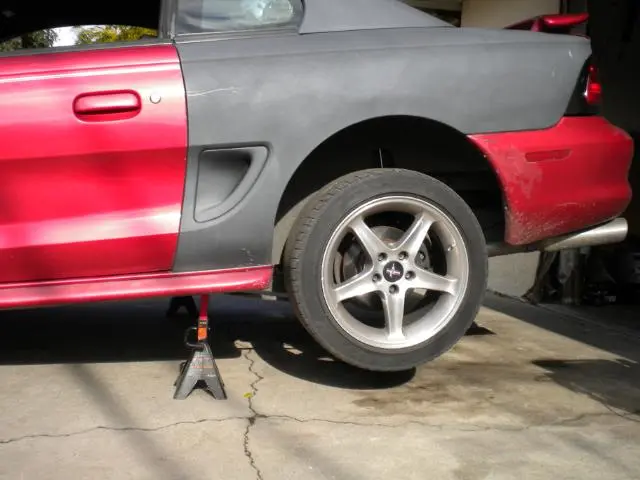
4.Remove Wheels.
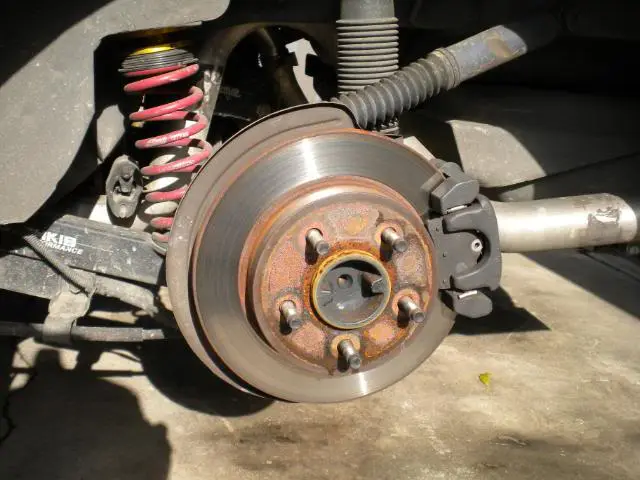
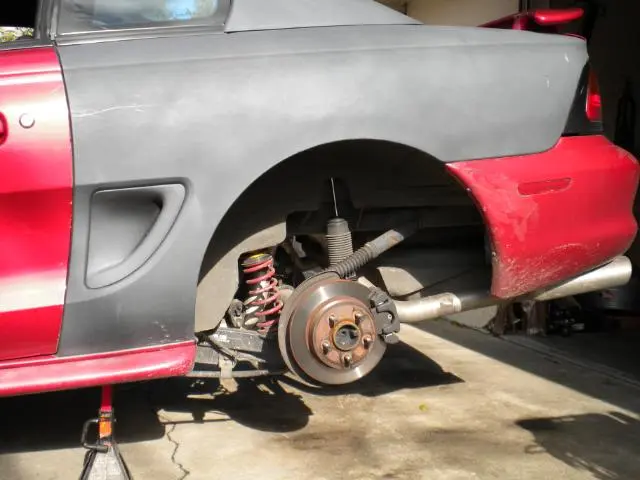
5.Release Parking Brake.
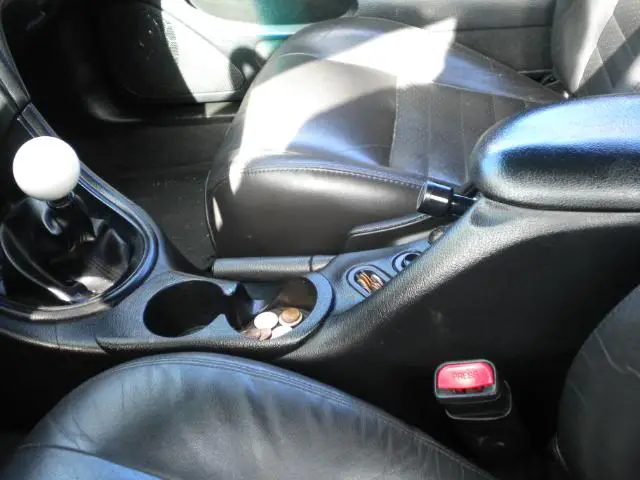
6.Under car,clean rear end cover.place Drain Pan under Rear End.
with 3/8 ratchet,short extension,and 1/2 socket,remove lower Bolts,
loosen top Bolts,drain Rear.
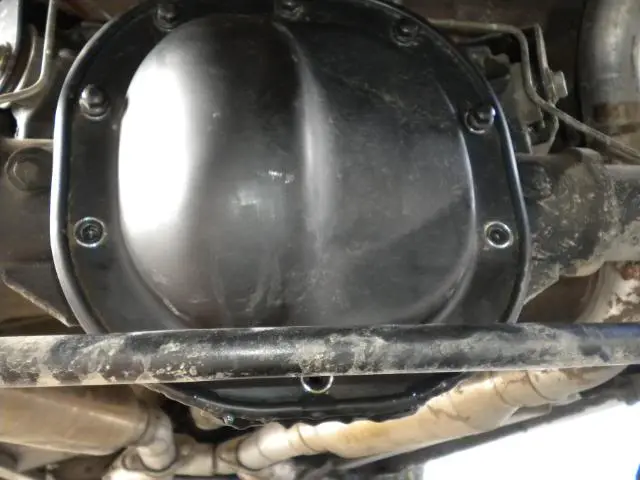
7.Remove Cover.
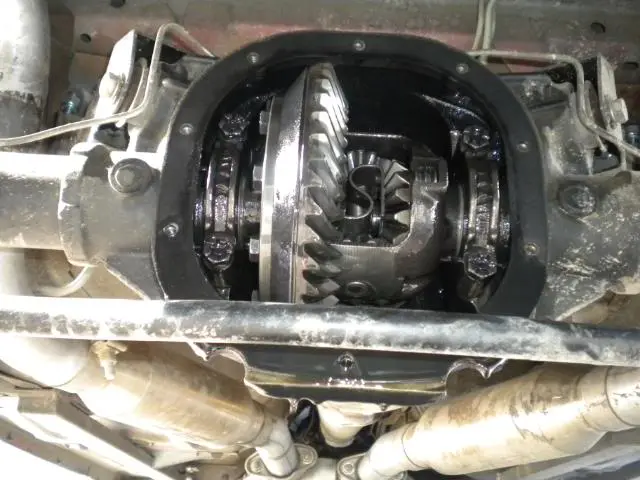
8.Rotate until Cross Pin Bolt is exposed.
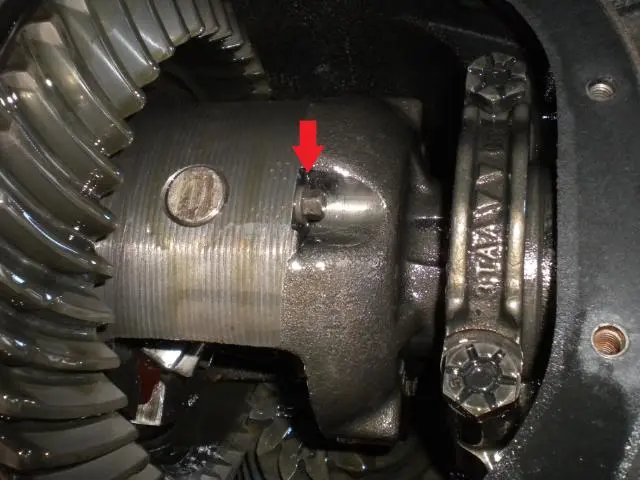
9.Inside car,set Parking Brake.
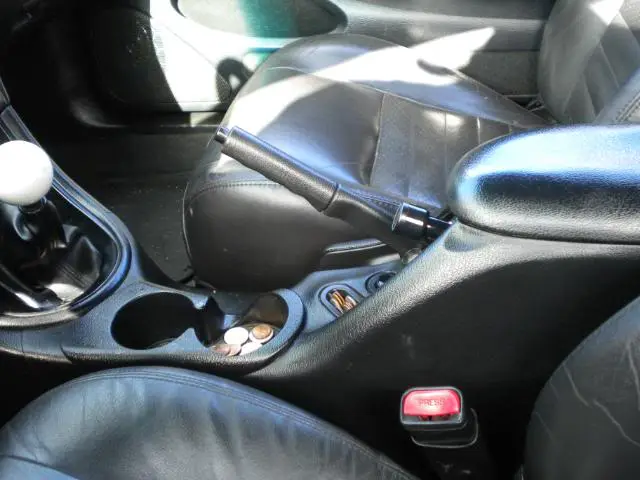
10.With 1/4 Ratchet,and 5/16 Socket,loosen Cross Pin Bolt,dont remove yet.
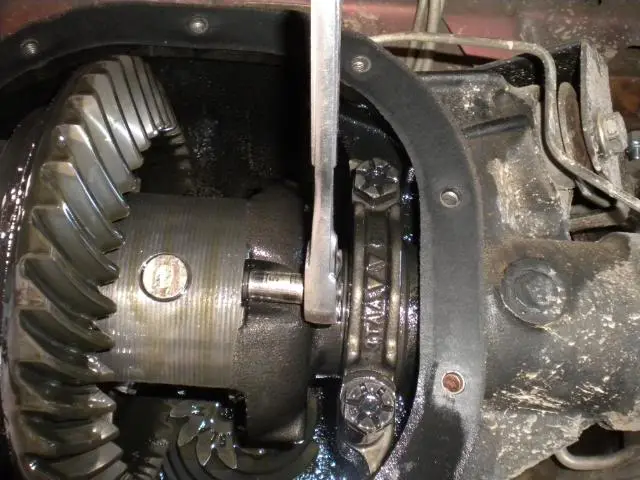
11.Inside car,release Parking Brake.
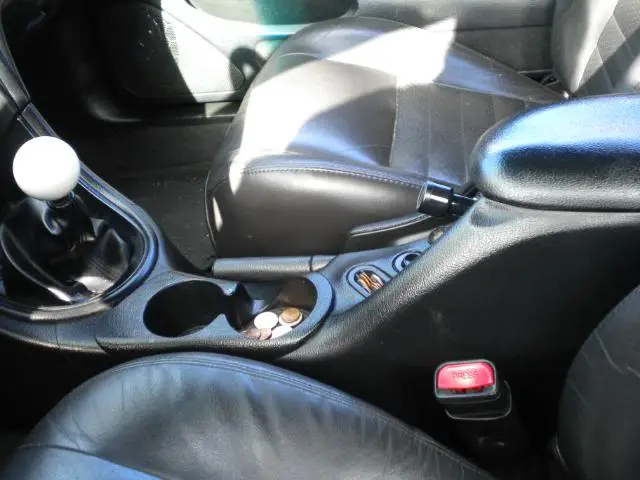
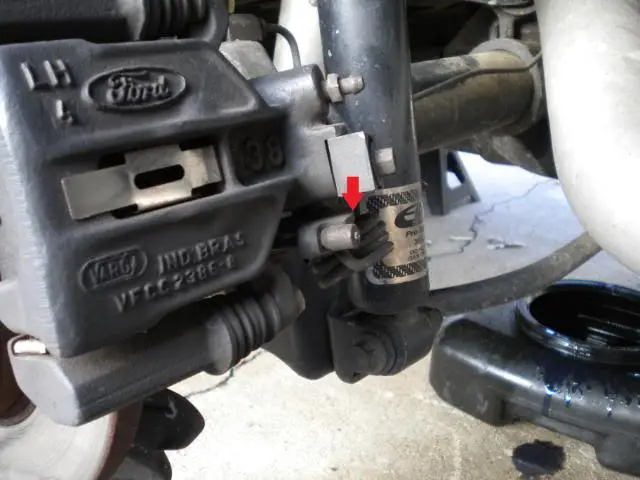
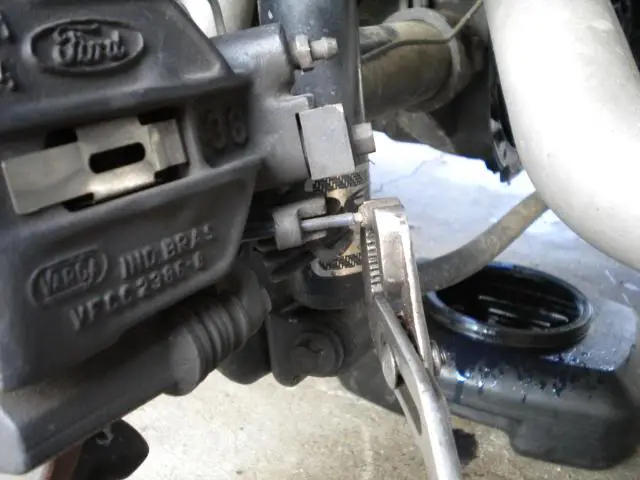
12.With Large Plier,grab end of Parking Brake cable (red arrow)
Pull out,and away.
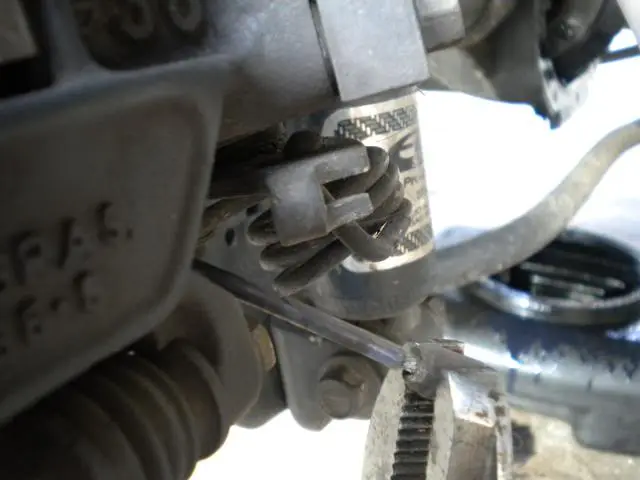
13.At Caliper,with Needle Nose Plier,grab Parking Brake Cable E-Clip.
(red arrow)
Pull off and set aside (we will be reusing this)
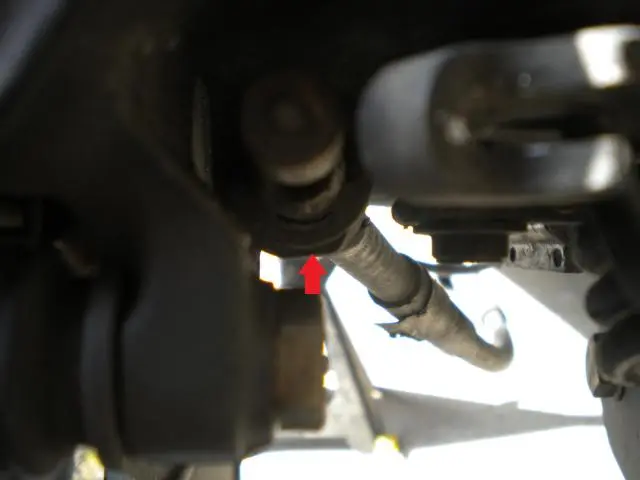
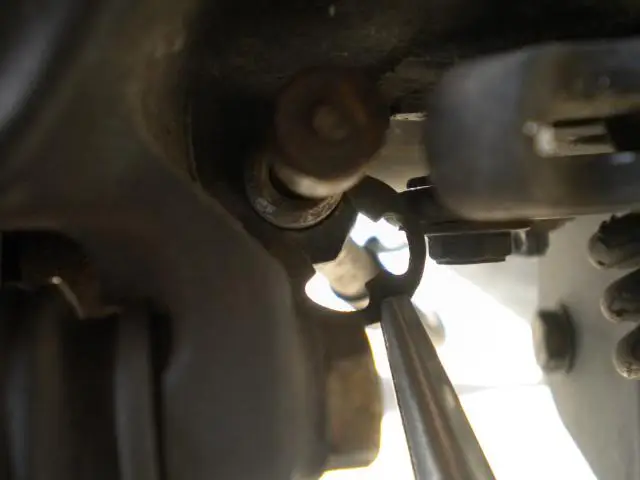
14.Pull Parking Brake Cable out of Caliper.
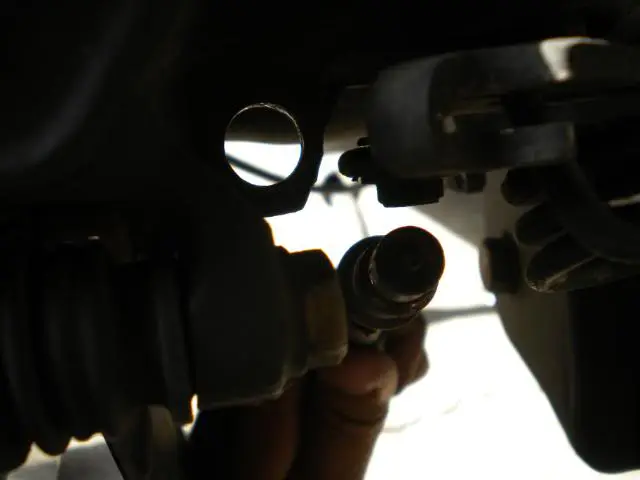
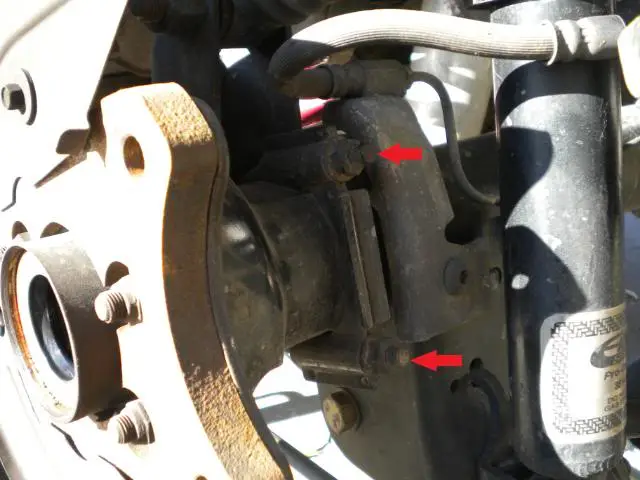
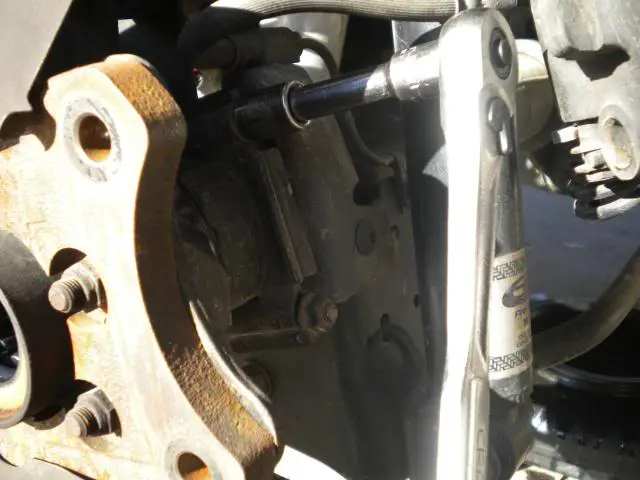
15.At Brake Caliper,with 1/2 Wrench,
Loosen and remove (2) Caliper to Caliper Bracket Bolts (red arrows)
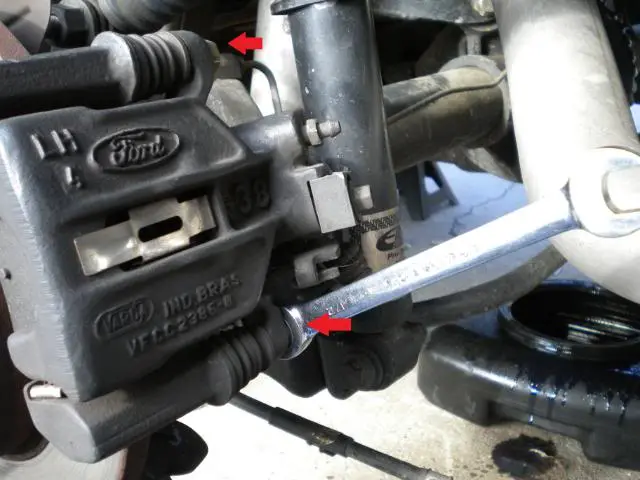
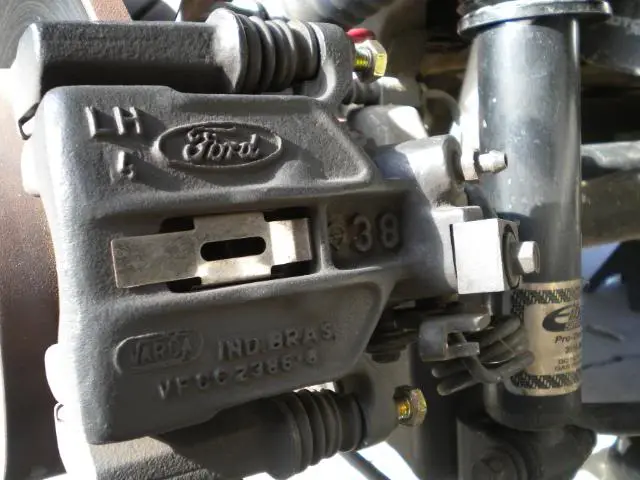
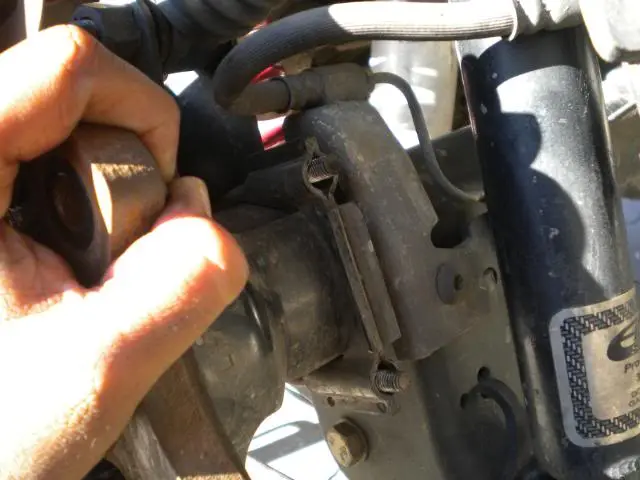
16.Remove Brake Caliper from Caliper Bracket.
Zip Tie out of the way.
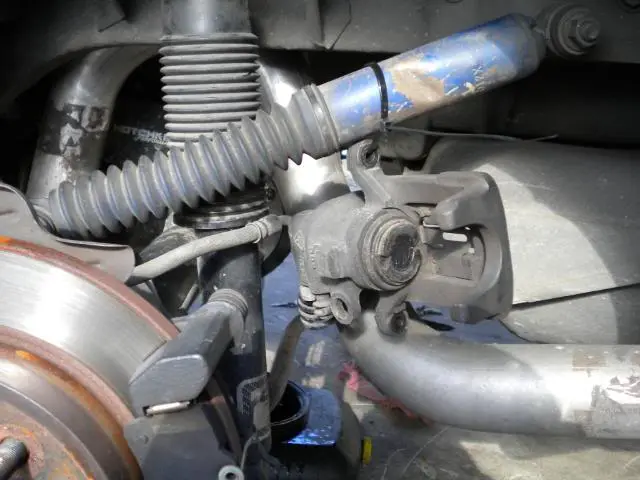
17.With 3/8 Ratchet,and 15mm Socket,
Loosen and remove (2) Caliper Bracket to Backing Plate Bolts (red arrows)
Set Bolts aside (we will be reusing these)
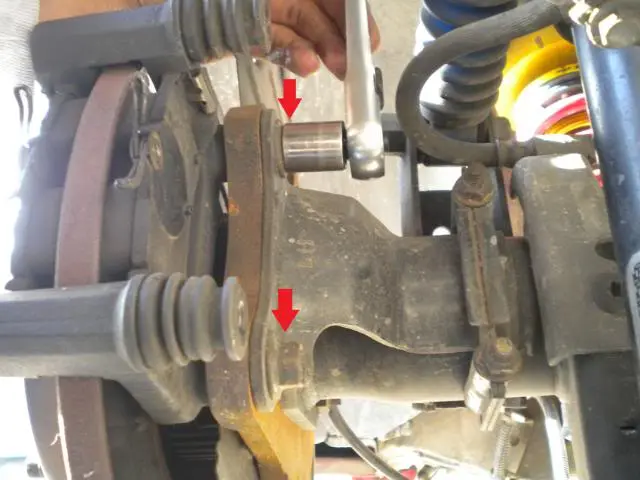
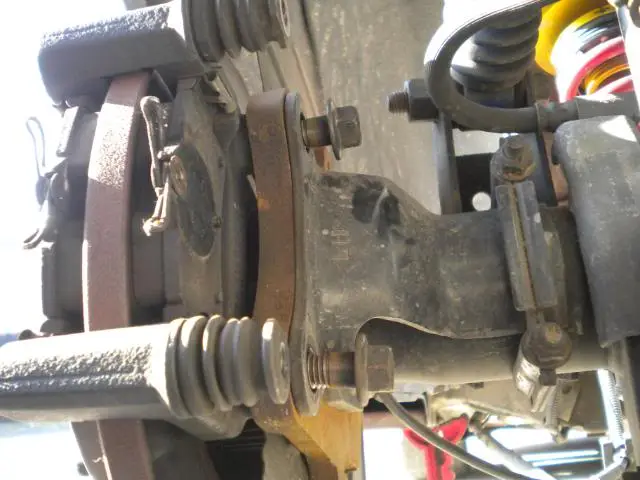
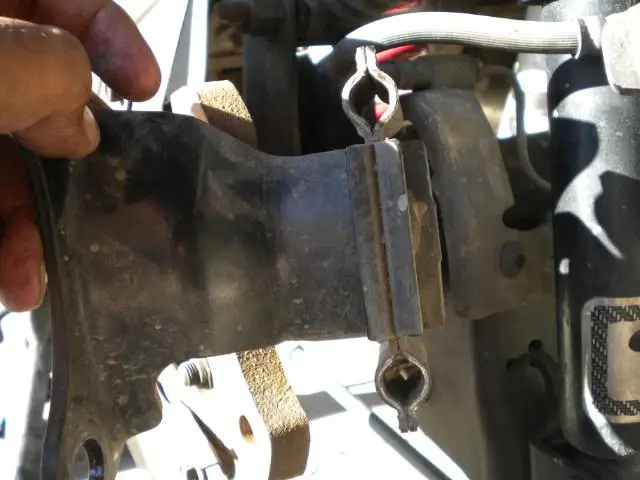
18.Pull Caliper Bracket w/Pads off,set aside.
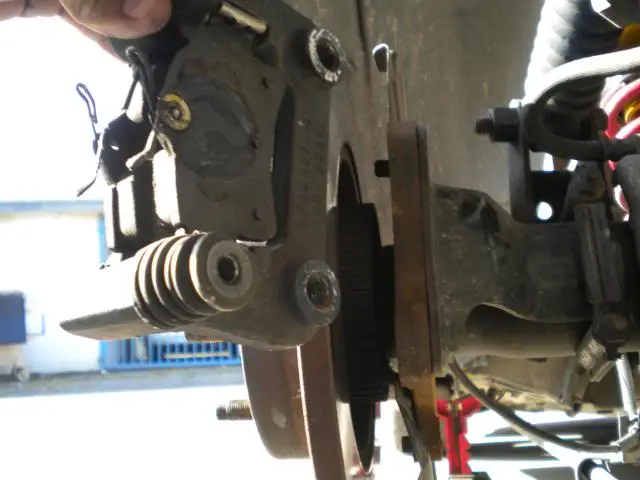
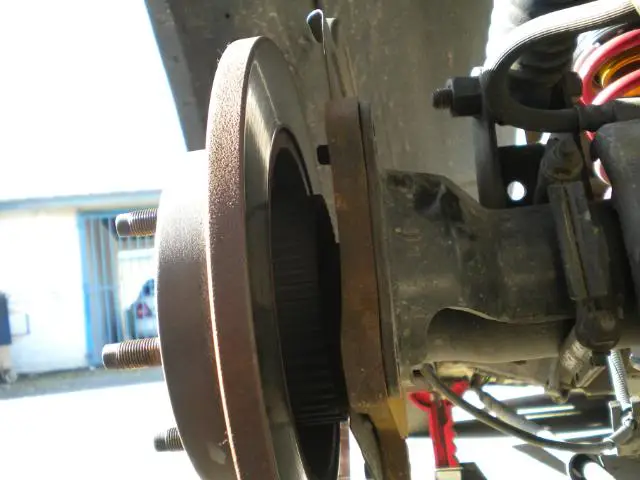
19.Pull Rotor off Axle Shaft,set aside.
(if needed,use rubber mallet on back-side of rotor to knock it off)
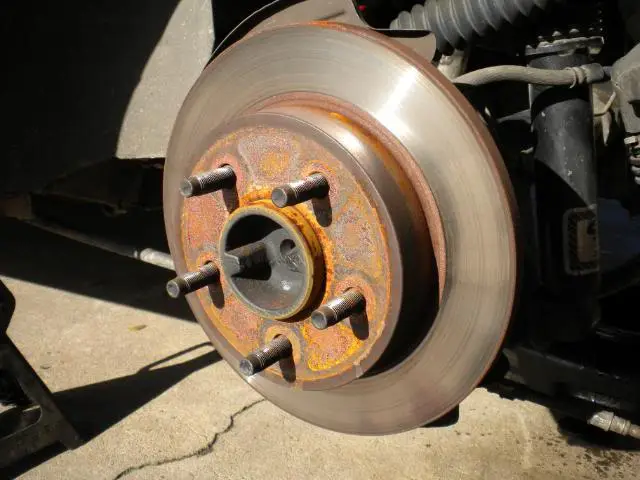
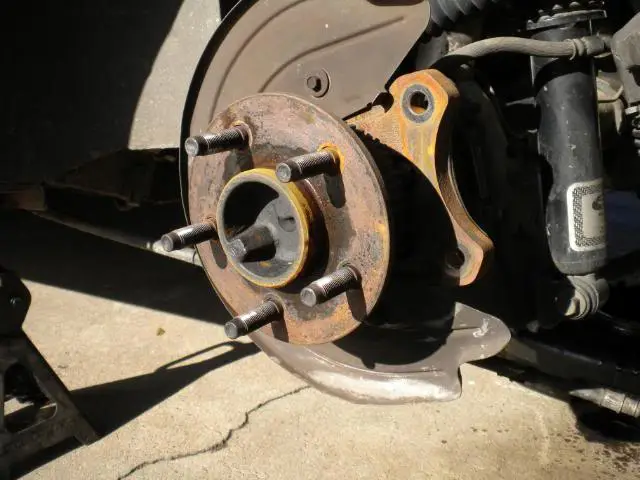
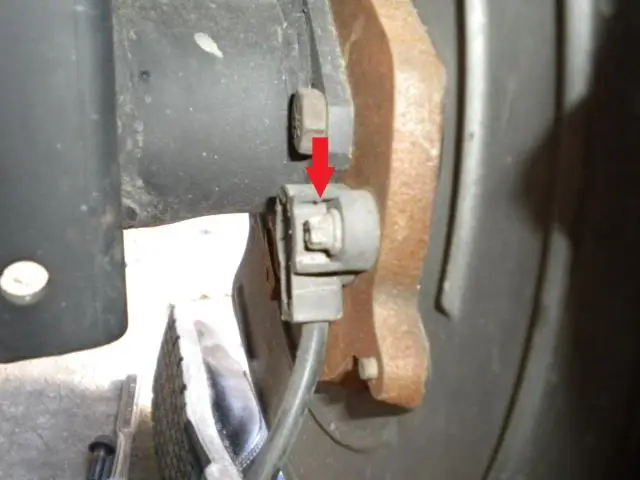
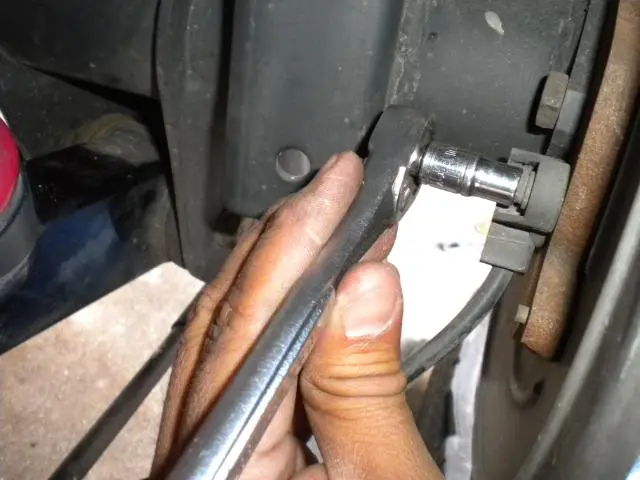
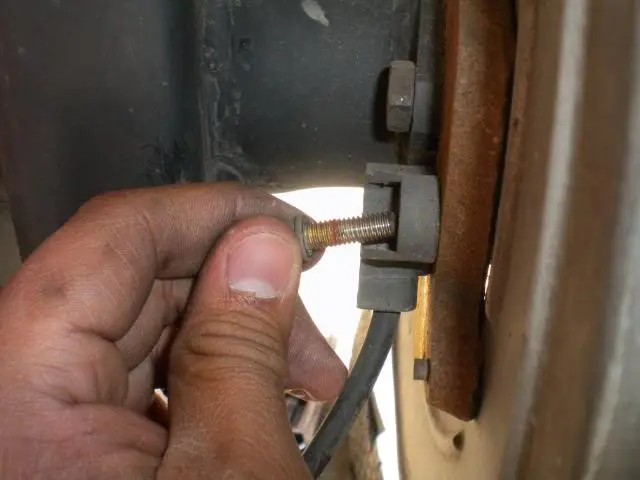
20.Remove ABS Sensor Bolt,on back-side of Backing Plate.
With 1/4 Ratchet,and E8 Socket,remove ABS Sensor Bolt (red arrow)
Set aside (we will be reusing these)
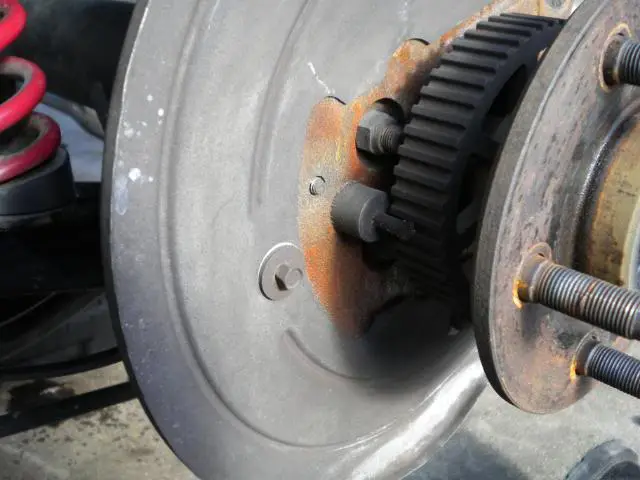
21.Under car,with your hand or 5/16 Wrench,remove Cross Pin Bolt.
Set aside (we will be reusing this)
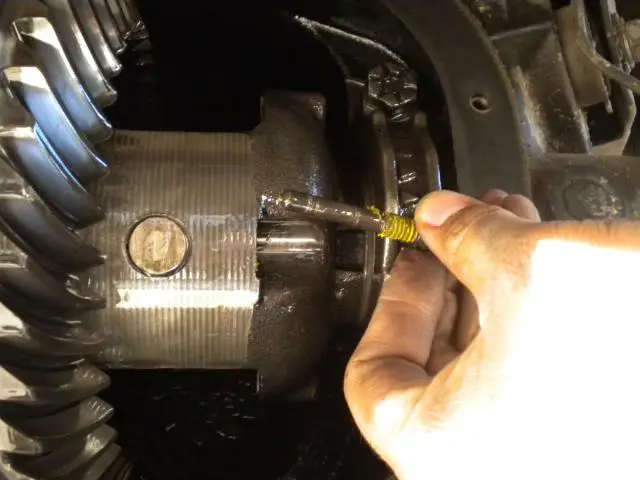
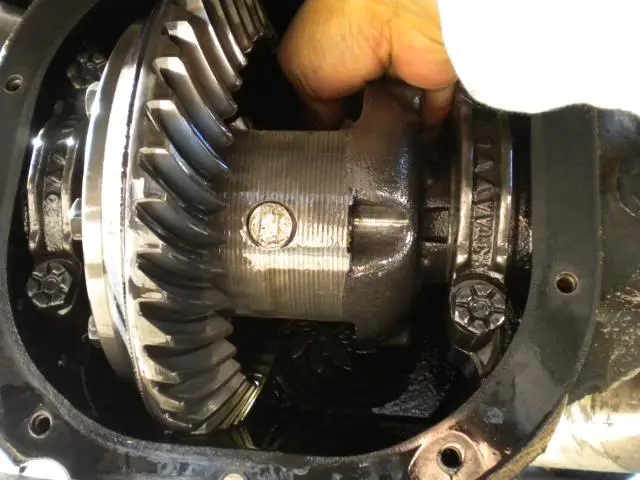
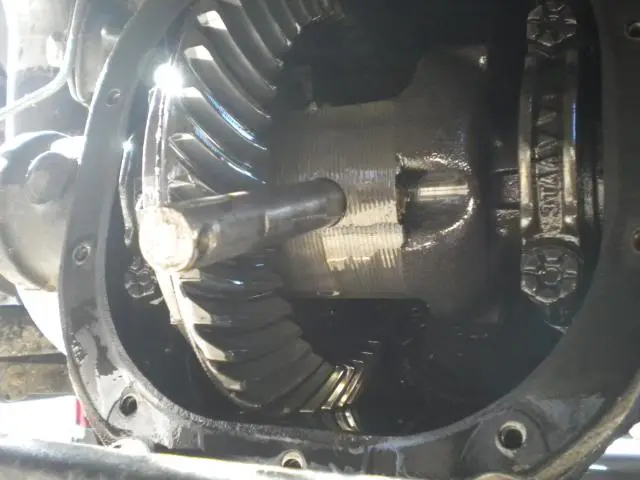
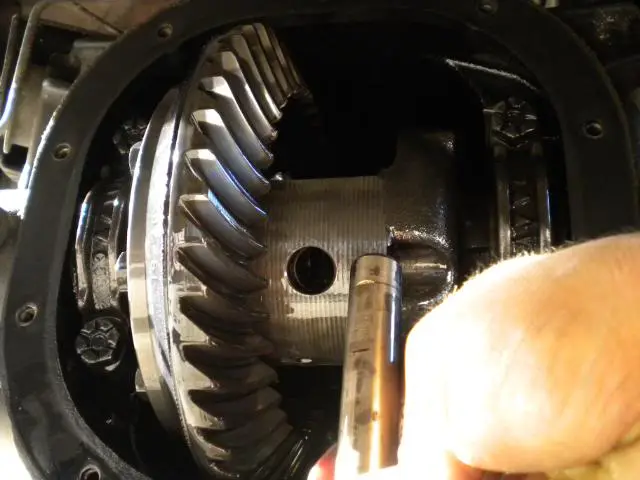
22.With 1 hand,from the back,push Cross Pin out.
Use your free hand to catch it while it slides out.
set aside (we will be reusing this)
23.Next,we will need to push Axle Shafts inward,to expose and remove C-Clips.
With Rubber Mallet,gently tap Axle Shafts in,
This will press the ABS Sensor out,and expose the C-Clips.
(I have done this many times,with no damage to the ABS Sensor or ABS Ring)
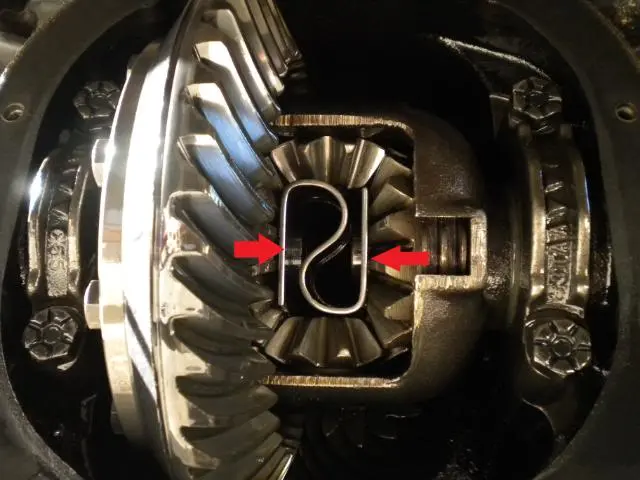
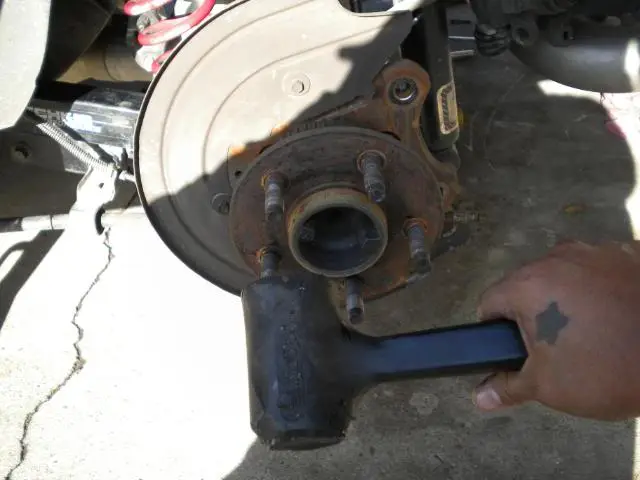
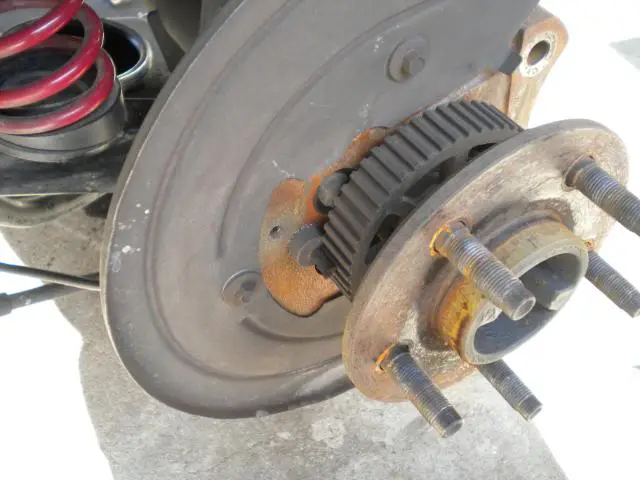
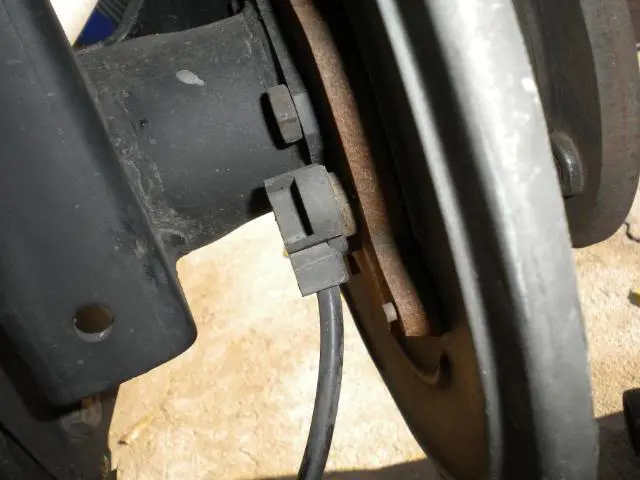
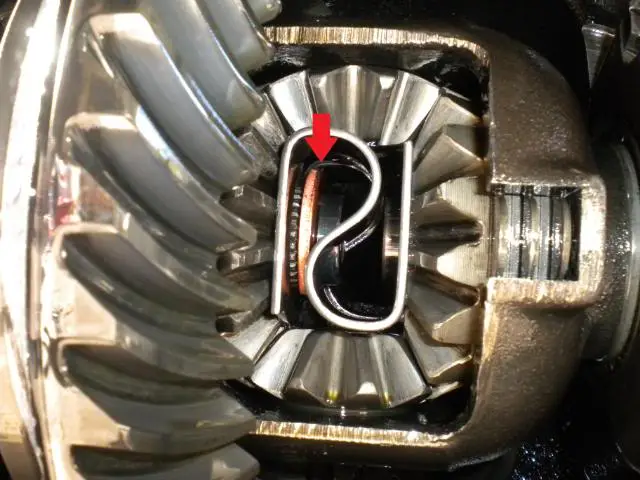
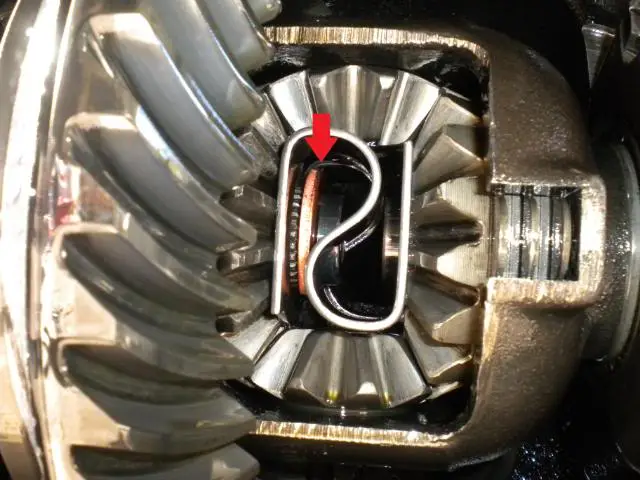
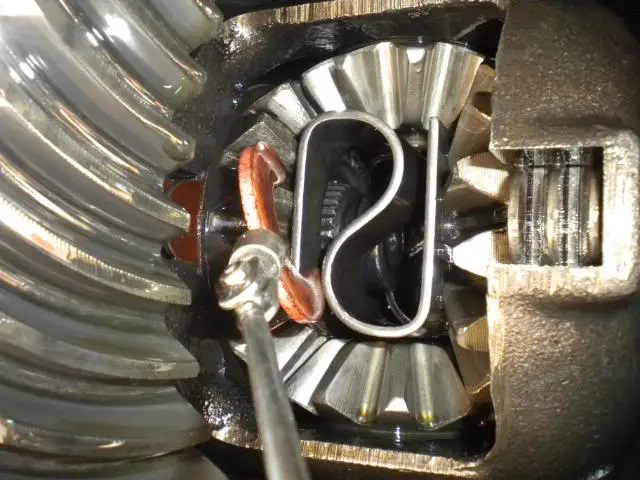
24.With Magnet,reach in and remove C-Clip (red arrow)
set aside (we will be reusing these)
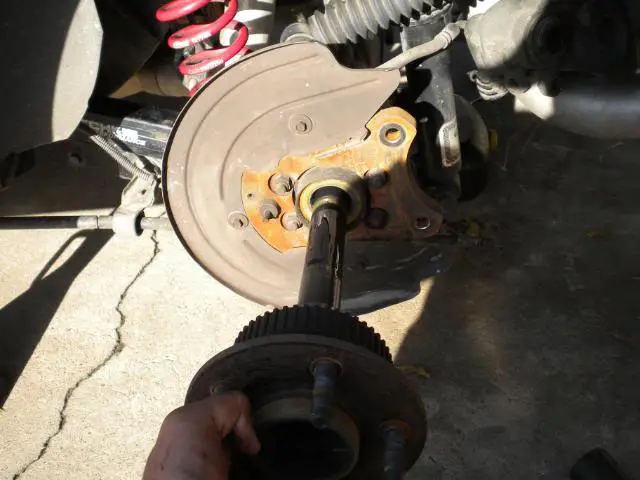
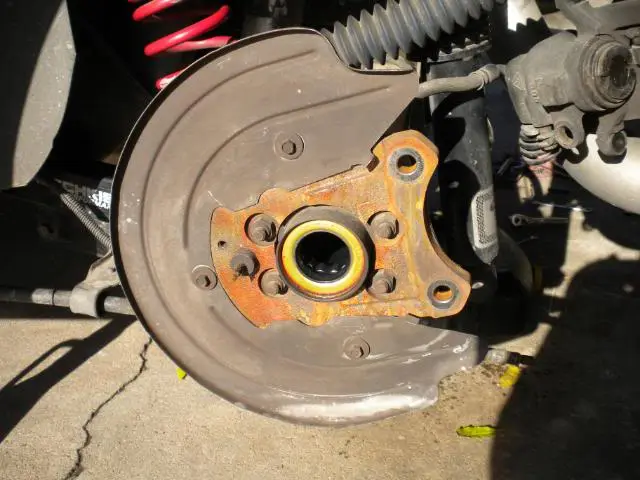
25.With both hands,carefully remove Axle Shaft from Rear End.
Take care not to damage Seal or Bearing.
Set aside (we will be reusing these)
26.Remove Anti-Moan Brace.
With 3/8 Ratchet,Short Extension,and 1/2 Socket
Remove (2) 1/2 Nuts (red arrows)
set aside.
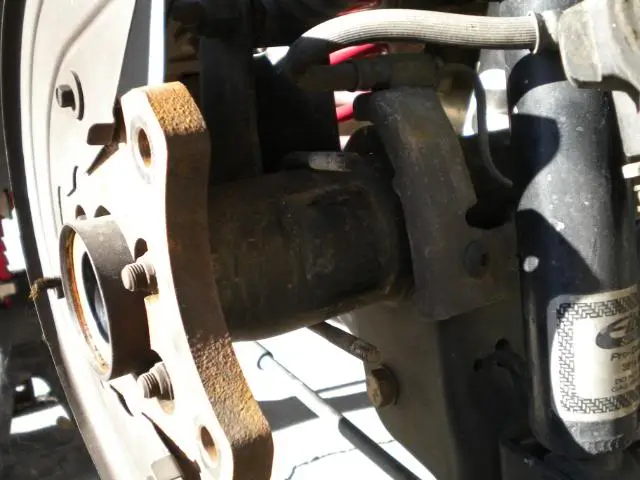
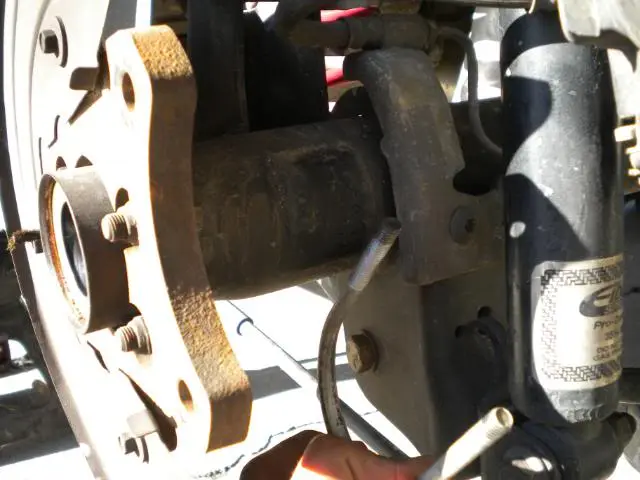
27.Push ABS Sensor out,and place out of the way.
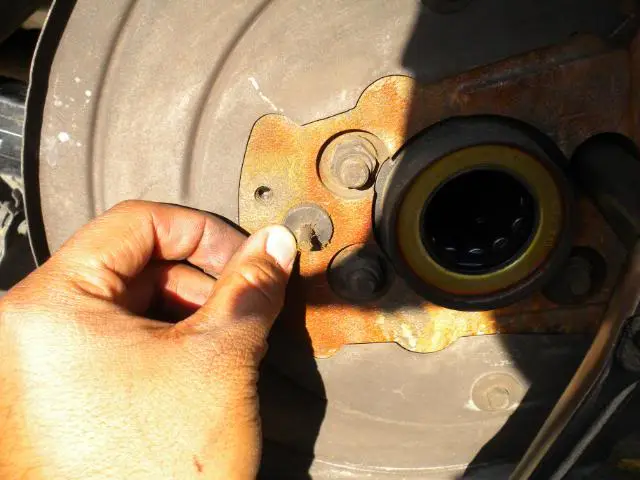
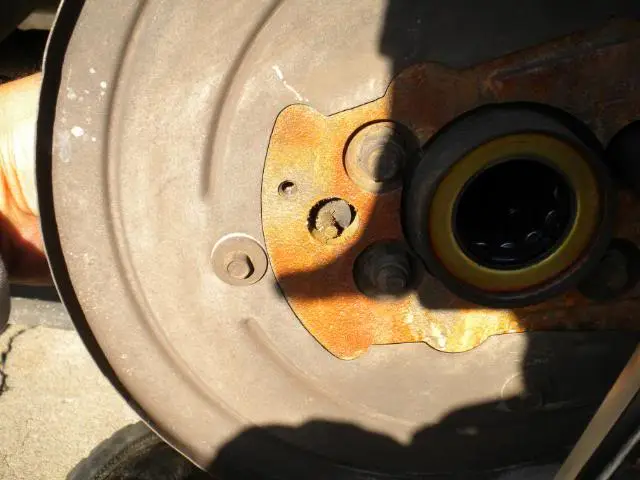
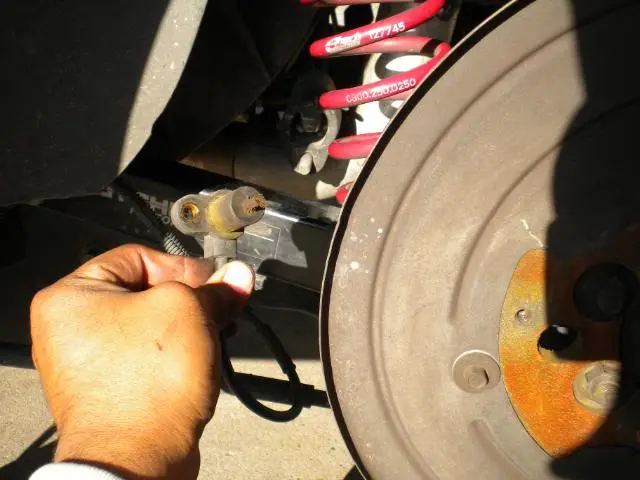
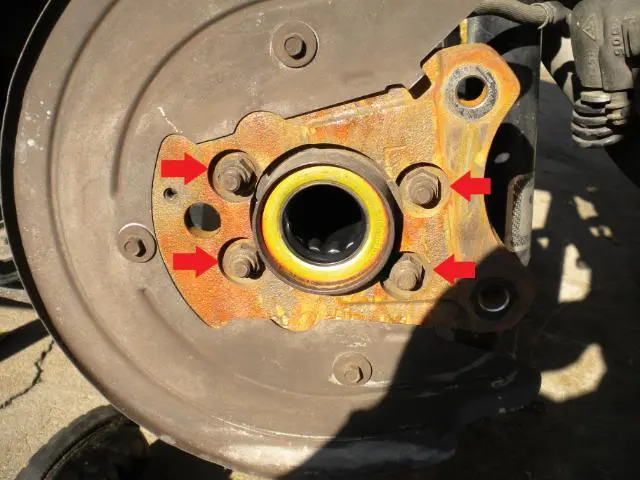
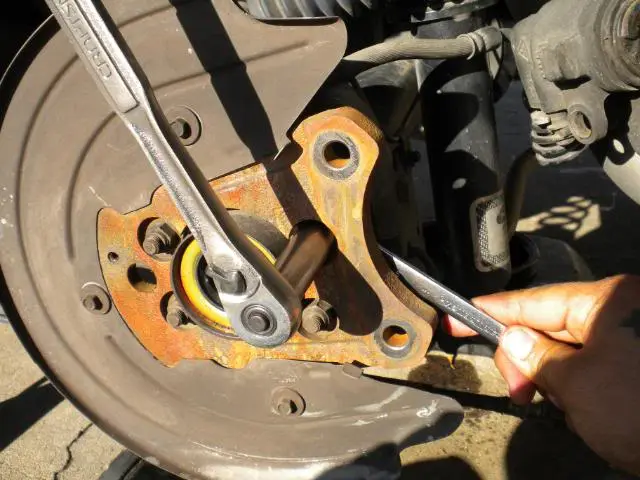
28.Remove Backing Plate.
Remove (4) 9/16 Backing Plate to Rear End Housing Bolts/Nuts (red arrows)
With 3/8 Ratchet,9/16 Socket,and 9/16 Wrench.
Set Nuts/Bolts aside (we will be reusing these)
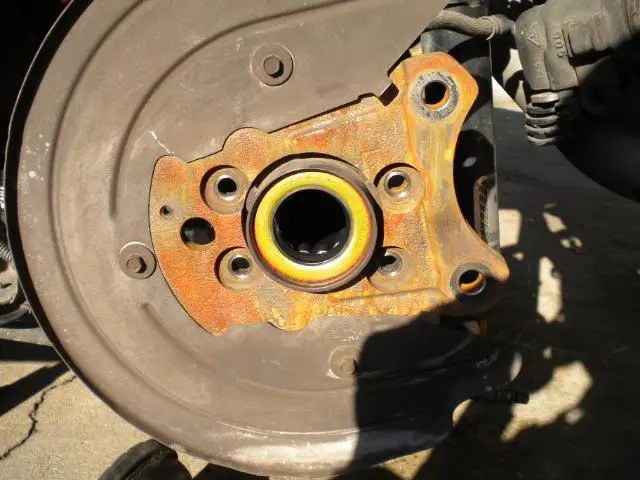
29.Remove Backing Plate from Rear End Housing,
Set aside.
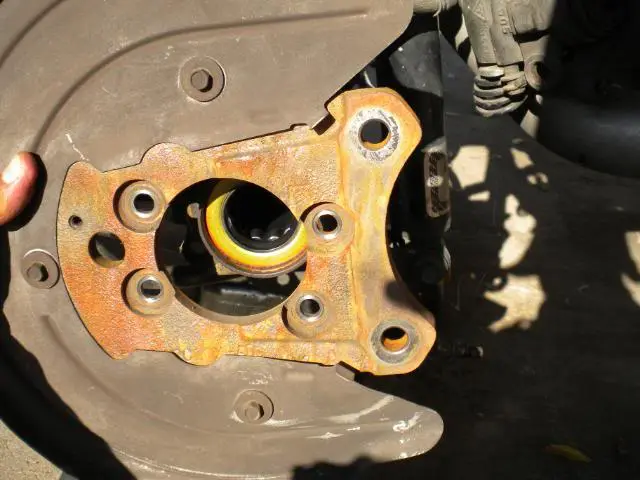
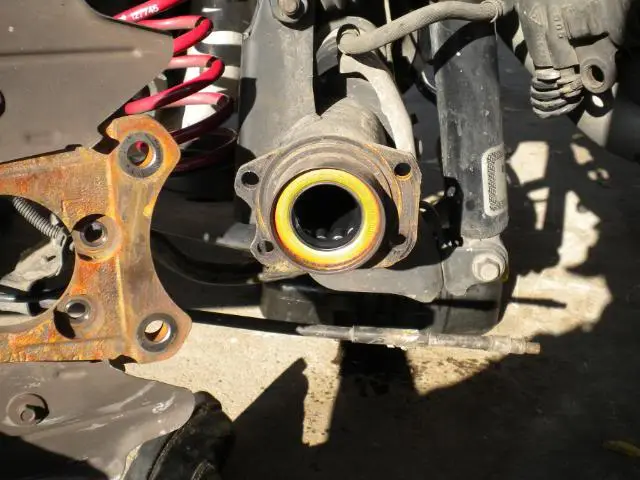
30.Heres everything removed.
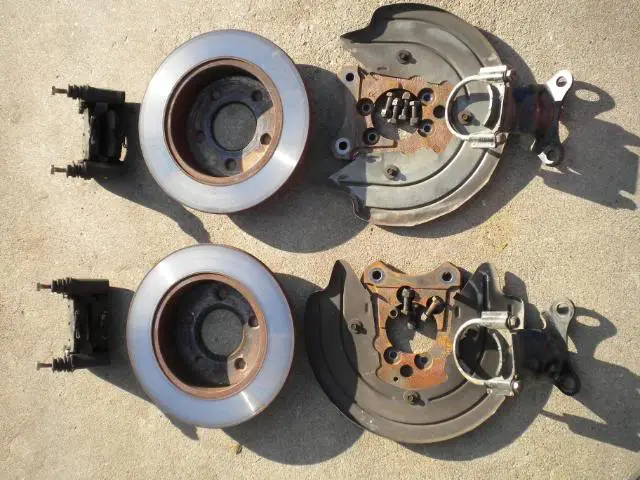
--Before we start the install,let go over what comes in the M-2300-M kit.
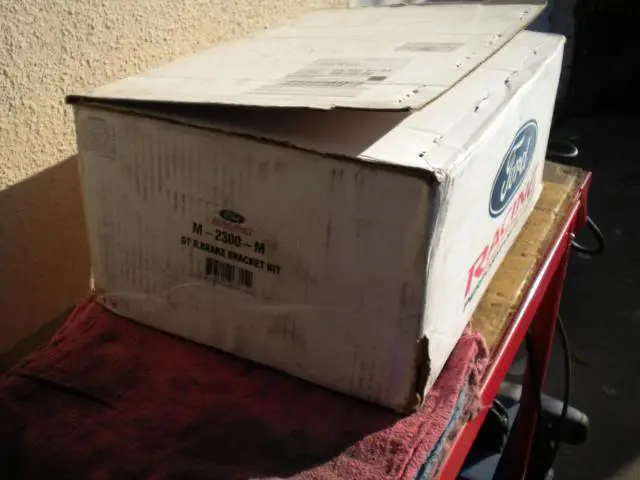
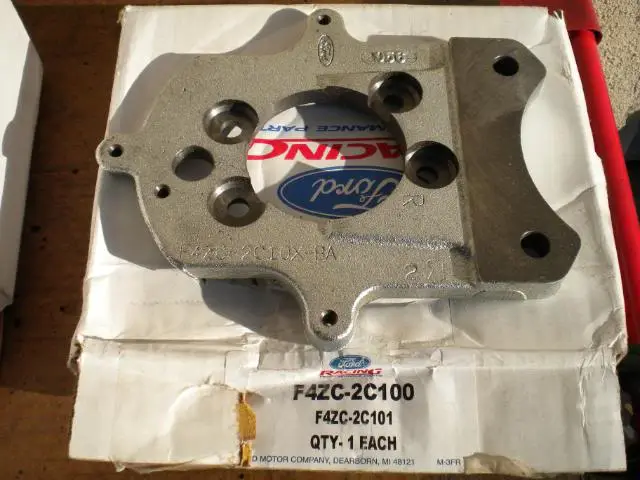
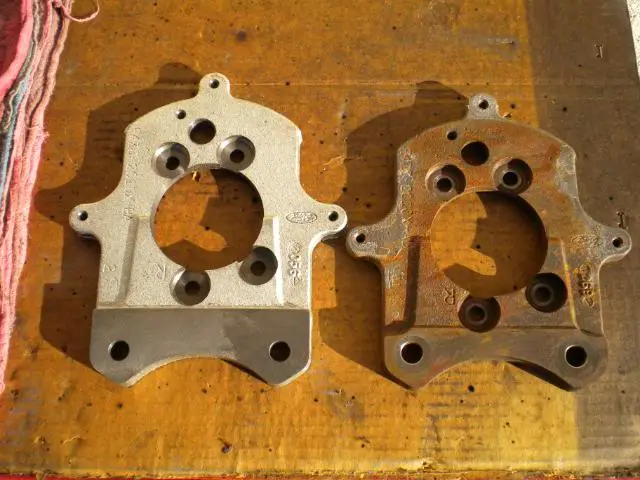
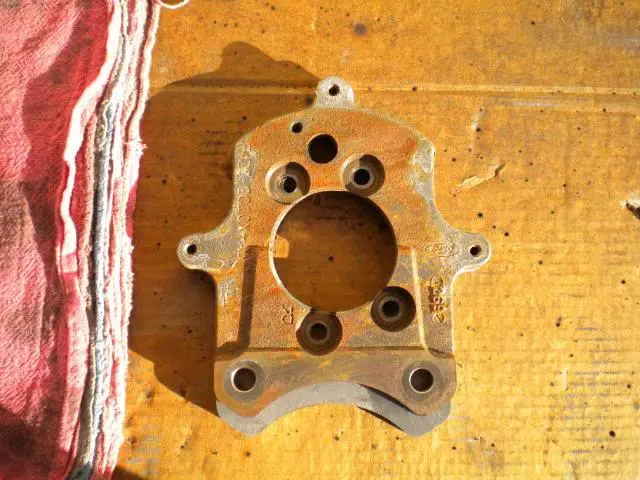
- (1) Left,(1) Right side Cobra Backing Plate.
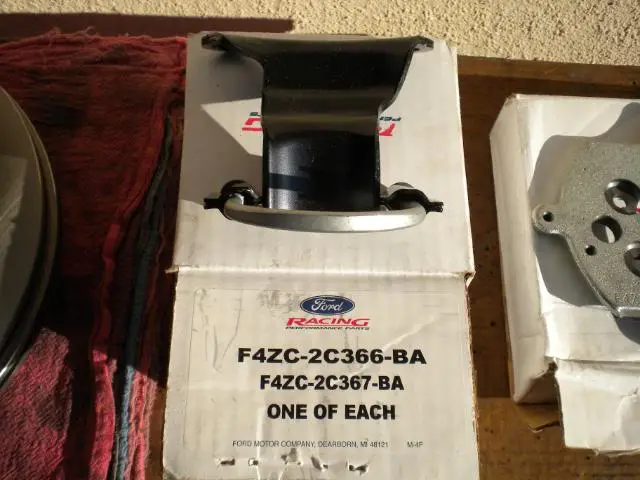
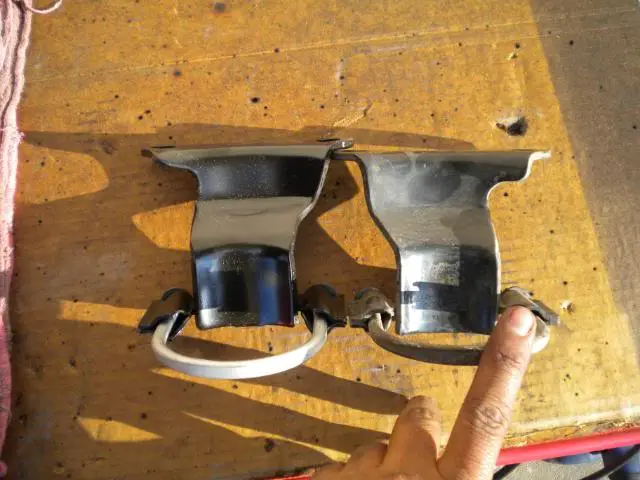
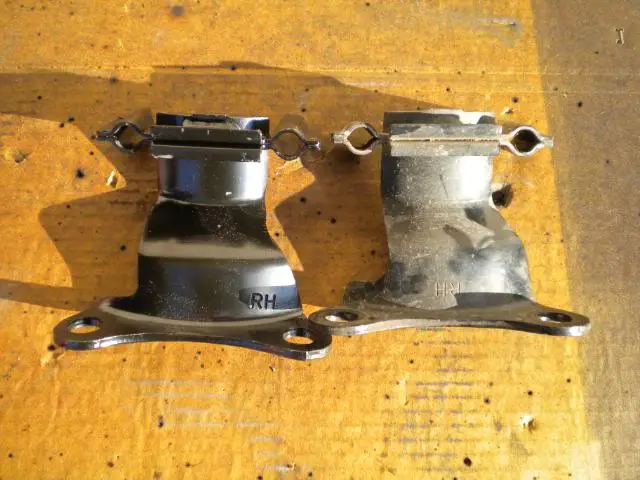
- (1) Left,(1) Right side Anti-Moan Brace w/U-Bolts.
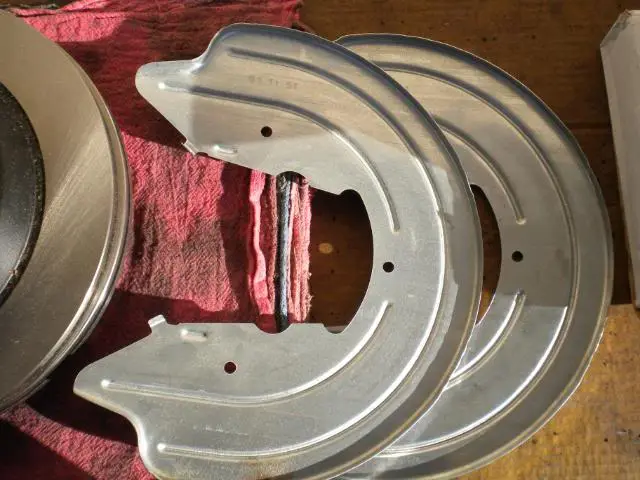
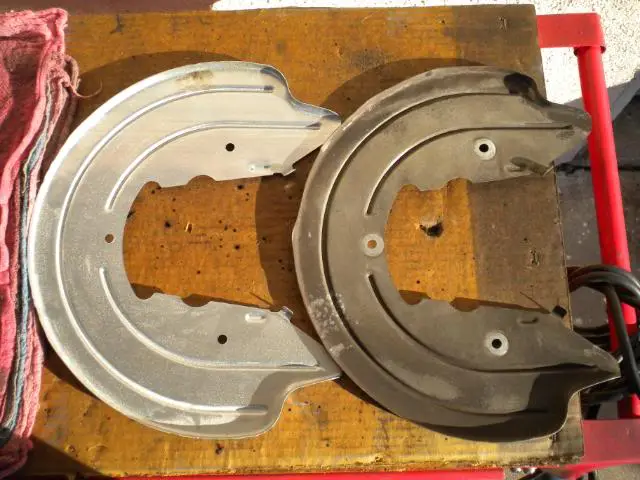
- (2) Dust Shields.
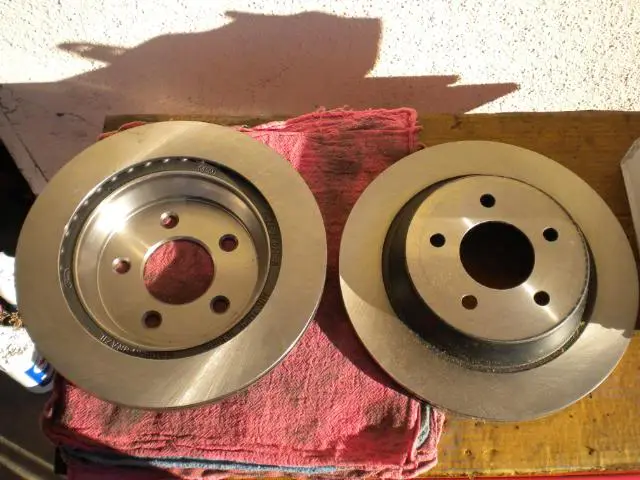
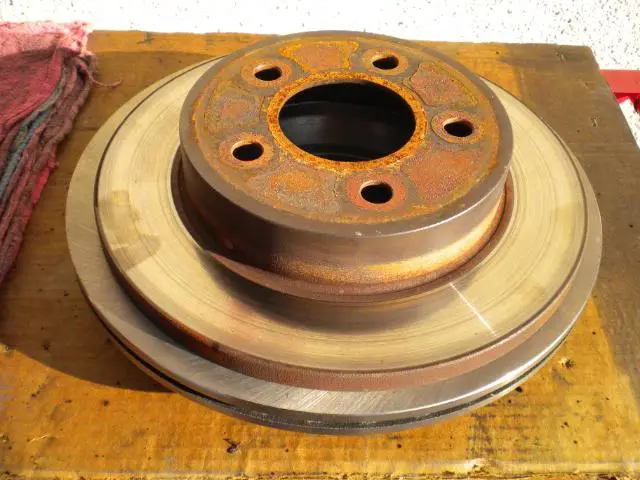
- (2) Rear Vented Cobra Rotors.
- (6) Dust Shield Bolts.(not pictures)
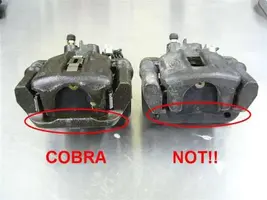
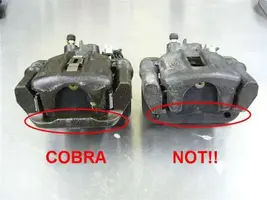
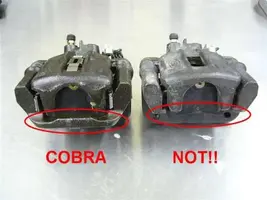
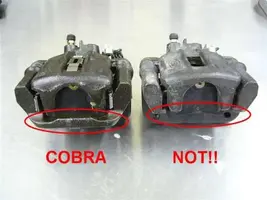
--Here are some comparison shots.
Tools Needed.
1-Jack
2-Jack Stands
1-Brake Caliper piston Compressor
1-set Wheel Chocks or Wood Blocks
1-Foot pound torque Wrench (optional)
1-Inch Pound Torque Wrench (optional)
1-Lug wrench,or 1/2 Breaker bar w/proper Socket
1-3/8 Inch Ratchet
1-(of each) 15mm,9/16,and 1/2-3/8 Drive Socket
1-Short 3/8 Drive Extension
1-1/4 Ratchet
1-5/16-1/4 Drive Socket
1-E8-1/4 Drive Socket (external torx socket,for ABS Sensor)
1-1/2 Wrench
1-9/16 Wrench
1-5/16 Wrench
1-Large Plier
1-Needle Nose Plier
1-Magnet (to remove C-Clips)
1-Gasket Scraper
1-Rubber Mallet
Supplies Needed
1-M-2300-M Cobra Rear Brake Kit
- Ford Racing Rear Caliper Bracket Kit with Rotors (Rear Pair) at AmericanMuscle.com - Discontinued
1-Set Cobra Rear Brake Pads Of Your Choice
Duralast Gold Cmax/Brake Pads - Rear (DGC627) | Brake Pads - Reartrue | AutoZone.com
2-Quarts 80-90w Gear Oil Of Your Choice
1-Bottle Motorcraft Friction Modifier (if equipt with Traction Loc Diff)
1-Can Brake Cleaner
1-Rear End Cover Gasket,or RTV Sealant
1-Tube Anti-Seize
1-Tube or Pack Brake Lube
?-Supply Of Shop Rags,Or Paper Towels
Optional Supplies
-The stock GT/V6 Rear Caliper Brackets can be used.
But,i decided to use the proper Cobra Rear Caliper Brackets.
2-Cobra Rear Caliper Brackets (Cardone #14-1042,$20.00 each @ Autozone)
Cardone Reman/Brake Caliper Bracket - Rear (14-1042) | Brake Caliper Bracket - Reartrue | AutoZone.com
2-Sets Of Caliper Slider Pins (Duralast #H15009,$4.00 per set @ Autozone)
Duralast/Brake Caliper Bolt/Pin (H15009) | Brake Caliper Bolt/Pintrue | AutoZone.com
1-Brake Hardware Kit (Duralast #H5991,$10.00 @ Autozone)
Duralast/Brake Disc Hardware Kit - Rear (H5991) | Brake Disc Hardware Kit - Reartrue | AutoZone.com
REMOVAL
Left (Driver Side) Shown For All Pics.
1.Place blocks in front of Front Wheels.
2.With Lug Wrench,or Breaker bar w/proper Socket,loosen Lug Nuts.
3.With Jack,raise car and place on 2 Jack Stands.
4.Remove Wheels.
5.Release Parking Brake.
6.Under car,clean rear end cover.place Drain Pan under Rear End.
with 3/8 ratchet,short extension,and 1/2 socket,remove lower Bolts,
loosen top Bolts,drain Rear.
7.Remove Cover.
8.Rotate until Cross Pin Bolt is exposed.
9.Inside car,set Parking Brake.
10.With 1/4 Ratchet,and 5/16 Socket,loosen Cross Pin Bolt,dont remove yet.
11.Inside car,release Parking Brake.
12.With Large Plier,grab end of Parking Brake cable (red arrow)
Pull out,and away.
13.At Caliper,with Needle Nose Plier,grab Parking Brake Cable E-Clip.
(red arrow)
Pull off and set aside (we will be reusing this)
14.Pull Parking Brake Cable out of Caliper.
15.At Brake Caliper,with 1/2 Wrench,
Loosen and remove (2) Caliper to Caliper Bracket Bolts (red arrows)
16.Remove Brake Caliper from Caliper Bracket.
Zip Tie out of the way.
17.With 3/8 Ratchet,and 15mm Socket,
Loosen and remove (2) Caliper Bracket to Backing Plate Bolts (red arrows)
Set Bolts aside (we will be reusing these)
18.Pull Caliper Bracket w/Pads off,set aside.
19.Pull Rotor off Axle Shaft,set aside.
(if needed,use rubber mallet on back-side of rotor to knock it off)
20.Remove ABS Sensor Bolt,on back-side of Backing Plate.
With 1/4 Ratchet,and E8 Socket,remove ABS Sensor Bolt (red arrow)
Set aside (we will be reusing these)
21.Under car,with your hand or 5/16 Wrench,remove Cross Pin Bolt.
Set aside (we will be reusing this)
22.With 1 hand,from the back,push Cross Pin out.
Use your free hand to catch it while it slides out.
set aside (we will be reusing this)
23.Next,we will need to push Axle Shafts inward,to expose and remove C-Clips.
With Rubber Mallet,gently tap Axle Shafts in,
This will press the ABS Sensor out,and expose the C-Clips.
(I have done this many times,with no damage to the ABS Sensor or ABS Ring)
24.With Magnet,reach in and remove C-Clip (red arrow)
set aside (we will be reusing these)
25.With both hands,carefully remove Axle Shaft from Rear End.
Take care not to damage Seal or Bearing.
Set aside (we will be reusing these)
26.Remove Anti-Moan Brace.
With 3/8 Ratchet,Short Extension,and 1/2 Socket
Remove (2) 1/2 Nuts (red arrows)
set aside.
27.Push ABS Sensor out,and place out of the way.
28.Remove Backing Plate.
Remove (4) 9/16 Backing Plate to Rear End Housing Bolts/Nuts (red arrows)
With 3/8 Ratchet,9/16 Socket,and 9/16 Wrench.
Set Nuts/Bolts aside (we will be reusing these)
29.Remove Backing Plate from Rear End Housing,
Set aside.
30.Heres everything removed.
--Before we start the install,let go over what comes in the M-2300-M kit.
- (1) Left,(1) Right side Cobra Backing Plate.
- (1) Left,(1) Right side Anti-Moan Brace w/U-Bolts.
- (2) Dust Shields.
- (2) Rear Vented Cobra Rotors.
- (6) Dust Shield Bolts.(not pictures)
--Here are some comparison shots.