Progress Thread Komo's 1990 GT - Parts Gathering Purgatory & Home Remodel

1745355861867.webp


Doesn't care what color the hood is. O_o
Me, myself and I don't care what the hood looks like either. I think i'm real close to being able to drive this thing whenever. Actually plan on taking it to work this Friday.

However, i've started researching the Paxton supercharger install... and that will put her back down for a long while. I want to at least enjoy as is for a while, maybe this whole summer.
 
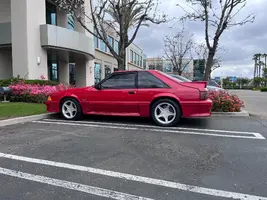
Well I just realized what an idiot I am. I bought 275/40/17’s for the rear wheels…. THOUGHT I bought 245/40/17s for the front but I bought, received and had mounted 245/45/17’s…. Is this gonna look goofy as hell? Should I have them swapped out? I’m sure they would I haven’t done anything with the tires just brought them home and put them in the garage.

Edit: nevermind they are almost identical in diameter, should be fine.
It will look great. That's what sizes come in LMR's 8/9" wheels package.

The backs are wider so the sidewalls end up very similar betweent the two. If running staggered you actaully want different aspect ratios front and rear (assuming you want the same tire height front and back)

781f27b1-7a12-4c05-8e52-c4c14f046e82.webp
 
  • Like
Reactions: gkomo and Noobz347
It will look great. That's what sizes come in LMR's 8/9" wheels package.

The backs are wider so the sidewalls end up very similar betweent the two. If running staggered you actaully want different aspect ratios front and rear (assuming you want the same tire height front and back)

781f27b1-7a12-4c05-8e52-c4c14f046e82.webp
Thanks for the reassurance. I had a little freak out but then remembered I ordered them those sizes because those were the same sizes that were already on the car.
 
I'm confused on how the Paxton 1220SL works with both the regular LX/GT 5.0's and the 1993 Cobra motors only because the Cobras have different waterpump/alternator/crank pullies (which i've installed). AmericanMuscle (and other sites) all say:

Application. This Paxton Novi 1220SL Entry Level Supercharger Satin Trim Kit is specifically designed for use on 1986-1993 automatic and manual 5.0L V8 Mustangs, including the LX 5.0, GT and SVT Cobra models.

So how does the Paxton crank/supercharger pulley work with two different sets of pullies, 1 for the regular 5.0s and 2 for the Cobras?

Not a big deal, just don't want to swap out the Cobra pullies back to stock... and everything i read leads me to believe i can leave them on... just curious as to how that works.
 
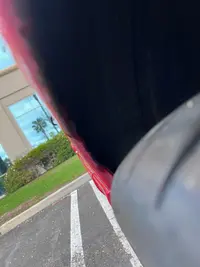
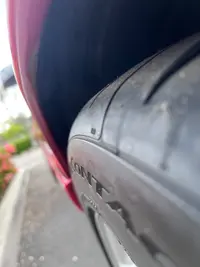
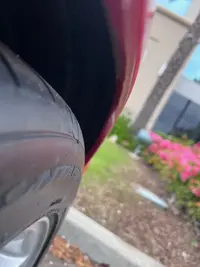
Got the drivers side rear fender rolled to where I ‘think’ I’m comfortable with. The Eastwood roller tool definitely works… but it ain’t easy. That’s some manual labor swinging that thing back and forth. Besides kneeling parallel to the car, I found any other position won’t give you enough leverage to actually move it. Hopefully get the passenger side done tomorrow.
 
  • Like
Reactions: AeroCoupe
Got the passenger side rear fender rolled today. Actually had the little one 'help' me, so that was cool. Passenger side was in worse condition, but the rolling went smoother after doing the drivers side and learning some tricks and how to angle the roller. Car is all buttoned up and back on the ground, ready to go to work tomorrow! Excited to drive it a little longer of a distance after all thats been done.
 
Post pics of those rolled fenders please.
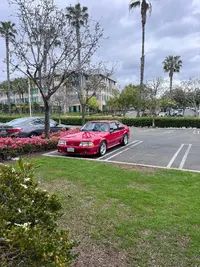
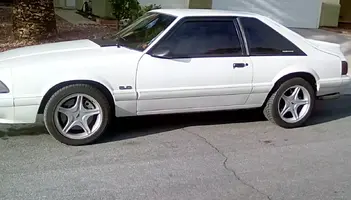
I'll head back out to take some photos, but i did snap one of the whole car when i got to work. She made it with no issues (ha, its like a 15 minute commute)... nothing leaking or anything. Turned the heater on the way and it blew out hot air... first time turning the heater on. If you zoom in you can see the new 5.0 badging. I didn't hear any rubbing at all on the way to work, although i never really went over any major bumps or anything. The new tires fixed my 'bump bump bump' issue, which is fantastic. Engine still feels like it vibrates too much like when i got on it up in the 4k-5k rpm range. She's still slow.

Fox Work 2.webp
 
Post pics of those rolled fenders please.
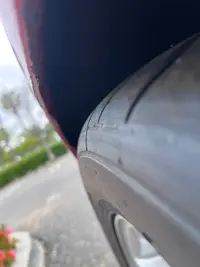
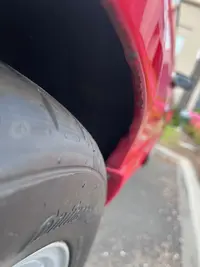
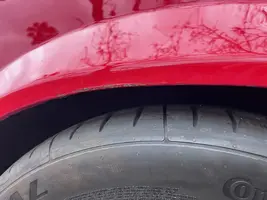
Here you go. JUST remember, the PO already 'rolled' the fenders so chipped paint or :poo:ty looking rolling job was not me, lol. I tried to improve where i could with the Eastwood Roller. Some camera angles blurr the photos a little, but i think you can get the idea.
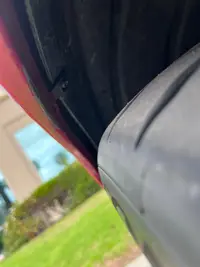
Drivers front Fender:

Driver Front Fender 2.webp
Driver Front Fender 1.webp

Drivers rear Fender:

Driver Rear Fender 2.webp
Driver Rear Fender 1.webp

Passenger front Fender:

Passenger Front Fender 2.webp
Passenger Front Fender 1.webp

Passenger rear fender:

Passenger Rear Fender 2.webp
Passenger Rear Fender 1.webp

And here's the worst of the PO's work... chipping on the outside of the rear passenger fender:
Passenger Rear Fender.webp

And another full body shot:

Fox Work 3.webp

I think the yellow fogs look good out in the natural light.
 
Yeah that came out good, the fogs set it off and your choice of rims are brilliant,
 

Attachments

  • IMG_20200313_171037_hdr.webp
    IMG_20200313_171037_hdr.webp
    158.5 KB · Views: 64
  • Like
Reactions: gkomo
I'm currently running 43-year-old Rockwell Gold Mesh wheels on my '82. I bought them as soon as I got the car. I have a set of staggered SVE Gold Mesh wheels from LMR, I just need to upgrade the front suspension. I have '87 spindles/rotors/calipers/lines/lower control arms to install.
The rear axle was replaced from a 7.5 to a '93 Mustang GT 8.8 with 3.55 gears.
 
  • Like
Reactions: gkomo
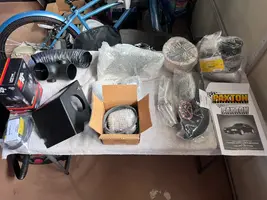
Well, after my successful drive to work… parked the car back in the garage… decided, why not… let’s start the supercharger install now. Got everything out and laid out on a little work table. I feel like with the fuel pump done, everything else ‘shouldn’t’ be too hard to do. Car will probably be down for a while now. The only thing I’m not 100% sure on is the FMU fuel line hookups. The Paxton/Vortech install instructions suck, and ive watched the LMR vortech V3 install videos but they like skip over the actual fuel lines. It like “hook up the fuel lines” and bam they are done and don’t really show you where exactly they go. I’ll cross that bridge when it’s time and I’m sure I’ll be asking questions.

I’ll take this time to completely flush my coolant because the coolant in my new overflow tank (after topping off with fresh coolant) looks like garbage now.

IMG_8552.webp
 
  • Like
Reactions: TuFun
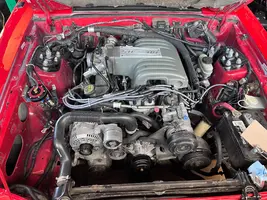
This mornings work, going a little out of instruction order because I wanted to get the noisy FMU hole drilling done while the kiddo was gone.

- removed fan, shroud & drive belt
- removed intake tract and moved relay/mounted FMU
- ran FMU vacuum line to tree and secured with ziptoes
- started doing the passenger side boot heat wraps


IMG_8553.webp
 
  • Like
Reactions: nicholase and TuFun
This mornings work, going a little out of instruction order because I wanted to get the noisy FMU hole drilling done while the kiddo was gone.

- removed fan, shroud & drive belt
- removed intake tract and moved relay/mounted FMU
- ran FMU vacuum line to tree and secured with ziptoes
- started doing the passenger side boot heat wraps


IMG_8553.webp
I just noticed the inlet holes are still there for the dual snorkel air cleaner.