Progress Thread Komo's 1990 GT - Parts Gathering Purgatory & Home Remodel

The fuel lines become much more self explanatory when you get started. I was wondering the same things. Basically the FMU goes in series with the return line. You unplug the return line by the flexible plastic lines under the car by the sway bar. Then plug the FMU to the lines you just split. It can only go one way because of the push lock ends that come with the kit.

Just makes sure they get connected properly to the FMU. There's one on the side and one on the bottom.
 
I just noticed the inlet holes are still there for the dual snorkel air cleaner.
Wait what do you mean? I removed the circular plastic cover from the one hole rearward of the normal airbox hole. If I end up going like a power pipe it takes that hole (enlarged) but for now I’ll leave it open. The cover was pretty loose which is why I removed it.
 
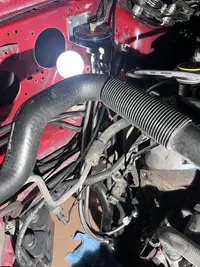
There are two large round holes in the fender wells where air cleaner tubes are attached.

IMG_0395.webp
 
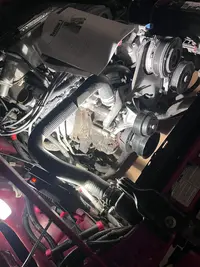
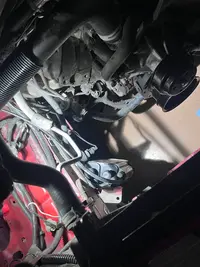
Got through ‘Phase 1’ of the installation… removal of all necessary parts and repositioning the canister. Tonight was:

- drain coolant
- remove tensioner
- remove alternator
- remove alternator bracket (one bolt was kind of a pain)
- remove smog pump & bracket
- reposition canister

Not that there’s many, but bolts and parts are bagged and labeled.

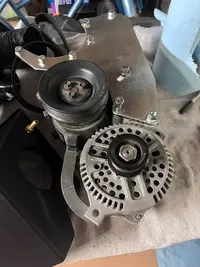
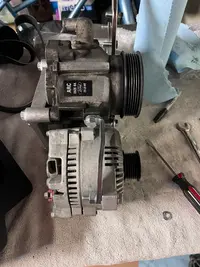
IMG_8557.webp

IMG_8558.webp

In the directions it says I need to reroute a ground cable on the radiator support through the headlight hole… is that really necessary? I’m not seeing how it would interfere with anything.
 
  • Like
Reactions: TuFun
Can someone sanity check my fuel lines for the FMU??

IMG_8572.webp

I have the 90 degree fitting off the FMU going to the fuel rail (non shrader valve hard line), the bottom port on the FMU I have going down to the bottom of the engine to hook up to that line… if I could actually disconnect it. Any tips/tricks are welcome.

But, do I have it right? Then I just remove the return hard line completely?

Also, the line I have hooked up from the bottom center port of the FMU (the one just hanging near where the airbox would be), why doesn’t the other end of that line look like the other fuel line? I.e. have the disk and o-rings?

Also got the Paxton crank pulley on.
 
Last edited:
The fuel lines become much more self explanatory when you get started. I was wondering the same things. Basically the FMU goes in series with the return line. You unplug the return line by the flexible plastic lines under the car by the sway bar. Then plug the FMU to the lines you just split. It can only go one way because of the push lock ends that come with the kit.

Just makes sure they get connected properly to the FMU. There's one on the side and one on the bottom.
Unless they changed the FMU hook up, you don't have it right. The hard line stays. Unplug the connection like I mentioned above and connect the fmu in series there.

The reason the hard line stays is the fittings on the FMU are male/female. You'll see when you unplug the line. To eliminate the hard line the FMU would need to have two of the same fittings.

Soak the metal spring area with penetrating oil. Try to blow out all the crud.
 
Unless they changed the FMU hook up, you don't have it right. The hard line stays. Unplug the connection like I mentioned above and connect the fmu in series there.

The reason the hard line stays is the fittings on the FMU are male/female. You'll see when you unplug the line. To eliminate the hard line the FMU would need to have two of the same fittings.

Soak the metal spring area with penetrating oil. Try to blow out all the crud.
Ok so disconnect only the hard line connection (non shrader valve line - the return line) down by the engine block. From that newly disconnected hard line i connect to the 90 degree fitting on the FMU, and from the soft line that runs to the tank connect that to the bottom center port on the FMU?
 
Hope i didn't mess up the o-rings on the top hard line connection by removing it. I must've got confused because at the 5:50 mark in this video they are connecting up to the fuel rails:


View: https://youtu.be/zPKrUcUChDk?si=fnq_cTPnndZnraLS

and as i mentioned previously, Paxtons installation instructions aren't very helpful as they also show the line going up near the fuel rails:
1746031326094.webp
 
Last edited:
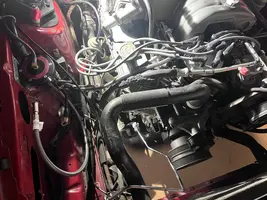
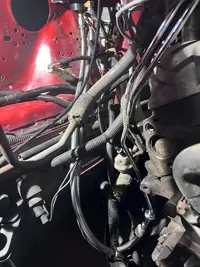
Ok one more sanity check from anyone please. Reconnected the stock fuel rail up by the intake, finally was able to disconnect the other side of that hardline from the soft return line to tank… swapped my Paxton fuel lines on the FMU and ran them as @nicholase suggested, and yes once off you’re right there is only one way to connect both of them… just need to make sure they are connected correctly on the FMU. Anyways, sorry for the bad lighting this is my nighttime working conditions, lol

IMG_8580.webp

IMG_8581.webp

I tried to adjust my lights the best I could so you could trace the lines from the FMU down to the soft/hard return lines. I’ve connected everything but just loosely until I know they are correct.

Oh one other question, the connections on the FMU, do they need any sort of sealant or tape on them? They are bare now… directions don’t say to use anything, just wondering.
 
Last edited:
The fitting going into the FMU are compression fittings. The seal is made against the nose of the fitting:

1746080803860.webp


The torque on these is [important] and they should [not] be overtightened. Torque to what the instructions say.

The fittings going to the fuel rails are idiot proof. Just make sure they're clicked all the way in.

On my initial setup, It was not uncommon to see 70 - 90 psi fuel pressures at full tilt. I hope your injectors are healthy.

As far as which hose goes where... I don't recall the flow direction (or if there was one). I don't think it matters. There's no check-valve. All the FMU does is pinch off the return line when it sees boost. I don't think it cares when way the flow is going.
 
On my initial setup, It was not uncommon to see 70 - 90 psi fuel pressures at full tilt. I hope your injectors are healthy.
Healthy? We gon’ find out soon… nothing on this car seems to be healthy.

Thanks for the heads up on the compression fittings. No torque values in the directions, not sure how I would even know since the are tightened with an open ended wrench.

The FMU does have a direction of flow, I’m like 99% sure I’m good to go as I have it now. Side port to hardline off rail, bottom port to soft line to tank.
 
This is how.

Damn those are expensive sets. My other issue is, no torque specs are provided so even if i had those, i wouldn't know what spec to set my torque wrench to.

In the LMR Vortech v3 install video, he just tightens them down with a wrench. Not saying thats how it should be done, but also i have nothing else to go off of. The picture i put in post #792 is all i have from the actual Paxton Installation Instructions... like thats a direct snip from their instructions.
 
Should be in this range:

Good-N-Tite but not too tite O_o
I see i see, so we using the scientific method!

Hopefully tonight, i'll finish up the 'fuel system' part of this, and move onto the main accessory bracket assembly. Need to clean up my smog pump, was looking pretty nasty when i took it off.
 
May have hit my first snag due to this kit needing to be on a completely stock engine. I am assembling the accessory mounting bracket and with the 3G alternator I can’t get the alternator ’stay’ bracket lined up correctly because the 3G is larger, and also its mounting boss isn’t threaded, and neither is the bracket, shown here:

IMG_8584.webp

So the bolt they call out is 1. Too short (assuming 3G mounting boss is also thinker) and 2. not threaded.

So, I thought I’d just put a bolt and nut through it, but then it cockeyes the alternator so the pulleys don’t line up, as shown here:

IMG_8585.webp

One other semi non-related issue, the 2” bottom bolt called out holding the smog pump on in the instructions says to go In from the front but it’s too long where the smog pump to alternator bracket boss gets in the way. So I went in from the back to make it work.

Any ideas on the alternator situation?

Also the kit comes with lock washers but the instructions don’t say where to use them. Frustrating how bad the instructions are.