

You are using an out of date browser. It may not display this or other websites correctly.
You should upgrade or use an alternative browser.
You should upgrade or use an alternative browser.
Project 81 Hack Job!!!!!
- Thread starter SVT32VDOHC
- Start date

1990Coupe
Founding Member
Let's not go there.
This question was turned into a 4-5 page thread that got closed. Many like the idea, and many didn't....so we all battled a while. It has calmed down since then, and I have a lot of members who have been following me along the way and I appretiate that!!:D
It all comes down to what you want when building a car, and that is what I wanted. Never build a car for someone else.
Thanks to all you guys!!
 opcorn: i'm one of those people!!!
It looks like my plans for a newer edge stang will be falling through. I have always wanted to try this swap and im still unsure if i can do it (hell AFFORD IT!!) buttt once my fiance and I get a house i may give it a try. Your progress and this car are just amazing!!!!! I think this is the coolest set of progress threads i've ever seen and i cant wait for you to finish her!!!!

HACK JOB FTW!!!!!!!

25thmustang
Mustang Master
Thanks, but your car has a lot more mechanically into it than mine. Not to mention what your doing is right up my alley. Take something old, graft in new stuff, add some nice wheels/tires, make it clean and fresh.
Just keep it up, use other progress threads to push you along, thats what I did.
Just keep it up, use other progress threads to push you along, thats what I did.

1990 Coupe----I know you have been there for me!! Thank you. My advice if you start this swap...start with a car that was originally fuel injected...86-93. Lots less crap to modify under the hood. AND much easier to mount the gas tank!!! Man did that suck for me!! I can give you all my info along the way.
25th---It might have more mechanically as far as ABS, T/C, etc....I'll be looking at your tail lights in the quarter mile! I wonder what this thing will run...not that that is what I built it for, but just curious. I hope all is well when it hits the road...especially because of what you said...grafting in new parts.
When the car is done, I will make one thread. I will put many pics of before during and afters. It has just taken too long to have made one thread. I would have had to keep bringing them back.
25th---It might have more mechanically as far as ABS, T/C, etc....I'll be looking at your tail lights in the quarter mile! I wonder what this thing will run...not that that is what I built it for, but just curious. I hope all is well when it hits the road...especially because of what you said...grafting in new parts.
When the car is done, I will make one thread. I will put many pics of before during and afters. It has just taken too long to have made one thread. I would have had to keep bringing them back.

Really?
That is interesting. I have no idea what to ask for it. I do know one thing though...I have way more in it than planned!!!! I still know I will be buying 300-400 on paint supplies this weekend. Maybe not that much.
If anybody wonders, I am using a single stage paint by Nason. 1 Gallon of paint, 1 quart of Reducer and 2 pints of Activator. (Might be 1 pint I forget) Anyways, it's great because you spray once, and clean the gun onces. Base/clear you have to clean in between paint/clear I hate that. Besides the single stage shines more, shrinks less, it's 40% harder than base/clear, and it is a touch cheaper.
That is interesting. I have no idea what to ask for it. I do know one thing though...I have way more in it than planned!!!! I still know I will be buying 300-400 on paint supplies this weekend. Maybe not that much.
If anybody wonders, I am using a single stage paint by Nason. 1 Gallon of paint, 1 quart of Reducer and 2 pints of Activator. (Might be 1 pint I forget) Anyways, it's great because you spray once, and clean the gun onces. Base/clear you have to clean in between paint/clear I hate that. Besides the single stage shines more, shrinks less, it's 40% harder than base/clear, and it is a touch cheaper.

PUNISHER RACING
Active Member
Demented4.6
Founding Member
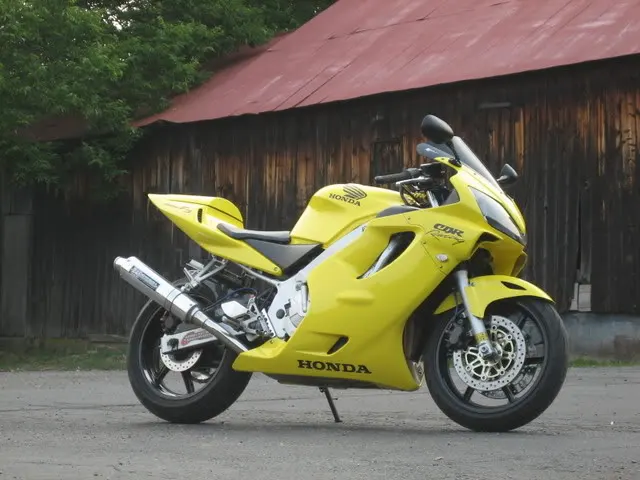
nicer color choice.. Looks similar to the paint i used on my bike. Mine was Lightning Yellow ( mazda color)
Punisher---I was waiting for someone to notice that!! I found that in the trunk of the 2001 GT I took apart. It was brand new, and I figured....YES...nice drop cloth!!
Crap....I should have sold it on EBAY!!!!
Demented----Thanks....it stands out like no other...nice bike BTW!
Crap....I should have sold it on EBAY!!!!
Demented----Thanks....it stands out like no other...nice bike BTW!
impulse001
New Member

fiveohlxhatch
New Member
- Sep 18, 2007
- 27
- 0
- 0


allballsmustang
Member
AllballsMustang---It is a crazy color, very different from anything else I have done. I bet people never missed your F350 coming!!!
wow thats weird mine was chrome yellow too...ill have to dig up the pics of it and post them..its an unbelieveable color... you will definately not be disappointed... everywhere i went ppl were like omg that color is sick...
wow thats weird mine was chrome yellow too...ill have to dig up the pics of it and post them..its an unbelieveable color... you will definately not be disappointed... everywhere i went ppl were like omg that color is sick...
Yeah thanks, I can't wait to drive the damn thing. I have been noticing every yellow car on the road lately wheather it's a Dodge Ram, A Chevy Cobalt, V6 Mustang's, Neon's Monte Carlos....etc. They all make me itch to get it done.

not to hijack your thread but since yellow foxes are not that common here's a picture of my dad's 91 LX hatch painted Chrysler Prowler Yellow. BTW, your car's gonna look great man. Glad to see another nice yellow fox
Picture was taken before lowering springs were installed.......
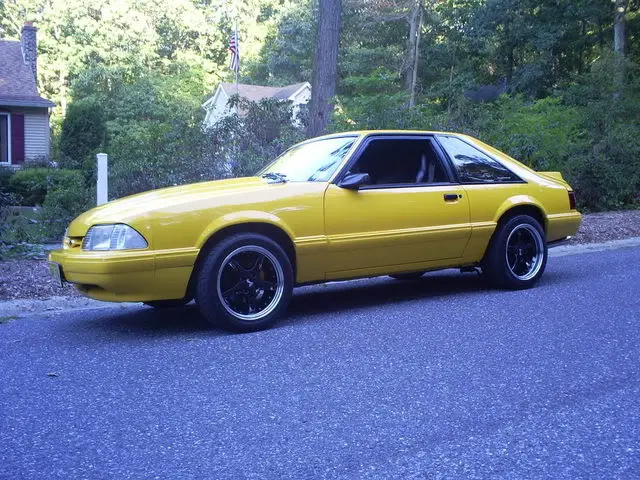
Picture was taken before lowering springs were installed.......
not to hijack your thread but since yellow foxes are not that common here's a picture of my dad's 91 LX hatch painted Chrysler Prowler Yellow. BTW, your car's gonna look great man. Glad to see another nice yellow fox
Picture was taken before lowering springs were installed.......
That is nice, I was contemplating black wheels, but they aren't me. You are killing me by posting those pics....I need to spray my car!!!!
You didn't hi-jack anything. Now, if you were the 1st post after me, that would be a different story....but no harm done! Thanks man!
Successful reconditioning of 87-93 door moldings
I got these rust free doors from another junkyard...(Couldn't believe I didn't have any) They were dented from end to end, the moldings were curled up at each end, and I was torn between taking the chance of fixing them and spending 650 dollars for new ones People mentioned heating the up metal and peeling it off. I tried that, and the two sided tape does not stick to rubber AT ALL. Maybe they used 3M Plastice and Emblem Adhesive, but that stuff eats paint so no way am I using that. Of all the methods mentioned to fix them. This is the method I used to fix them. Remember I am doing an entire paint job, so using a razor knife on a car that doesn't need paint might not be the best idea, but I have used fishing line, and windshield wire before and they curl and bend the metal up beyond use. THIS METHOD DOES NOT BEND IT AT ALL!!
1. Heat up molding with heat gun.
2. Take a long razor knife, and gently stick the razor in between the door and the molding being careful not to cut the molding. Drag it along slowly from end to end. You will have to repeat this step many times until the razor can reach the bottom of the twosided tape. Then move to the bottom area of the molding and repeat. DO NOT BEND/PULL/YANK on the molding. Take your time, keep the knife flat and the molding flat. Heat in between if possible.
3. Flip the moldings over. I tried using a wire wheel and a drill to get the old tape off. Yeah right! IT gummed the wheel up in two seconds. I then took my grinder with a new 36 grit grinding disc and took it to the tape. This worked great, but don't dig into the metal band with it!!! You just want to shave it down.
4. Now, move to 80 grit sandpaper on a D/A sander or Palm sander. Use this until you can see all the clean metal banding.
5. Hit the bandings with 150/320 grit. Either one, doesn't matter.
6. Buy 3M two sided tape. I bought the smallest roll (60ft) and have half left over. I did all 6 two sided tape style moldings on the body. Now....this will not stick well to the metal as it is.
7. I scratched my head and then took a can of clear coat. I made two passes on each strip, let it dry, and made two more. Let it dry. The tape STICKS LIKE NO TOMORROW, and you cannot get it back off!!! PERFECTO!!
8. This tape will NOT stick to primer, so you must have paint and clear behind the moldings....you will see in my pics that I painted behind the moldings.
9. After you lay the tape on the moldings, heat up the molding itself. Do NOT get real close to the tape as it wrinkle!! Just keep the heat gun moving. Heat the other side as well.
10. If the body is cold, heat the body in that area too.
11. Get a friend to help you hold it steady. Run masking tape to keep a straight line when sticking them on. Start at one end and steadily work your way toward the other. Keep pressing it on it steps, and keep it as straight as possible.
I know you have all stopped ready by now. But this has been covered 100 times on here, and this is the way that I did it and it work. They have been on for about 15 hours now and have not lifted. The temp has changed from 75* in the building to about 40* this morning when I came in, and now back to 70*. I am painting them on the car tomorrow, I will add more pics tomorrow.
AND FINALLY.........
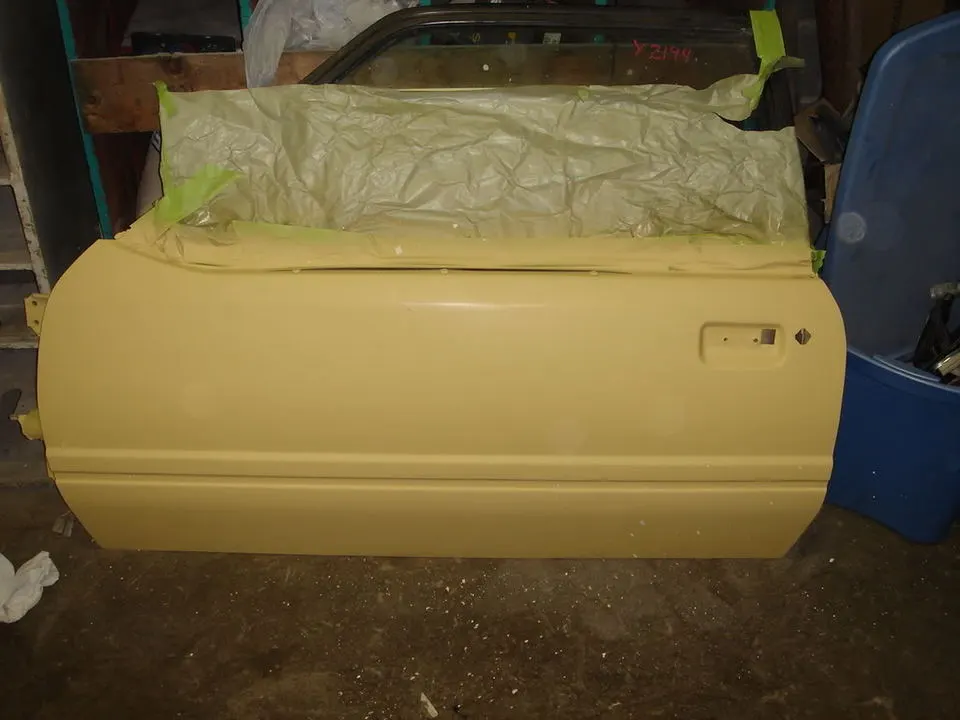
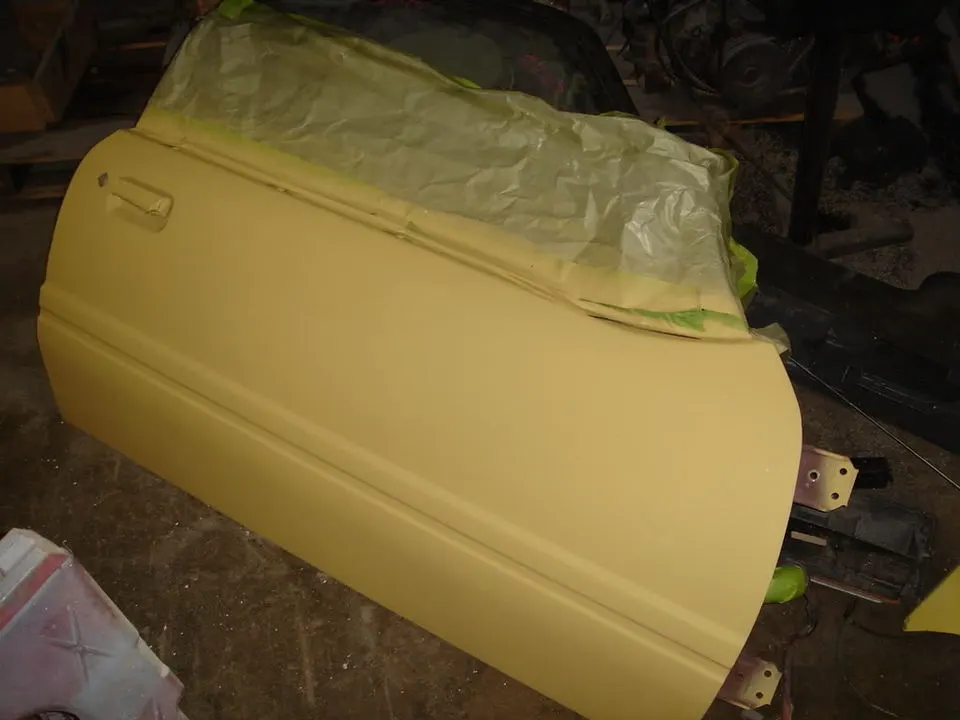
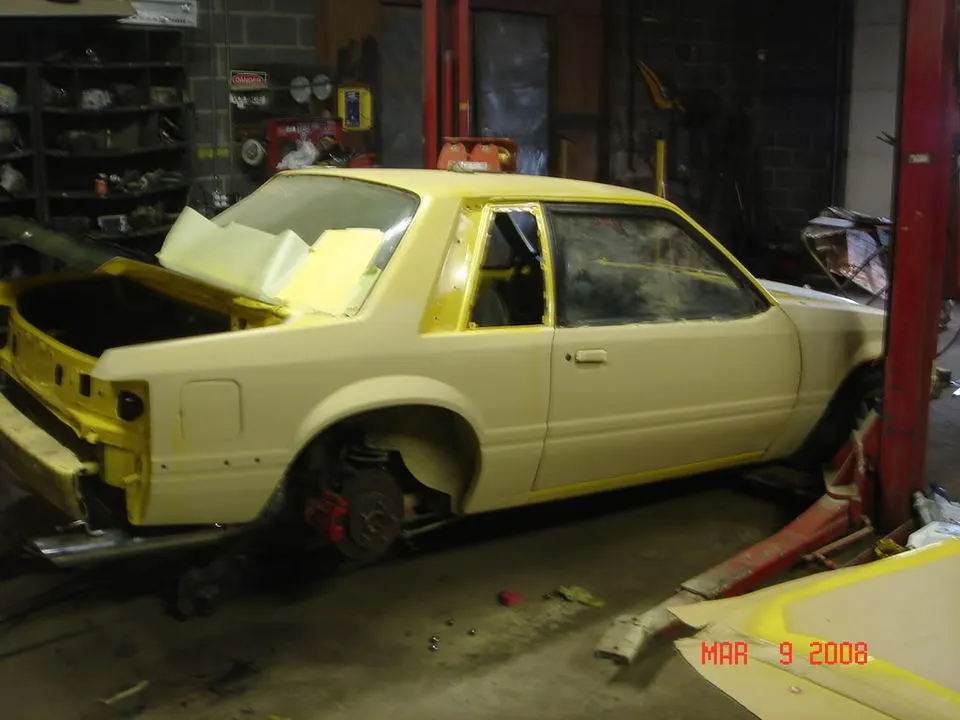
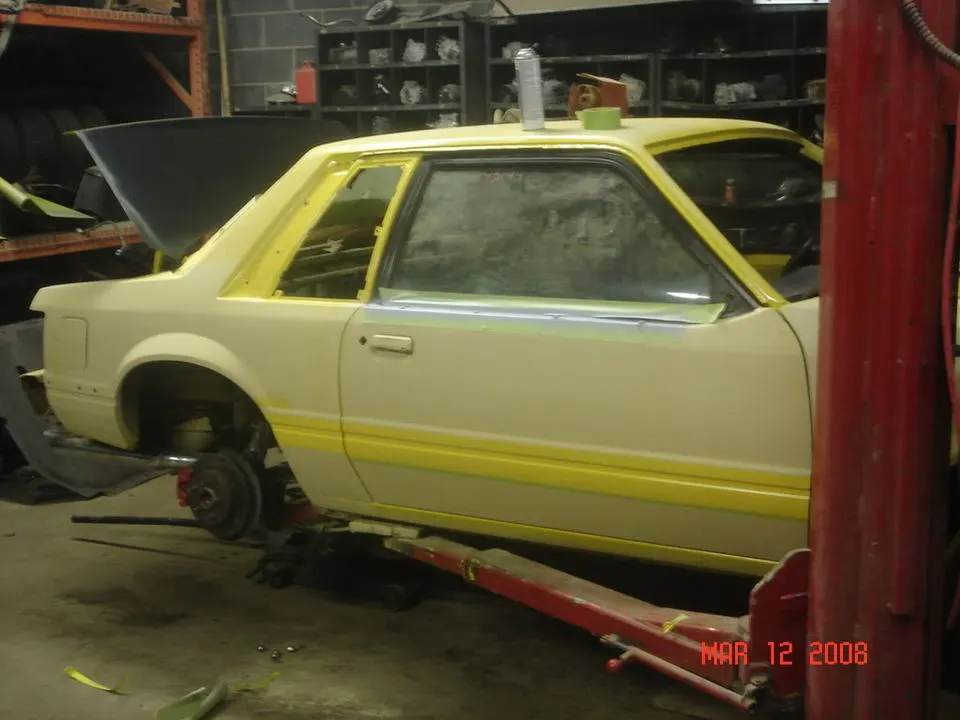
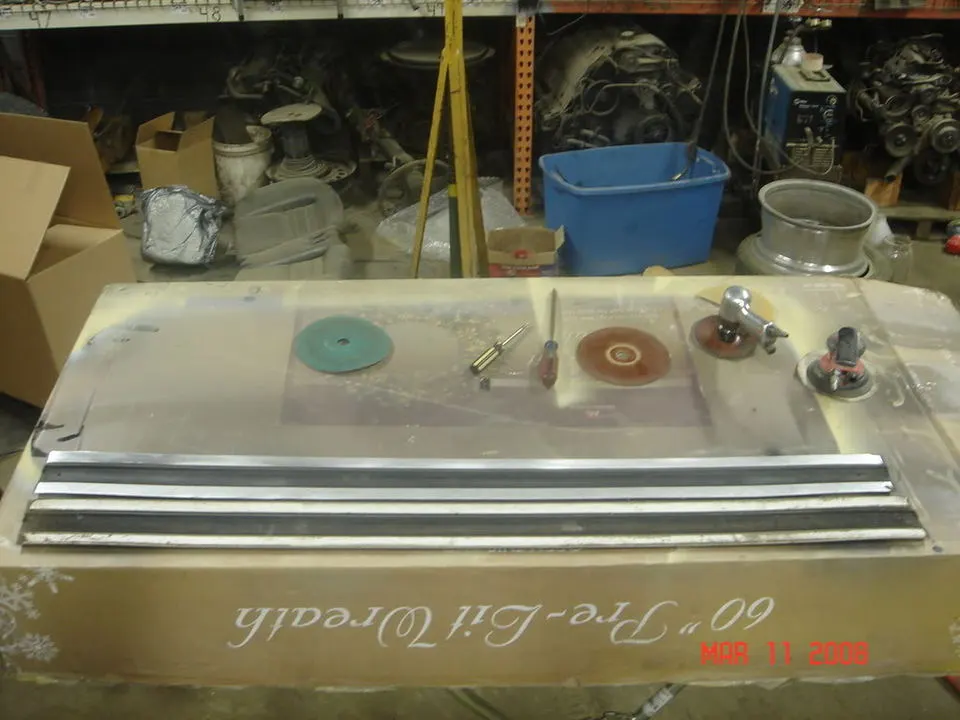
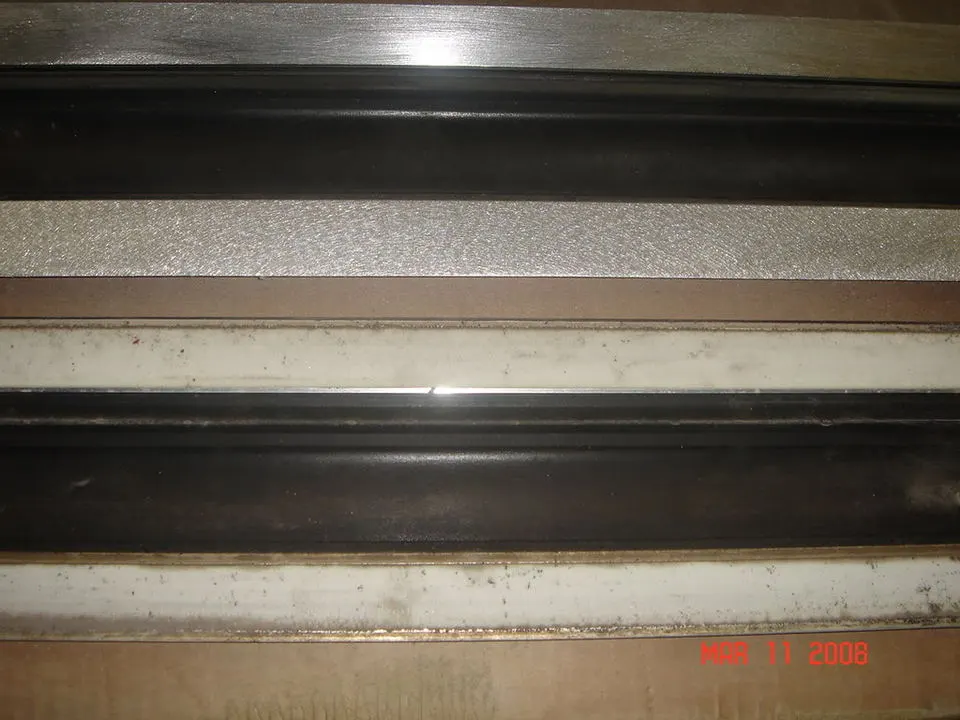
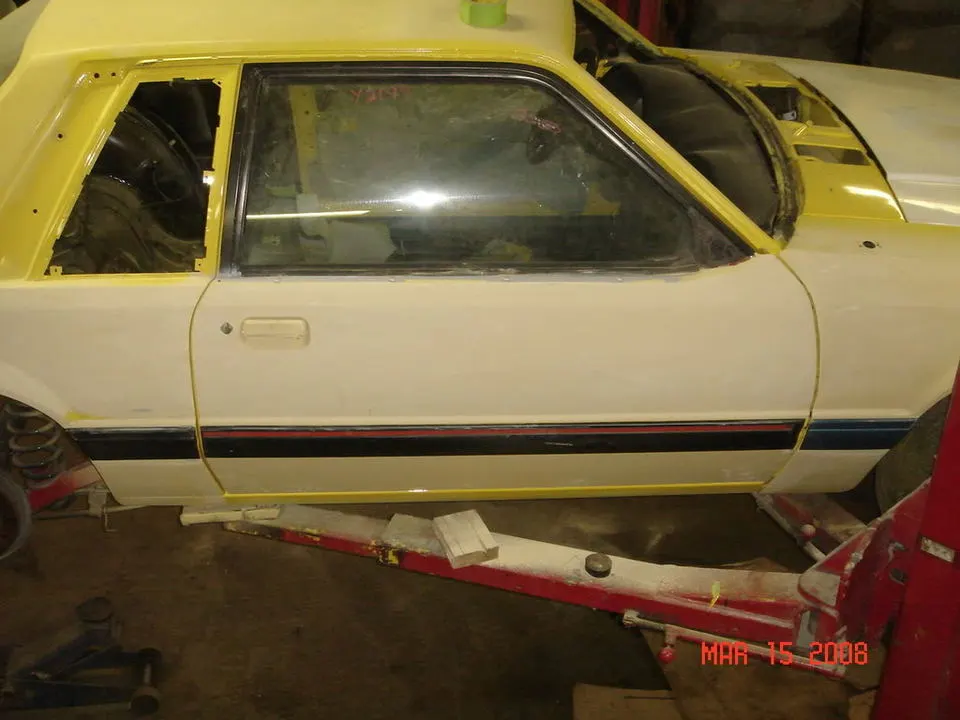
View attachment 326735
View attachment 326736
I got these rust free doors from another junkyard...(Couldn't believe I didn't have any)
They were dented from end to end, the moldings were curled up at each end, and I was torn between taking the chance of fixing them and spending 650 dollars for new ones People mentioned heating the up metal and peeling it off. I tried that, and the two sided tape does not stick to rubber AT ALL. Maybe they used 3M Plastice and Emblem Adhesive, but that stuff eats paint so no way am I using that. Of all the methods mentioned to fix them. This is the method I used to fix them. Remember I am doing an entire paint job, so using a razor knife on a car that doesn't need paint might not be the best idea, but I have used fishing line, and windshield wire before and they curl and bend the metal up beyond use. THIS METHOD DOES NOT BEND IT AT ALL!!1. Heat up molding with heat gun.
2. Take a long razor knife, and gently stick the razor in between the door and the molding being careful not to cut the molding. Drag it along slowly from end to end. You will have to repeat this step many times until the razor can reach the bottom of the twosided tape. Then move to the bottom area of the molding and repeat. DO NOT BEND/PULL/YANK on the molding. Take your time, keep the knife flat and the molding flat. Heat in between if possible.
3. Flip the moldings over. I tried using a wire wheel and a drill to get the old tape off.
Yeah right! IT gummed the wheel up in two seconds. I then took my grinder with a new 36 grit grinding disc and took it to the tape. This worked great, but don't dig into the metal band with it!!! You just want to shave it down. 4. Now, move to 80 grit sandpaper on a D/A sander or Palm sander. Use this until you can see all the clean metal banding.
5. Hit the bandings with 150/320 grit. Either one, doesn't matter.
6. Buy 3M two sided tape. I bought the smallest roll (60ft) and have half left over. I did all 6 two sided tape style moldings on the body. Now....this will not stick well to the metal as it is.
7. I scratched my head and then took a can of clear coat. I made two passes on each strip, let it dry, and made two more. Let it dry. The tape STICKS LIKE NO TOMORROW, and you cannot get it back off!!! PERFECTO!!
8. This tape will NOT stick to primer, so you must have paint and clear behind the moldings....you will see in my pics that I painted behind the moldings.
9. After you lay the tape on the moldings, heat up the molding itself. Do NOT get real close to the tape as it wrinkle!! Just keep the heat gun moving. Heat the other side as well.
10. If the body is cold, heat the body in that area too.
11. Get a friend to help you hold it steady. Run masking tape to keep a straight line when sticking them on. Start at one end and steadily work your way toward the other. Keep pressing it on it steps, and keep it as straight as possible.
I know you have all stopped ready by now. But this has been covered 100 times on here, and this is the way that I did it and it work. They have been on for about 15 hours now and have not lifted. The temp has changed from 75* in the building to about 40* this morning when I came in, and now back to 70*. I am painting them on the car tomorrow, I will add more pics tomorrow.
AND FINALLY.........
View attachment 326735
View attachment 326736

Aaron
20+ Year Stangneter 
Nice write up! I bought new moldings when I had my car painted a couple years ago, and they are already starting to curl a bit, so I will probably use some of the methods above to redo mine.
Keep the write ups going! Normally progress threads are interesting to me, but your car is really peaking my interest - maybe because of all the little side threads you have made (like this one). It's good reading!
Keep the write ups going! Normally progress threads are interesting to me, but your car is really peaking my interest - maybe because of all the little side threads you have made (like this one). It's good reading!

A buddy of mine just pulled the metal strip out and used 3M double stick on the inside and it's held up awesome so far.
A buddy of mine just pulled the metal strip out and used 3M double stick on the inside and it's held up awesome so far.
That's good. I stuck some tape to one molding I peeled the metal off of and let it sit for about 12-15 hours, one in room temp, and one by the heater, and both of them peeled right off. I didn't think thye would hold up for a long time and when water hits it. I didn't want to risk it.
BTW...I forgot to add that I spent a total of about 5 hours making everything useable and installing them.

FYI
There is a wheel available that is designed to remove pinstriping and double sided tape. I just one on all my moldings, took me about 30-40 minutes to get it off all the moldings with a few of the wheels.
Also, a friend, some paint sticks and some windshield removing wire will bring moldings off in in a snap!
There is a wheel available that is designed to remove pinstriping and double sided tape. I just one on all my moldings, took me about 30-40 minutes to get it off all the moldings with a few of the wheels.
Also, a friend, some paint sticks and some windshield removing wire will bring moldings off in in a snap!
Similar threads

- Replies
- 13
- Views
- 2K

- Replies
- 0
- Views
- 164

- Sticky
- Replies
- 16
- Views
- 679

- Replies
- 8
- Views
- 324
