

You are using an out of date browser. It may not display this or other websites correctly.
You should upgrade or use an alternative browser.
You should upgrade or use an alternative browser.
Build Thread Want To Blow 5 Years And $50k On A Foxbody? Step By Step Instructions Inside!
- Thread starter RacEoHolic330
- Start date

Welded together and installed the hinged lid for the false floor area in the back. Came out pretty well.
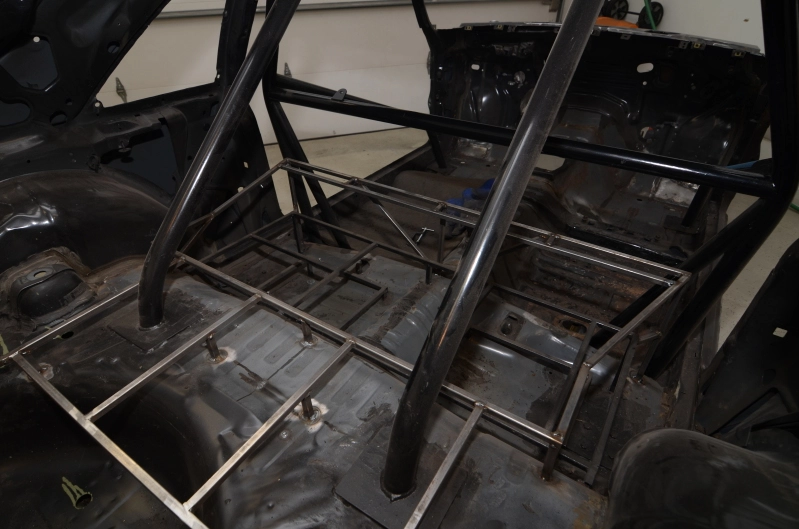
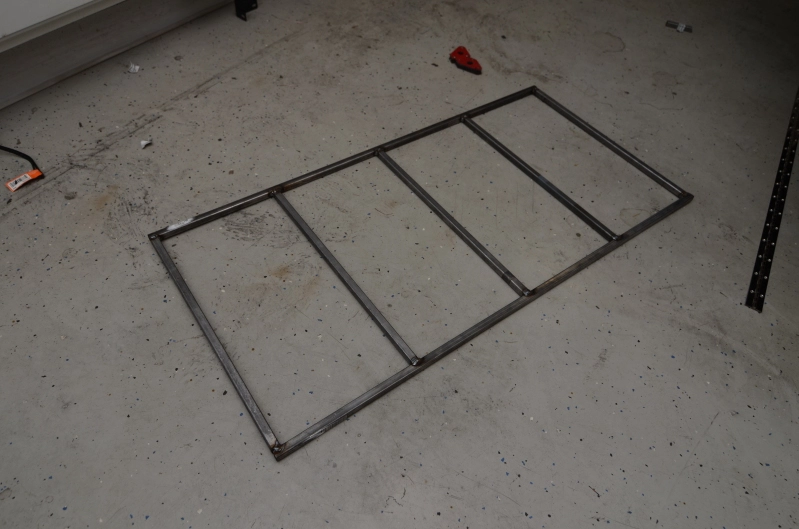
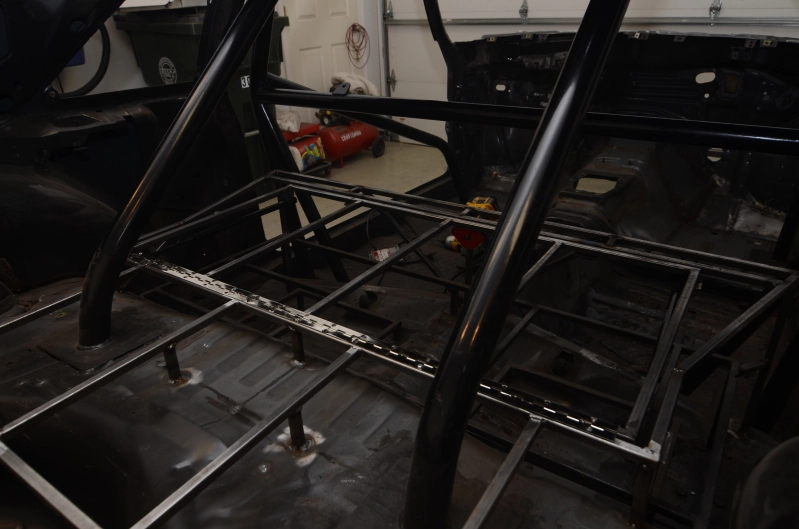
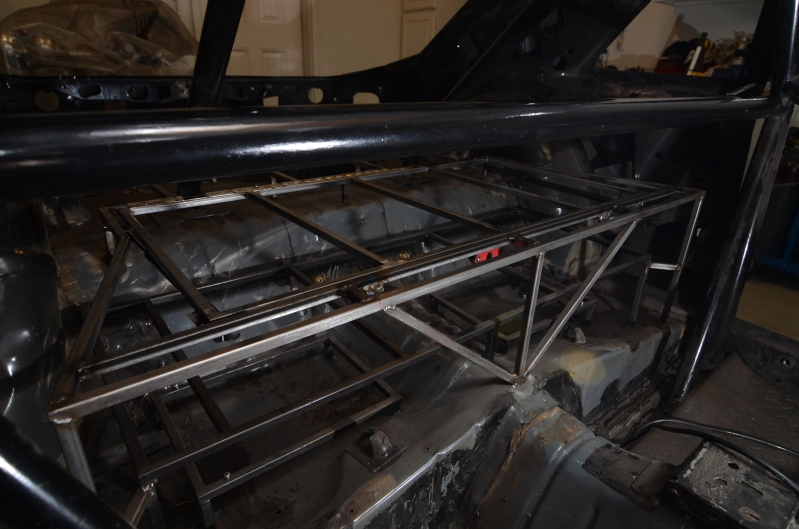
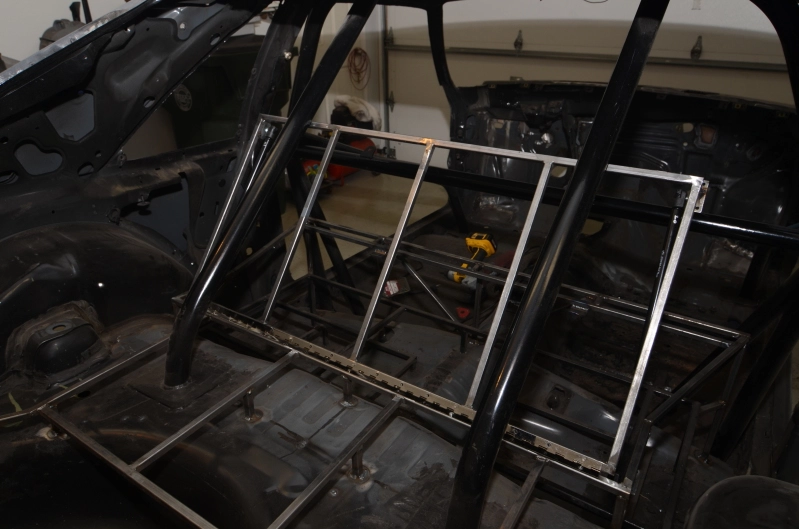
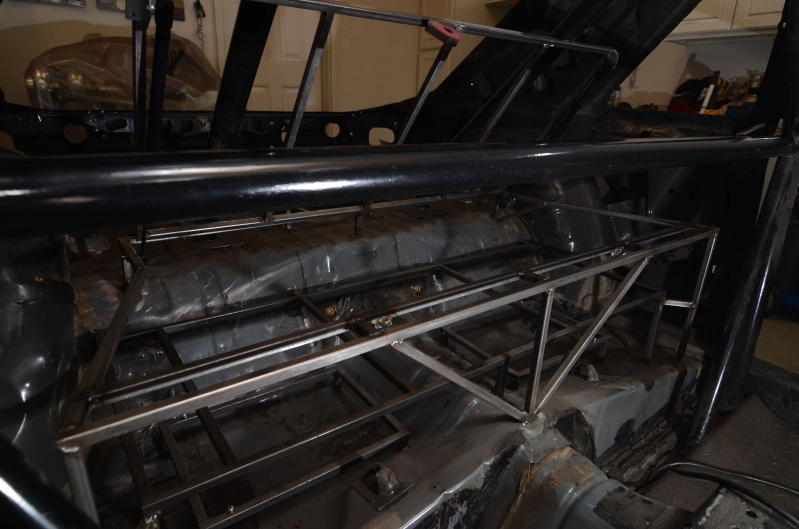
I wound up using a pair of 20lb struts. It comes up pretty fast, but it will slow down once it has the weight of the MDF and carpet on it. I do need to reposition the lid side of the strut mount. The geometry is a bit off. The lid somewhat floats when it is in the closed position. A small spacer should fix that geometry issue for me.
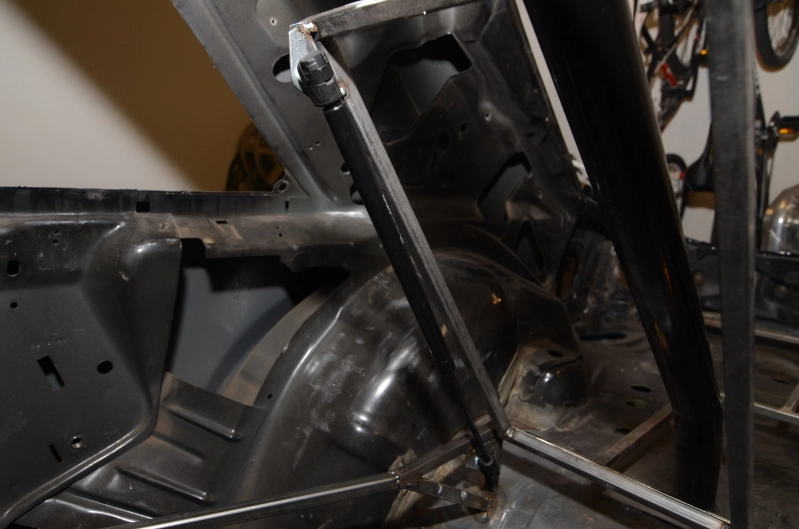
I wound up using a pair of 20lb struts. It comes up pretty fast, but it will slow down once it has the weight of the MDF and carpet on it. I do need to reposition the lid side of the strut mount. The geometry is a bit off. The lid somewhat floats when it is in the closed position. A small spacer should fix that geometry issue for me.

You're only going to be able to smuggle one hooker at a time in that... Unless they're midgets. 
No worries. I can fit at least 2 more in the spare tire well if I remove the subwoofer enclosure.

Cory Berg
Active Member
You've made some monumental achievements in my eyes, the projet looks great! I did some time working in a body shop as shop bitch, so I feel Ding Pao's pain.
Just started reading the thread this morning and I should probably get off and start paying attention to engineering class....
Keep up the good work!
Just started reading the thread this morning and I should probably get off and start paying attention to engineering class....
Keep up the good work!
Thanks man. It has come a long way, but still has a longer way to go until it's done.
Don't worry about paying attention in class. You won't use anything you learned at school when you are in the industry
Don't worry about paying attention in class. You won't use anything you learned at school when you are in the industry
Cory Berg
Active Member

Welding and grinding in the engine bay has officially come to an end. It's ready to be prepped, cleaned, and filled with body filler...
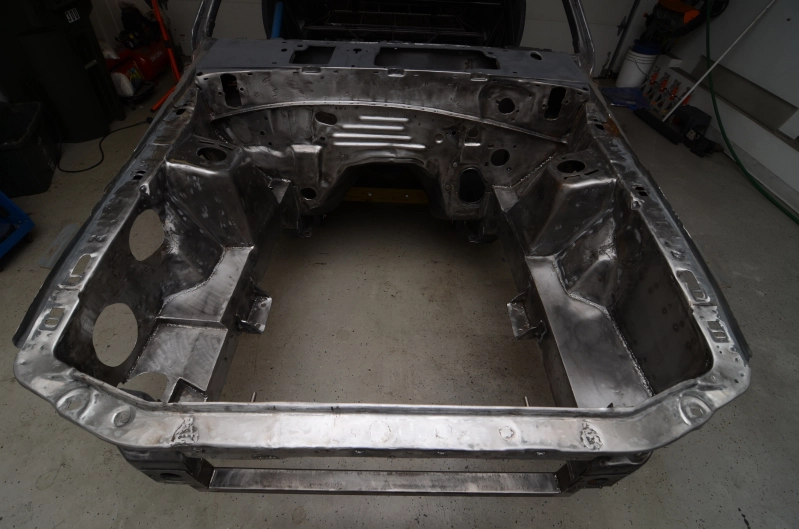
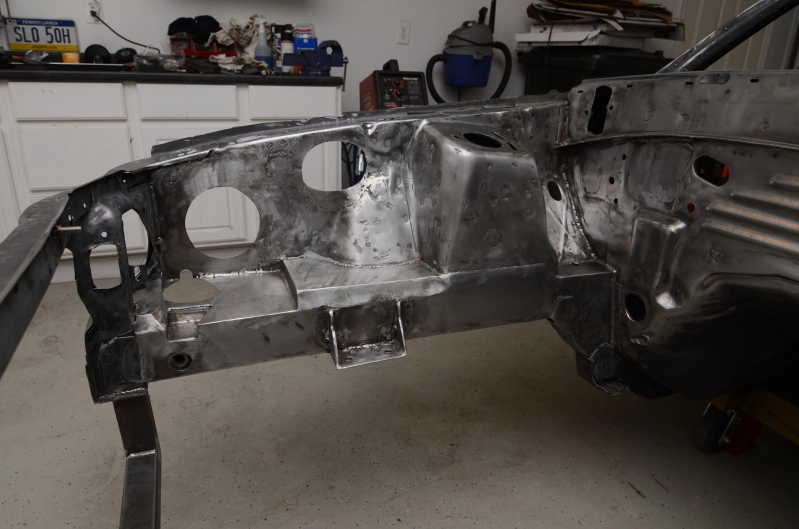
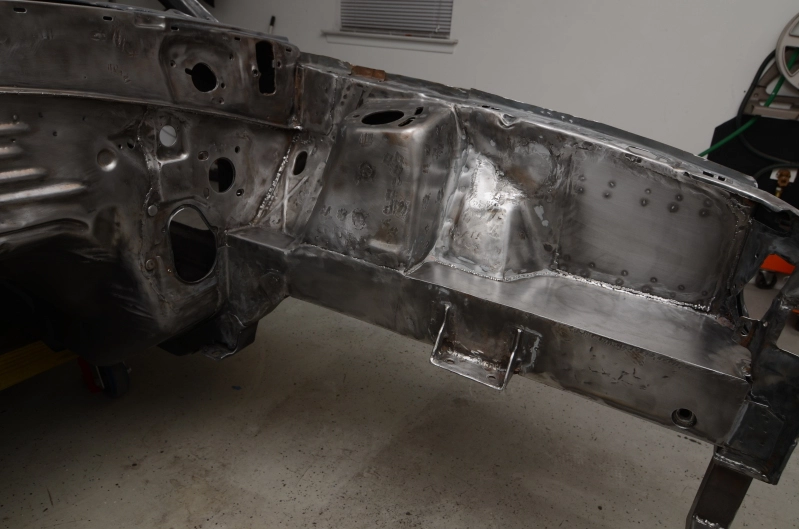
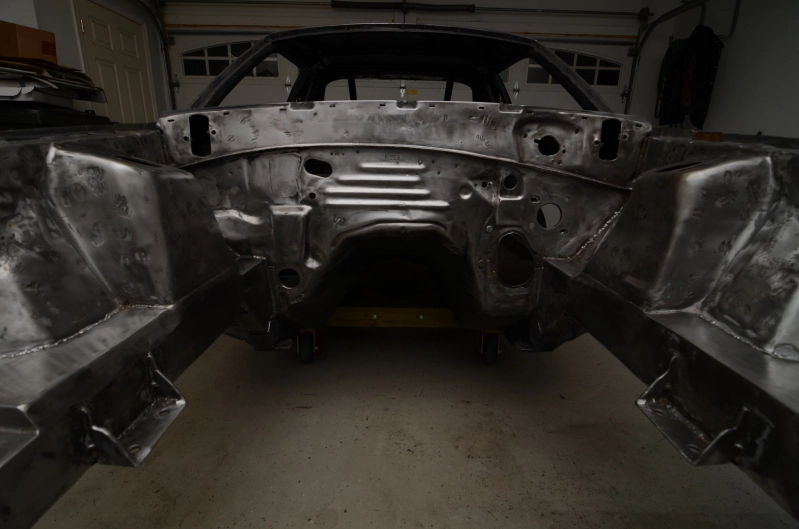
It's not pretty now, but it will be when I'm done with it...I hope.
It's not pretty now, but it will be when I'm done with it...I hope.
Put a layer of All Metal down in the major areas. This stuff seems to be love it or hate it in the autobody industry. I like the stuff. It's just very hard to sand down, but it's tough as nails and I don't have to worry about it cracking.
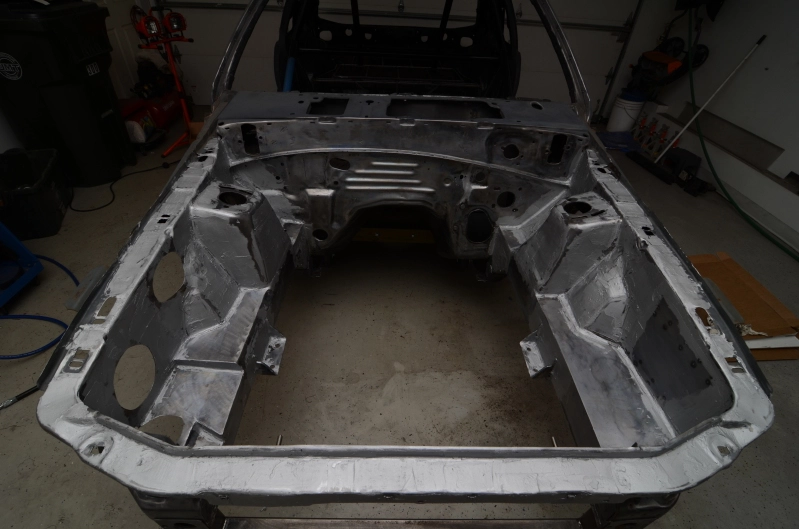
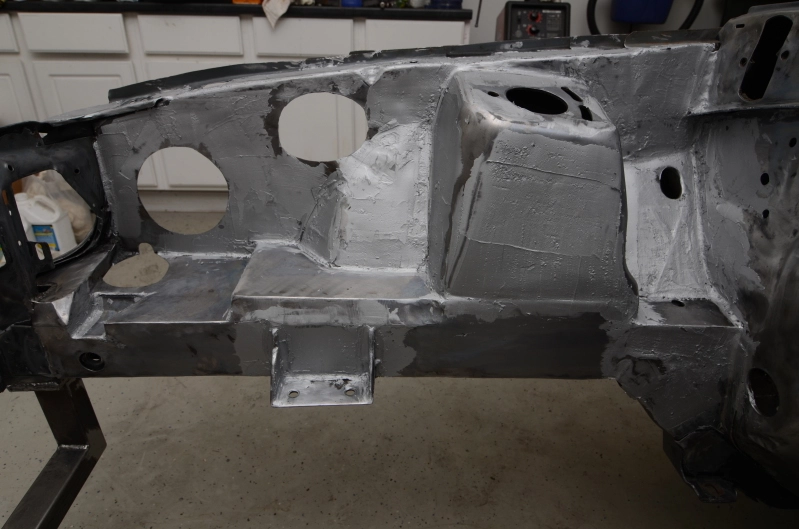
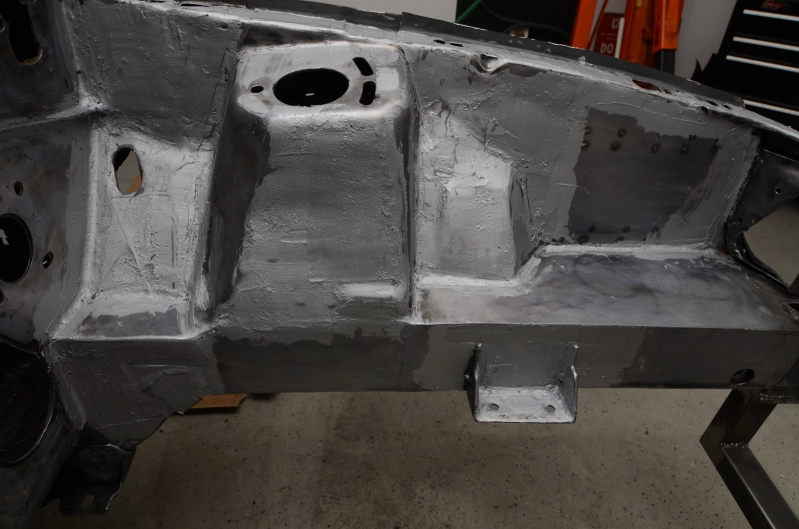
Once I sand the excess down, I'll put a layer of Evercoat filler on and keep working it up until I get it where it needs to be.
Once I sand the excess down, I'll put a layer of Evercoat filler on and keep working it up until I get it where it needs to be.
Got some more engine bay work done today. First I needed to sand down the All Metal.
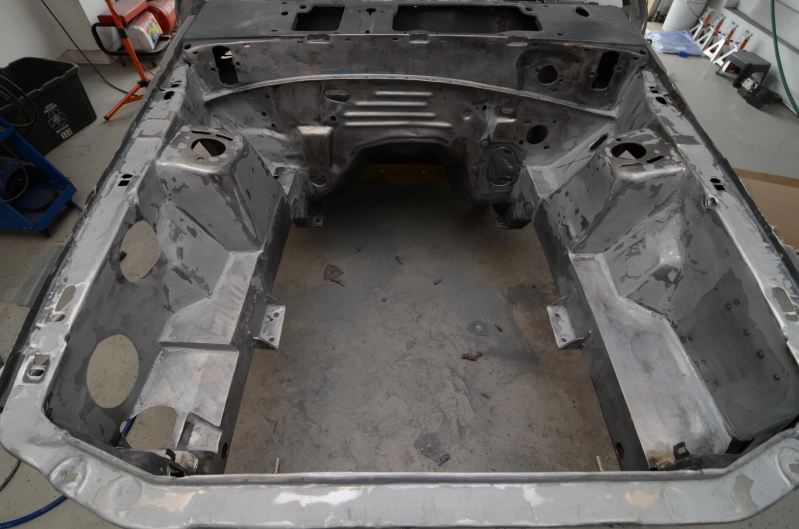
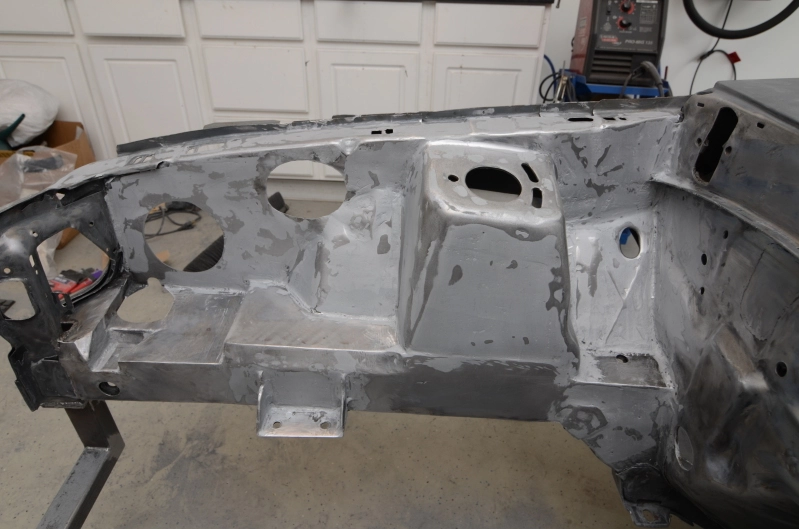
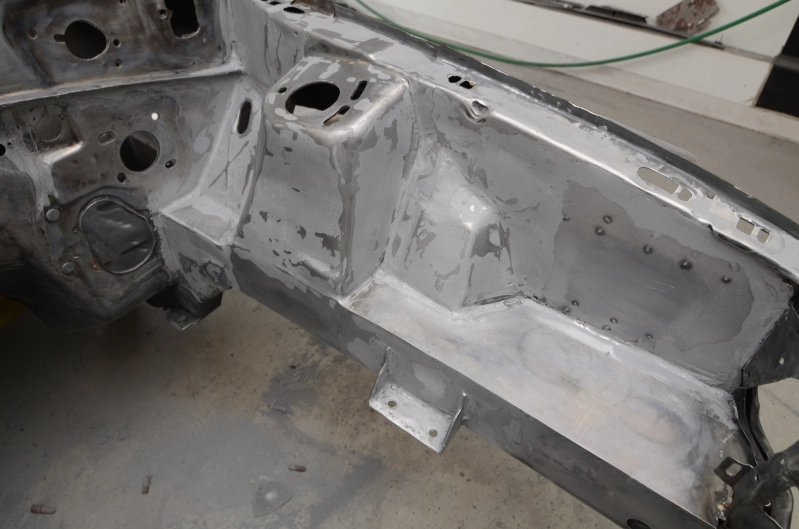
Then I applied a light coat of Evercoat Z-Grip filler. I really liked the way it laid down, although I'm not very good at applying filler neatly. There were a lot of peaks and ridges that I needed to cut down with a chisel.
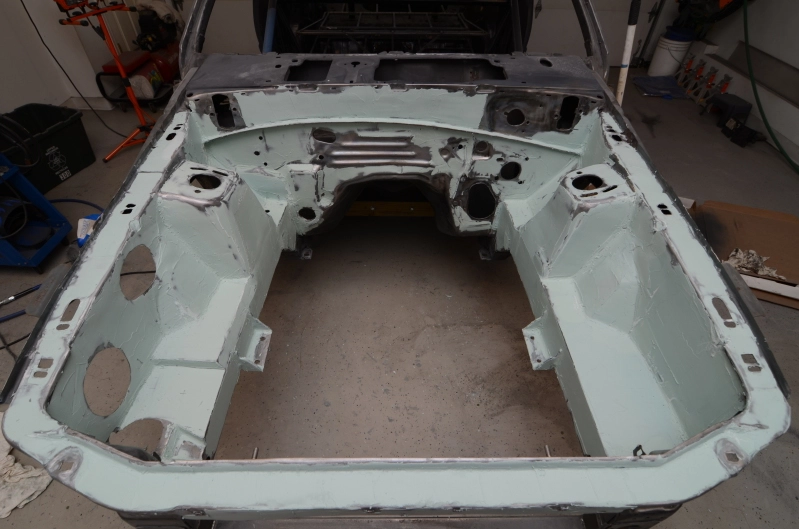
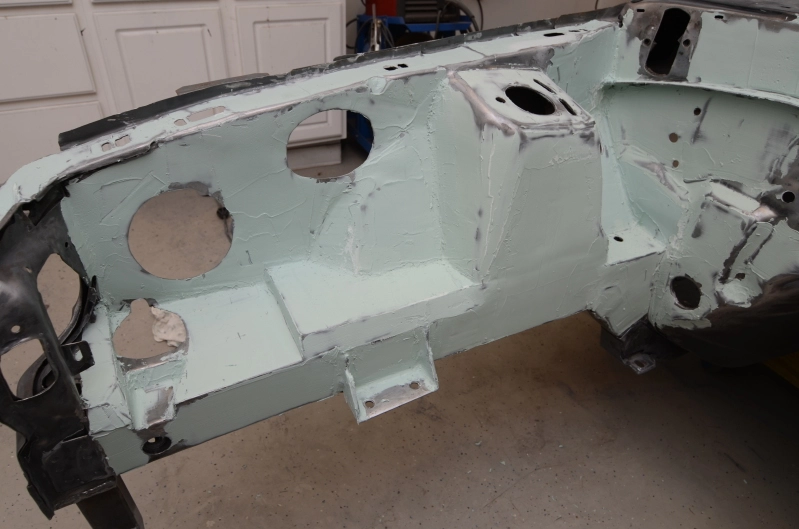
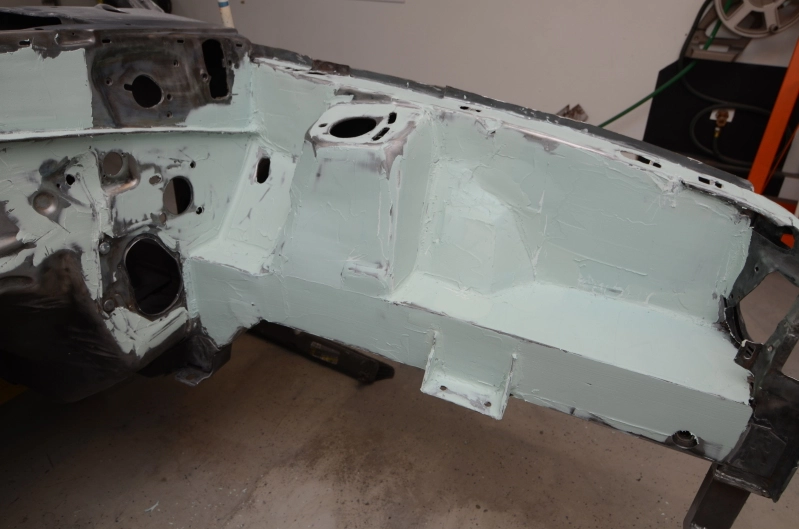
Next I started to block down the coat of filler. Got tired, so there is still more to do before I touch up areas with more filler.
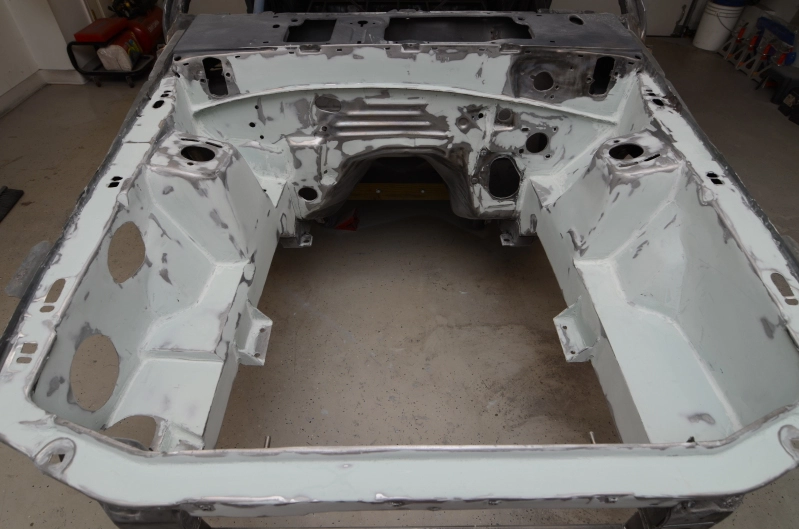
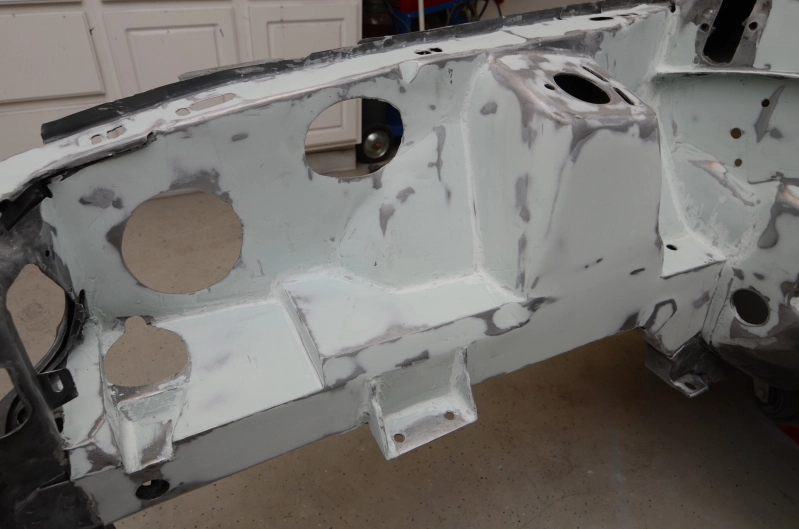
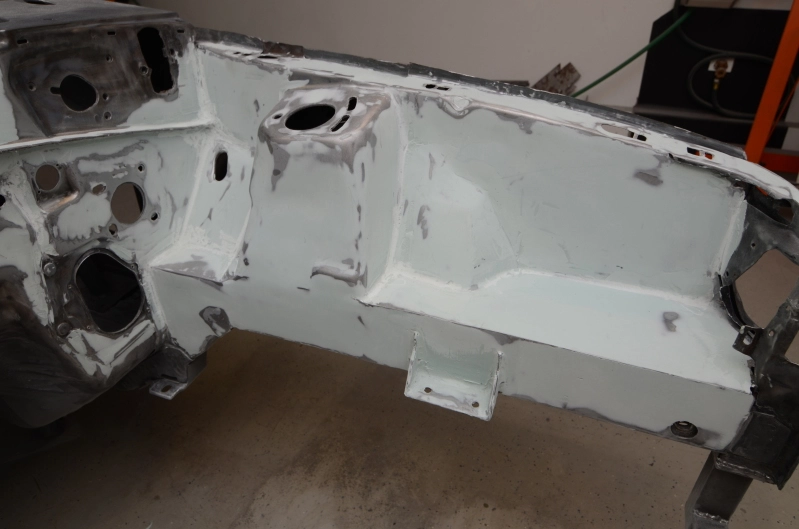
After I'm done with this round of filler work, I think I'm going to spray the bay with a polyester primer. Something like Evercoat G2 featherfill will probably get the job done. It's basically a sprayable filler and I think it will cut down on sanding time for me. I should be able to spray 3-4 coats and then just sand that down with 320 grit. This way it will be ready for my painter to prime without needing any more body work after the primer.
Then I applied a light coat of Evercoat Z-Grip filler. I really liked the way it laid down, although I'm not very good at applying filler neatly. There were a lot of peaks and ridges that I needed to cut down with a chisel.
Next I started to block down the coat of filler. Got tired, so there is still more to do before I touch up areas with more filler.
After I'm done with this round of filler work, I think I'm going to spray the bay with a polyester primer. Something like Evercoat G2 featherfill will probably get the job done. It's basically a sprayable filler and I think it will cut down on sanding time for me. I should be able to spray 3-4 coats and then just sand that down with 320 grit. This way it will be ready for my painter to prime without needing any more body work after the primer.




Thanks man. Knock yourself out. I'm not the first guy around here to use the stuff. Ozz and Almost Stock were kind of the All Metal 'pioneers'.
In all honesty, after laying the Evercoat filler down and realizing how little All Metal I actually used, I proably could have skipped the All Metal completely and just went with regular filler throughout.
I also spoke to my painter today, and he suggested to just shoot the bay with a few coats of urethane primer. It builds nicely and sands easy. It's also going to be what he uses to prime the rest of the car. Best of all it comes in quart form so I don't need to blow $200 on a gallon of the stuff.
In all honesty, after laying the Evercoat filler down and realizing how little All Metal I actually used, I proably could have skipped the All Metal completely and just went with regular filler throughout.
I also spoke to my painter today, and he suggested to just shoot the bay with a few coats of urethane primer. It builds nicely and sands easy. It's also going to be what he uses to prime the rest of the car. Best of all it comes in quart form so I don't need to blow $200 on a gallon of the stuff.


Urethane primer is the bomb. Sprayed my whole car with that stuff. Builds up really thick and is ridiculously easy to sand. You can see highs and lows in it really good, as wellThanks man. Knock yourself out. I'm not the first guy around here to use the stuff. Ozz and Almost Stock were kind of the All Metal 'pioneers'.
In all honesty, after laying the Evercoat filler down and realizing how little All Metal I actually used, I proably could have skipped the All Metal completely and just went with regular filler throughout.
I also spoke to my painter today, and he suggested to just shoot the bay with a few coats of urethane primer. It builds nicely and sands easy. It's also going to be what he uses to prime the rest of the car. Best of all it comes in quart form so I don't need to blow $200 on a gallon of the stuff.
Thanks guys  - that 'all metal' sorta looked like concrete - I will use / try that urethane primer (can I spray that over sanded SEM self etching primer? while grinding down my engine compartment and doing the bodywork I was planning on misting it over to cover the metal / till I was ready for paint )- the weather here is a tic away from breaking - and I can finally start working on it -
- that 'all metal' sorta looked like concrete - I will use / try that urethane primer (can I spray that over sanded SEM self etching primer? while grinding down my engine compartment and doing the bodywork I was planning on misting it over to cover the metal / till I was ready for paint )- the weather here is a tic away from breaking - and I can finally start working on it -
It sands like concrete too! I used an oscillating tool with a hook-n-loop triangle pad on the front. Made very quick work to cut down the high spots.
The urethane primer will be okay over etch primer, it just needs extra time to cure before topcoat, but that's only a few extra hours. Urethane is okay over small bare metal spots, but anything large should be hit with an etch primer first.
I picked up some glazing putty as well to make the crevaces a little easier to fill and sand. Should be slinging some more mud tomorrow and get the bay all ready to go for primer.
The urethane primer will be okay over etch primer, it just needs extra time to cure before topcoat, but that's only a few extra hours. Urethane is okay over small bare metal spots, but anything large should be hit with an etch primer first.
I picked up some glazing putty as well to make the crevaces a little easier to fill and sand. Should be slinging some more mud tomorrow and get the bay all ready to go for primer.
Sounds great - thx - can't wait to 'see' yours in primer .....man I'm only maybe a week or 2 away from really getting to the parts that "I" like to do on mine - but .....I'm having nightmares - b/c I don't know....paint it (engine compartment ) semi gloss black or body color????........I know it's a heated issue......but it's keeping me up at night ......once I spray it a color... if body paint - I'm stuck - but it does look factory........ ........but I was planning on buying a few used fenders for practice and color choice - I plan on making this at least look like a $10k paint job....so color choice for me is critcal ......your so F-n lucky I hate you.....black......black....black....black....ALL black......
........but I was planning on buying a few used fenders for practice and color choice - I plan on making this at least look like a $10k paint job....so color choice for me is critcal ......your so F-n lucky I hate you.....black......black....black....black....ALL black......
I think with your old school engine bay with the carb and big air filter, doing a semi-gloss black would look awesome.
Black black black...sucks sucks sucks to prep for and paint nicely. I know it's going to end up costing me a lot of time to get everything on the car straight as an arrow so I can be happy with the finish. My painter is doing all the blocking on the body itself, so depending if I get raked over the coals for the labor involved with that, painting the rest of the parts may get delayed until the late spring. At least I will have all winter to put it back together. Not like a need a hood, fenders, bumpers, doors, hatch, and ground effects to drive the car around anyway.
Black black black...sucks sucks sucks to prep for and paint nicely. I know it's going to end up costing me a lot of time to get everything on the car straight as an arrow so I can be happy with the finish. My painter is doing all the blocking on the body itself, so depending if I get raked over the coals for the labor involved with that, painting the rest of the parts may get delayed until the late spring. At least I will have all winter to put it back together. Not like a need a hood, fenders, bumpers, doors, hatch, and ground effects to drive the car around anyway.
hahaha.....Thanks!.......oh your sooooo right on the black paint jobs - but if you really want any color to look awesome - it's all in the prep - I think ur right - I'll probably stick to a black - it fits my theme ........I just like to torture myself - like you .....picking a black exterior .....
....I just like to torture myself - like you .....picking a black exterior .....
I think with your old school engine bay with the carb and big air filter, doing a semi-gloss black would look awesome.
Black black black...sucks sucks sucks to prep for and paint nicely. I know it's going to end up costing me a lot of time to get everything on the car straight as an arrow so I can be happy with the finish. My painter is doing all the blocking on the body itself, so depending if I get raked over the coals for the labor involved with that, painting the rest of the parts may get delayed until the late spring. At least I will have all winter to put it back together. Not like a need a hood, fenders, bumpers, doors, hatch, and ground effects to drive the car around anyway.
^^^ This!!.
That final prep to get a perfect finish prior to paint is gonna be the part where you will hate yourself for not going the extra mile. whether it be spending the extra hours/days getting it right yourself, or handing it over to the painter and paying for the finish, (my mistake).....I don't have to tell you how bad you'll hate your paint job if there is one ripple down the sides.
Yours is the high tech opposite of mine (well,...the new owners') It will be the working example for any future build for me if there is ever to be one. (Where have all of the Fairmonts gone?) All of that cool little nit-picky sh it that you are doing will come back in drop jaw points ten fold when this car gets done.
You got that right Mike. I spoke to my painter about the whole project in general, and it's basically going to be a 'pay as you go' kind of deal. Because I'm only getting the shell done now, that's all I'll pay for at the moment. He is also going to call me after every stage of the process so I can approve him moving to the next stage. If I want anything done different (or better) he will let me know the cost to get it done. He knows my expectations and he definitely knows what goes into a painting a black car, so I'm confident in his abilities to meet my demands.
As for the rest of the body parts, I'm going to take them to him to have primed with a high build urethane primer. I'll then take the parts back and block everything myself to save on those labor costs. He said he will let me know if I didn't do a good job blocking and let me know how much it would be to fix my handywork before he primes again and topcoats. I'm hoping I won't give him much 'repair' work to do. We'll see...
As for the rest of the body parts, I'm going to take them to him to have primed with a high build urethane primer. I'll then take the parts back and block everything myself to save on those labor costs. He said he will let me know if I didn't do a good job blocking and let me know how much it would be to fix my handywork before he primes again and topcoats. I'm hoping I won't give him much 'repair' work to do. We'll see...
Similar threads

- Replies
- 37
- Views
- 62K

Progress Thread
'67 Mustang 351C > C4 trans > Clueless 21 year old
- Replies
- 5
- Views
- 3K
- Replies
- 3
- Views
- 15K


- Replies
- 1
- Views
- 10K

- Replies
- 2
- Views
- 3K