Progress Thread Komo's 1990 GT - Parts Gathering Purgatory & Home Remodel

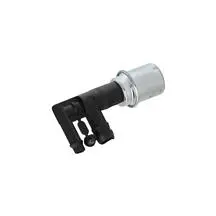
You're talking about this guy:

1743481743394.webp


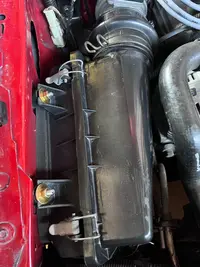
I just put off the plastic piece.

I don't know which cars use the extra port or what it's for.


This freaking bulldog is sitting next to me, whining about some damned thing. I need to teach him some basic English. :chin
I think he waits until he hears me typing...
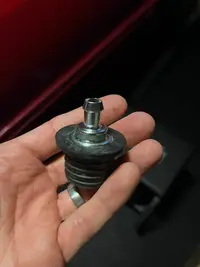
Oh, another idiot moment for me. Yes before I saw your post I did just that… the part came pre assembled so I thought it was like one piece but you’re correct I just yanked the top part off:

IMG_8377.webp

All makes sense now.

On a side note there is a ton of old caked on oil all around the PCV so hopefully replacing it helps.
 
Oh, another idiot moment for me. Yes before I saw your post I did just that… the part came pre assembled so I thought it was like one piece but you’re correct I just yanked the top part off:

IMG_8377.webp

All makes sense now.

On a side note there is a ton of old caked on oil all around the PCV so hopefully replacing it helps.


You probably need to replace that screen. A long [wood screw] usually helps to get the one one out along with some brake cleaner if it's [really] jammed in there.

Plan on changing the oil if you end up going this route. If you don't run the engine, you can leave the filter be.
 
You probably need to replace that screen. A long [wood screw] usually helps to get the one one out along with some brake cleaner if it's [really] jammed in there.

Plan on changing the oil if you end up going this route. If you don't run the engine, you can leave the filter be.
I have the screen and valve. I have a magnet thing I’ll try first, then one of those long bendy claw things, then I’ll go to more drastic measures if those don’t work.
 
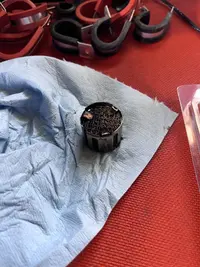
Got the old mesh screen out:

IMG_8380.webp

Looks like crap.

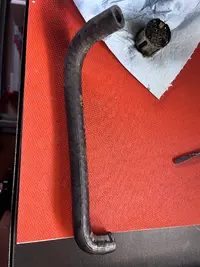
Got the tube out, this is the tube I’ll cut in half and put the one way check valve into right?


IMG_8381.webp

Tube looks great, BUT it’s like bone dry inside which tells me the PCV wasn’t doing its job? Or do I have that wrong?

Now the hard part will be trying to clean the surface where the grommet goes without getting gunk all down into the valley. Oh and the bendy claw tool was key to getting the mesh screen out.
 
Just out of curiosity, why wouldn't you want a one way check valve also from the Valve Cover oil filler neck to Throttle Body hose?

The subject of the PCV  system could be an entire thread alone. The short of it is dirty air gets drawn out of the crankcase by that tube you just removed and sucked into the intake to be reburned. (The PCV valve  is only there to prevent an intake backfire from entering the crankcase that may contain gas vapors.)

That hose is connected to the intake  behind the throttle blade, so engine vacuum is constantly pulling on the crankcase.

The idea is to draw fresh air  through the crankcase. Not just to pull vacuum on it. So that fresh air has to come from somewhere. As long as the engine is creating vacuum, fresh air is pulled  into the valve cover by the tube attached to the TB in front of the throttle blade. That air has already been drawn through the MAF so it is metered. It's getting burned too. It's just taking a trip through the engine block first. Keep in mind that valve cover tube is connected between the MAF and TB from the factory and needs to be that way after you install the Paxton.

When you do inatall your Paxton you'll remove the tube from the throttle body and cap the nipple because now that area will be pressurized (Boost pressure would pump into the valve cover and crankcase). Then that tube on the valve cover needs to get connected again between the MAF and TB but in a non boosted area. That is your SC inlet pipe.

On a centrifugal SC car boost pressure closes the PCV valve and your new check valve. During this time crankcase pressure builds. It can no longer vent through the PCV tube because boost pressure closed it. The only place is has to vent is out the valve cover tube that is plumbed into the SC inlet.

For that reason I'd sugest installing either a catch can or at the least a filter of some sort in that line. Your kit might come with a little fuel filter for that reason. If you're keeping it 5psi or so that should be all you really  need to do.
 
Last edited:
The subject of the PCV  system could be an entire thread alone. The short of it is dirty air gets drawn out of the crankcase by that tube you just removed and sucked into the intake to be reburned. (The PCV valve  is only there to prevent an intake backfire from entering the crankcase that may contain gas vapors.)

That hose is connected to the intake  behind the throttle blade, so engine vacuum is constantly pulling on the crankcase.

The idea is to draw fresh air  through the crankcase. Not just to pull vacuum on it. So that fresh air has to come from somewhere. As long as the engine is creating vacuum, fresh air is pulled  into the valve cover by the tube attached to the TB in front of the throttle blade. That air has already been drawn through the MAF so it is metered. It's getting burned too. It's just taking a trip through the engine block first. Keep in mind that valve cover tube is connected between the MAF and TB from the factory and needs to be that way after you install the Paxton.

When you do inatall your Paxton you'll remove the tube from the throttle body and cap the nipple because now that area will be pressurized (Boost pressure would pump into the valve cover and crankcase). Then that tube on the valve cover needs to get connected again between the MAF and TB but in a non boosted area. That is your SC inlet pipe.

On a centrifugal SC car boost pressure closes the PCV valve and your new check valve. During this time crankcase pressure builds. It can no longer vent through the PCV tube because boost pressure closed it. The only place is has to vent is out the valve cover tube that is plumbed into the SC inlet.

For that reason I'd sugest installing either a catch can or at the least a filter of some sort in that line. Your kit might come with a little fuel filter for that reason. If you're keeping it 5psi or so that should be all you really  need to do.
Awesome that explains a lot thanks for writing it all out. Ya I was thinking the VC hose was venting OUT to the TB, not the other way around.

I’m sure all this will make more sense when I see parts in front of me.
 
  • Like
Reactions: nicholase
Awesome that explains a lot thanks for writing it all out. Ya I was thinking the VC hose was venting OUT to the TB, not the other way around.
That's the part that I think trips most people up. The hose that goes between the VC and TB behaves differently during different operating conditions. Remember...
As long as the engine is creating vacuum, fresh air is pulled  into the valve cover by the tube attached to the TB in front of the throttle blade.

The engine isn't always creating vacuum. In a NA car when you step on the throttle engine vacuum drops. During WOT there is no engine vacuum. Without engine vacuum there is no suction on the PCV hose. So it is no longer  pulling air through the crankcase via the valve cover tube.

During those conditions (no engine vacuum) pressure in the crankcase exceeds the atmospheric pressure in the intake. Crankcase vapors will find the path of least resistance and  push up through the PCV valve and VC hose  into the TB. That's how that sludge gets there. Once you let off the throttle the throttle blade closes, engine vacuum is created and the PCV system returns to normal operation.

It works pretty much the same in a centrifugal SC car except during no vacuum conditions boost pressure is now present in the intake and the PCV tube is forced closed.
 
Last edited:
That's the part that I think trips most people up. The hose that goes between the VC and TB behaves differently during different operating conditions. Remember...


The engine isn't always creating vacuum. In a NA car when you step on the throttle engine vacuum drops. During WOT there is no engine vacuum. Without engine vacuum there is no suction on the PCV hose. So it is no longer  pulling air through the crankcase via the valve cover tube.

During those conditions (no engine vacuum) pressure in the crankcase exceeds the atmospheric pressure in the intake. Crankcase vapors will find the path of least resistance and  push up through the PCV valve and VC hose  into the TB. That's how that sludge gets there. Once you let off the throttle the throttle blade closes, engine vacuum is created and the PCV system returns to normal operation.

It works pretty much the same in a centrifugal SC car except during no vacuum conditions boost pressure is now present in the intake and the PCV tube is forced closed.
Everything you are saying makes total sense when I read it… I just need to like reread and engraine in my head. But thanks again for spending your time explaining it out!
 
  • Like
Reactions: nicholase
I know these micro-updates don't mean much to most readers, but i'll take little wins as I progress through even the easiest of jobs. In my RLCA replacement, last night i got the rear sway bar removed and got all the LCA bolts loosened or the nuts taken off in prep to actually do the replacements. Now all i need to do is lift the rear of each LCA with a jack (one side at a time), remove the bolt completely, lower and remove the spring, then remove the front bolt and finally remove the entire control arm. Then reverse with the MM ones.

I cleaned the opening and got the new PCV mesh screen and grommet/valve in... just waiting on the one-way check valve @nicholase recommended to come in before putting the hose back on.

and in my effort to slowly hoard parts i ordered an ARP head bolt kit and high volume oil pump. Since i plan on driving the car more prior to actually starting the supercharger install, i ended up ordering that foam gasket that goes around the intake filter housing, the two rubber bushings/bolts that hold the intake housing to the fender (mine crumbled apart when removing the intake assembly to do the spark plugs) and i cleaned my K&N filter.

I also ordered the Eastwood fender roller (it was on sale), so i can properly finish rolling my fenders and not chew up my new Continental tires.
 
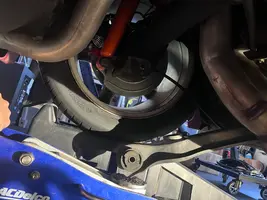
Ok toddler napping, started on the drivers side LCA. Got the old one out, fairly easy task. Got the new one in, having a bit of trouble getting the rear bolt to line up:

Old one coming out:

IMG_8397.webp

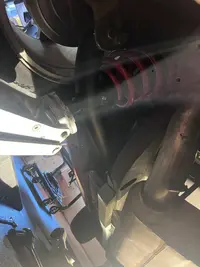
New one going in:

IMG_8398.webp

Kinda hard to see with my spot light shining. I’m like 99% certain I have the correct side LCA for drivers side based on MM’s instruction photo. I can get the bolt in on one side but am having an issue getting it to go all the way through… it’s like the entire LCA needs to move rearward an 1/8th of an inch.
 
Ratchet strap. Sounds like your saying the axle needs to come forward a bit. Put a ratchet strap from your axle to something sturdy in front of it and clickity clickity until it all lines up.
Does the rear joint pivot? Just odd I can get one bolt through all the way where I can feel the head of the bolt from the other side, but the hole on the other side is just off slightly. Either way I’ll play with it a little more, I know it will eventually line up.