
Navigation
Trending media
-
-
-
Media 'Last Call Racing Cammed All Motor S197 Walk Around - Comp 127600' in category 'Sound Clips'
- LastCallRacing
Comments: 0 -
 Media 'beastie boys - Time to Get Ill - Licensed To Ill' in category 'Juke Box'
- Noobz347
Comments: 0 -
 Media 'Mustang's & Friends Car Cruise' in category 'Mustang Compilation Videos'
- Speedstang302
Comments: 1
Imported Item
-
 Grabbin' Asphalt
 - Jul 4, 2013
- 0 Comments

Imported Item
-
Grabbin' Asphalt
- Jul 4, 2013
- 0 Comments


Fox Mustang Lower Door Hinge Tension Spring Install
-
 Jarrod@latemodel
 - Jun 28, 2013
- 0 Comments
Want more info on Mustang Door Repair? Click here - http://www.latemodelrestoration.com/products/83-93-Mustang-Lower-Door-Hinge-Spring-Install-Video
1983-93 MUSTANG LOWER DOOR HINGE TENSION SPRING
Part # LRS-23504A
Brand: 5.0Resto - Ford Original Tooling
Fits: Mustang LX, GT
Years: 1983 (83) - 1984 (84) - 1985 (85) - 1986 (86) - 1987 (87) - 1988 (88) - 1989 (89) - 1990 (90) - 1991 (91) - 1992 (92) - 1993 (93)
Tired of your Fox Body Mustang door not staying open when you open it? Well you could have a bad door check spring (tension spring). In this video Jmac walks you through the simple process of replacing your door hinge spring. Our 5.0Resto door spring is a direct replacement and is a made in the USA part that features Ford Original tooling! Includes spring face plate and backing plate. Don't forget to replace your lower door hinge roller while replacing the door spring!
LatemodelRestoration.com

05-09 Mustang GT500 Strut Mounts, Ball Joints & Tie Rod Ends
-
Jarrod@latemodel
- Jun 28, 2013
- 0 Comments
Shop all your 05-14 Mustang Suspension Parts here:
http://www.latemodelrestoration.com/products/05-09-Mustang-Tie-Rods-Ball-Joint-Strut-Mounts
05-14 Mustang Inner & Outer Tie Rod Ends and Lower Ball Joints
Worn suspension components can lead to excessive tire wear patterns and that annoying suspension pop when turning. The combination of everyday driving stresses mixed with the occasional spirited driving can cause your S197 Mustang's suspension to wear quicker than you expect. Rest assured LatemodelRestoration.com carries all the suspension parts you need to get your Stang back in alignment!
05-14 Mustang GT500 Strut Mounts M-18183-C
These super popular strut mounts are a must when installing a new set for Mustang lowering springs or just replacing a set of worn factory strut mounts. The Ford Racing GT500 Strut Mounts feature improved materials and design to provide exceptional performance and handling. Don't forget we carry Heavy Duty Race Inspired Strut Mounts from Steeda for the more race duty Pony.
These suspension parts are designed for the following models and years
Ford Mustang V6 GT GT500 Bullitt Boss 302
2005 (05) - 2006 (06) - 2007 (07) - 2008 (08) - 2009 (09) - 2010 (10) - 2011 (11) - 2012 (12) - 2013 (13) - 2014 (14)
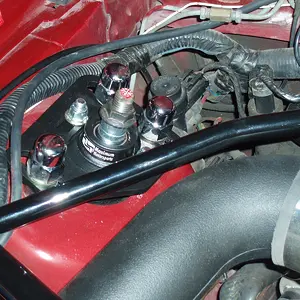
Maximum Motorsports Caster Camber Plates
-
 90GTFIVO
 - Jun 17, 2013
- 0 Comments
Another view of passenger side
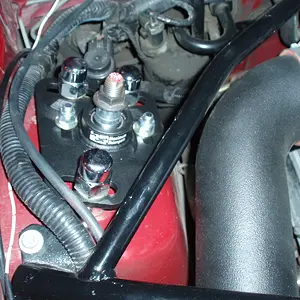
Maximum Motorsports Caster Camber Plates
-
90GTFIVO
- Jun 17, 2013
- 0 Comments
Installed on 6/8/2013 (passenger side)
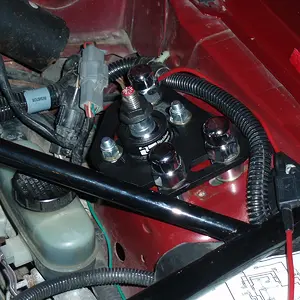
Maximum Motorsports Caster Camber Plates
-
90GTFIVO
- Jun 17, 2013
- 0 Comments
Another view of driver side
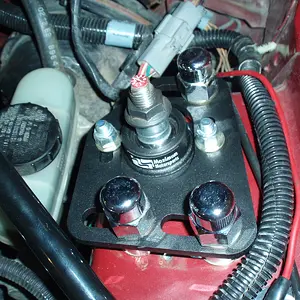
Maximum Motorsports Caster Camber Plates
-
90GTFIVO
- Jun 17, 2013
- 0 Comments
Installed 6/8/2013. Great product! (Driver side)

Imported Item
-
 wemay
wemay - Jun 16, 2013
- 0 Comments
2012 Mustang GT Premium-Performance White
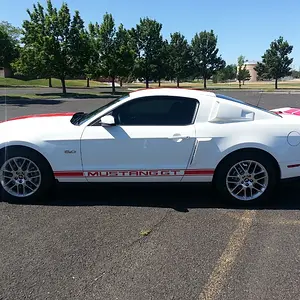
Imported Item
-
wemay
- Jun 16, 2013
- 0 Comments
2012 Mustang GT Premium-Performance White

Imported Item
-
wemay
- Jun 16, 2013
- 0 Comments
2012 Mustang GT Premium-Performance White
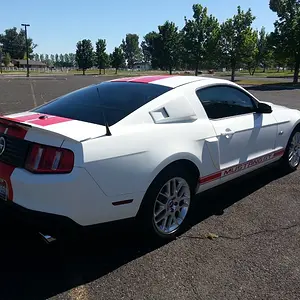
Imported Item
-
wemay
- Jun 16, 2013
- 0 Comments
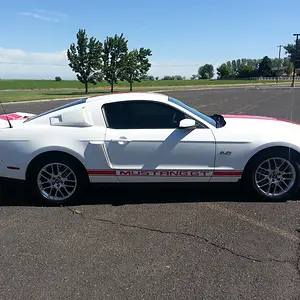
2012 Mustang GT Premium-Performance White
Imported Item
-
wemay
- Jun 16, 2013
- 0 Comments
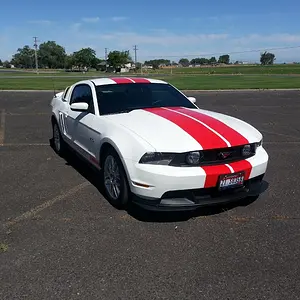
2012 Mustang GT Premium-Performance White
Imported Item
-
wemay
- Jun 16, 2013
- 0 Comments
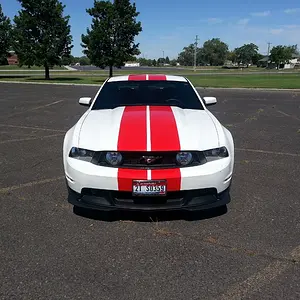
2012 Mustang GT Premium-Performance White

Mustang Coyote Swap: 5.0L Engine Install
-
 MRaburn
 - Jun 14, 2013
- 0 Comments
Want more information about your Mustang Coyote Swap - click here:
http://www.latemodelrestoration.com/products/Mustang-Coyote-Swap-Project
Well Jmac said it best, It's D-day here at LatemodelRestoration.com. We will be installing the 5.0L Ford Coyote motor into our SN95 Cobra. This Coyote swap is gettting closer to being fired up for the first time! Follow along in the video as Jmac walks you through our install procedure. We decided to keep the factor k member for this project Mustang.
Be sure to subscribe and get all the latest updates on our Project Coyote Swap!
See previous parts of this build:
Project Coyote Swap: Intro
http://www.latemodelrestoration.com/products/Mustang-Coyote-Swap-Project
Project Coyote Swap: Ford Racing Controls Pack and Fuel System
http://www.latemodelrestoration.com/products/Mustang-Coyote-Swap-Project-Control-Pack-Fuel
Project Coyote Swap: BBK Headers, Oil Pan & Clutch Assembly
http://www.latemodelrestoration.com/products/Mustang-Coyote-Swap-Headers-Oil-Pan-Clutch-Install

Mustang Coyote Swap: Brakes, Power Steering & Start Up
-
MRaburn
- Jun 14, 2013
- 0 Comments
It is finally time to turn the key and start our Coyote Swap Project. See more here: http://www.latemodelrestoration.com/products/Mustang-Coyote-Swap-Start-Up-Brakes-Power-Steering
In the video Jmac walks you through the final steps we had to complete before we could start our Bondurant Cobra Coyote Swap. He quickly rehighlights the BBK Coyote Swap headers, off road x pipe and the dumped cat back system we have in place. He also highlights the Ford Racing aluminum driveshaft, Quicktime bellhousing, Stifflers tubular crossmembers and other driveline items we used in the swap. Lastly Jmac hits on some of the most critical parts of this Mustang Coyote swap - the brake system, oil system and the power steering system.
To retain the sway bar, we were forced to relocate the oil filter and find another solution for power steering pump bracket. We used the Ford Racing Remote Oil Filter adapter, M6881M50, to accomplish moving the oil filter. We tried to use the Ford Racing Power Steering Pump Bracket, M8511M50BR, but unfortunately it would not clear the sway bar. So we turned to the SVE accessory brackets to give us all needed clearance. It even allows for us to easily keep the hydroboost system by putting the power steering pump in the factory 96-04 location.
The engine wiring harness plugged right into the Ford Racing Controls Pack with no issue. Next up we connected our braided fuel line to the fuel rail with the help of our 5.0L fuel rail adapter fitting, RUS-640853. With that done, we now had the brakes hooked up, the engine plugged into the ecu, the fuel connected to the motor. Next on the list is connecting the clutch assembly to the pedal. We reused the existing clutch cable and routed it around the new 5.0L engine. We also addressed the coolant lines to hook the engine up to the radiator. The only thing missing at this point is electrical power. You will have to use a battery relocation kit to move the battery to the trunk.
With that complete the LatemodelRestoration.com Mustang Coyote Swap officially runs! Now it is time get this Cobra to the dyno to she how much extra power we are making!

Imported Item
-
Grabbin' Asphalt
- Jun 13, 2013
- 0 Comments

Imported Item
-
Grabbin' Asphalt
- Jun 13, 2013
- 0 Comments
Imported Item
-
Grabbin' Asphalt
- Jun 13, 2013
- 0 Comments

Imported Item
-
Grabbin' Asphalt
- Jun 13, 2013
- 0 Comments
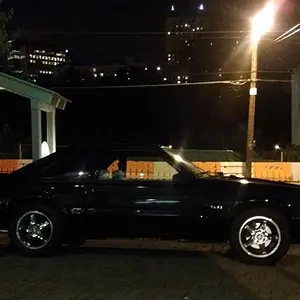
Imported Item
-
Grabbin' Asphalt
- Jun 13, 2013
- 0 Comments

Getting there little by little
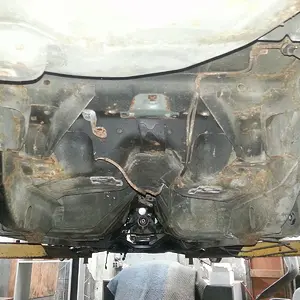
Out with the old