1965 Fastback Mustang Project

We have a new rear panel so Brian removed the old one. This will save a lot of time.

282.webp


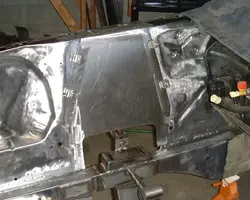
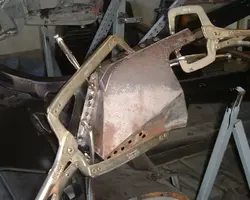
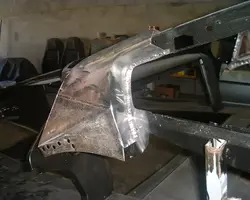
After the panel was removed he had to make a patch for the front trunk floor

283.webp


284.webp


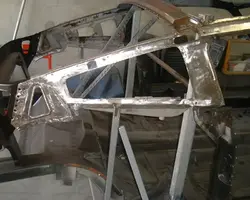
After Brian cleaned up the plug welds

285.webp
 
Now that the rear panels fit it is time to prep the frame rails. As Brian was cleaning the front trunk floor he found a few rust pin holes. He cut out the bad area and made three patches one at a time to keep it from warping the edge that hangs down.

292.webp


Brian ground all the welds on the patch than brushed a heavy coat of epoxy in the frame rails

293.webp


299.webp
 
Left side trunk floor welded to the rear frame rail

300.webp


New rear panel with package tray test fitted and also the quarters and taillight panel installed before the rear crossmember is welded. We wanted to make sure everything lines up in the rear before the rear crossmember is installed.

302.webp


303.webp


304.webp


Rear crossmember welded to the trunk floor and rear frame rail

305.webp


306.webp


Rear trunk floor prepped for epoxy primer

307.webp


Epoxy primed

308.webp
 
Rusty, question for you

The cowl area, how you put the patches in the holes, how much time did that take? And where does the heater draw its air from now?

I like that look, you got me thinking about it.
 
The cowl area, how you put the patches in the holes, how much time did that take? And where does the heater draw its air from now?

I like that look, you got me thinking about it.

Brian makes a pattern out of poster board than transfers to steel and butt welds it using magnets to hold in place or you can use these clamps I got on ebay

39.webp


The car will have AC and with the kit they supply a blockoff for the fresh air.
 

Attachments

  • 39.webp
    39.webp
    60.6 KB · Views: 204
Brian made a few patches than cleaned everything and epoxy primed

318.webp


320.webp


Starting to put the puzzle back together

321.webp


322.webp
 

Attachments

  • 318.webp
    318.webp
    51.7 KB · Views: 218
  • 322.webp
    322.webp
    43.4 KB · Views: 217
  • 321.webp
    321.webp
    58 KB · Views: 197
  • 320.webp
    320.webp
    48.9 KB · Views: 189
Brian has to make or patch the inner structure since it is not available.

330.webp


332.webp


334.webp


Next epoxy before making another patch

336.webp
 

Attachments

  • 330.webp
    330.webp
    38.1 KB · Views: 202
  • 332.webp
    332.webp
    51.3 KB · Views: 202
  • 334.webp
    334.webp
    49.6 KB · Views: 189
  • 336.webp
    336.webp
    46.7 KB · Views: 187