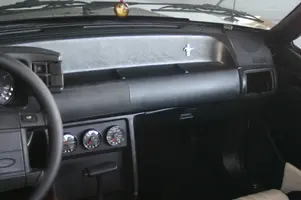
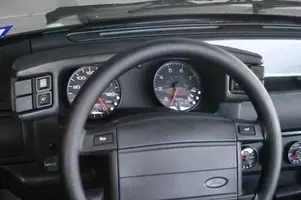
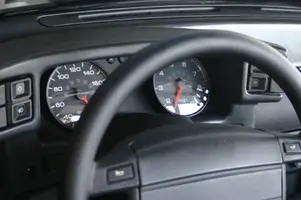
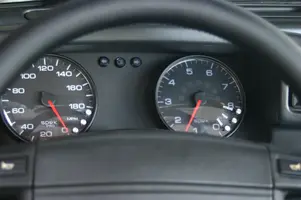
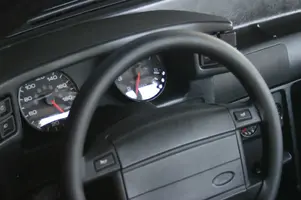
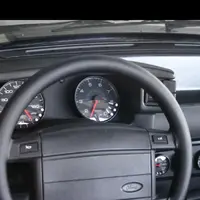
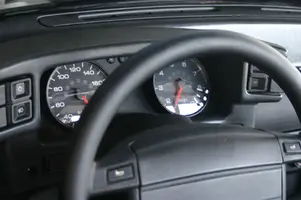
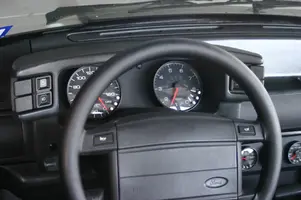
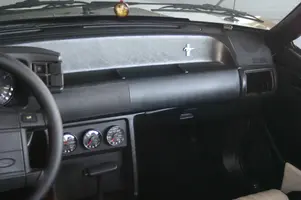
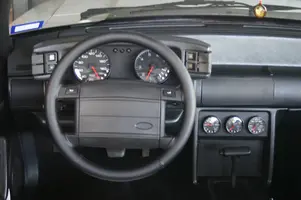
5" inch gauges on fox body 1987-1993

wallyinc

Member
Jul 16, 2025
11
20
13
La Joya, TX
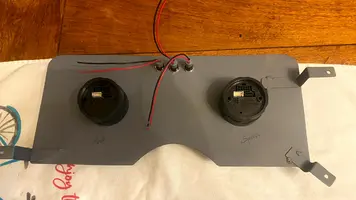
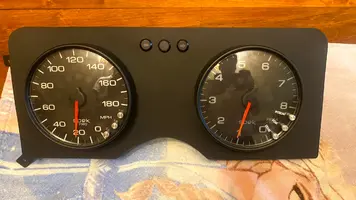
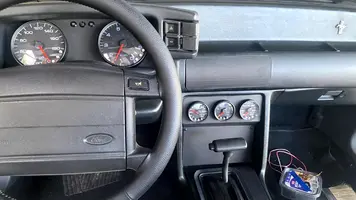
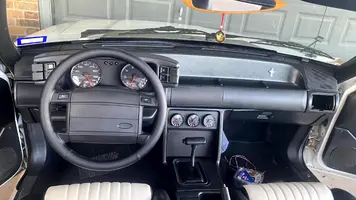
New Ford owner here. Purchased a 91 convertible on April 15, 2025 (not running at the time) and the gauges were beaten to death and trashed. I looked around at different options and wasn't too crazy about anything on the market. Looked and searched to see if anyone had done 5" gauges on an 87-93 and couldn't find anything. I decided to give it a go, and it turns out they do fit and look pretty cool! I figured since I was doing an ac delete (I drive the car with the top down 100% of the time) I should try to do a custom setup. Did some cleaning up of the wiring, audio and steering wheel work while I was at it too.

This is a google drive link to all the photos of the install in case you'd like to see more or do the same.


Attachments

  • IMG_2374.webp
    IMG_2374.webp
    149.3 KB · Views: 77
  • IMG_2377.webp
    IMG_2377.webp
    181.9 KB · Views: 78
  • IMG_2382.webp
    IMG_2382.webp
    229.5 KB · Views: 85
  • IMG_2383.webp
    IMG_2383.webp
    155.7 KB · Views: 78
  • IMG_2388.webp
    IMG_2388.webp
    132.5 KB · Views: 88
  • IMG_2389.webp
    IMG_2389.webp
    145.9 KB · Views: 73
  • IMG_0793.webp
    IMG_0793.webp
    60.4 KB · Views: 79
Last edited:
  • Like
Reactions: Noobz347 and 85GT4V
Wow!


The few images you posted here do [not] tell the story. hehe

That is a lot of really nice work that you put into this.

My only question: Did you diagram it as you went?


Here is the real enticement to get these guys to go look at the rest of your images:

1752772044026.webp
 
  • Like
Reactions: wallyinc and 85GT4V
Thank you, gentleman. I will try to see if there is a way I can convert the photos from iphone format to another usable format for this forum in the next week or so. This car is an absolute blast! That being said it's sole purpose is to take my kids out for icecream on the weekends :)
 
  • Like
Reactions: limp
  • Like
Reactions: wallyinc
Here is Pt. 1 (of six) of what it took to put 5" gauges in my fox body. I'll write more about the car later, but I figure this is worthwhile as I havne't seen anyone else do this. I am using Autometer/SPEK gauges. They fit with the correct angle and look great!... but there is zero wiggle room. Each of the gauges has about 2mm of space between itself and the dash bezel, that's why the welding part of this project was so crutial. Had to find that perfect angle to get them to fit just-so.


B78442EA-AB20-4CAC-91AC-0F220CD1AFB4.webp

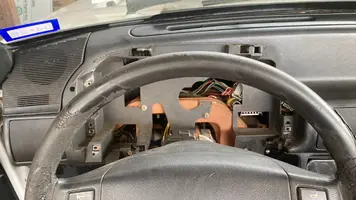
First I removed the dash bezel to use some CAD (cardboard aided design)

IMG_9269.webp


This is what I was working with orginally :o/


IMG_9273.webp


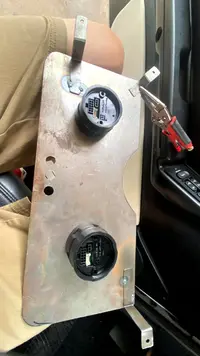
Next I used the cardboard template to cut a matching pattern in steel.


IMG_9323.webp


Next I used the card board template to make sure the gauges fit and more importantly looked good too!

IMG_9330.webp


Blinker and highbeam are from amazon. well worth the 10$ for the set.


IMG_9340.webp


Next I used a hole saw to cut the holes for the gauges.

IMG_9342.webp


With ac and radio delete i put oil, fuel and water temp in the center console.

IMG_9341.webp


another look

IMG_9329.webp


This is my volt meter which will be pushputton switch activated. In place of where the dimmer switch was, found this on amazon and required VERY little filing to fit in.

IMG_9394.webp


This was the hard part. Getting the angle just PERFECT for the gauges to fit. This required a lot of cutting, marking and measuring.

IMG_9395.webp


I used vicegrips to secure the metal tabs that needed to be weleded in place.
IMG_9397.webp

Tig (tack) welding the metal tabs into place.

IMG_9396.webp


Not perfect, but they'll get the job done!

IMG_9399.webp


And they fit!!!! :0))))))

IMG_9402.webp


Here's a mockup of what it shoudl look like when it's "done".
 

Attachments

  • IMG_9408.webp
    IMG_9408.webp
    254.2 KB · Views: 51
  • IMG_9401.webp
    IMG_9401.webp
    195.7 KB · Views: 53
  • IMG_9410.webp
    IMG_9410.webp
    299.9 KB · Views: 56
  • IMG_0220.webp
    IMG_0220.webp
    356 KB · Views: 56
  • IMG_9317.webp
    IMG_9317.webp
    243 KB · Views: 49
The next step was to remove the dash and all the uneccessary stuff under it. This car will be driven with the top down 100% of the time, so no use having dead weight. The stero was also trashed and so I deceded to add a blue tooth unit and small 4 channel amp instead. this was next after knowing my new gauges would fit.
IMG_9508.webp


There goes the console. At this point I've already had the dash vents removed and covers made by www.carchains3d.com (which are awesome by the way).

IMG_9516.webp


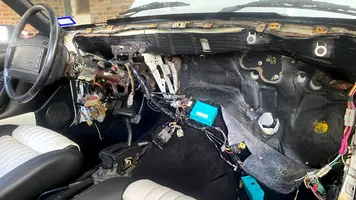
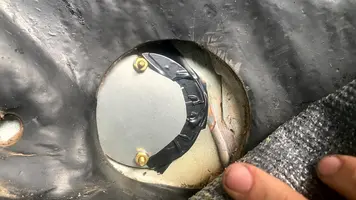
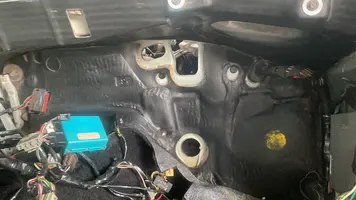
Lots of deteriorating factory cloth electrical tape and now big holes in the firewall.


IMG_9515.webp


All the stuff that WONT be going back into the car :)


IMG_9514.webp

Took the main hvac unit to the restroom scale just for kicks

84E5B827-6B4D-4328-ACAA-126893EA735B.webp


More CAD

IMG_9855.webp


Used left over sheetmetal from an old cd disc changer to make a cover for the cowl vent

IMG_9856.webp


my daughters artwork will forever be preserved on the firewall too.

IMG_9854.webp


All three main holes covered at this point.

IMG_9903.webp


This is a piece of recalimed wood a fellow teacher gave me at school for the project. I just tried to maximize the space i had under there, i didn't really know how everything would fit at this point.
IMG_9904.webp


But maybe something like this???
IMG_9905.webp


Removed all the factory cloth tape and recovered and cleaned wiring with 3m electrical. You can see the firewall holes closed off here too
 

Attachments

  • IMG_9906.webp
    IMG_9906.webp
    366.7 KB · Views: 56
  • IMG_9857.webp
    IMG_9857.webp
    284.3 KB · Views: 66
  • ED1D97DE-1987-468A-9660-0C6D3E4ACAC2.webp
    ED1D97DE-1987-468A-9660-0C6D3E4ACAC2.webp
    472.4 KB · Views: 56
  • BCEABD77-AA25-40EE-8AB0-2C9AAB04F584.webp
    BCEABD77-AA25-40EE-8AB0-2C9AAB04F584.webp
    424.6 KB · Views: 53
IMG_0001.webp


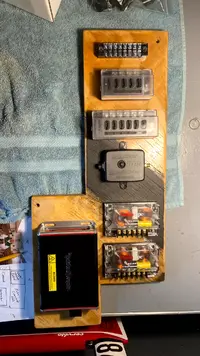
After a bit of sanding and clearcoat this is where my electronics will we mounted to the firewall

IMG_0004.webp


Used high temp header paint because it yellows over time and gives the wood a nice color ( i found this out by accident on another project)

IMG_0005.webp


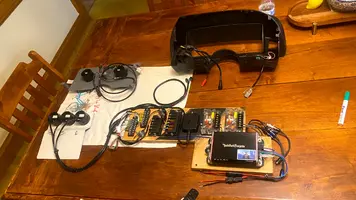
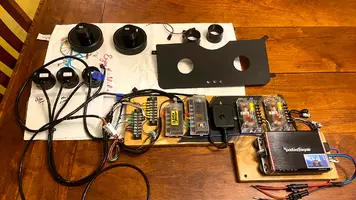
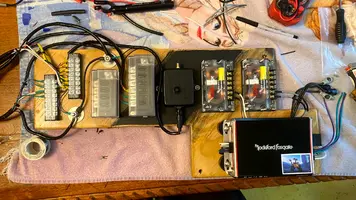
This is what the layout of my electronics will look like. I added in two new fuse boxes (amazon) so I wouldn't have to piggyback off of the stock fusebox for anything. One is 12 power at all times, the other is 12v switched. The car although it didnt' have a working stereo it had aftermarket speakers on all six locations so I decided to use those with some cheapo amazon crossovers with a 400w 4 channel RF amp. nothing crazy, just to make enough noise to hear at highway speeds with the top down.

IMG_0207.webp


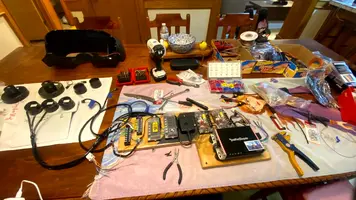
My wife so kindly gave me permission to take over the dining room table for a week as i wired everything up, everything is soldered with shrink tubing.

IMG_0209.webp


A lot of this wiring is recycled from old projects. There are plugs running to everything in case i need to remove something to work on it.
IMG_0226.webp


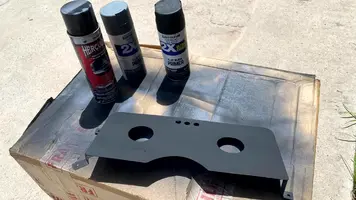
this is what the gauges will look like. Painted the steel sheetmetal with primer, then bedliner, then matte black.

IMG_0234.webp


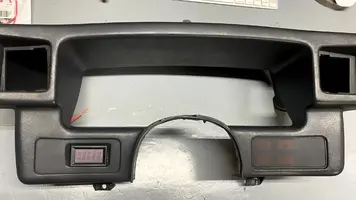
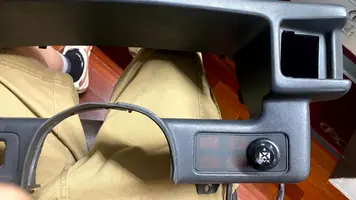
Here is what the dash bezel will look like with the amazon volt meter and bluetooth radio knob. Again, all plug and play.

IMG_0236.webp


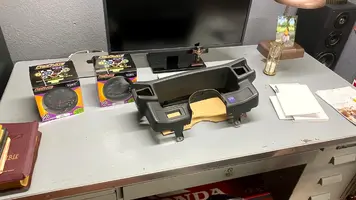
this is the final! ready for install. I'm happy with the result at this point :)

IMG_0238.webp


Labeled all the shrink tubing just to be overy cautious. Also wrote/drew and made a video of where all the wires go.

IMG_0239.webp


again, marked EVERYTHING!

IMG_0240.webp


One last view before install.
 

Attachments

  • IMG_0237.webp
    IMG_0237.webp
    330.1 KB · Views: 61
  • IMG_0230.webp
    IMG_0230.webp
    276.3 KB · Views: 52
  • IMG_0229.webp
    IMG_0229.webp
    231.9 KB · Views: 53
  • IMG_0221.webp
    IMG_0221.webp
    405.5 KB · Views: 52
  • IMG_0216.webp
    IMG_0216.webp
    245.8 KB · Views: 51
  • IMG_0208.webp
    IMG_0208.webp
    478.3 KB · Views: 56
  • IMG_0006.webp
    IMG_0006.webp
    447.4 KB · Views: 48
  • Like
Reactions: gkomo and 85GT4V
IMG_0323.webp


The "mother board" bolted up well and didn't look so bad either!


IMG_0324.webp

Here it is before I started to hardwire it into the car.

IMG_0445.webp

The interesting part of this buid is that its 100 degrees in south texas and we've had a ton of rain over the summer. but i've been outside working on this car (under a small carport) no matter the weather. here i'm using a light because i started in the dark and finished in the dark too.

IMG_0448.webp

mounted some led strips just for show!

IMG_0523.webp

This i-beam was important and took the better part of a morning to make.

IMG_0524.webp

I painted the rusty dash frame black after stripping it down to the metal and despite everthing being tight, the dash still had a lot of shake in it from the factory. Now that the amp and radio were no longer being used, i used the two studs from the floorboard to be the base for my i-beam to stiffen up the dash and it did help... a TON!


IMG_0525.webp

Three different pieces at three completely different angles. A lot of measuring, tack welding, fitting, breaking welds and then refiiting just to get this part right.


IMG_0533.webp

And after finally getting it right and welding everything together, i painted it and put a racing stripe on just for fun.


IMG_0672.webp

the finished support.

IMG_0685.webp

I took the dash and dash frame off in two pieces. I can see why these things crack so often. the fitment isn't really all too great from the factory.


IMG_0686.webp

it's starting to look like a car again!


IMG_0687.webp

The added effort of installing all these plugs made the install effortless too.


IMG_0688.webp

Driver side view.


IMG_0692.webp

Gave the center gauge cover/ radio and ac delete plate the same primer/bed liner/ flat black treatment as the main gauge cluster last minute.

IMG_9907.webp

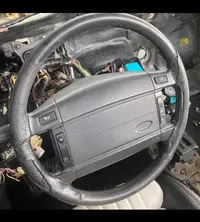
I don't know if this is what a steering wheel looks like after 75, 175 or 275k miles. but either way it needed to be replaced!


IMG_9908.webp

Cruise congrol went in the trash with the ac.

IMG_9910.webp

Old vs. new.


IMG_9913.webp

After a bit of soldering it's good to go!
 

Attachments

  • IMG_9914.webp
    IMG_9914.webp
    72.2 KB · Views: 50
  • IMG_9915.webp
    IMG_9915.webp
    77.7 KB · Views: 57
  • Like
Reactions: gkomo and 85GT4V
IMG_0697.webp


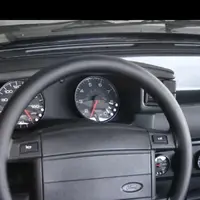
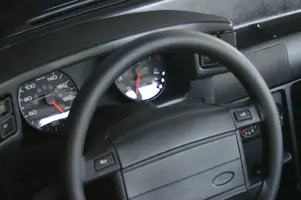
Here is a pic of the final setup. I am waiting on the pass side vent delete, but it should be coming in sometime soon. Cory at carchains3d.com has it sent out already.
IMG_0699.webp


Simple. Clean. I forgot to mention the convertible drop top switch was gone when i got the car. THe headlight switch was busted as were the right horn button. All those have been replaced or repaired at this point.

IMG_2388.webp


I am having trouble with two of the gauges that are working faulty at this point and need to be sent back to autometer. The ease of removing them is fantastic but I think i'll wait a month an enjoy the car before is sent them back. I'll upload more photos and a startup video once i get the final vent delete in and the gauges back from autometer.
 

Attachments

  • IMG_0793.webp
    IMG_0793.webp
    55.5 KB · Views: 58
  • IMG_2389.webp
    IMG_2389.webp
    127.6 KB · Views: 46
  • IMG_2383.webp
    IMG_2383.webp
    130.8 KB · Views: 58
  • IMG_2382.webp
    IMG_2382.webp
    203.1 KB · Views: 47
  • IMG_2377.webp
    IMG_2377.webp
    160.2 KB · Views: 56
  • IMG_2374.webp
    IMG_2374.webp
    132.3 KB · Views: 48
  • IMG_0700.webp
    IMG_0700.webp
    339 KB · Views: 60
  • IMG_0698.webp
    IMG_0698.webp
    276.2 KB · Views: 52
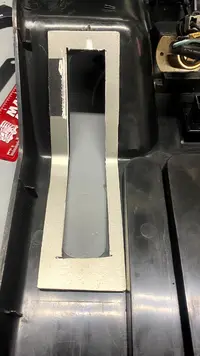
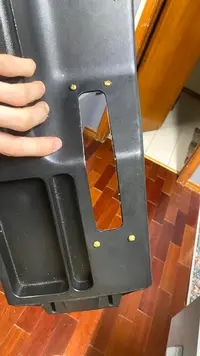
An last but not least I ordered a new ebrake boot from redline goods. I have no idea how the factory rubber piece was installed but they don't make it easy to install anew one, and the car looks terrible without anything there. Again I used a piece of the sheetmetal/steel cover from a recently broken cd changer to make a bracket that would hold it on.

IMG_0708.webp


PIece of paper. Pencil. Boot. Console.
IMG_0711.webp


Template made and used angle grinder to cut it out.

IMG_0714.webp
Bent, then some pretty brass screws to secure.
IMG_0717.webp

Boot in place and clamped in

IMG_0716.webp

New ash tray cover and new boot. Looks pretty decent imho!
 

Attachments

  • IMG_0712.webp
    IMG_0712.webp
    205.5 KB · Views: 92
  • IMG_0715.webp
    IMG_0715.webp
    222.6 KB · Views: 60