Progress Thread Komo's 1990 GT - Parts Gathering Purgatory & Home Remodel

Good. I figured that would help. Certainly play around with it and see if you can completely eliminate the squeal with small adjustments there.

I feel the problem with the tensioner relocation is that it doesn't mount to a single bracket like the factory one did. It mounts to a small plate that is attached to the new blower bracket (which mounts to heads and block) and also straddles over to the water pump stud. While that might have worked better with brand new factory fresh cars.... most aren't anymore. So small tolerance differences in replacement waterpumps, timing covers, aftermarket gaskets can all create what's know as "stacked tolerances ". Meaning many parts with slightly different tolerances from original can create a larger difference. Any tolerance difference with the water pump attachment point pulls it out of parallel.

If you can't completely eliminate the squeal with just the tensioner I steered you to I suggest leaving it float (for now) and move to the alternator.

This is a similar situation. Remember earlier when I suggested tightening just the long bolt that secures the alternator to the main bracket. Then carefully making sure the bottom L bracket doesn't pull it out of parallel when you snug it up? Same deal. That L bracket is like the water pump stud for the tensioner. A very small change can create or eliminate a squeal.
Loosen that L bracket and make sure it's not pulling the alternator out of parallel at all. Now you know how little it takes to make a nasty squeal.

Remember it's made for a factory alternator. You don't have one. You have a 130a alternator that is actually so large it required grinding your smog pump to fit. Chances are you will need a little loving there. You might need to bend the L bracket slightly, or elongate the holes. Small, small adjustments.

I really feel between these two things you'll completely eliminate it. Heck, you might clear it up with just the tensioner.

Good luck with it.
Thanks for getting me on the right track!
 
  • Like
Reactions: nicholase
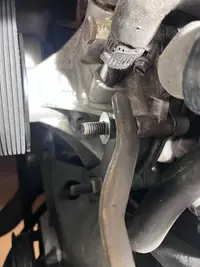
Ok nevermind there’s really no way of getting around removing the tensioner assembly to get a washer/spacer on… thankfully it’s easy. Spent less time just taking it off completely than I did fiddling with getting my makeshift cut up spacer thing in. So, ended up putting the thinnest washer I had in my ‘bucket o’ bolts’.

IMG_8754.webp

Will give it another start tomorrow and see if it helps. If not I do have a little bit thicker washer I could try.
 
Switching gears, back to my AFR Wideband install.

So i have the gauge hooked up in the Pod, its getting power as i hooked all that up when i did my boost gauge. Gauge currently just displays "SNSR", duh, no sensor is hooked up yet.

My question is, before i start drilling, is there a good opening from the interior to the exterior to go through thats already there/available? For simplicity and space constraints i was going to drill through the floor (unknown location yet) but was thinking like down by the front left area forward of the drivers seat in the floor pan. Unless thats a terrible idea. This would require me to remove or at least loosen my drivers seat so i could lift up the carpet in that area. Right now i have the sensor hookup wire/connector just rolled up and ziptied next to my drivers kick panel. Just need to find the best route out of the interior and down to where the sensor will be on the midpipe. I was planning on not removing the wideband connector, so i would need a hole big enough to fit the entire connector end through.
 
Well bummer, i started up the car with the washer and it was actually worse. Took the washer off (like yesterdays test) and its still there but a lot less. Just a split second on startup. So either i sand down my already pretty thin washer and try again, and/or start looking at the alternator pulley alignment.
 
Have you carefully checked to see if a bearing is going bad, I sure you have.
curious, is it a constant squeal at startup or a chirping?
Not a chirping, just an annoying ass split second squeal/screech just at startup. Wasn’t there before the S/C install, all pulleys seem to spin ‘fine’. Tensioner pulley doesn’t have a super smooth spin but does spin freely, A/C pulley will spin around then stop itself but isn’t hard to spin with my finger. Otherwise all the other pulleys seem good.
 
Rough up that shiny new pulley with some sand paper or stainless steel cheek poker on the end of a drill.

I mean... I'm confident that it will eventually go away. I've had a [couple] brand new blower pulleys "chirp".

Brand new. Nice and smooth. Shiny coating... You get it.
 
@nicholase is onto something I’m sure with the tensioner alignment as the squeal was greatly reduced when allowing the drivers side of the tensioner to ‘spring forward’ when I took the nut off that side of the assembly.

I feel like it’s close but not quite there yet. I just wish there was a way to measure/compare the pulleys instead of sort of guessing with spacers and alignment changes.

I know it’s not scientific but all looks perfect from the eye.
 
True true, I did clean up all the pulleys to remove any dirt and debris from the S/C install. Could use a good rough up too I suppose.

I’m gonna go back to using a straight edge off the crank pulley as best I can.
 
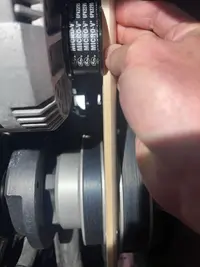
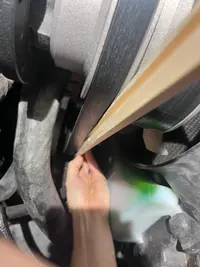
Alright so I went out with a ‘straight edge’ (piece of furniture trim - only thing that’s straight that can fit down in between the pulleys) and just looked at what I could. From what I can tell, the only pulley that’s off is the power steering pulley where the passenger side of the pulley is more rearward than the drivers side of the pulley:

Tensioner pulley to PS pulley (this one I could get my metal ruler on as a straight edge):

IMG_8755.webp

You can see a gap sort of on the right.

Alternator to crank pulley, looks dead on:

IMG_8757.webp

PS pulley to crank pulley, also slightly off:

IMG_8758.webp

It should line up with the outside ridge of the pulley but as you can see lines up more with the belt itself.

Tensioner pulley to crank pulley looked dead on. Alternator to smog pump looked dead on. Can’t really do the A/C pulley as it has the clutch on the front.

Doesn’t make much sense since I didn’t touch the PS pump, but that’s what I’m seeing. I’m scratching my head why adjusting the tensioner pulley affects the squeal but it all seems to be lined up. Oh I didn’t get a picture but the tensioner to alternator pulley also seems dead on.

There is a funky bolt head on the PS pulley, I know they are pressed on but could I try tightening that bolt?
 
  • Like
Reactions: 85GT4V
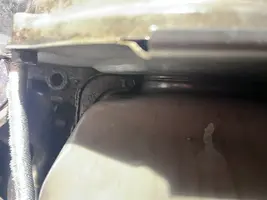
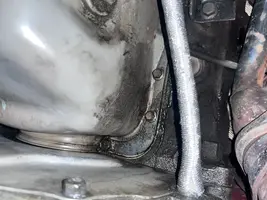
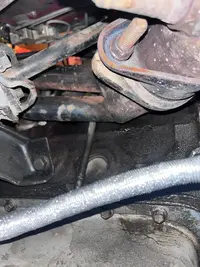
Oh and since I was under the car doing these measurements, I needed to clean up my little oil drips, so I investigated further. I’ve been thinking it’s my oil pan gasket, but upon further inspection there’s wet oil above the oil pan, I’m wondering if my drivers side valve cover is leaking.

Rear main seal area. I did clean it but honestly it wasn’t looking too bad:

IMG_8759.webp

Here you can see all the sludge above the pan gasket on the block:

IMG_8761.webp

And another view:

IMG_8760.webp
 
  • Like
Reactions: 85GT4V
Figured i'd start gathering parts for the valve cover gasket replacements. So far i have the following:

- 1979-1995 Mustang 5.0/5.8 Rubber & Metal Valve Cover Gaskets, #LRS-50203
- 1986-1995 Mustang 5.0 Factory Upper Intake Gasket - by Fel-Pro Gaskets, #LRS-9486B
- 1986-1993 Mustang Trick Flow 58mm-70mm Throttle Body & EGR Gasket & Stud Kit - by Trick Flow, #TFS-51500093
- 1986-1995 Mustang 5.0 Smog Tube, #LRS-9449A (hoping this fixes my code 44)

I also want to paint my upper intake and valve covers in Argent Silver, take apart and clean my throttle body and EGR spacer. Is there anything else i should do while i have the upper intake off? I was thinking maybe sending in my 19lb injectors to have them cleaned and flow tested.
 
Last edited:
Figured i'd start gathering parts for the valve cover gasket replacements. So far i have the following:

- 1979-1995 Mustang 5.0/5.8 Rubber & Metal Valve Cover Gaskets, #LRS-50203
- 1986-1995 Mustang 5.0 Factory Upper Intake Gasket - by Fel-Pro Gaskets, #LRS-9486B
- 1986-1993 Mustang Trick Flow 58mm-70mm Throttle Body & EGR Gasket & Stud Kit - by Trick Flow, #TFS-51500093
- 1986-1995 Mustang 5.0 Smog Tube, #LRS-9449A (hoping this fixes my code 44)

I also want to paint my upper intake and valve covers in Argent Silver, take apart and clean my throttle body and EGR spacer. Is there anything else i should do while i have the upper intake off? I was thinking maybe sending in my 19lb injectors to have them cleaned and flow tested.
Well, i ordered this list of parts to tackle the valve cover gaskets and other things.
 
Have the intake extrude honed to Cobra specs and replace the TB and spacer with an Accufab 65mm unit.


Well... You asked :shrug:


:jester:
I've finally reached the part of my Project where funding has reached the point of 'can't just buy what i want when i want' phase. I've been looking at TB/EGR spacers (65mm and 70mm) which i can buy in the $300 range. BUT, i figured i'll wait until i decide on what i want to do with the MAF/Injectors as well and do it all at once after i've saved up a bit. For now, i am at the 'lets just get this thing running and driving smoothly' phase and be happy with the s/c.

For the intake i've been researching and think (with the whole engine rebuild idea + the TFS heads i have sitting on the shelf) to do a TF Street Burner intake (70mm opening) so probably will go with a 70mm TB/EGR when that time comes. Then that snowballs into a bigger MAF and bigger injectors which snowballs into removing the FMU and doing a real tune, which snowballs into will my T5 handle the power at that point, etc. etc.

For the immediate future, i'm looking at getting these valve cover gaskets replaced, replacing my high/low pressure PS hoses and flushing the system (i checked the fluid yesterday and its straight up brown, and the hoses are slowly leaking), and i still have the motor mounts i need to put in.