

You are using an out of date browser. It may not display this or other websites correctly.
You should upgrade or use an alternative browser.
You should upgrade or use an alternative browser.
Build Thread Want To Blow 5 Years And $50k On A Foxbody? Step By Step Instructions Inside!
- Thread starter RacEoHolic330
- Start date

You don't have to spend a couple grand to do it, you just have to wire in the outputs to the ECU. Ive had MS2 and i currently have the holley and there is no comparison for the two, the holley is much easier to use, the learning feature on the fuel map works much better and you get rid of the old junk engine harness with the holley stuff. I know you can build a harness for the MS2 but not for $400 bucks.
I bought the DIY wiring bundle labeled, and intended to be the foundation for the engine harness. Those wires, and the pigtails for the injectors, and sensors was a little over 150.00. The ECU as a kit was 300.00, and the sensors (VR, CLT, IAT, and TPS) added another 200.00 .
Granted, the learning curve would be the deal breaker for a lot of guys, but the fact that I'm in it for way less than a grand makes it ok by me

So I didn't take too many pictures of the creation of the rear seat delete area. I was powering through everything and realized how few pictures I took.
After spending a bunch of time with cardboard templates for the top parts of the floor, I decided to use some math and measuring to plot out the front piece. The whole deal of cutting the cardboard close and then test fitting over and over again got old. This worked much better.
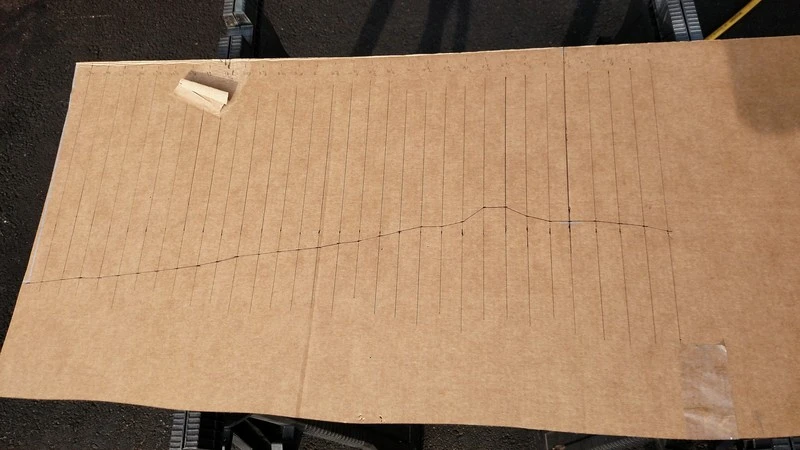
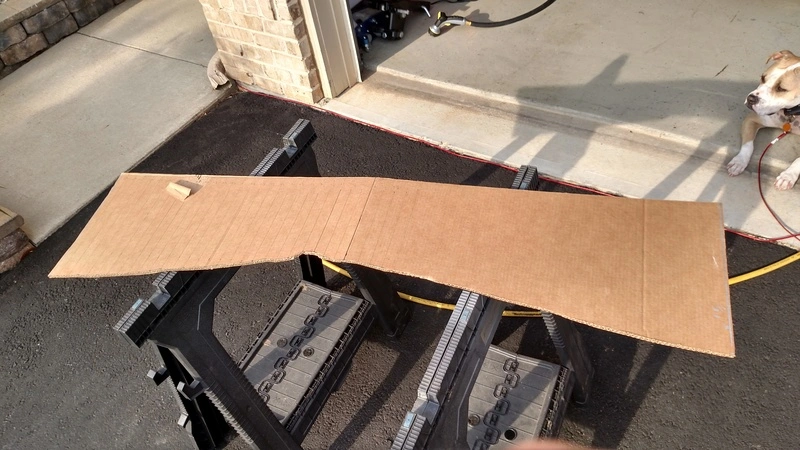
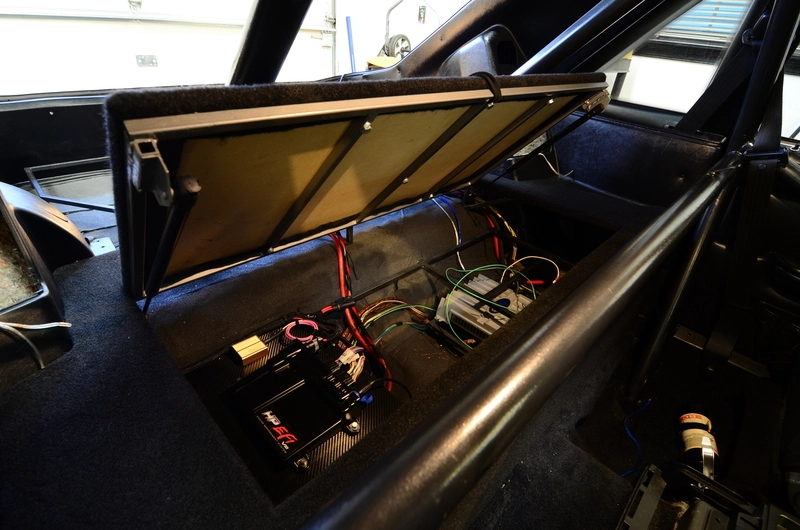
The hump in the middle is there the ECU harness is.
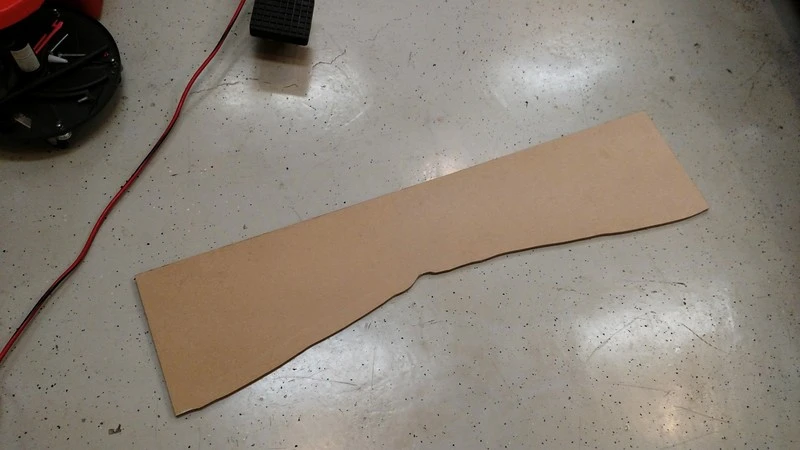
After getting the top piece close, I traced out where the opening should sit.
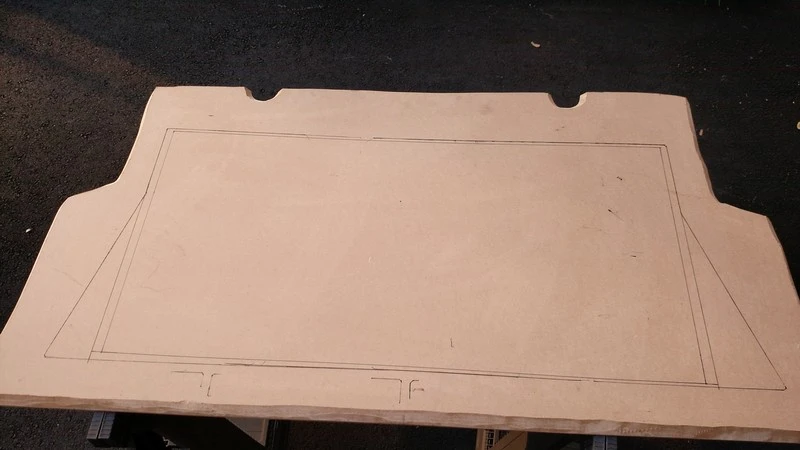
The metal pieces are nifty little guys I found at the hardware store. They let me bolt and unbolt the floor pieces easily without any evidence of them being there from the top.
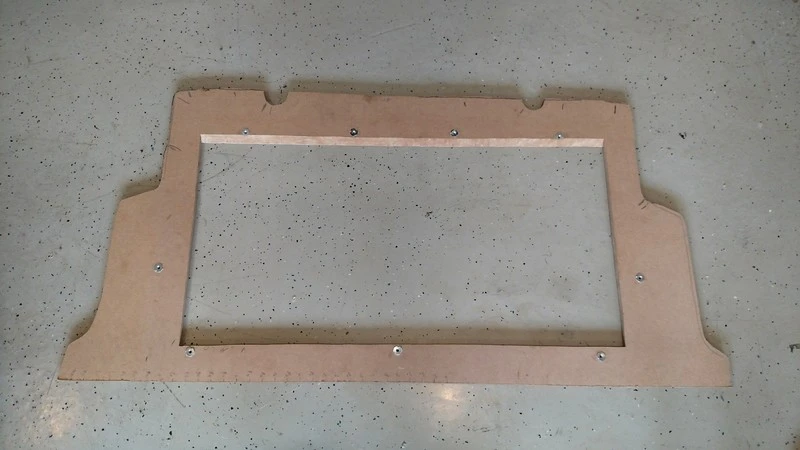
After many many hours, I got the front part done. It took me a lot longer than I thought it would, but it came out pretty well. I'm using a shoelace to pull the cover open until I can find something a little more permanent.
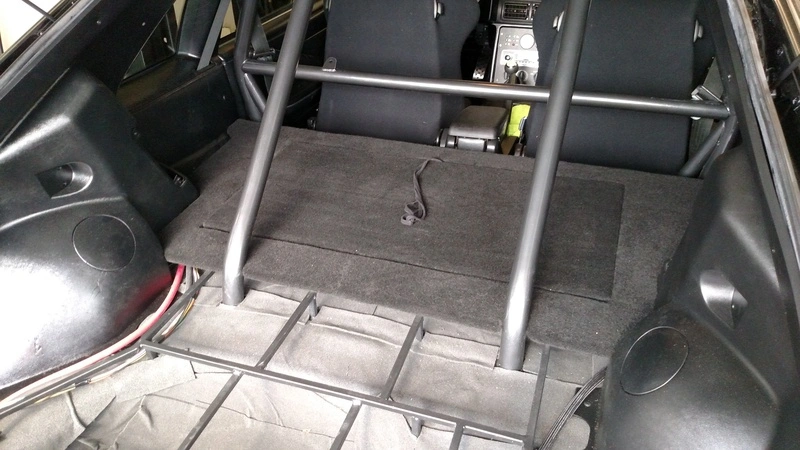
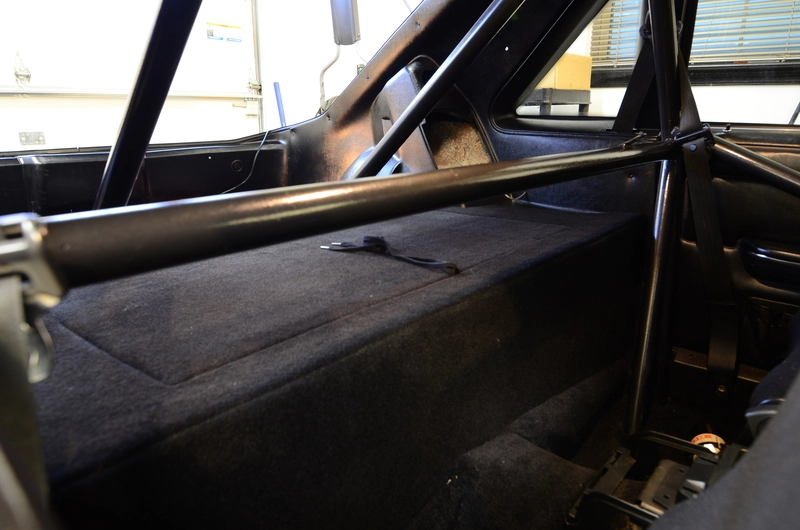
I also got most of the sound system goodies installed. I'm don't care too much about having an amazing audio system, but I did want to use the amplifiers I previously had. The old Rockford's are probably quite outdated by today's standards, but they work so I'm putting them to good use.
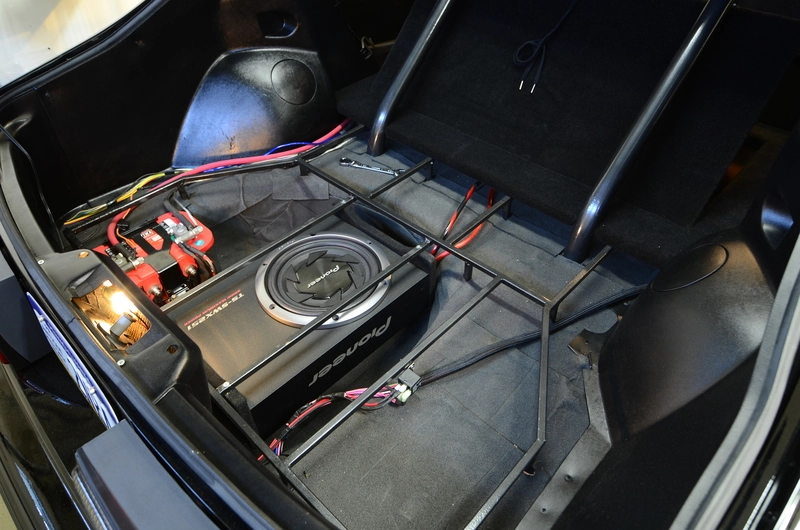
During the audio install, I realized I only ran one set of RCA cables from the receiver to the back seat area. I'm not sure what I was thinking, but I must have just forgot to run both of them. That oversight of mine meant that I had to remove the top of the center console so I could fish the other set of cables from the front of the car to the back. Oh what fun that was. I still have a bit more wiring to do, but I should be able to get it all done tomorrow. Then I'll finish up the back section of the floor.
After spending a bunch of time with cardboard templates for the top parts of the floor, I decided to use some math and measuring to plot out the front piece. The whole deal of cutting the cardboard close and then test fitting over and over again got old. This worked much better.


The hump in the middle is there the ECU harness is.

After getting the top piece close, I traced out where the opening should sit.

The metal pieces are nifty little guys I found at the hardware store. They let me bolt and unbolt the floor pieces easily without any evidence of them being there from the top.

After many many hours, I got the front part done. It took me a lot longer than I thought it would, but it came out pretty well. I'm using a shoelace to pull the cover open until I can find something a little more permanent.


I also got most of the sound system goodies installed. I'm don't care too much about having an amazing audio system, but I did want to use the amplifiers I previously had. The old Rockford's are probably quite outdated by today's standards, but they work so I'm putting them to good use.


During the audio install, I realized I only ran one set of RCA cables from the receiver to the back seat area. I'm not sure what I was thinking, but I must have just forgot to run both of them. That oversight of mine meant that I had to remove the top of the center console so I could fish the other set of cables from the front of the car to the back. Oh what fun that was. I still have a bit more wiring to do, but I should be able to get it all done tomorrow. Then I'll finish up the back section of the floor.


KC Pro tuning and wiring Holley EFI - Grain Valley, Missouri - Race Cars, Automotive Parts & Accessories | Facebook
Hes got 4 fox dashes all ready to go for the screen.
Hes got 4 fox dashes all ready to go for the screen.
The shocks on the hatch door to access the ecu is just over the top! I mean everything is over the top but this takes the cake, well done.... let me know pick up my jaw and move on
Haha. Thanks Nick. I realized after I got everything together that I could have mounted the bottom of the struts more towards the front of the car so they have more leverage on the lid to lift it quicker. It does hold fine though, but needed 30lb struts. The idea of welding inside the car now is not something I'm interested in doing.
KC Pro tuning and wiring Holley EFI - Grain Valley, Missouri - Race Cars, Automotive Parts & Accessories | Facebook
Hes got 4 fox dashes all ready to go for the screen.
Nice to know he offers them. They look like the blank Florida 5.0 dashes that he did the modifications on.
Absolutely just figured if you wanted something right meow .... Lol it popped up so just wanted to shareHaha. Thanks Nick. I realized after I got everything together that I could have mounted the bottom of the struts more towards the front of the car so they have more leverage on the lid to lift it quicker. It does hold fine though, but needed 30lb struts. The idea of welding inside the car now is not something I'm interested in doing.
Nice to know he offers them. They look like the blank Florida 5.0 dashes that he did the modifications on.
Sent from my iPhone using my fingers while my auto correct makes me seem illiterate

Is it safe to assume that you'll have a full photo shoot done for the car after it's tuned and ready to roll?
I decided to buy a mityvac to rule out any potential vacuum leaks. I just don't believe that my setup should only be making 7in of vacuum at 900 rpm with a cam that has a duration in the 230s and a lsa of 115.
The mityvac showed up today and I played with it for a little bit. I definitely have some vacuum leaks. There are only two lines coming off the upper intake. One is dedicated for the HVAC and the other is for the boost controller, blow off valve, boost gauge, and map sensor.
The HVAC line builds vacuum, but it bleeds off slowly. I'll have to check the connections at the selector switch. The other line isn't building vacuum at all. I only had a few minutes to mess with things, so I couldn't dig into it much. I'm going to disconnect each item, plug the end, and pump away. I'm not sure if the ignition needs to be on for the boost controller solenoids to be in the proper position or not, but I'll find out. If I had to guess, I'm sure the problem has something to do with the solenoids. All the non-hvac vacuum lines are 200 psi plastic push lock fittings, so any T's and unions should be fine. Something ain't right, that's about all I know right now. We may have very well been tuning around a vacuum leak the whole time.
The mityvac showed up today and I played with it for a little bit. I definitely have some vacuum leaks. There are only two lines coming off the upper intake. One is dedicated for the HVAC and the other is for the boost controller, blow off valve, boost gauge, and map sensor.
The HVAC line builds vacuum, but it bleeds off slowly. I'll have to check the connections at the selector switch. The other line isn't building vacuum at all. I only had a few minutes to mess with things, so I couldn't dig into it much. I'm going to disconnect each item, plug the end, and pump away. I'm not sure if the ignition needs to be on for the boost controller solenoids to be in the proper position or not, but I'll find out. If I had to guess, I'm sure the problem has something to do with the solenoids. All the non-hvac vacuum lines are 200 psi plastic push lock fittings, so any T's and unions should be fine. Something ain't right, that's about all I know right now. We may have very well been tuning around a vacuum leak the whole time.
So this is the part where I eat my words. I said in my last post that the push lock fittings can't possibly be the source of my leak. Yea, um.. not true. I pushed the lines back into a T again fitting to make sure they were in all the way. Well, one of them wasn't. It must have been in far enough not to blow off under boost, but it was still allowing a leak. After I pushed them in more and pumped the mityvac, I have a nearly rock solid reading on the gauge. It bleeds off at about at the rate of 1in every 10 seconds. I'm going to pull the passenger fender liner because I know I have a 90 degree fitting in there. I'm going to try to eliminate it with a single piece. It is safe to assume the gauge shouldn't bleed off at all?
@madmike1157, I know you have audio equipment experience so I'm going to ask you for your opinion. What are the typical causes for accessory pop through the speakers when turning on lights and other high current accessories? I finished up my audio system install, adjusted the gain on the amplifiers, and started playing some music. Everything seems to work fine until I turn on my parking lights and headlights. I get an audible pop. It's faint, but it's still there.
My two dash speakers are not fed by the amplifier. They are fed directly for the head unit. The other 4 speakers are fed by an amp along with the subwoofer fed from a second amp.
The RCA cables are not ran parallel to any power sources. Amplifier power and grounds come directly off the battery. I've read that the amp turn on lead from the head unit could cause some issues, and some recommend to use that lead to activate a relay to turn the amps on. I've also read that some say to run the ground and power to the head unit directly from the amplifier so everything is seeing the same reference.
I think the pop is only coming from the amplified speakers. I need to disconnect the amps to find out for sure though.
My two dash speakers are not fed by the amplifier. They are fed directly for the head unit. The other 4 speakers are fed by an amp along with the subwoofer fed from a second amp.
The RCA cables are not ran parallel to any power sources. Amplifier power and grounds come directly off the battery. I've read that the amp turn on lead from the head unit could cause some issues, and some recommend to use that lead to activate a relay to turn the amps on. I've also read that some say to run the ground and power to the head unit directly from the amplifier so everything is seeing the same reference.
I think the pop is only coming from the amplified speakers. I need to disconnect the amps to find out for sure though.
So
sorry Scott, despite my audio experience, most of that is confined to residential.@madmike1157, I know you have audio equipment experience so I'm going to ask you for your opinion. What are the typical causes for accessory pop through the speakers when turning on lights and other high current accessories? I finished up my audio system install, adjusted the gain on the amplifiers, and started playing some music. Everything seems to work fine until I turn on my parking lights and headlights. I get an audible pop. It's faint, but it's still there.
My two dash speakers are not fed by the amplifier. They are fed directly for the head unit. The other 4 speakers are fed by an amp along with the subwoofer fed from a second amp.
The RCA cables are not ran parallel to any power sources. Amplifier power and grounds come directly off the battery. I've read that the amp turn on lead from the head unit could cause some issues, and some recommend to use that lead to activate a relay to turn the amps on. I've also read that some say to run the ground and power to the head unit directly from the amplifier so everything is seeing the same reference.
I think the pop is only coming from the amplified speakers. I need to disconnect the amps to find out for sure though.

I managed to nail down my vacuum leak issue. I mentioned earlier that a T fitting was leaking. Once that was fixed, the gauge was still bleeding down ever so slowly. I narrowed it down to the fuel pressure regulator. I isolated that and put the vacuum directly to the regulator. It bled down relatively quick. Because it's hard to hear a very small vacuum leak, I decided to apply pressure to the regulator. I set my compressor to 20 psi and put the hose on the regulator port. I heard a distinct hissing coming from somewhere, so I grabbed my handy mechanic's microphone and hovered it around different areas of the regulator. The air was coming right from the adjustment screw on the top of the regulator. I unscrewed it and noticed there was no kind of gasket or sealer on the threads, so I wrapped the threads in some Teflon tape. After re-testing the vacuum to the regulstor, it was rock solid. Didn't move a bit.
I'm going to call fuelab and just make sure there isn't an internal issue with the regulator that was causing the leak through the screw threads. If some tape is all that was needed, I'm happy with that.
I tested the whole vacuum system again. Set it to 20in and went to get some lunch. And hour and a half later I came back and the gauge was at 14in. Good enough for me! Time to start this thing up again and see what kind of vacuum I see now. I just need to wrestle the fender liner back in and get the wheel on first.
I
I'm going to call fuelab and just make sure there isn't an internal issue with the regulator that was causing the leak through the screw threads. If some tape is all that was needed, I'm happy with that.
I tested the whole vacuum system again. Set it to 20in and went to get some lunch. And hour and a half later I came back and the gauge was at 14in. Good enough for me! Time to start this thing up again and see what kind of vacuum I see now. I just need to wrestle the fender liner back in and get the wheel on first.
I

I am not an audio expert, but I remember way back in my highschool days, a friend of mine had sometype of filter between his speakers and the wires. It was there to filter out "ground" noise from what I recall.
Joe
Joe


This is everything I know about music/stereo's......................you can tune a Piano, but you can't tuna fish. Hope that helps.
Ground loop isolators work sometimes, but are typically a band aid to cover up the real problem. I have a hard time believing that I have ground issues with the way my grounding system is set up, but who knows. I've been wrong before.
Similar threads

- Replies
- 37
- Views
- 62K

Progress Thread
'67 Mustang 351C > C4 trans > Clueless 21 year old
- Replies
- 5
- Views
- 3K
- Replies
- 3
- Views
- 15K


- Replies
- 1
- Views
- 10K

- Replies
- 2
- Views
- 3K