Paint and Body A Couple Pictures of My 82 Rust Repair Project

Rcdgl

5 Year Member
Feb 19, 2018
313
168
63
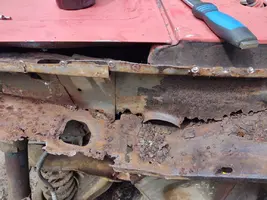
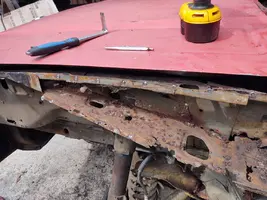
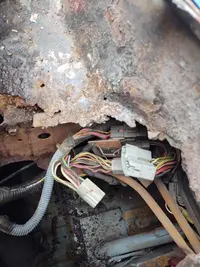
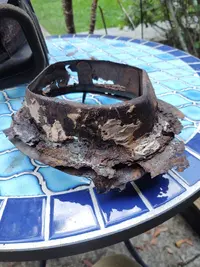
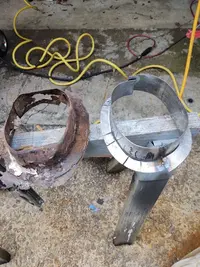
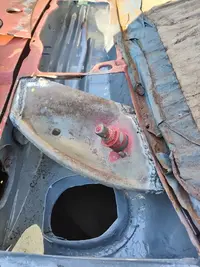
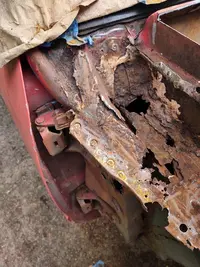
A couple pictures mostly of the starting point for repairing the rusty cowl on my 82 Mustang.

Yes, this is the hard way...

Now on the third 2 x 4 sheet of 18 gage and about five bottles of gas, and a bunch of wire...
 

Attachments

  • IMG_20230612_161556392 More dr side inner fender brace rust.webp
    IMG_20230612_161556392 More dr side inner fender brace rust.webp
    356.9 KB · Views: 126
  • IMG_20230612_161558375 dr side inner fender brace rust.webp
    IMG_20230612_161558375 dr side inner fender brace rust.webp
    318.2 KB · Views: 120
  • IMG_20230615_150916227  Dr side cowl plenum rust.webp
    IMG_20230615_150916227 Dr side cowl plenum rust.webp
    188.7 KB · Views: 122
  • IMG_20230623_185320078 Dr side vent rusty.webp
    IMG_20230623_185320078 Dr side vent rusty.webp
    193.4 KB · Views: 133
  • IMG_20230624_174229080 Driver side vent b.webp
    IMG_20230624_174229080 Driver side vent b.webp
    241.6 KB · Views: 133
  • IMG_20230612_161554836 dr side cowl side rust.webp
    IMG_20230612_161554836 dr side cowl side rust.webp
    406.6 KB · Views: 126
  • Like
Reactions: 2Blue2
Dang man, that looks worse than my car did... but I'd guess that if the rust is that bad there you VERY likely have rust hidden in the A pillars, frame rails, and rockers. Glad to see you're saving it though!
 
I replaced about one third of the bottom of the cowl panel. I did the pinch weld around the windshield about two years ago, thats how I knew I had to do this. The A pillars seem decent. Pass door post needed some repair. Frame under the battery box (front pass side on an 82) and the battery box floor needed new steel.

The toe pan has some rust on both sides, that I covered several years back. As soon as the front exterior is done, I will go inside and fix it decently. Not sure if I am going to buy floor pans or not.

Pita. Yes, a donor cowl section would have been easier.

I wish I had just taken the engine and dash out. Everything is covered in rusty grinding dust.

Spent the 18 mos before this putting a new trunk, dutchman, package tray and tail panel in my 66 Malibu. Using replacement panels makes this go much faster.

Got more photos of repairs coming.
 
Last edited:
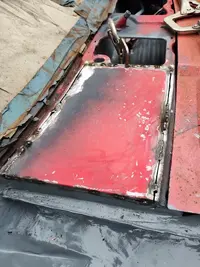
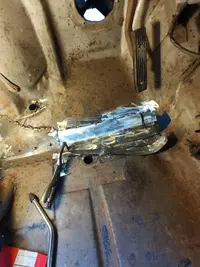
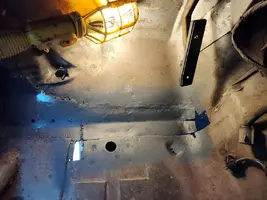
Couple photos, before and after of the main patch in the drivers floor. Still got some more small areas to finish up.
IMG_20240330_175937100 Drivers floor cut out and cleaned.webp
 

Attachments

  • IMG_20240330_175852084 Drivers Floor patch mocked up.webp
    IMG_20240330_175852084 Drivers Floor patch mocked up.webp
    157.3 KB · Views: 87
  • IMG_20240401_181517933 Drivers Floor main patch.webp
    IMG_20240401_181517933 Drivers Floor main patch.webp
    244.2 KB · Views: 79