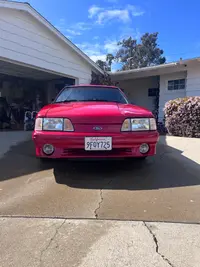
Progress Thread Komo's 1990 GT - Parts Gathering Purgatory & Home Remodel

Think I found the culprit to my ‘bump bump bump’ when driving…
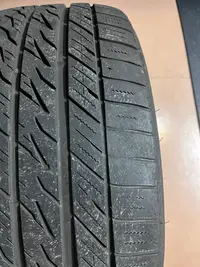
IMG_8448.webp

It’s harder to see in a photo but there is definitely two distinct bald spot or at least more worn down areas in the tire tread.

Glad I’m getting these replaced, just waiting for the tires to come in.

Bad news is I have family coming into town tomorrow and my wife wants the garage open for a ‘game room’ for my nephews (I have a TV and multiple consoles out there)… so I had to put the car back together and fingers crossed it starts tomorrow lol
 
  • Like
Reactions: 91AOD5.0LX
Got everything back together, dropped the car, leveled out the rear now that it’s on the ground. Measured 26.5” ground to fender both sides. My front passenger sits like 1/2” lower than the front driver. I’ll drive it around a remeasure.

Bluetoothed into my ‘new’ radio and found out only my rear speakers work… assuming it has something to do with the hodgepodge of wiring going to the floating around under the seat amp. A problem to solve another day.
 
Damn, started the car up to move it. Let it idle for like 15 minutes then drove it up and down the street a few times. Once parked, i reran KOEO codes and i'm still getting "O" 67, and code 10? which doesn't show up in my scanner manual. This is cylinder #1 issue right? Weird thing is it didn't say "O" or "C" on the scanner when i ran it.

edit: should not be a cylinder code as i didn't run KOER cylinder balance test. I ran out of time due to work (had to pick kid up from school due to false pinkeye diagnosis - doctor says shes fine)... now meetings meetings meetings.
 
Awesome, thanks for that!

Bummed that Neutral Gear Selector connector pigtail replacement didn't clear my code 67. Next step is to replace the actual sensor.

Next step is to disconnect the pigtail and see if you can make the code away with a paper-clip. If so, [then] replace the sensor.
 
  • Like
Reactions: General karthief
Have you checked the switch itself? Disconnect the connector and use a DVM set to continuity which is #11 in this image

1744679459577.webp


When the trans is in neutral I believe the switch is closed (meter will read continuity and typically generate a tone) and when in any gear the switch is open (so the meter will read no continuity and there will be no tone).

It could be that the switch is still good and someone got into the trans and forgot or did not install the ball that trips the switch.

So if you can determine the switch is good or bad this may save time and money.
 
Next step is to disconnect the pigtail and see if you can make the code away with a paper-clip. If so, [then] replace the sensor.

Have you checked the switch itself? Disconnect the connector and use a DVM set to continuity which is #11 in this image

1744679459577.webp


When the trans is in neutral I believe the switch is closed (meter will read continuity and typically generate a tone) and when in any gear the switch is open (so the meter will read no continuity and there will be no tone).

It could be that the switch is still good and someone got into the trans and forgot or did not install the ball that trips the switch.

So if you can determine the switch is good or bad this may save time and money.
I already have the sensor, I bought it a while ago. Should I still try testing the pigtail or just go ahead and replace the sensor?

@AeroCoupe where is the actual switch you’re referring to? I have a DVM.
 
This should help:

1744728751150.webp


Rebuild manual is here:


This video series on rebuilding a T5 is money. Go to 4:10 in this video and Paul goes discusses the NGS and how to remove the parts:


View: https://youtu.be/XREsRG9Y1mU?si=wbDGlR7ohAoVqvEw

So I found this over on the Corral and I think it sums things up nicely:

"You need to do to simulate the connection at the Neutral Gear Switch (NGS, the 'gear switch thingy' on the TOP of the T5 trans) is jumper between the BLK/WHT (or GRY/RED) and the LBLU/YEL wires at the body side of the trans harness. This will simulate 'trans in neutral' by connecting EEC pins 30 (NGS) and 46 (SIGRTN)."
 
Last edited:
  • Useful
Reactions: General karthief
This should help:

1744728751150.webp


Rebuild manual is here:


This video series on rebuilding a T5 is money. Go to 4:10 in this video and Paul goes discusses the NGS and how to remove the parts:


View: https://youtu.be/XREsRG9Y1mU?si=wbDGlR7ohAoVqvEw

oh ok we are talking the same thing i'm just using different verbiage. I call it a sensor and its really a switch. Yes, i have that switch/sensor already... i'm just going to replace since i've already paid for it.
 
Took the car to fill up the tank… first full fill up since I got her! No leaks that I can see so I put the tank back together correctly.

The fuel pump, filter, plugs, wires, cap, rotor, clean air filter all must’ve made a difference because I got on it a couple times to/from the gas station and it seemed like it had a lot more pull than before. Could also be that I haven’t driven it in a while.

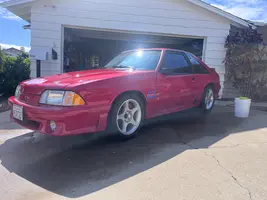
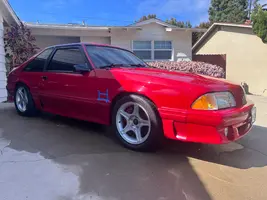
Anyways, before pulling her back into the garage I gave her a quick wash with some photos:

IMG_8477.webp

IMG_8478.webp

IMG_8479.webp

Now to keep working on her. Hopefully I can drop off the wheels to get the new tires mounted tomorrow.
 
Ordered a MM Panhard Bar. I remember that making a pretty significant difference in handling on my last one. This almost all but exhausts my big ticket item funding for now.

Anyone have suggestions on what type of drill bit to use for drilling through the frame rail? I also remember me and my buddy who helped me out had a hell of a time drilling through the frame but i think we weren't using the right bits.
 
Last edited:
  • Like
Reactions: nicholase
So a few of us here have the MM panhard bar and I can tell you that they are great. For me I would say that for the cost and degree of install they are not as much of an improvement over quality lower and upper control arms until you add the torque arm. The other thing that happens is that once you install the panhard bar the way the body articulates relative to the rear axle can cause the rear tires to hit the wheel well. I had to space my wheels out 1/4" to keep the tire from contacting the wheel well which also meant trimming the fender lip.

I would also mention that welding the panhard bar in is the best way to go. I do not trust bolt in stuff like that or subframe connectors.

Also remember that you need a cat back that exactly follows the stock path or it will contact all kinds of things after the installation.

When my Coupe had full length subframe connectors (welded in), H&R Super Sport springs, Tokico Illumina dampers, MM lower and upper control arms in the rear, rebuilt stock front control arms, and stock LX 5.0 sway bars (new frame mount bushings and new sway bar end links) it was the best bang for the buck suspension wise. The car is a full MM car now and the handling is improved but it cost some ride quality.
 
So a few of us here have the MM panhard bar and I can tell you that they are great. For me I would say that for the cost and degree of install they are not as much of an improvement over quality lower and upper control arms until you add the torque arm. The other thing that happens is that once you install the panhard bar the way the body articulates relative to the rear axle can cause the rear tires to hit the wheel well. I had to space my wheels out 1/4" to keep the tire from contacting the wheel well which also meant trimming the fender lip.

I would also mention that welding the panhard bar in is the best way to go. I do not trust bolt in stuff like that or subframe connectors.

Also remember that you need a cat back that exactly follows the stock path or it will contact all kinds of things after the installation.

When my Coupe had full length subframe connectors (welded in), H&R Super Sport springs, Tokico Illumina dampers, MM lower and upper control arms in the rear, rebuilt stock front control arms, and stock LX 5.0 sway bars (new frame mount bushings and new sway bar end links) it was the best bang for the buck suspension wise. The car is a full MM car now and the handling is improved but it cost some ride quality.
Thank you.

I'm mostly going off memory now, but where i'm currently at with my suspension, tires and wheel combo is almost identical to my last Foxbody. I don't recall any 'new' rear tire rubbing issues after the PHB installation. With my SN95 rear axles my wheels/tires are already pushed out further which is why i bought the fender roller tool, but unless i'm going over a large incline and an extreme angle i never get 'inside' rubbing in the inner fender (i do, but on rare instances like mentioned). I hadn't thought of welding the PHB in before, interesting - maybe something to do down the road.

The exhaust is a good point, i BELIEVE my current exhaust follows the factory routing but i can't be certain until i check. I didn't have to deal with that before as i had dumps.

So right now my suspension set up is as follows:

- H&R Race Springs
- Koni orange shocks/struts (need to replace)
- MM Heavy Duty RCLAs
- Stock UCAs
- Stock sway bars (new font bushings in LMRs sway bar mount kit)
- MM Full length SFCs
- MM C/C Plates

And also, the PO did replace a bunch of front bushings, although i do need to replace the drivers side ball joint and the passenger side inner tie rod.

Thats it. Next year i plan to go MM Coilovers up front, but leave the rear non-coilover.

Besides the harsh springs i want to swap out, i'm not so concerned with ride quality as long as it feels solid. In my head i have these grandiose ideas of driving this thing all the time, but in reality, it will sit parked in the garage most of the time.
 
Thank you.

I'm mostly going off memory now, but where i'm currently at with my suspension, tires and wheel combo is almost identical to my last Foxbody. I don't recall any 'new' rear tire rubbing issues after the PHB installation. With my SN95 rear axles my wheels/tires are already pushed out further which is why i bought the fender roller tool, but unless i'm going over a large incline and an extreme angle i never get 'inside' rubbing in the inner fender (i do, but on rare instances like mentioned). I hadn't thought of welding the PHB in before, interesting - maybe something to do down the road.

The exhaust is a good point, i BELIEVE my current exhaust follows the factory routing but i can't be certain until i check. I didn't have to deal with that before as i had dumps.

So right now my suspension set up is as follows:

- H&R Race Springs
- Koni orange shocks/struts (need to replace)
- MM Heavy Duty RCLAs
- Stock UCAs
- Stock sway bars (new font bushings in LMRs sway bar mount kit)
- MM Full length SFCs
- MM C/C Plates

And also, the PO did replace a bunch of front bushings, although i do need to replace the drivers side ball joint and the passenger side inner tie rod.

Thats it. Next year i plan to go MM Coilovers up front, but leave the rear non-coilover.

Besides the harsh springs i want to swap out, i'm not so concerned with ride quality as long as it feels solid. In my head i have these grandiose ideas of driving this thing all the time, but in reality, it will sit parked in the garage most of the time.
Since you have the MM SFC's and LCA's, and once you get the PHB installed, eventually down the road I'd say put the TQ Arm on as well and get rid of the UCA's. Up until I got my Cobra that already has all that installed I had only driven a car like yours is now, and an IRS equipped fox, but with the TQA/PHB setup on the Cobra it is amazing. I don't yet know my spring rates as I need to get it in the air and look, but the ride is awesome, firm, but yet somehow still supple. I fully understanding taking it a step at a time and you're going in the right direction, but I seriously recommend putting in the TQA down the road as the ride is awesome.
 
  • Like
Reactions: slow84lx and gkomo