Progress Thread Komo's 1990 GT - Parts Gathering Purgatory & Home Remodel

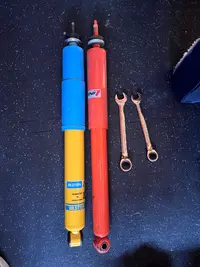
The bilsteins are quite a bit beefier than the koni oranges:
IMG_8983.webp

Got the drivers side in loosely, hopefully wrap up the passenger side tonight. The tomorrow when my crows feet sockets come in I can finish tightening the top bolts.

I just used an impact to get these out, but I know I can’t use an impact to tighten the bilsteins down.
 
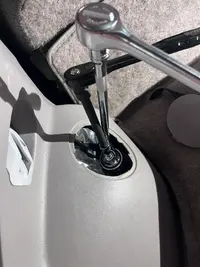
There is a socket you can get that fits the top of the shock shaft ( :doh: can't believe I'm going to leave this here:bang:) where you'll see there are flat sides, a pair of vice grips work but are kinda wonky, the socket leaves room for a crows foot wrench, most mechanics use an small impact and watch the rubber bushing sneek'n up on it, uggadugga and a half? Maybe two.
My 89 has bigger access holes
 
  • Like
Reactions: gkomo
Well the passenger side is giving me some issues. I think the mounting bracket is too narrow and the eyelet of the Bilstein shock won’t fit in it. Maybe it’s just bent inward from the koni’s being tightened down, but I tried bending each side outward but it’s just bending like the tips of the tabs, not so much inside to open it up more.
 
Ok got both in, man one side was so much easier than the other. What I actually think happened was the lip of the mounting bracket inner hole was catching on the lip of the sleeve in the shock eyelet. I lightly sanded down the mounting bracket inside hole surfaces, sprayed with lubricant and it went right in.

Crows feet sockets are now coming tomorrow then I can wrap this job off. If it weren’t for the little issue, this could have been a 45 minute job for both sides.
 
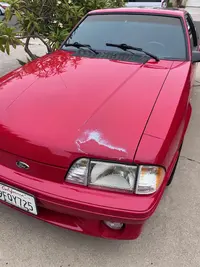
So for my birthday, since my wife despises the large paint blemish on my hood, she is on board with me having the hood painted as to not be embarrassed driving in it. I was thinking, since it needs to be painted anyways, maybe now is the time to get a cowl hood. I'm really liking the Dynacorn steel 2" cowl hood with Saleen style hood vents. Price is reasonable around the $550-650 range depending on where you look.

However, the freight charges are astronomical. I can even have it shipped to my work which is a commercial building with a full on shipping/loading dock. BUT, does anyone have any good ideas on how i can even search if there is a place i could buy and pick it up in person? San Diego doesn't seem to have the best car scene, not a lot of shops that i know of down here. The $550 hood price turns into $950 once tax/shipping is applied. I did go to the Dynacorn website and filled out a 'wishlist' thing that says they will reach out to distributors or whatever. Maybe thats the best i can do.

If all-in (without paint) a new hood must be close to a grand, i'll probably keep my stock hood and just have it painted. I was hoping to get something that will help with heat dissipation, but if thats not in the financial cards then so be it.

Fox Hood.webp
 
Last edited:
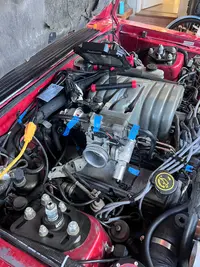
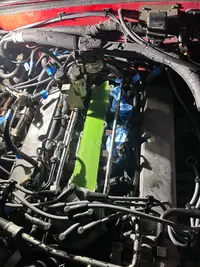
Alright well I decided to start the valve cover gasket replacement project. Didn’t get too far today but got the intake side disconnected, sensors disconnected, throttle cable disconnected. Marked things I know I’ll probably forget where they go. Got the 4 front upper intake bolts out, need to get the 2 rear out.

IMG_9021.webp

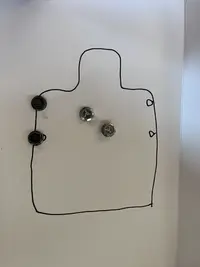
IMG_9022.webp
 
Ok got the intake off, started removing the injectors, man the connectors are a pain to remove, as are the injectors from the fuel rails. Only got as far as getting all the drivers side ones out.

Not looking forward to getting the vacuum lines hooked back up to the rear of the intake, was a pain just getting them off.

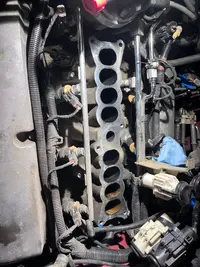
IMG_9023.webp

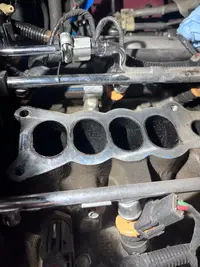
IMG_9024.webp

Pretty nasty. What’s up with the two back runners looking less dirt black?

IMG_9026.webp

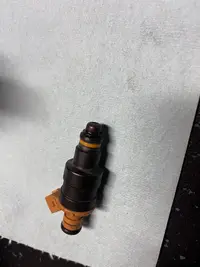
And I noticed the tip of my #7 injector was cracked. Can’t be 100% certain I didn’t do that removing it, but curious because it was my #7 spark plug that looked like dog:poo: when I changed my plugs.

IMG_9025.webp
 
Ok got the intake off, started removing the injectors, man the connectors are a pain to remove, as are the injectors from the fuel rails. Only got as far as getting all the drivers side ones out.

Not looking forward to getting the vacuum lines hooked back up to the rear of the intake, was a pain just getting them off.

IMG_9023.webp

IMG_9024.webp

Pretty nasty. What’s up with the two back runners looking less dirt black?

IMG_9026.webp

And I noticed the tip of my #7 injector was cracked. Can’t be 100% certain I didn’t do that removing it, but curious because it was my #7 spark plug that looked like dog:poo: when I changed my plugs.

IMG_9025.webp

It very well could be. Caps, seals, o-rings and filter kits are cheap and easy to replace.
 
Any ideas from anyone why those two back intake runners look more clean than the rest? They are all super oily/carbon build up, except the two rear ones.

Yeah... The oil mist you're picking up through the intake has more difficulty making it back to the rear cylinders.


Are you pulling plugs any time soon?
 
  • Like
Reactions: gkomo
I think he pulled them but maybe not recently?

“And I noticed the tip of my #7 injector was cracked. Can’t be 100% certain I didn’t do that removing it, but curious because it was my #7 spark plug that looked like dog:poo: when I changed my plugs.”
 
Yeah... The oil mist you're picking up through the intake has more difficulty making it back to the rear cylinders.


Are you pulling plugs any time soon?
Yes i did recently change plugs. They all didn't look great, lots of oily residue on them (i posted a photo back in my thread, can't remember how far back), but the #7 plug was covered in sludge. I just used Motorcraft replacements gapped to .050
With the blower, you will likely need a small separator/catch for the line running from the oil fill port to the TB.
The s/c kit caps off that port at the TB and has a new line going from the oil fill neck to the air filter intake with its own one way check valve. So i have that check valve, and the PCV valve with an additional check valve (UPR) between the PCV and the upper intake (per Nicholase recommendation)
I think he pulled them but maybe not recently?

“And I noticed the tip of my #7 injector was cracked. Can’t be 100% certain I didn’t do that removing it, but curious because it was my #7 spark plug that looked like dog:poo: when I changed my plugs.”
Yessir - with that said i wasn't planning on doing plugs again, but maybe i'll pull #7 just to take a look. Car doesn't get driven too much but might be worth looking at it.
 
  • Like
Reactions: Noobz347
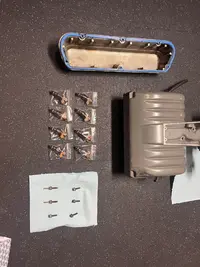
Got the passenger side injectors out. All the o-rings stuck inside the fuel rail for some reason whereas none of them on the drivers side did. Anyways got them bagged and tagged.

IMG_9028.webp

I proceeded to clean out the injector holes like where the bottom o-ring would sit as they were pretty crummy. If by chance tiny bits of crud fell down into the injector holes… how bad is that? I was very careful, used like 100 qtips to get them as clean as I could, but I can’t guarantee some crud didn’t made its way down there.

From there I removed the drivers side valve cover. Gasket had definitely been changed… so maybe I never had a leak, they didn’t look too bad and I didn’t see any rips or areas where a leak could occur:

IMG_9029.webp

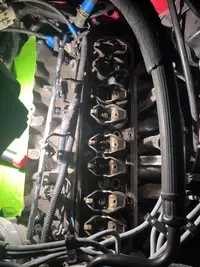
Here’s the drivers side valve train:

IMG_9030.webp

It all looked pretty good in there. No rockers wiggled or anything.

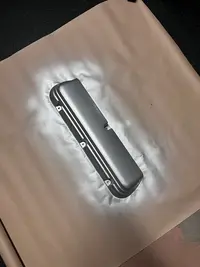
Cleaned up that valve cover and started painting it.

IMG_9031.webp

The more I remove from the car the more anxious I get that I won’t get it all back on correctly.
 
Last edited:
  • Like
Reactions: 85GT4V