Build Thread 1978 Mustang I I

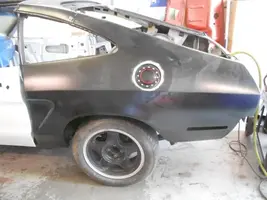
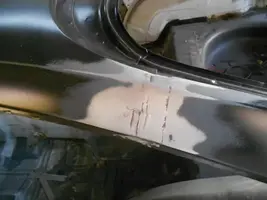
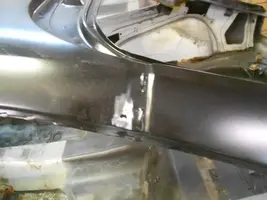
I did not like the mopar gas cap or the rust

DSCN8288_zps430c14b0.jpg

The rust was cut out.

DSCN9440_zps1cabc458.jpg

Eleanor gas filler kit from Mustangs to Fear was welded in place. A gas filler neck from a 1968 Mustang was also used.

DSCN9448_zpsc6392dff.jpg

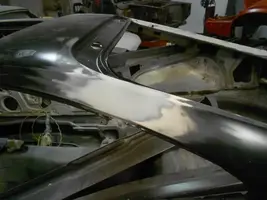
Billet gas cap from Mustangs Unlimited
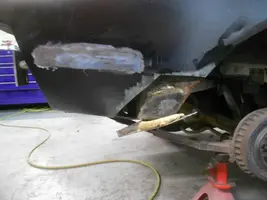
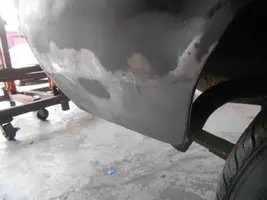
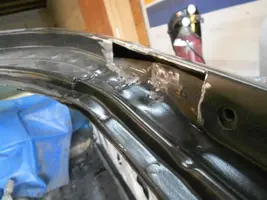
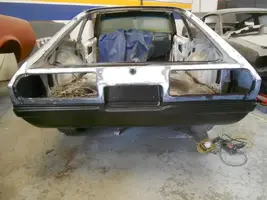
DSCN9446_zps74f63176.jpg
 

Attachments

  • DSCN9440_zps1cabc458.jpg
    DSCN9440_zps1cabc458.jpg
    42.3 KB · Views: 331
  • DSCN8288_zps430c14b0.jpg
    DSCN8288_zps430c14b0.jpg
    50.4 KB · Views: 332
  • DSCN9446_zps74f63176.jpg
    DSCN9446_zps74f63176.jpg
    54.3 KB · Views: 569
  • DSCN9448_zpsc6392dff.jpg
    DSCN9448_zpsc6392dff.jpg
    38.7 KB · Views: 301
  • Like
Reactions: 1 user
  • Sponsors (?)


Removed the marker light and rust repair on the right quarter panel.

DSCN9455_zps016d276c.jpg

DSCN9459_zpsbf1d84e0.jpg

DSCN9497_zps915e88cb.jpg

DSCN9498_zpsd0c78080.jpg
 

Attachments

  • DSCN9459_zpsbf1d84e0.jpg
    DSCN9459_zpsbf1d84e0.jpg
    45.6 KB · Views: 398
  • DSCN9455_zps016d276c.jpg
    DSCN9455_zps016d276c.jpg
    48.7 KB · Views: 359
  • DSCN9497_zps915e88cb.jpg
    DSCN9497_zps915e88cb.jpg
    43.5 KB · Views: 321
  • DSCN9498_zpsd0c78080.jpg
    DSCN9498_zpsd0c78080.jpg
    49.6 KB · Views: 454
  • Like
Reactions: 1 user
The lead was removed from the seam and we found rust

DSCN9433_zps0a0a1495.jpg

The rust was cut out and patched

DSCN9499_zpsacac2a5f.jpg

Rust was cut out of the rear hatch channel new piece was welded in place and epoxy primed

DSCN9500_zpse78f0421.jpg

Epoxy was brushed in that area and I sanded and added a little filler. Since we had a couple of patches in the channel I decided to add filler and also fill all the spot welds in the channel

DSCN9561_zps4861ecb1.jpg

I wanted a cleaner looking taillight panel so the Ford holes were welded and ground down

DSCN9434_zpsa346e7d2.jpg

The bodywork is finished on the taillight panel

DSCN9558_zps12f2f5d2.jpg
 

Attachments

  • DSCN9499_zpsacac2a5f.jpg
    DSCN9499_zpsacac2a5f.jpg
    46.7 KB · Views: 306
  • DSCN9433_zps0a0a1495.jpg
    DSCN9433_zps0a0a1495.jpg
    50.9 KB · Views: 318
  • DSCN9561_zps4861ecb1.jpg
    DSCN9561_zps4861ecb1.jpg
    53.4 KB · Views: 337
  • DSCN9500_zpse78f0421.jpg
    DSCN9500_zpse78f0421.jpg
    57.4 KB · Views: 331
  • DSCN9434_zpsa346e7d2.jpg
    DSCN9434_zpsa346e7d2.jpg
    46.5 KB · Views: 335
  • DSCN9558_zps12f2f5d2.jpg
    DSCN9558_zps12f2f5d2.jpg
    62.4 KB · Views: 358
  • Like
Reactions: 1 user
Scottrods rear bumper fits great. The original bumper brackets were cut off and two holes were drilled in the trunk for a test fit. Add a few more bolts inside the trunk and a couple on each quarter and your done.

DSCN9588_zpsc13cc7bc.jpg
 

Attachments

  • DSCN9588_zpsc13cc7bc.jpg
    DSCN9588_zpsc13cc7bc.jpg
    64.7 KB · Views: 329
  • Like
Reactions: 1 user
We found a 8" rear from a 1965 Mustang. The spring perches are a little wider on the rear but we made it fit. I ordered a 1" lowering kit.

DSCN0166_zpsc13b33c8.jpg

I installed a Rod & Custom front suspension in my 1968 Coupe and upgraded to Baer brakes so I used the original ones that came with the kit on the II.

DSCN0174_zpsacce4628.jpg

The wheels and tires are from my son's 1994 Mustang just to test fit. 245/45 17 on an 8" rim with 5 1/2" back space. The front tires clear but the rear hits the leaf spring and I have about 2" clearance to the quarter panel. If I would have used a rear from a 1967 up Mustang they would work.

DSCN0177_zps43f71316.jpg

DSCN0181_zpsec7fbdd1.jpg

DSCN0184_zps2a3ddbb2.jpg

I'm going to reshape the front of the wheel well for a little more clearance.
 
  • Like
Reactions: 1 user
The rear Scott Rods bumper fit so good I was hoping the front bumper and lower valance would be the same. No so luck they will require a lot of work to get to fit and look right. I'm thinking of modifying and making them one piece.
 
  • Like
Reactions: 1 user
Because this has a T-top we are going to add subframe connectors and a roll bar from S&W. The roll bar was sanded and epoxy primed.

DSCN0337_zpsf13dd987.jpg

DSCN0338_zpsa55fbf1f.jpg

Today I'm working on the front valance that was too wide. When I'm finished the valance and bumper will be one piece.

DSCN0336_zps3fb08af5.jpg
 
  • Like
Reactions: 1 user