'88 GT Convertible - Croatia, Europe

New engine:
Tearing down the engine slowly...still can't find damn recommended crank grinder.
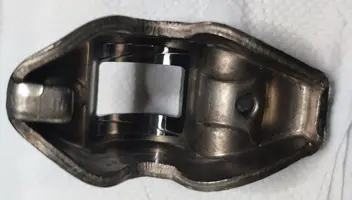
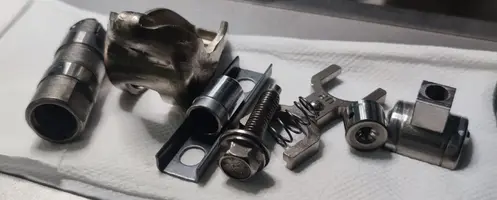
Now as I have time I took comfort to clean the valvetrain parts and lifters in a ultrasonic bath...
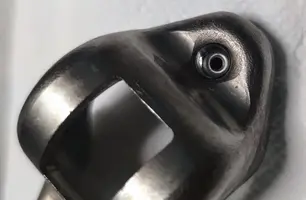
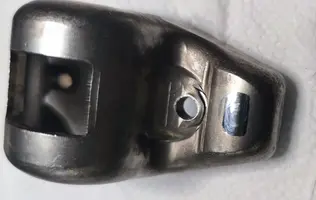
Rockers took some wear but I will lightly polish them, just enough to make contact surfaces smooooooth

Old engine:
Drove some 50 miles in new 5w40 Maxlife synthetic and oil pressure on idle is 20psi.
Now I only have to pass yearly inspection and it will have a winter sleep.
 

Attachments

  • IMG_20221029_120814.webp
    IMG_20221029_120814.webp
    122.9 KB · Views: 158
  • IMG_20221029_120803.webp
    IMG_20221029_120803.webp
    105.1 KB · Views: 158
  • IMG_20221029_120746.webp
    IMG_20221029_120746.webp
    102.4 KB · Views: 156
  • IMG_20221029_120826.webp
    IMG_20221029_120826.webp
    102.9 KB · Views: 149
  • Like
Reactions: 90sickfox
Okay, new engine apart.

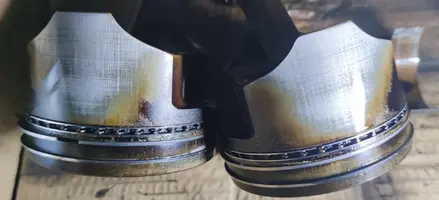
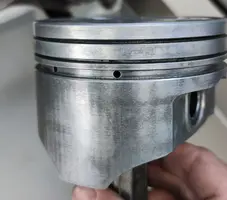
I will measure skirts in next few days, only skirts show wear.
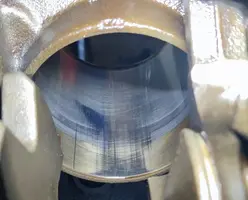
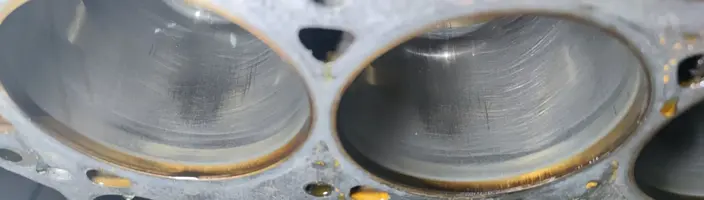
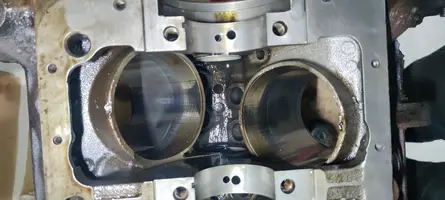
Cylinder bores have a bit wear marks from the cylinder skirts also, but honing is still clearly visible. No deep scratches, can't feel them with fingernail. But, you can feel the edge at the top of the cylinder bore with finger.

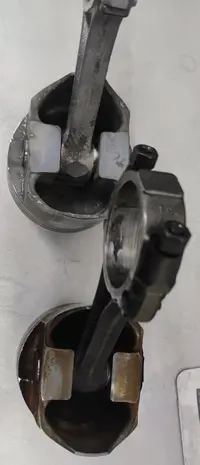
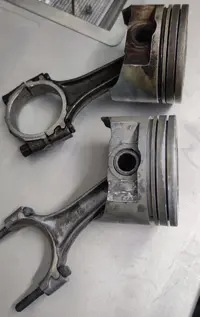
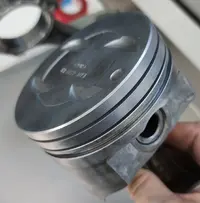
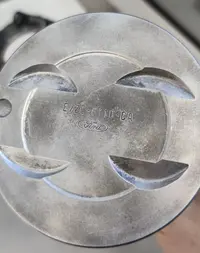
I plan to reuse the pistons, wear is there, but does not seem too much. See pictures, and tell me if it is a good idea to hone and re-ring. Thnx.
 

Attachments

  • IMG_20221127_205016.webp
    IMG_20221127_205016.webp
    203.1 KB · Views: 191
  • IMG_20221127_205032.webp
    IMG_20221127_205032.webp
    70.9 KB · Views: 165
  • IMG_20221127_205050.webp
    IMG_20221127_205050.webp
    151.5 KB · Views: 145
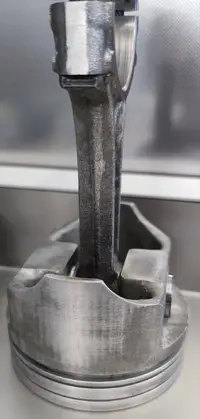
This is how ultrasound cleans the pistons and rods (scrapes are from manual wire brushing carbon deposits)....

Shall I try to slightly&gently polish the skirts? Something crossed my mind: Did anybody use that cerakote stuff on skirts?

Still need to measure the skirts, but now I am obstructed and out of the garage due to the word cup... I hope You cheer for us (Croatia )
 

Attachments

  • IMG_20221210_173412.webp
    IMG_20221210_173412.webp
    120.6 KB · Views: 208
  • IMG_20221210_173356.webp
    IMG_20221210_173356.webp
    179.5 KB · Views: 146
  • IMG_20221210_173429.webp
    IMG_20221210_173429.webp
    133.9 KB · Views: 138
@General karthief got me wrong there, was just thinking into replacing worn 0.001" with ceracote. But You are right, looking into the price tag.... does not make sense....

Pictures of rubber polished pistons attached... proud about results!!!!
Roughly measure says middle of specification. I would say REUSABLE....

You reminded me with Your footnote:
Croatia played first official soccer game under modern independed flag with - USA. Way back in October, 1990. Google it :-), I remember that match as it was yesterday.
 

Attachments

  • IMG_20221212_204401.webp
    IMG_20221212_204401.webp
    131.6 KB · Views: 150
  • IMG_20221212_204337.webp
    IMG_20221212_204337.webp
    264.9 KB · Views: 144
  • IMG_20221212_204322.webp
    IMG_20221212_204322.webp
    163.4 KB · Views: 192
  • IMG_20221212_204305.webp
    IMG_20221212_204305.webp
    376 KB · Views: 166
  • Like
Reactions: 90sickfox
Howdy!

I am still here, project is still alive :)
After some other projects (bought 2012 F-150 STX with Coyote 5.0), machine shop finished the crankshaft so I went back to my spare engine rebuild.

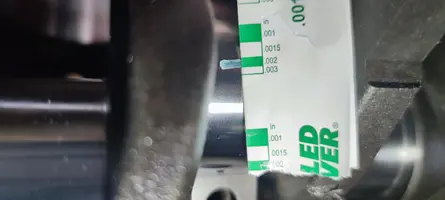
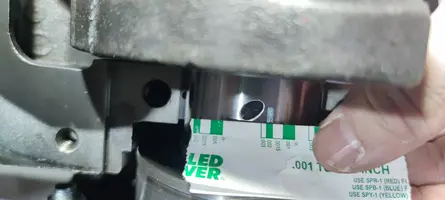
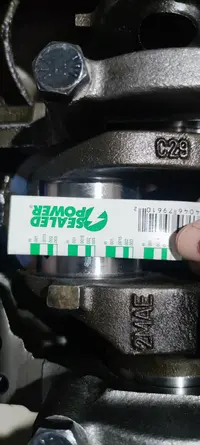
Checked the crank with some used .010 bearings...

Plastigage say:
Main oil clearance 0.002
Con rod oil clearance 0.002

Feeler gauge:
Crank play 0.0078

Border tolerance for crank play, but could be okay...
Next to check are the pistons after polishing them and backyard cylinder honing still need to be done (three stones tool)...I hope those dirty oil scoring marks will disappear with light hone...

Just from curiosity, what is the maximum allowable piston to cylinder wall clearance on TRW pistons? I mean before noticeable piston slap?
I know factory is 0.003 to 0.0035, but I ask from experience?
My pistons first measured ~3.996" which is below tolerance -0.0012", and I expect the backyard honing to take away another 0.001" (at least) from cylinder wall.... so I could have eyeballing 'bout 0.006-0.008" piston to wall....

Thnx!
 

Attachments

  • IMG_20230306_221947.webp
    IMG_20230306_221947.webp
    219.4 KB · Views: 143
  • IMG_20230305_104158.webp
    IMG_20230305_104158.webp
    273.6 KB · Views: 136
  • IMG_20230305_105517.webp
    IMG_20230305_105517.webp
    125 KB · Views: 138
  • IMG_20230305_105552.webp
    IMG_20230305_105552.webp
    112.8 KB · Views: 129
  • IMG_20230306_212603.webp
    IMG_20230306_212603.webp
    205.4 KB · Views: 121
  • IMG_20230306_221950.webp
    IMG_20230306_221950.webp
    208.9 KB · Views: 138
Okay. This is as deep as I would go with hone 320 grit for moly rings.
Clearance 0.0045"
What will yall say? Good to go for trw pistons and moly rings?
 

Attachments

  • IMG_20230307_175115.webp
    IMG_20230307_175115.webp
    137.3 KB · Views: 141
  • IMG_20230307_175102.webp
    IMG_20230307_175102.webp
    179 KB · Views: 130
  • IMG_20230307_175055.webp
    IMG_20230307_175055.webp
    176.2 KB · Views: 138
  • IMG_20230307_175049.webp
    IMG_20230307_175049.webp
    241.2 KB · Views: 141
Hi yall.
Long time no report :cool:

After a backyard hot tank at the end of last year I finally found a bit of inspiration to start working on engine again.
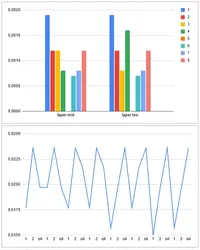
Stock piston compressio rings had .0030-ish gaps so I went with a .005 rings in order to file fit them.

Said, done... yesterday. Looking at the numbers, I have:
- 1st rings on three pistons .015-.0157, rest are .017-.019 max.
- 2nd rings on three pistons .0197, rest are .0217-.0236 max.
- oil rings all inside .0197 min to .0236 max.
Graph attached.
Question: Shall I file thoose three compression rings a bit more to be safe or I should be fine (book says .010 to .020)?

Cylinder wall taper is well under 0.002" after honing.
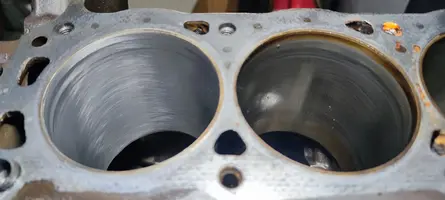
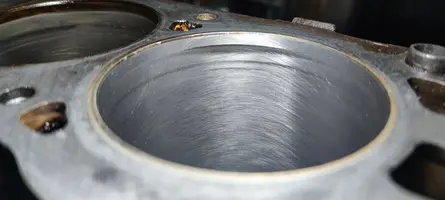
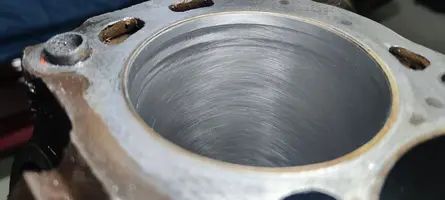
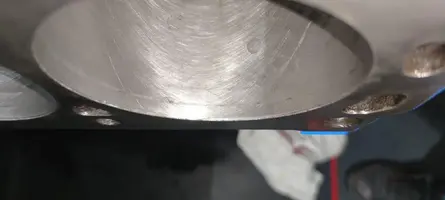
Damn... guess I did not oil after WD40 spray: on cylinder walls there were some "spots" of some surface rust pitting from standing a longish time. They went out with a few hone strokes, but the surface "etching" is still visible. Guess it went a bit deeper into steel, a few spots per cylinder, not worth boring I think so... check picture.

Heads look okay.
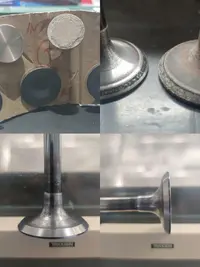
Almost all of the exhaust valves had a lot of pitting on 44° face so I took them to my workplace and we ground 44°.
A few valve stem tips have a kind of edge chipping around perimeter where valve stem is chamfered. Thoose may be from hex hitting stem during disassembly, but what this may show? On the other hand, wear marks are nearly perfect on valve stem tips. I must picture this...
Valve lapping follows :)

Thnx a lot for comments and suggestions!
 

Attachments

  • Snimka zaslona 2024-02-14 145547.webp
    Snimka zaslona 2024-02-14 145547.webp
    17.2 KB · Views: 134
  • pitting.webp
    pitting.webp
    39 KB · Views: 135
  • exh_valves.webp
    exh_valves.webp
    41.9 KB · Views: 127
You need the correct margin on the valves or they will burn
That margin is what you see below the pitting (needs to be roughly .80- .120")
Be careful grinding the valves and seats
Easy to get the valve sucked into the head too far and make the lifter plunger be in the wrong spot, you get a lifter tick that will not go away
I also thing you are asking for trouble with your piston to bore clearance
Same with the ring ridges, those need to be removed before punching the pistons out to not crack the ring lands
Your ring ridge was light, so the piston ring lands are most likely okay
3rd time around this thing needs to be fixed for the knock
Good luck
Maybe run the engine on a test stand before stabbing it into your Mustang
Ehen you say "good to go with TRW pistons"? What? You got new pistons?
 
Ring end gap spec is .020 for the top ring and add .008 for the second ring
So ,020 and ,028 is the minimum.
If you have ever cracked a set of rings due to lack of end gap...
That tears pistons and bores up real bad (ask me how I know)
 
Ring end gap spec is .020 for the top ring and add .008 for the second ring
So ,020 and ,028 is the minimum.
If you have ever cracked a set of rings due to lack of end gap...
That tears pistons and bores up real bad (ask me how I know)
Thnx.
Then I will file cylinder 5,7,8 rings a bit more to get the end gap in range of .017 as the rest. Second rings are .022

Your numbers are a bit on safe side, but You just said why... :-(
I read a lot about it and found consensus: for NA in general there is a .004 per inch, for 302 some guidelines are .016-.018 and +.004 for second rings. Of course for spray or blower You need to open up further (sometimes double).

3rd time around this thing needs to be fixed for the knock
Good luck
Maybe run the engine on a test stand before stabbing it into your Mustang
Ehen you say "good to go with TRW pistons"? What? You got new pistons?
Nay pal, You got it all mixed up. It is not THAT engine.
As I doubt in cracked block, this is a second 302 I managed to buy overseas and I build it as a spare engine.
I belive this one could run good with a hone, rering and bearing job (crank was ground .010). So yes, OEM TRW pistons...

Matching number 302 is still in the car, still runnin'. I plan to do an oil change before the season (now), and to pour in Valvoline VR1 20w50 just to keep the oil pressure up on hot idle. I allready got the blood and filters ready.

You need the correct margin on the valves or they will burn
That margin is what you see below the pitting (needs to be roughly .80- .120")
Good luck
Maybe run the engine on a test stand before stabbing it into your Mustang
Yeah, we just licked the 44° face until the pitting went out. Margin was therefore not changed too much and was within spec. Allhtru, I still need to check the stem to guide clearance.

Thnx.
For running the engine on a stand I would need a cooler and fuel supply which is less of a problem than EEC, cables here overseas.
UNFORTUNATELY I have enough of practice to make it fast enough :-(
 
  • Like
Reactions: General karthief
Sweet, I did not realize / remember you got another block
The piston type and ring manufacturer have more to do with the ring end gap than the Ford spec does these days on a rebuild
The rule of thumb for Hastings for instance is 3.5 thousandths per inch of bore (means .014 is okay for a 4 inch bore)
We saw a bunch of 302's that knocked slightly under base warranty when new
All or most had specs within tolerance on everything we could check including piston to wall clearance
Problem was eventually narrowed down to piston slap on #1 on a few of them
No need for a stand then
Run it. My Boss 302 (forged) pistons are set up a little loose to go racing
 
Sweet, I did not realize / remember you got another block
Ain't it?
You want sweet? Sweet is that I hunted AOD tranny for a spare engine...and last week I just scored ANOTHER 302 with AOD as a part of a good deal in Germany.

I took it cause I doubt that the matching number block is cracked somewhere and therefore loosing oil pressure when hot.
302 casting numbers say it is a roller block from 1987. Turning okay, no more info. Comes from F150 with foxbody upper intake, so it is probabbly a flat tappet and truck cam if it is stock. I believe rollers started in 1992 on truck?
AOD casting number says it is a 1983, comes with converter and sadly no more info than that.
I will know more when truck arrives, maybe I just got a pile of junk...

First I must finish assembly of this 'spare' 302, then I will take a look at that spare AOD guts :)

Sooo, y'all got a V8, 302 junkie over here, overseas.
Just keen to keep that old fox on the road whatever it takes...
 
Hi all!

Neee some advice:

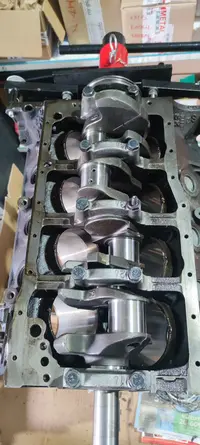
I just installed the crankshaft and pistons into the block, which had been waiting for assembly for at least a yea

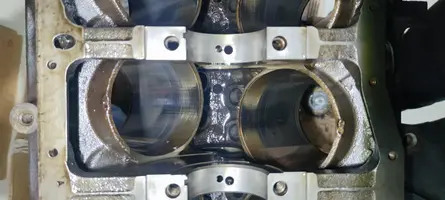
I used Plastigage to check clearances — the crank is ground -.010, giving about 0.015–0.020" on the mains and 0.016–0.018" on the rods.

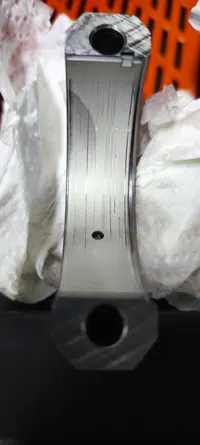
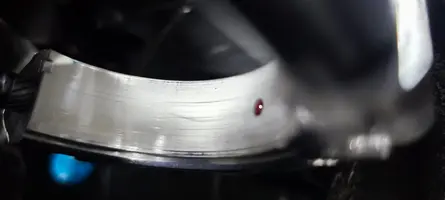
While removing the Plastigage, I noticed a shiny upper connecting rod bearing — I assumed it had just seated itself.

Attached are some pictures of the rod bearings after about 30–50 turns of the crank (during piston installation, oiling between turns, and wiping excess oil from the cylinder walls). Assembly lube was used, of course.

Upper is much worse. You can’t feel any marks with a fingernail, but it looks like contamination — even though everything was clean (pistons, rods, caps, and bolts were all cleaned in an ultrasonic bath).

I also re-checked the crank’s oil passages with a brush before installation.

This is driving me crazy.

Not sure what to do now — just put it together, or tear it all down and clean everything again?

Thnx...
 

Attachments

  • IMG_20251011_124608.webp
    IMG_20251011_124608.webp
    80.6 KB · Views: 44
  • IMG_20251011_124556.webp
    IMG_20251011_124556.webp
    55.3 KB · Views: 37
  • IMG_20251011_162311.webp
    IMG_20251011_162311.webp
    99 KB · Views: 48
Hi all!

Neee some advice:

I just installed the crankshaft and pistons into the block, which had been waiting for assembly for at least a yea

I used Plastigage to check clearances — the crank is ground -.010, giving about 0.015–0.020" on the mains and 0.016–0.018" on the rods.

While removing the Plastigage, I noticed a shiny upper connecting rod bearing — I assumed it had just seated itself.

Attached are some pictures of the rod bearings after about 30–50 turns of the crank (during piston installation, oiling between turns, and wiping excess oil from the cylinder walls). Assembly lube was used, of course.

Upper is much worse. You can’t feel any marks with a fingernail, but it looks like contamination — even though everything was clean (pistons, rods, caps, and bolts were all cleaned in an ultrasonic bath).

I also re-checked the crank’s oil passages with a brush before installation.

This is driving me crazy.

Not sure what to do now — just put it together, or tear it all down and clean everything again?

Thnx...

Merged into your original thread.