Almost done with Randalls rack install and have a Q re: clearance

jim7485

Founding Member
Jan 5, 2002
64
0
0
Michigan
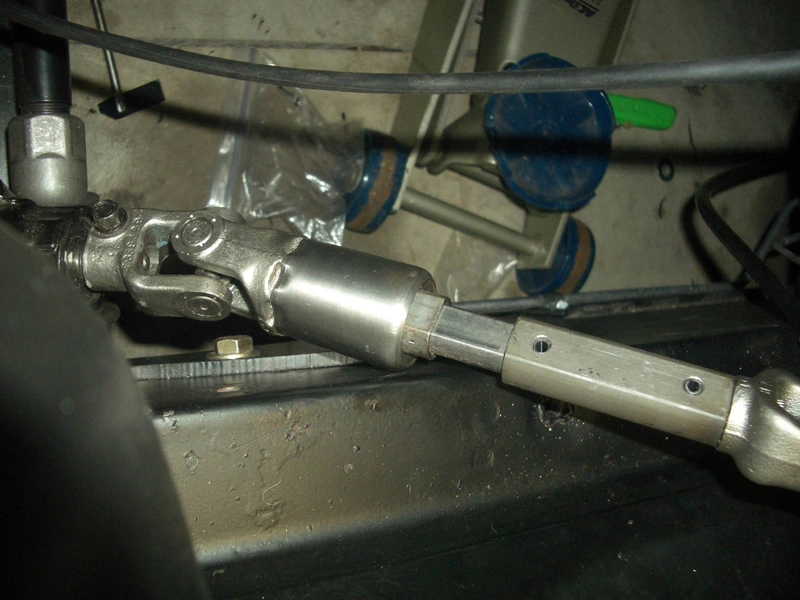
First off, let me tell you that Randall aka Randalls Rack is a class act. I bought his kit some months ago and started the install. I got sidetracked for several reasons, but Randall has responded quickly to every inquiry I've sent his way. Even called me on a Sunday once to check on my progress. I got to the intermediate shaft the other day and found that it is VERY close to the frame rail as you can see in this picture.
rack_shaft.webp

The shaft is about 1/8 inch from the frame rail. To solve the problmem, Randall recommended that I mount the firewall bracket as far as possible toward the engine, which will give me clearance of about 3/8 to 1/2 inch. This still seems a bit tight to me, given the possible flex in a convertible. Maybe I'm nuts (likely) but is this too close? I've considered, and rejected the idea of cutting the frame rail to weld in a curved plate. The cut would be about 1 inch wide by 2 inches long on an angle to match the intermediate shaft. I still like this idea but every time I mention it, people look at me like I just landed from mars. There's been some great discussions here about R&P so please post your ideas.

Thanks in advance.
jim-
 

Attachments

  • rack_shaft.webp
    rack_shaft.webp
    114.6 KB · Views: 262
I would run it, and see what happens. Drive it around some corners, take it over a couple bumps, then get under the car and see if it has rubbed anywhere.

This saves you work that you may not even need to do. You only NEED enough space for the thing to rotate, and if nothing really flexes in that area, you have no concerns.

Just my .02 cents.

87
 
What do you think of the kit overall?? Looks good on the website. I've emailed Randall twice in the past 3 weeks with some questions and other than an auto-response , no word. I don't think Randall likes me :(
:) :)
 
Randall

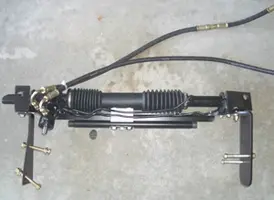
The kit looks fantastic and I'm amazed that Randall has not returned your e-mails. He has been very responsive to me. I'd give it another try. He's at SEMA this weekend, so maybe try Monday. This is a really high quality heavy duty unit. Here's another pic...
rack_B4_install_web.webp


jim-
 

Attachments

  • rack_B4_install_web.webp
    rack_B4_install_web.webp
    32 KB · Views: 304
hey guys i'd just like to add someting to this conversation, randall shows a mod on his website about re-drilling the tie-rod mount on the granada spindle, and wanted to say that you can accomplish the same thing using the pro-motorsports bump steer correcter kit, although it is a lot more expensive than randall's mod this way you don't have to drill on the spindle. just another option for you guys is all, for anyone who is not familiar with the mod it is designed to allow you to regain any lost turning radius after installing the rack kit, if any is lost at all. i have also spoken to randall several times through email and he does seem to be a great guy, i will be geting my rack kit from him when i get the car ready for that stage :nice:
 
dolfan87 said:
I would run it, and see what happens. Drive it around some corners, take it over a couple bumps, then get under the car and see if it has rubbed anywhere.

This saves you work that you may not even need to do. You only NEED enough space for the thing to rotate, and if nothing really flexes in that area, you have no concerns.

Just my .02 cents.

87

If you do this, you might consider claying it up like you would for a piston to see valve clearance. Get a wad of clay and stick it to the framerail and up touching the shaft. Go drive around and see how it's displaced the clay. Triple expanding foam might work as well as it'll crush the foam, but I think it has a bit of springback.
 
to answer an earlier post....

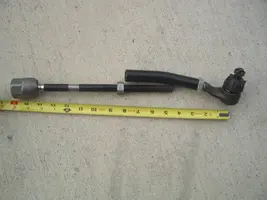
Yes it was basically a bolt-in. The only issues I had to deal with were cutting the steering shaft to length and buying/cutting the tie rods. Thankfully, I have a buddy with access to a machine shop. The steering shaft mod is not a garage-type fix. It's got to be done right. Here's a snap shot of a tie rod. The inners are from an 80's car and the outers from a 66. The 'elbow' in the middle came with the kit and mates the two together. All three pieces had to be cut in order to get a proper length. If there is one drawback in the kit, it is this item. Although it was about $100 in parts, I think they should have been included and pre-cut to length.
Otherwise, I love it. Can't wait for a drive- then I can report more detailed info.
tie_rod_new_web.webp

jim-
 

Attachments

  • tie_rod_new_web.webp
    tie_rod_new_web.webp
    68.1 KB · Views: 196