Detonation After Tfi And Egr Cleaning

Martman

Active Member
Jun 20, 2016
163
23
28
Louisville, KY
So recently replaced the tfi and cleaned egr valve, iac valve, egr plate, throttle body, maf. Have what feels like a miss around 1500 rpm and below but it is very subtle but it does buck now at lower speeds. Also noticed on a hard run through the gears I heard a bit of detonation that I have never heard before. I run 92/93 octane. I marked the distributor when replacing tfi but do not have a timing light to check it. PO said it was set to 14 degrees and didn't have detonation before the recent maintenance.

Car is also idling a bit high at 900-1000 rpm. Just looking for some ideas on what would cause the detonation if we assume the timing is still at 14 as I think it is.

Keep in mind the egr is was completely blocked and you can see the sludge from one of my previous threads.
 
  • Sponsors (?)


I think you can damage the egr by using the wrong cleaner causing a vacuum leak. Someone here can cime in on that. Fwiw previous owners have done some wonky things in an attempt to get 'more' power. Verify timing, run codes, check tuneup status, yadda, yadda, if the car is stock, timing at 10 or 12 degree you can run 87 octaine in it with no problem.
A word of advice, make it run right before you start modify'n it, ask me how I know.
And learn from the people on here, most have 'been there done that'.
 
For the egr I used purple power and carb cleaner and pretty sure I kept it off of the diaphragm. But you never know. Is there a way to test the egr in regards to a vacum leak?

Also I have double checked all of my vacum lines and have one question. Is there supposed to be a line connected to the empty spot in the photo below? The line coming in is from the upper intake but not sure about one on the connecting side. I read the vacum diagram and think everything is in the proper place but its just hard to know if you have never broken one all the way down and seen how they all route.

IMG_20161016_112013.jpg
 
To test your Egr, use a vacuum pump, apply about 10 inches of vacuum with engine off. If diaphragm in Egr is good it will hold on guage of pump. If it drops replace Egr valve. Test pump with hose plugged to be sure it's good and holding. Next, attach hose from pump, engine running, apply vacuum again, engine should stumble and die, if port is clear on intake. Also make sure your getting vacuum to egr hose going to egr. Verify timing with a timing light. 14-15 degrees is fine on 5.0 engines. If it didn't detonate before, it's got to be something you did, or uncovered. Keep us posted.


Sent from my iPhone using Tapatalk
 
Bwd tfi from O'Reilly's with heat transfer paste. Not dielectric. I am honestly leaning towards egr. I still have code 34 after all of the cleaning and stuff I did. The question for me is whether it is the valve, sensor on top, or both.

Sent from my Nexus 6 using Tapatalk
 
Code 34 Or 334 - EGR voltage above closed limit –

Revised 26-Sep-2011 to add EGR cleaning and movement test for pintle when vacuum is applied to diaphragm

Failed sensor, carbon between EGR pintle valve and seat holding the valve off its seat. Remove the EGR valve and clean it with carbon remover. Prior to re-installing see if you can blow air through the flange side of the EGR by mouth. If it leaks, there is carbon stuck on the pintle valve seat clean or, replace the EGR valve ($85-$95).

Recommended procedure for cleaning the EGR:
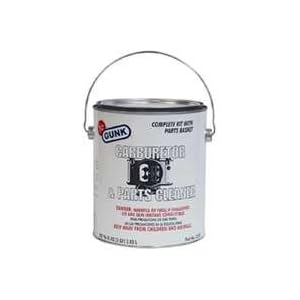
Conventional cleaning methods like throttle body cleaner aren’t very effective. The best method is a soak type cleaner used for carburetors. If you are into fixing motorcycles, jet skis, snowmobiles or anything else with a small carburetor, you probably have used the one gallon soak cleaners like Gunk or Berryman. One of the two should be available at your local auto parts store for $22-$29. There is a basket to set the parts in while they are soaking. Soak the metal body in the carb cleaner overnight. Don’t immerse the diaphragm side, since the carb cleaner may damage the diaphragm. If you get any of the carb cleaner on the diaphragm, rinse it off with water immediately. Rinse the part off with water and blow it dry with compressed air. Once it has dried, try blowing through the either hole and it should block the air flow. Do not put parts with water on them or in them in the carb cleaner. If you do, it will weaken the carb cleaner and it won’t clean as effectively.

Gunk Dip type carb & parts soaker:
21hb0QWbOeL._SL500_AA300_.jpg


If you have a handy vacuum source, apply it to the diaphragm and watch to see if the pintle moves freely. Try blowing air through either side and make sure it flows when the pintle retracts and blocks when the pintle is seated. If it does not, replace the EGR.


If the blow by test passes, and you have replaced the sensor, then you have electrical ground problems. Check the resistance between the black/white wire on the MAP/BARO sensor and then the black/white wire on the EGR and the same wire on the TPS. It should be less than 1.5 ohm. Next check the resistance between the black/white wire and the negative battery post. It should be less than 1.5 ohm.

Note that all resistance tests must be done with power off. Measuring resistance with a circuit powered on will give false readings and possibly damage the meter.

Let’s put on our Inspector Gadget propeller head beanies and think about how this works:
The EGR sensor is a variable resistor with ground on one leg and Vref (5 volts) on the other. Its’ resistance ranges from 4000 to 5500 Ohms measured between Vref & ground, depending on the sensor. The center connection of the variable resistor is the slider that moves in response to the amount of vacuum applied. The slider has some minimum value of resistance greater than 100 ohms so that the computer always sees a voltage present at its’ input. If the value was 0 ohms, there would be no voltage output. Then the computer would not be able to distinguish between a properly functioning sensor and one that had a broken wire or bad connection. The EGR I have in hand reads 700 Ohms between the slider (EPV) and ground (SIG RTN) at rest with no vacuum applied. The EGR valve or sensor may cause the voltage to be above closed limits due to the manufacturing tolerances that cause the EGR sensor to rest at a higher position than it should.

The following sensors are connected to the white 10 pin connector (salt & pepper engine harness connectors)
attachment.php


This will affect idle quality by diluting the intake air charge
 
@jrichker so just got done dumping codes again after driving home from work so it is good and warm. I have also included a link to it idling yesterday after I reset the base idle and checked the TPS. It is still not as smooth as I would expected but doesn't seem to do too bad. You can tell something is a miss though.

The biggest problem is still the bucking 1500 and below in rpms.

https://goo.gl/photos/21bysCeQ6y9abfvM6

I did some reading about 94 and 44 and really couldn't find anything that pointed to a specific part/problem. More generalized in regards to the smog system which everything is still in place as far as I can tell. 34 is obviously EGR. I think I can do a quick test on the egr to see if it is causing a vacum leak by unhooking and capping the vacuum line to the cluster. I don't have a hand vacuum to test it right now.

I have been down this EGR route before on many fox body fords and I have spent $60.00-$80.00 on these dang valves many times that didn't fix the problem and I would rather not do that this time.


KOER
94, 44, 34

KOEO
34, 63

I checked TPS voltage and it is at .99 and 4.91 v on the power side so it seems okay but this is the first time I have got 94 and 44.

And one more thing I have forgot to mention. When cold it will start and then stall and then do fine on restart.
 
Last edited:
if you have the stock intake and distributor, line up the marks on the distributor shaft and the lower intake and you will be at 10 BTDC. At least that will give you a safe base before you start playing with timng.
 
Didn't get out of work until late and didn't have a chance to stop and get a light. I did flip some of the vacuum lines around this morning that I believe were incorrect and going to rerun the codes to see if anything changed. It still has the jerking maybe not as bad but still there.
 
The stall on cold engine points to timing being too far advanced; bucking under load at low speed is another symptom. Do the obvious: beg, borrow or buy a timing light and check the timing. Auto parts store will loan tools and test equipment if you have credit card.

Count on having to run 93 octane with 14° timing, particularly on an older engine that has a lot of carbon buildup in the combustion chambers.
 
  • Like
Reactions: 1 user
Dumped codes again on both engine off and engine running to make sure nothing had changed and it did not. I even did the cylinder balance test and the first pass got the 9 on the second pass got a 3 and then a 3 again which I thought was a bit weird as I thought you would only get one number per pass but I could be wrong on that.

I am getting the light tomorrow for sure. Had a long day at work and didn't feel like fighting any more traffic on way home. The car is idling pretty good and runs pretty good outside of the 1500 and lower range and I am leaning more towards timing as well. I have been running 93 octane but with it being a stock engine with a 65mm TB I am not looking for that little extra horsepower via timing just yet. Chassis is priority this go around now that I am older and wiser. I figure I would set it to 12 once I get the light. You think 12 would be okay or just set it to 10.

Also double checked all vacuum lines. Seems PO replaced them all with rubber so that is good.
 
Keep in mind the egr is was completely blocked and you can see the sludge from one of my previous threads.
I can see from your pic that the cross over tube is still in place. Would it be hard for you to check it for clogs? It wont cost anything to check it reguardless.

Count on having to run 93 octane with 14° timing, particularly on an older engine that has a lot of carbon buildup in the combustion chambers.

You were the one that came up with the solution in the thread that I just read! Do you think that it would apply to this situation also? This is what you said in the other post:

Failure mode is usually due to a clogged air crossover tube, where one or both sides of the tube clog with carbon. The air crossover tube mounts on the back of the cylinder heads and supplies air to each of the Thermactor air passages cast into the cylinder heads. When the heads do not get the proper air delivery, they set codes 44 & 94, depending on which passage is clogged. It is possible to get both 44 & 94, which would suggest that the air pump or control valves are not working correctly, or the crossover tube is full of carbon or missing.
 
Last edited:
Oh yeah I am definitely going to check that tube. I don't know that I have ever did anything with that tube on a fox body but when the engine is cool I will be pulling that guy off and cleaning it. I have a suspicion it is probably blocked and probably difficult to remove. Based on how bad the build up was on the upper part of this intake tract I can only assume that is blocked as well. I also remembered I got the original TB that was on the car and it was not pretty either.

I appreciate all of the effort and time you all are giving me in working through this. I am not one to just throw parts at a problem. I want to understand it and know how to fix it. Could be the fact I am a programmer and game developer and always face challenges.

If you all get bored with stangnet go download my game Twisted Dragbike Racing. I partnered with and used to work with the maker of NoLimit drag racing to make this.

I am keeping a photo album of all pics related to the car if you want an easy way to go see all of them. https://goo.gl/photos/wfD9CrmuZZiGvazLA
 
  • Like
Reactions: 1 user
I can see from your pic that the cross over tube is still in place. Would it be hard for you to check it for clogs? It wont cost anything to check it regardless.


You were the one that came up with the solution in the thread that I just read! Do you think that it would apply to this situation also? This is what you said in the other post:

Failure mode is usually due to a clogged air crossover tube, where one or both sides of the tube clog with carbon. The air crossover tube mounts on the back of the cylinder heads and supplies air to each of the Thermactor air passages cast into the cylinder heads. When the heads do not get the proper air delivery, they set codes 44 & 94, depending on which passage is clogged. It is possible to get both 44 & 94, which would suggest that the air pump or control valves are not working correctly, or the crossover tube is full of carbon or missing.

That is correct, thank you for mentioning it.
 
  • Like
Reactions: 1 user