Gonna be in Anaheim, CA this Thursday...

So, the Mustang has been getting some serious body work lately. I'm going to see a friend (Sixt9Coug) in Anaheim to get the Mustang sprayed! I can't wait. I'll be updated this thread with pics of what it looked like, what it looks like now, and when it's finished.

Anyhow, just figured I'd let you all know :)

Here's a collage of pics that I've taken over the months:

When I first got it.
IMG_0047.jpg


After I got some Cobra reps, and lowered her with Eibach Sportlines, and replaced the door shell.
IMG_0436.jpg


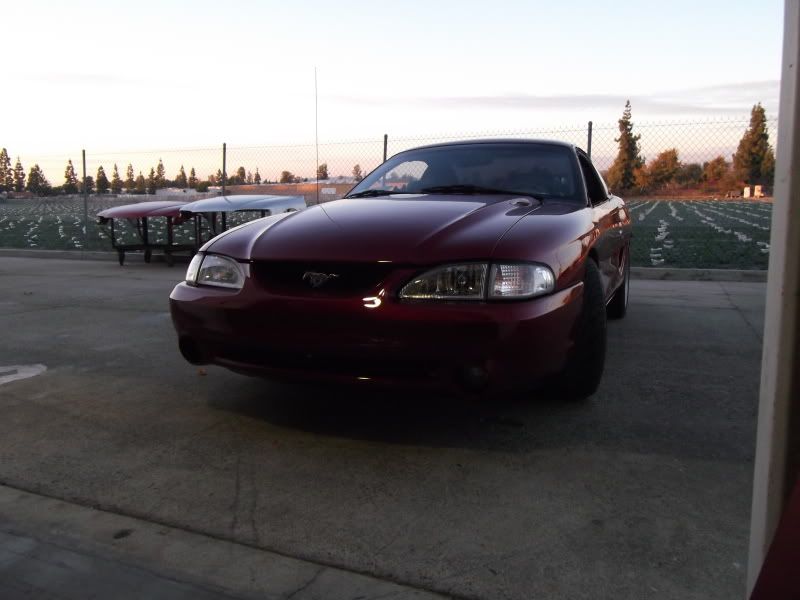
When I first got it, again
photo4.jpg

photo5.jpg

photo6.jpg


At Harvey's (Davis3) garage, doing some welding
IMG_0050.jpg

IMG_0053.jpg


What it looks like on the opposite end after the Cobra wheel install
IMG_0396.jpg


Uh oh.... she's unmasked!
IMG_0038.jpg


AH! Much better!
IMG_0042.jpg


I know I know, not a Cobra... But I loooove the look. Plus, all the GT emblems are staying.

Start some filling...
IMG_0117.png

IMG_0116.jpg


Doing some sanding...
IMG_0143.jpg

IMG_0144.jpg

IMG_0145.jpg


The roof was a pain in the ASS!!

To show you all, who this car belongs to!
IMG_0146.jpg


Finished the quarter panels
IMG_0119.jpg


This one being the worst of them
IMG_0118.jpg


And her current state, as she sits right now...
IMG_0156.jpg


So, I'll update with a 360 of what the car looks like now... then during the process, then the finished product.

WISH ME LUCK!
 
  • Sponsors (?)


Could make this a StangNet meet if we want, I'm free Saturday.

This is gonna take a few days to complete so yeah, we will be there Saturday. I am HOPING to get the car painted late Friday night with preparation and priming to take place the better part of Thursday. Hopefully Saturday will be defect correction and reassembly. Sunday is a spare day in case things come up.

Sal, it's gonna be a long few days lol. Trust me, I just went through it Monday through today at the other facility.
I'm definitely down for long days. Trust me, I'll work on stuff 10+ hours everyday ;)

I can't wait! See you tomorrow STEVE-O!
 
This is gonna take a few days to complete so yeah, we will be there Saturday. I am HOPING to get the car painted late Friday night with preparation and priming to take place the better part of Thursday. Hopefully Saturday will be defect correction and reassembly. Sunday is a spare day in case things come up.

Saturday is a better day for me, so Saturday it is then. PM'd you for the address - don't want that personal stuff out in a public forum.
 
Sorry about it not turning into a meet. All there would have been to see was two fat dudes sanding ha ha.

Long 3 days. Looooong lol. It took about 33 hours of labor in those three days to get it knocked out.

Sal... get some pics up!
 
Ok, so I got to Steve's work on Thursday. (Yes, we were working on a car on Thanksgiving!)

This is what she looked like as soon as I drove in.
DSCF0015.jpg

DSCF0016.jpg

DSCF0017.jpg

DSCF0018.jpg

DSCF0019.jpg

DSCF0020.jpg


As soon as I got there, we didn't waste no time to tare into her.
DSCF0021.jpg

DSCF0022.jpg

DSCF0023.jpg

DSCF0024.jpg


Time to block the car and see how straight I have it. Not too bad, but had to add filler on the roof and the rear right quarter. Damn kid who owned it before me butchered the damn car :(
DSCF0025.jpg

DSCF0026.jpg


Time to get rid of the horrible rock chips on the hood.
DSCF0027.jpg

DSCF0028.jpg

DSCF0029.jpg


Since we got some bare metal, filler, and fiberglass showing. Time to mask and primer!
DSCF0030.jpg

DSCF0031.jpg

DSCF0032.jpg

DSCF0035.jpg

DSCF0036.jpg

DSCF0037.jpg

DSCF0038.jpg

DSCF0033.jpg
around and a new header panel.
DSCF0034.jpg

DSCF0040.jpg


Day Two:

Time to take her out of the both!
/DSCF0039.jpg[/IMG]
DSCF0041.jpg

DSCF0042.jpg


Time to start blocking areas and see how well we did!
DSCF0043.jpg

DSCF0044.jpg

DSCF0045.jpg

DSCF0046.jpg

DSCF0047.jpg


That roof is looking pretty good!
DSCF0048.jpg

DSCF0049.jpg


As Steve-o blocks, I'll start prepping the trim items and bumpers
DSCF0050.jpg

DSCF0051.jpg

DSCF0052.jpg

DSCF0054.jpg


The whole car is buzzed down, and ready for some paint!!!
DSCF0055.jpg

DSCF0057.jpg

DSCF0058.jpg


She's masked up again, and ready for some sealer before the paint is laid down. Before we do that, gotta make sure the car is dust-less and clean!
DSCF0059.jpg

DSCF0060.jpg

DSCF0061.jpg

DSCF0062.jpg

DSCF0063.jpg

DSCF0064.jpg

DSCF0067.jpg

DSCF0065.jpg


The color I picked! (Will disclose at the end of my posting)
(Without flash)
DSCF0066.jpg

(With flash)
DSCF0068.jpg


Time to lay out some sealer
DSCF0069.jpg

DSCF0070.jpg

DSCF0071.jpg

DSCF0072.jpg

DSCF0073.jpg

DSCF0074.jpg

DSCF0075.jpg


The car is sealed 100%!
DSCF0076.jpg

DSCF0077.jpg

DSCF0078.jpg

DSCF0079.jpg

DSCF0080.jpg


Now to add some color to the mix!
DSCF0081.jpg

DSCF0082.jpg

DSCF0083.jpg

DSCF0084.jpg

DSCF0085.jpg

DSCF0086.jpg

DSCF0087.jpg

DSCF0088.jpg

DSCF0091.jpg

DSCF0092.jpg

DSCF0093.jpg

DSCF0094.jpg

DSCF0095.jpg

DSCF0096.jpg

DSCF0097.jpg

DSCF0098.jpg

DSCF0099.jpg

DSCF0100.jpg

DSCF0101.jpg

DSCF0102.jpg

DSCF0103.jpg

DSCF0104.jpg

View attachment 203069

For those who want to see Steve in action. Two videos:
View attachment 203070

DSCF0106.jpg MG]

DAY 3:

Once the color was laid out, the clear was sprayed. Once dried, I pulled the car out and started reassembly.
DSCF0107.jpg

DSCF0108.jpg

DSCF0109.jpg

DSCF0110.jpg

DSCF0111.jpg

DSCF0112.jpg

DSCF0113.jpg

DSCF0114.jpg

DSCF0115.jpg

DSCF0116.jpg

DSCF0116.jpg
 
ALL DONE!!! FINALLY!!! Color code 3R1 Lexus IS-F Matador Red Mica
DSCF0117.jpg

DSCF0118.jpg

DSCF0119.jpg

DSCF0120.jpg

DSCF0121.jpg

DSCF0122.jpg


Day 4

We left the car at the facility, even though it was complete. It was raining outside and didn't feel a fresh car deserved such treatment. LOL

Anyhow, here she is in fresh sunlight!
DSCF0123.jpg

DSCF0124.jpg

DSCF0125.jpg

DSCF0126.jpg

DSCF0127.jpg

DSCF0128.jpg


33 hours of labor, only taking one break on day 2 for lunch. All the other days we worked straight through!! First day was 10 hours, the other two were about 12 each. Lots of hard work, but well worth it. Hope you all enjoyed the pics!
 
It's a training facility we have in Anaheim. We can sometimes get approval from the higher ups to do things like this. Lots of strings attached but it's worth it to use a great place where everything works. Basically I can shoot personal, family and friend's cars there as long as I am not profiting off of it. I am fine with that. I like my job and have no interest in doing side work for money. So yeah, this was a freebie.
 
No profit? Well, there goes my thought of paying you to paint my Cervini's ram air hood. Can't exactly leverage a friendship when one doesn't (yet) exist. I'd rather pay someone who cares about 'Stangs to do a good job, rather than chance getting a guy who only cares enough to get paid.

You do this for a living, huh? What's the name of the company?