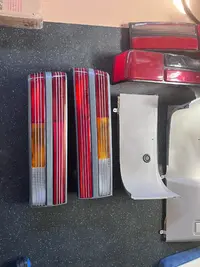
Got the lenses off and cleaned up the panels and taillight housings.


That sucks, living in TX it is basically overnight delivery for everything I've bought from them... Or worst case I could drive there in like 1.5 hours.
Man, in the days of Amazon Prime, waiting any longer than 2 days is like waiting an eternity. Still waiting on LMR parts to come in.

Man, in the days of Amazon Prime, waiting any longer than 2 days is like waiting an eternity. Still waiting on LMR parts to come in.

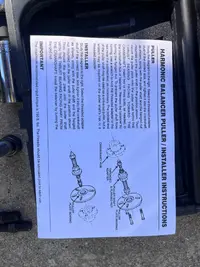
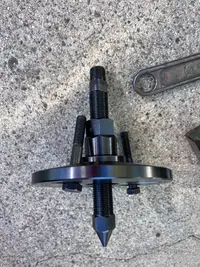

Looks like you have it on backwards if you attached it the way the photo goes. The pointed end goes into the crank and will center itself. Once you install the 2 other bolts on the balancer, you use two wrenches...one for the center nut and one for the outer nut (you will only turn the outer one).Ok got all my parts in to do the harmonic balancer and front main seal. Couple questions as I got stuck in my initial try. The balancer puller/installer came with these instructions:
So I thought I set up the puller the way the diagram goes… is this correct?
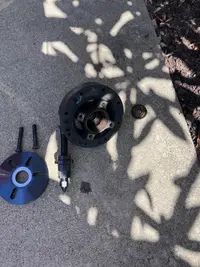
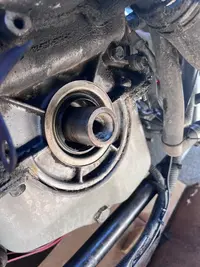
Couple things. Directions say to thread the appropriate threaded adapter into the crank… I’m assuming this adapter goes into the hole the crank bolt comes out of? I matched the correct size adapter, but it’s too short to catch any threads in the crankshaft hole. That is the very top piece in the pic above. Second, so I put my puller together as shown and just put it in the hole, unthreaded the puller shaft flanged nut as far away from the balancer as possible where I could still get threads from the puller plate into the balancer, but it sits too far inside the balancer to get a wrench on the flanged nut to keep it from spinning. Any suggestions?
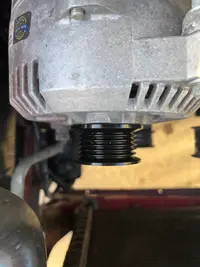
Second and unrelated, how do you remove the alternator pulley since the nut and pulley just spin together? I don’t see a hole that you could like stick a screw driver through to keep it still.
Hmm if that works for pulling it off then I still feel like I’m in the same predicament when I go to install the new one, the adapter thread won’t be long enough to catch threads inside the crank. I guess I’ll cross that bridge when I get there.Looks like you have it on backwards if you attached it the way the photo goes. The pointed end goes into the crank and will center itself. Once you install the 2 other bolts on the balancer, you use two wrenches...one for the center nut and one for the outer nut (you will only turn the outer one).
Hmm if that works for pulling it off then I still feel like I’m in the same predicament when I go to install the new one, the adapter thread won’t be long enough to catch threads inside the crank. I guess I’ll cross that bridge when I get there.
Do I need to drain the oil before removing the front main seal if the car has been sitting for two weeks?
When you install, you may need a longer bolt to ensure it engages plenty of threads. Does your kit come with different ends? Can you remove the pointed end and thread on anything different?Hmm if that works for pulling it off then I still feel like I’m in the same predicament when I go to install the new one, the adapter thread won’t be long enough to catch threads inside the crank. I guess I’ll cross that bridge when I get there.
Do I need to drain the oil before removing the front main seal if the car has been sitting for two weeks?
Ya the one that matches the width of the crank bolt isn’t long enough to catch any threads inside the crank.Have you tried screwing the insert into the crank, [first]?
Well wtf this kit was supposed to be Ford 302 specific. Figured the correct bolts would come with it. It does come with a few different thread adapters but only one matches the width of the crank bolt.When you install, you may need a longer bolt to ensure it engages plenty of threads. Does your kit come with different ends? Can you remove the pointed end and thread on anything different?
No oil will come out. Make damn sure the crank and timing cover are spotless. I put some RTV on the outside of the seal and also on the inside of the balancer to ensure nothing leaks.
Well wtf this kit was supposed to be Ford 302 specific.

I've heard of people using the crank bolt to install it...not sure I would do that...good way to strip out your threads in the crank.According to a Twenty-something year old Chinaman that's never seen a Ford Windsor [in his life] and then translated by somebody else.


I've heard of people using the crank bolt to install it...not sure I would do that...good way to strip out your threads in the crank.

Well I can’t argue with needing to learn how to do this stuff and it is part of the reason I bought this car.Do the seal, you've done the hard part now finish the job!
Learning opportunity.
You're welcome