My turbo build: 1970 Mustang Grande

Well, I managed to get the intercooler mounted. What a pain in the arse!

To mount the 31"x12"x3"intercooler I had to do the following:
- Weld brackets to the crossmember underneath the radiator for the lower IC mounting bolts
- Relocate aftermarket alarm siren
- Relocate Taurus electric fan wiring and relays
- Relocate horns (modify mounting brackets)
- Cut 2 holes in the core support sheetmetal
- Drastically modify the grill support bracket and hood latch support.


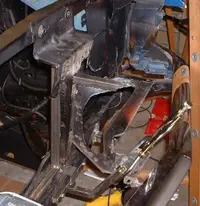
Here's a pic of the grill support and hood latch support brackets in the process of being modified. As you can see, I had to somehow fit the intercooler "inside" of these brackets.
attachment.php
 

Attachments

  • Intercooler bracket in progress - resized.webp
    Intercooler bracket in progress - resized.webp
    64 KB · Views: 802
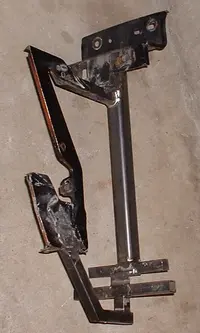
Here's a pic of the nearly finished hood latch support and grill support bracket (they are now 1 piece). In this pic all that needs to be done is to add the upper intercooler mounting points.

I never did get a pic of the final bracket after powdercoating.
attachment.php
 

Attachments

  • Intercooler bracket nearly finished.webp
    Intercooler bracket nearly finished.webp
    55.9 KB · Views: 676
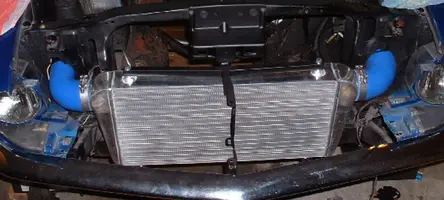
Here's a pic of the intercooler mounted. In this pic you can see what the mounting bracket looks like after powdercoating and with the upper IC mounting points.
attachment.php
 

Attachments

  • Mounted Intercooler-resized.webp
    Mounted Intercooler-resized.webp
    63 KB · Views: 678
And here's a pic from the front with all of the grill components back in place (with exception of the front valance)
attachment.php
 

Attachments

  • Mounted Intercooler 2 - resized.webp
    Mounted Intercooler 2 - resized.webp
    63.6 KB · Views: 705
Yep. Just drill and 1/4 npt tap and it'll be fine. But a 3an to a 1/4npt for it and one for the turbo. Don't worry too much about drilling too far when you do it. It's plenty thick. I usually go a little to far and drill into the other side a little to make sure the hole I drill goes completely thru and there is no taper.
I wish I could see their faces. That big chunk of aluminum sure does confuse people. :)
 
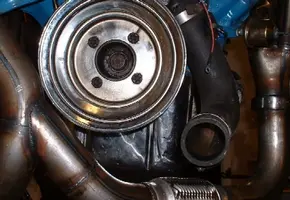
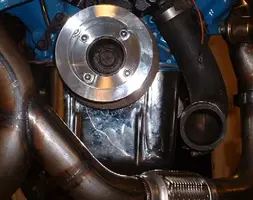
I ran into a bit of a problem with clearance around the crank pully. Instead of denting the tube or cutting up the crossover pipe, I decided to take the easy way out and install an underdrive (smaller) crank pully.

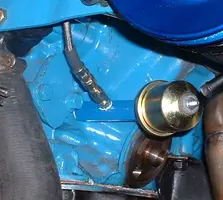
Here's a pic of the clearance with the old pully. The pully just barely touched the tube, but the alternator belt would have been rubbing:
attachment.php


Here's a pic of the clearance with the new pully. As you can see, there's plenty of clearance now. Unfortunately it looks like March and I have different opinions as to how pully diameter should be measured. This pully is a little smaller than I would like it to be. But since I have an upgraded charging system and the engine idles high because of the cam, I don't expect this to be a problem.
attachment.php
 

Attachments

  • Old Crank Pully - resized.webp
    Old Crank Pully - resized.webp
    53.9 KB · Views: 635
  • New Crank Pully - resized.webp
    New Crank Pully - resized.webp
    51.3 KB · Views: 624
Lol... you don't know how hard it is to drop the tools and come in to post.

Luckily (I think?) the wife has gotten to the point where she is rationing my "garage time". Which leaves me a little time to post progress updates.


my wife generally tries to make me go out in the garage as long as it doesn't involve spending money anyway, like why don't you go clean that garage, or go crawl under your car for a while or something like that. :rolleyes:
 
:lol:

Another great piece of advice I got was "If you screw something up enough they will stop asking you to do it." I have broken 16 toilet brushes and 4 vacuums but she still asks me to help with cleaning. :nonono:

if you complain about enough, then just stop complaining one day and just start lowering your head and getting that puppy dog look and walk away and start doing things really slow and sloppy, they'll eventually stop even asking you to do anything, because they could do it themselves in the time it takes you to get the "supplies" for whatever little project they want you to do. :rlaugh:
 
Sorry about that. Glad to see it was an easy fix ( although out of the pocket book.) This was my biggest fear building any of these kits. All the crank pulleys I measure hover around 6.5 inches at the widest sectionof the pulley. How big is that thing ? I did try to make it close, but not knowing your was that large.
After your first test drive. I better be the first person you contact. I wanna know how big that Kool Aid smile is. lol