
I have a 91 LX. It has a E303 cam and Seems to like ignition timing around 30 degrees. It is week on power at about 3k RPM and up. Three questions, 1. Why does it need so much ignition timing? Do you guys think my camshaft is dot to dot, or advanced on the sprocket by a tooth or two? 2. It is week on power around 3k RPM and higher, why? 3. When I run WOT, the check engine light comes on. Read codes and it called out the IAC. This has nothing to do with WOT. So why the check engine light at WOT? The check engine light goes off before I get off the highway. Again stock motor, stock exhaust manifold with x pipe off road exhaust.
You are using an out of date browser. It may not display this or other websites correctly.
You should upgrade or use an alternative browser.
You should upgrade or use an alternative browser.
Stock motor with E303 cam. Ignition timing issue & weak at high RPMs
- Thread starter Kent Hall
- Start date
-
Sponsors (?)
on my 91 LX with a all stock motor, except for a E303 camshaft I have to set my ignition timing around 30 degrees in order for the motor to run right? Do you think my camshaft was advanced when installed? It was done by previous owner. Car does not run strong above 3k RPM. It just feels week above that.
Welcome to stangnet
i moved this to our tech forum, first thing to do is go to the technical/how to thread in the 5.0 tech forum, there you will find out how to pull codes, codes will be present even if the cel goes out, also there you will find other things like the 'surging idle checklist', I know you don't have a surging idle but it covers the stuff that will make the car misbehave, it will show you the proper way to check timing and many other things, jrichker put it together and he knows his stuff, it will save you time and money.
now use this thread to ask any questions, and there will be questions!
now post some pics of that pony,
It could be retarded.... if they installed it dot-dot... when I put the E303 cam in mine, I was just going to install it dot-dot, but after reading ect... I was told you really need to degreed it, since most of the self cams are not true when put dot-dot... and also, most cams can have up to 4 degree advance in them, but the E303 does not... So when I degreed mine, it was about 2-1/2 - 3 degree retarded. So I put it 4 degree advance when I installed it... and now I'm about 2- 2 1/2 degree advance.
So I should be good, motor still isn't in car yet... though...
So I should be good, motor still isn't in car yet... though...
With that kind of timing, I would bet that the harmonic balancer has torn up the rubber ring that connects the balancer inner hub with the outer ring where the timing marks are.
Harmonic balancer check to see if it has spun or moved the timing marks
Before you waste time and money replacing a balancer, make sure that it needs replacing....
Spend 30 minutes and $7.50 to save you $60. You can't get a better deal than that anywhere...
Prep step:
Joe R’s note: Timing tape (strip of adhesive backed paper with timing marks printed on it) is available from Summit Racing https://www.summitracing.com/parts/sum-163594/overview/ use it instead of a degree wheel. The cost is about $5 plus shipping
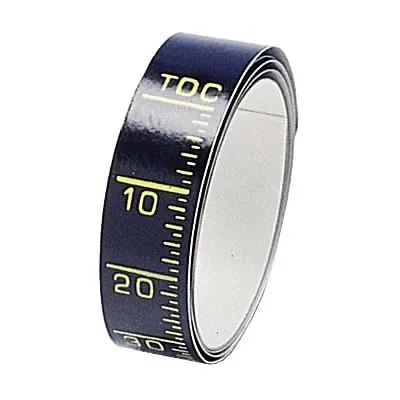
Clean the balancer rim up real good with acetone or paint thinner. Try not to get the acetone or paint thinner on anything but the balancer rim; it could damage the rubber mounting ring. Some cotton balls or a wadded up ball of paper towel may be the best application tools. Let whatever solvent you used dry completely and then apply the timing tape.
Line the TDC mark up on the tape with the TDC make on the balancer; make sure it is stuck down good.
TDC location process courtesy of Michael Yount
If you're trying to find ACTUAL tdc for cam installation/degreeing, follow the steps below:
Positive stop – obtain an old spark plug for the Ford engine – most of us have at least one laying around. Put it in your vice, and with a tool of destruction you deem appropriate – cut off the ground tip and bust up the ceramic around the center electrode. Keep pounding to get the ceramic and center electrode removed so you’ve got a good ¾” or so of hollow space inside what used to be the ‘business’ end of the spark plug. If you happen to break the ceramic on the other end of the spark plug, don’t worry about it. Once you’ve got a nice hollow space in the tip of the plug, take a 5/16” tap, and cut threads inside that end of the plug. I found that diameter to go right in without any drilling required. Once you’ve cut threads, screw in a 5/16" bolt about 1.5” to 2” long. Then take your hack saw and cut the head off the bolt. Wouldn’t hurt to take your file/grinder and dress up the freshly cut surface so no sharp edges or shrapnel enter the combustion chamber. Also clean up the threads on the plug so that it easily screws into and out of the plug hole.
Determining TDC – remove the passenger side valve cover. Rotate the engine (socket on crank bolt) until the #1 piston is down the cylinder on the intake stroke. Unscrew the spark plug in that cylinder, and replace it with the positive stop you just made. Only screw the positive stop in hand tight. Install your cam degree wheel and pointer (no easy task in some cases as harmonic balancer and other accessories will have to be removed). You may want to remove all spark plugs at this point because it will make it easier to smoothly turn the engine over in small increments. GENTLY rotate the engine clockwise until the piston comes to rest against the stop. Note the degree wheel reading. GENTLY rotate the engine in the opposite direction until the piston comes to rest against the stop. Note the degree wheel reading. TDC is exactly half way between these readings. Calculate where that position is on the degree wheel, remove the piston stop from the cylinder, and rotate the engine to TDC as you calculated it. You are now at true TDC.
After you have done that, make sure the TDC mark on the balancer now lines up with the timing pointer. If it doesn't line up then replace the balancer.
If it does line up, you need to look elsewhere for your problem.
Setting the timing:
You can forget about anything beyond this point if you don't have access to a timing light. You will never get the timing set right without one.
Note: If you don't have access to a timing light, most of the larger auto parts stores will rent or loan one if you have a credit card or leave a cash deposit.
Paint the mark on the harmonic balancer with paint -choose 10 degrees BTC or 14 degrees BTC or something else if you have NO2 or other power adder. I try to paint TDC red, 10 degrees BTC white and 14 degrees BTC blue.
10 degrees BTC is towards the driver’s side marks.
Note: setting the timing beyond the 10 degree mark will give you a little more low speed acceleration. BUT you will need to run 93 octane to avoid pinging and engine damage. Pinging is very hard to hear at full throttle, so it could be present and you would not hear it.
Simplified diagram of what it looks like. Not all the marks are shown for ease of viewing.
ATC ' ' ' ' ' ' ' ' ' '!' ' ' ' ' ' ' ' ' ' BTC
---------------- > Direction of Rotation as viewed standing in front of the engine.
The ' is 2 degrees.
The ! is TDC
The ' is 10 degrees BTC
Set the timing 5 marks BTC. Or if you prefer, 5 marks towards the driver's side to get 10 degrees.
To get 14 degrees, set it 7 marks BTC. Or if you prefer, 7 marks towards the driver's side to get 14 degrees.
The paint marks you make are your friends if you do it correctly. They are much easier to see that the marks machined into the harmonic balancer hub.
Make sure that you set he timing when the engine is up to operating temperature.
At this point hook up all the wires, get out the timing light. Connect timing light up to battery & #1 spark plug.
Remove the SPOUT connector (do a search if you want a picture of the SPOUT connector) It is the 2 pin rectangular plug on the distributor wiring harness. Only the EFI Mustang engines have a SPOUT. If yours is not EFI, check for a SPOUT: if you don’t find one, skip any instructions regarding the SPOUT
Warning: there are only two places the SPOUT should be when you time the engine. The first place is in your pocket while you are setting the timing and the second is back in the harness when you finish. The little bugger is too easy to lose and too hard to find a replacement.
Start engine, loosen distributor hold down with a 1/2" universal socket. Shine the timing light on the marks and turn the distributor until the mark lines up with the edge of the timing pointer. Tighten down the distributor hold down bolt, Replace the SPOUT connector and you are done.
The HO firing order is 1-3-7-2-6-5-4-8.
Non HO firing order is 1-5-4-2-6-3-7-8
Harmonic balancer check to see if it has spun or moved the timing marks
Before you waste time and money replacing a balancer, make sure that it needs replacing....
Spend 30 minutes and $7.50 to save you $60. You can't get a better deal than that anywhere...
Prep step:
Joe R’s note: Timing tape (strip of adhesive backed paper with timing marks printed on it) is available from Summit Racing https://www.summitracing.com/parts/sum-163594/overview/ use it instead of a degree wheel. The cost is about $5 plus shipping
Clean the balancer rim up real good with acetone or paint thinner. Try not to get the acetone or paint thinner on anything but the balancer rim; it could damage the rubber mounting ring. Some cotton balls or a wadded up ball of paper towel may be the best application tools. Let whatever solvent you used dry completely and then apply the timing tape.
Line the TDC mark up on the tape with the TDC make on the balancer; make sure it is stuck down good.
TDC location process courtesy of Michael Yount
If you're trying to find ACTUAL tdc for cam installation/degreeing, follow the steps below:
Positive stop – obtain an old spark plug for the Ford engine – most of us have at least one laying around. Put it in your vice, and with a tool of destruction you deem appropriate – cut off the ground tip and bust up the ceramic around the center electrode. Keep pounding to get the ceramic and center electrode removed so you’ve got a good ¾” or so of hollow space inside what used to be the ‘business’ end of the spark plug. If you happen to break the ceramic on the other end of the spark plug, don’t worry about it. Once you’ve got a nice hollow space in the tip of the plug, take a 5/16” tap, and cut threads inside that end of the plug. I found that diameter to go right in without any drilling required. Once you’ve cut threads, screw in a 5/16" bolt about 1.5” to 2” long. Then take your hack saw and cut the head off the bolt. Wouldn’t hurt to take your file/grinder and dress up the freshly cut surface so no sharp edges or shrapnel enter the combustion chamber. Also clean up the threads on the plug so that it easily screws into and out of the plug hole.
Determining TDC – remove the passenger side valve cover. Rotate the engine (socket on crank bolt) until the #1 piston is down the cylinder on the intake stroke. Unscrew the spark plug in that cylinder, and replace it with the positive stop you just made. Only screw the positive stop in hand tight. Install your cam degree wheel and pointer (no easy task in some cases as harmonic balancer and other accessories will have to be removed). You may want to remove all spark plugs at this point because it will make it easier to smoothly turn the engine over in small increments. GENTLY rotate the engine clockwise until the piston comes to rest against the stop. Note the degree wheel reading. GENTLY rotate the engine in the opposite direction until the piston comes to rest against the stop. Note the degree wheel reading. TDC is exactly half way between these readings. Calculate where that position is on the degree wheel, remove the piston stop from the cylinder, and rotate the engine to TDC as you calculated it. You are now at true TDC.
After you have done that, make sure the TDC mark on the balancer now lines up with the timing pointer. If it doesn't line up then replace the balancer.
If it does line up, you need to look elsewhere for your problem.
Setting the timing:
You can forget about anything beyond this point if you don't have access to a timing light. You will never get the timing set right without one.
Note: If you don't have access to a timing light, most of the larger auto parts stores will rent or loan one if you have a credit card or leave a cash deposit.
Paint the mark on the harmonic balancer with paint -choose 10 degrees BTC or 14 degrees BTC or something else if you have NO2 or other power adder. I try to paint TDC red, 10 degrees BTC white and 14 degrees BTC blue.
10 degrees BTC is towards the driver’s side marks.
Note: setting the timing beyond the 10 degree mark will give you a little more low speed acceleration. BUT you will need to run 93 octane to avoid pinging and engine damage. Pinging is very hard to hear at full throttle, so it could be present and you would not hear it.
Simplified diagram of what it looks like. Not all the marks are shown for ease of viewing.
ATC ' ' ' ' ' ' ' ' ' '!' ' ' ' ' ' ' ' ' ' BTC
---------------- > Direction of Rotation as viewed standing in front of the engine.
The ' is 2 degrees.
The ! is TDC
The ' is 10 degrees BTC
Set the timing 5 marks BTC. Or if you prefer, 5 marks towards the driver's side to get 10 degrees.
To get 14 degrees, set it 7 marks BTC. Or if you prefer, 7 marks towards the driver's side to get 14 degrees.
The paint marks you make are your friends if you do it correctly. They are much easier to see that the marks machined into the harmonic balancer hub.
Make sure that you set he timing when the engine is up to operating temperature.
At this point hook up all the wires, get out the timing light. Connect timing light up to battery & #1 spark plug.
Remove the SPOUT connector (do a search if you want a picture of the SPOUT connector) It is the 2 pin rectangular plug on the distributor wiring harness. Only the EFI Mustang engines have a SPOUT. If yours is not EFI, check for a SPOUT: if you don’t find one, skip any instructions regarding the SPOUT
Warning: there are only two places the SPOUT should be when you time the engine. The first place is in your pocket while you are setting the timing and the second is back in the harness when you finish. The little bugger is too easy to lose and too hard to find a replacement.
Start engine, loosen distributor hold down with a 1/2" universal socket. Shine the timing light on the marks and turn the distributor until the mark lines up with the edge of the timing pointer. Tighten down the distributor hold down bolt, Replace the SPOUT connector and you are done.
The HO firing order is 1-3-7-2-6-5-4-8.
Non HO firing order is 1-5-4-2-6-3-7-8
Last edited:
mikestang63
SN Certified Technician

v8stang289
15 Year Member
- Apr 22, 2008
- 136
- 116
- 74
Is that 30* initial timing? Are you checking/setting it with the Spout connector out? Have you verified the timing marks on the balancer are true? sometimes the outer ring can slip.
+1 walk us through how you set the timing. the ECU adds 18* to the base timing at WOT.
get the car started and warmed up, pull the spout connector thats in the pigtail on the distributor harness and put it in your pocket they are easy to loose. now set the timing to 10* on the balancer, this will give you 28* total at WOT this is how the car came from the factory. Once you have it set to 10* shut the car off tighten the distributor and put the spout back in. Your done.
The ecu uses engine timing to help control the idle speed, so at idle with the spout connector in the ecu will add around 10* to the base timing. This will give you around 20* of timing at idle, this is NORMAL.
You absolutely cannot try to set the timing on these cars without removing the spout, doing so will result in very advanced timing and can cause engine damage.
With that kind of timing, I would bet that the harmonic balancer has torn up the rubber ring that connects the balancer inner hub with the outer ring where the timing marks are.
Harmonic balancer check to see if it has spun or moved the timing marks
Before you waste time and money replacing a balancer, make sure that it needs replacing....
Spend 30 minutes and $7.50 to save you $60. You can't get a better deal than that anywhere...
Prep step:
Joe R’s note: Timing tape (strip of adhesive backed paper with timing marks printed on it) is available from Summit Racing https://www.summitracing.com/parts/sum-163594/overview/ use it instead of a degree wheel. The cost is about $5 plus shipping
Clean the balancer rim up real good with acetone or paint thinner. Try not to get the acetone or paint thinner on anything but the balancer rim; it could damage the rubber mounting ring. Some cotton balls or a wadded up ball of paper towel may be the best application tools. Let whatever solvent you used dry completely and then apply the timing tape.
Line the TDC mark up on the tape with the TDC make on the balancer; make sure it is stuck down good.
TDC location process courtesy of Michael Yount
If you're trying to find ACTUAL tdc for cam installation/degreeing, follow the steps below:
Positive stop – obtain an old spark plug for the Ford engine – most of us have at least one laying around. Put it in your vice, and with a tool of destruction you deem appropriate – cut off the ground tip and bust up the ceramic around the center electrode. Keep pounding to get the ceramic and center electrode removed so you’ve got a good ¾” or so of hollow space inside what used to be the ‘business’ end of the spark plug. If you happen to break the ceramic on the other end of the spark plug, don’t worry about it. Once you’ve got a nice hollow space in the tip of the plug, take a 5/16” tap, and cut threads inside that end of the plug. I found that diameter to go right in without any drilling required. Once you’ve cut threads, screw in a 5/16" bolt about 1.5” to 2” long. Then take your hack saw and cut the head off the bolt. Wouldn’t hurt to take your file/grinder and dress up the freshly cut surface so no sharp edges or shrapnel enter the combustion chamber. Also clean up the threads on the plug so that it easily screws into and out of the plug hole.
Determining TDC – remove the passenger side valve cover. Rotate the engine (socket on crank bolt) until the #1 piston is down the cylinder on the intake stroke. Unscrew the spark plug in that cylinder, and replace it with the positive stop you just made. Only screw the positive stop in hand tight. Install your cam degree wheel and pointer (no easy task in some cases as harmonic balancer and other accessories will have to be removed). You may want to remove all spark plugs at this point because it will make it easier to smoothly turn the engine over in small increments. GENTLY rotate the engine clockwise until the piston comes to rest against the stop. Note the degree wheel reading. GENTLY rotate the engine in the opposite direction until the piston comes to rest against the stop. Note the degree wheel reading. TDC is exactly half way between these readings. Calculate where that position is on the degree wheel, remove the piston stop from the cylinder, and rotate the engine to TDC as you calculated it. You are now at true TDC.
After you have done that, make sure the TDC mark on the balancer now lines up with the timing pointer. If it doesn't line up then replace the balancer.
If it does line up, you need to look elsewhere for your problem.
Setting the timing:
You can forget about anything beyond this point if you don't have access to a timing light. You will never get the timing set right without one.
Note: If you don't have access to a timing light, most of the larger auto parts stores will rent or loan one if you have a credit card or leave a cash deposit.
Paint the mark on the harmonic balancer with paint -choose 10 degrees BTC or 14 degrees BTC or something else if you have NO2 or other power adder. I try to paint TDC red, 10 degrees BTC white and 14 degrees BTC blue.
10 degrees BTC is towards the driver’s side marks.
Note: setting the timing beyond the 10 degree mark will give you a little more low speed acceleration. BUT you will need to run 93 octane to avoid pinging and engine damage. Pinging is very hard to hear at full throttle, so it could be present and you would not hear it.
Simplified diagram of what it looks like. Not all the marks are shown for ease of viewing.
ATC ' ' ' ' ' ' ' ' ' '!' ' ' ' ' ' ' ' ' ' BTC
---------------- > Direction of Rotation as viewed standing in front of the engine.
The ' is 2 degrees.
The ! is TDC
The ' is 10 degrees BTC
Set the timing 5 marks BTC. Or if you prefer, 5 marks towards the driver's side to get 10 degrees.
To get 14 degrees, set it 7 marks BTC. Or if you prefer, 7 marks towards the driver's side to get 14 degrees.
The paint marks you make are your friends if you do it correctly. They are much easier to see that the marks machined into the harmonic balancer hub.
Make sure that you set he timing when the engine is up to operating temperature.
At this point hook up all the wires, get out the timing light. Connect timing light up to battery & #1 spark plug.
Remove the SPOUT connector (do a search if you want a picture of the SPOUT connector) It is the 2 pin rectangular plug on the distributor wiring harness. Only the EFI Mustang engines have a SPOUT. If yours is not EFI, check for a SPOUT: if you don’t find one, skip any instructions regarding the SPOUT
Warning: there are only two places the SPOUT should be when you time the engine. The first place is in your pocket while you are setting the timing and the second is back in the harness when you finish. The little bugger is too easy to lose and too hard to find a replacement.
Start engine, loosen distributor hold down with a 1/2" universal socket. Shine the timing light on the marks and turn the distributor until the mark lines up with the edge of the timing pointer. Tighten down the distributor hold down bolt, Replace the SPOUT connector and you are done.
The HO firing order is 1-3-7-2-6-5-4-8.
Non HO firing order is 1-5-4-2-6-3-7-8
I always ran mine at 12* base and used 87 octane also if you are having idle issue with the e303 cam increasing the base idle to around 900 helps with the surging idle.
fordoldfart
Member
- Oct 29, 2005
- 10
- 1
- 13
Just put a E303 in a 351w and it was retarded 5 degrees when I degreed it. So I used the 4 degree advance keyway. Set the timing at 11 degrees. This is on a carbed engine using a vacumme advance. Runs good and fired right off
Similar threads
- Replies
- 25
- Views
- 2K
- Replies
- 4
- Views
- 422
- Replies
- 6
- Views
- 452
- Replies
- 1
- Views
- 503
- Replies
- 56
- Views
- 5K