When I go into 3rd gear with my mustang , it slips for a moment
Now I dont want a pressure plate so strong that I break 3rd gear
My pressure plate has 66.000 miles on it, I thought if I could get that exact one new, I might be ok
Anyone know if I can still get the fact pressure plate?
Thanks
The pressure plate isn't what breaks the T5, its the driver doing full throttle speed shifts...
See
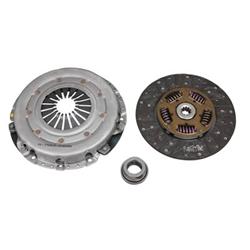
https://www.summitracing.com/parts/fms-m-7560-a302n/overview/
complete clutch kit
This is the aftermarket replacement most recommended.
$220. free shipping.
You will also need a new flywheel, or have your current flywheel resurfaced.
Transmission and Clutch replacement 79-95 V8 Mustangs
Revised 29-May-2016 to add shop supplies and miscellaneous changes
Before you get started, buy a Chilton or Haynes shop manual. You will need it for the bolt torques and patterns.
Shop supplies and hardware:
Never Seez anti-seize compound for all bolts. Use Never Seez on every bolt that you use a torque wrench on. It will help insure that the bolts or nuts are tightened to the proper torque. Apply Never Seez to the threads and under the bolt head and contact side of the nuts.
PB Blaster for the stuck nuts and bolts, especially the exhaust system nuts.
8 each 3/8” stainless steel nuts for the exhaust system.
1.) While you are still clean, get inside the car and remove the shifter handle and the shifter boot.
2.) Jack up the car front and rear, use jack stands to be safe. I use some very tall jackstands that I bought for my wife’s SUV to get enough clearance. To get the transmission out when using a transmission jack, you will need 22”-25” clearance between the lowest part of the bottom of the car and the floor. A 4x4 wood block may be used to get the jack to lift up higher if you have to jack the car in two passes.
3.) Put a 2x4 wood block under the engine oil pan to support the engine. Jack it up slightly. This prevents damage to the motor mounts when the transmission mount is removed. The oil pan is plenty strong for this purpose. Disconnect the negative battery cable. You will need a couple of extensions and a ½” swivel socket to remove the top starter mount bolt, which is accessed from the front and under the headers. Leave the starter wiring connected unless you plan to change the starter at this time.
4.) Label all the wiring for the transmission before disconnecting it. Disconnect the O2 sensor cables at their connectors. Disconnect the speedo cable by pulling it straight out of the VSS sensor (hard way, it may break the speedo cable), or by removing the bolt that holds the VSS sensor in place (easy way, I recommend that you do it). If you remove the VSS sensor, zip bag & tag it along with the bolt that secures it in place.
5.) Remove the drive shaft, the rear bolts are 12 MM. You will need a high quality 12 point wrench for this. Do not skimp on the wrench quality or you risk rounding off the bolt heads. A helper to step on the brake to keep the drive shaft from turning will be helpful. Since I don’t usually have a helper, a chain type oil filter wrench is a great substitute. Use your foot to apply pressure to the wrench to loosen the bolts. Note the yellow markings in the drive shaft and write down their alignment.
6.) Put a catch pan under the rear of the transmission to catch the fluid when you slide the yoke out of the transmission. I recommend that you drain the transmission at this time. There is a pair of pipe plug filler ports on the side of the transmission. Use the lower plug to drain the fluid.
7.) Remove the H pipe; you may need to spray the studs that bolt the headers to the H pipe with PB Blaster and let them soak for a while. Don’t be surprised if you have to do this 2 or 3 times The H pipe to header nuts need a deep or semi-deep socket with a universal joint to get them loosened. Remove the rear transmission cross member. The chassis to cross member bolts are metric, you need a 15 MM & 17 MM socket or wrench. Note the direction and size of the humps on the cross member and write it down. Inspect the rear transmission mount and replace if damaged.
8.) Remove the transmission. You will need a long extension & a universal joint with a ¾” socket. A transmission jack or a helper is almost a must have unless you can bench press 75-100 pounds with ease.
Steps 9-21 are for rear main engine oil seal, clutch removal and replacement.
9.) Remove the clutch cable cover and pry the throwout bearing arm forward enough to slide the cable off.
10.) Remove the bell housing using the long extension & a universal joint socket. Note how the throwout bearing rides it the throwout bearing arm, and which end faces the clutch pressure plate. Write it down or make a drawing if necessary.
11.) Remove the bolts securing the pressure plate to flywheel. Be sure to label & zip bag them separately from the rest of the parts. Work in a star pattern to reduce stress on the pressure plate mounting tabs.
12.) Remove the flywheel mount bolts, as you will need to either replace or re-surface the flywheel. Be sure to label & zip bag them separately from the rest of the parts. Tap the locator dowels out of the flywheel with a 1/4" pin punch. Zip bag them together with the flywheel bolts.
13.) Inspect the transmission input shaft where the throwout bearing rides. Replace it if worn or damaged.
14.) Inspect the throwout bearing, throwout bearing arm and ball pivot stud for wear or damage.
15.) Inspect the rear oil seal for leakage and replace if required. A pair of drywall screws carefully screwed into the metal part of the seal will enable you to pull it out. Use some acetone & swabs to clean out the place where the old seal fit. Coat the outer metal shell with silicone gasket maker prior to installing it. Use a seal driver or the old seal to drive the new seal in place.
16.) Remove & replace the pilot bearing. A puller borrowed or rented is helpful here. A wood block will be used to drive it home.
17.) Install the flywheel, noting that the bolts are an odd pattern, and it only lines up one way so that all the bolts go in easily. Torque to specs according to the shop manual. Install the locator dowels at this time.
18.) Install the clutch disk with the hub springs facing the rear of the car. Use a pilot tool available for $3-$7 from the auto parts store to line it up. An old T5 input shaft is the best pilot tool you can get.
19.) Install the pressure plate; be sure to use the pilot tool prior to tightening the pressure plate bolts. Torque to specs according to the shop manual. Remove the pilot tool when you are finished torqueing the bolts.
20.) Install the throwout bearing on the throwout bearing arm, noting the direction of the bearing and it mounting in the arm.
21.) Install the bell housing. Torque to specs according to the shop manual.
22.) Reinstall the clutch cable by prying on the throwout bearing arm. Replacement of the stock cable or quadrant is recommended if you haven’t already done so. With adjustable cables, both nuts go on the back side of the throwout bearing arm.
End of clutch replacement steps
23.) Install the transmission, have the transmission jack or helper at hand to lift it into place. I recommend that you have some guide studs made from long 7/16” coarse thread bolts. Screw them into the bellhousing and slide the transmission onto them. They will help guide the transmission into place if they aren’t too long. An old transmission yoke may be necessary to use to get the input shaft to turn and line up with the clutch disk splines. Put the transmission in any gear and turn the yoke while you are trying to slide the transmission home. When the input shaft engages the clutch disk splines, the yoke will be impossible to turn by hand. Watch out that the stub of the shifter does not tear the shifter boot. It may be necessary to press the clutch pedal to get the transmission to slide the last ½” or so. Remove the guide studs if you used them & torque to specs according to the shop manual.
24.) Reinstall the rear crossmember & transmission mount. Torque to specs according to the shop manual.
25.) Reinstall the wiring and speedo cable or VSS sensor if you removed it.
26.) Reinstall the drive shaft, slide the yoke in place. Align the rear yellow markings and install the bolts. A helper to step on the brake to keep the drive shaft from turning will be helpful. If your helper isn’t available, then use the oil filter chain wrench again. Use your foot to apply pressure to the wrench to tighten the bolts.
27.) Remove the jack from under the engine oil pan.
28.) Refill the transmission with the proper fluid. T5’s use Dextron ATF, Tremec 3550’s use GM Synchromesh Black or A/C Delco Synchromesh. There is a pair of pipe plug filler ports on the side of the transmission. Use the top plug as the filler port.
29.) Adjust the clutch cable according the manufacturer’s instructions if you have an adjustable cable & quadrant. Set the emergency brake and use the drag it provides in order to determine where the clutch starts to engage. You should have 1 -1 ½” free play from the top. The cable will not have any slack and will have some preload on it when properly adjusted.
30.) Coat all the exhaust studs with lots of Never Seez anti-seize compound and use 3/8” coarse thread stainless steel nuts. This will insure that the next time you take the exhaust system apart, that it won’t be overly difficult. Re-install the H pipe by loosely bolting up the pipe to the mufflers; it will make holding the header to H pipe end in place simpler. When the exhaust system is in place and the all the nuts are hand tight, tighten them up to the specified torque. Check the muffler tailpipe where it goes over the rear axle to make sure it isn’t too close to the car body. Then install and tighten the remaining items.
31.) When you have visually checked all the bolts, fittings and other parts are present and not interfering with each other, then take the car down off the jack stands.
32.) Be prepared to put the car back up on the jack stands to adjust the clutch and tighten up any loose items found after the test drive…
If you have a T5, you may be able to remove the trans & re-install it if you can bench press the 75 lbs that it weighs. If 75 lbs is too heavy, don't hurt yourself, get a trans jack. If your car has a Tremec 3550 or TKO, you will need a helper or trans jack because it weighs 100 + lbs. I built a trans jack from 2x2 angle iron, some swivel casters, 2x4's, 2x6's and a cheap floor jack. PM me if you are interested, and I will send you the photos (8 MB) with the write up.
While you are at it, replace the stock cable & quadrant if it is still present. My choice for clutch & quadrant for street use:
Ford Racing M-7560-A302N - Ford Racing Clutch Kits - Overview - SummitRacing.com Ford Racing M-7560-A302N king cobra clutch kit $215-$259
Ford Racing M-6375-B302 - Ford Racing Flywheels - Overview - SummitRacing.com flywheel, cast iron $130
I replaced my clutch disc, flywheel pressure plate and all new hardware - the cost was about $408, and
[
The quadrant needs to be replaced if you use any type of aftermarket cable or adjuster. My preference is a Ford Racing quadrant, adjustable cable and Steeda firewall adjuster. The adjustable Ford Racing cable is just a good as the stock OEM cable. It allows a greater range of adjustment than a stock cable with a aftermarket quadrant and firewall adjuster. Combined with the Steeda adjuster, it lets you set the initial cable preload and then fine tune the clutch engagement point to your liking without getting under the car.
Using a stock OEM cable and a single hook quadrant may result in not having any free pedal travel before the clutch starts to disengage. I found this out the hard way.
See
Summit Racing - High Performance Car and Truck Parts l 800-230-3030 for the following parts.
Ford Racing M-7553-B302 - Ford Racing V-8 Mustang Adjustable Clutch Linkage Kits - Overview - SummitRacing.com Cable and quadrant assembly $90
Steeda Autosports 555-7021 - Steeda Autosports Firewall Cable Adjusters - Overview - SummitRacing.com Steeda firewall adjuster. $40
Fix for the quadrant end of the cable popping out of the quadrant when installing a replacement cable courtesy of
Grabbin' Asphalt
[/color]