Engine Rebuilt 306 Cam Degreeing: 6.5 Degrees Off?

ZephyrEFI

Member
Mar 9, 2019
99
16
18
Shakopee, MN
I have a 306 shortblock I bought from TRE Performance. I've installed a Flowtech cam and am trying to degree it. It was manufactured by Comp. I got an intake centerline of 113.5 degrees. This was with the heads off, and timing set installed dot to dot. Is that a realistic possibility or did I maybe do something wrong? There's a Flowtech sheet, as well as the cam card from Comp that says the intake centerline should be 107 degrees.

I know the Comp literature that came with the cam says some of their cams are "ground 4 degrees advanced". Does that explain my findings? This is my first time degreeing a cam, so I don't know if it's typical to get such a big difference. Also, I should mention I'm using a solid roller lifter that came with a pushrod measuring kit I bought since my dial indicator's rod thingy isn't long enough to reach the lobe by itself.

Here's the whole process I used:

install piston stop so as to not allow piston to reach TDC
take readings on degree wheel as piston touches stop and average them
set degree wheel to 0 at TDC
remove piston stop
find approximate intake centerline and zero dial indicator
take degree wheel readings at 50 thousandths before and after: 153.5 and 73.5
average them to get 113.5 degrees

The video I followed:

View: https://www.youtube.com/watch?v=5yN4NymeU58&t=890s
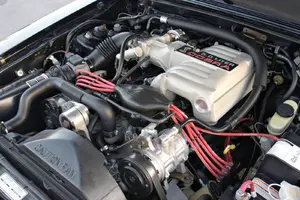

My setup
lLTwmME.jpg


Timing Set alignment
gqlhB1Z.jpg


Shows that I'm working with the #1 intake lobe
TZmXoM2.jpg


Any insight you might have would be much appreciated! Thanks!
 
  • Like
Reactions: 1 user
  • Sponsors (?)


Hi, very nice setup. Not unusual to find values of 2-4 Degree event variants from CamCard to actual findings with Intake and exhaust events, respectively.
Below is a method that gets in a bit deeper, but you’ll understand things with more confidence, much better explained:
Once calculating true TDC, I prefer to keep the indicator on- Motor rotating in it’s true operating direction from Cam heel (Base Circle) to peak lift & resetting the Indicator once full lobe lift Duration ends (if you go past, back Crank up 90 Deg. & resume) following lift declination to view the entire Cam profile, jotting down & comparing events with the Card as I do. I also check the Exhaust lobe in the same manner, but that’s personal preference. All info can be extracted from this.
You should Consider..
-a Crank Timing Gear (such as in the Video posted) allowing 8 Deg. Advance or Retard in 2 Degree increments, or “heads up” installation, allowing you more freedom of adjustment to purpose the Cam per desire.
(Advanced= more low end grunt, sacrificing top end power, Retarding- polar opposite.)
-A thrust Assembly stackup, whether using a Bronze spacer or Torrington single or dual Roller setup* is solid, inexpensive insurance against Cam walk & maintaining true timing set alignment, usually included with billet Cam/Crank Gear sets, such as by Comp, TrickFlow, Lunati, etc..
Notes: You don’t need to run the eccentric on your Cam Gear unless you’re planning usage of a Mechanical Fuel Pump, or to possibly run one in the Future.
You’re doing it this ideally, Heads off. Solid Lifter only required when Degreeing with Heads on & valvetrain installed, Indicator used on Spring retainer & factoring in Rocker ratio to show lobe lift from Valve or “Advertised” lift.
* Verify that no Block Machining is required if you desire a Torrington Roller Thrust Bearing type setup, Cam retainer plate fastener relocation (Bolt circle enlargement) on Block face is required by some Mfg's
Good luck, any questions feel free to post!
-John
 
Thanks!

I think i figured out something I'd done wrong. I had been counting all the numbers as positive on the degree wheel instead of positive and negative. When I re-did the whole thing after a few days and I came to that realization, I'm now getting about 102.5 - 104 degrees for intake centerline. I definitely feel better about a 4 degree difference, rather than a 6.5 degree difference!

I've seen that thing on the cam bolt called an "oil slinger" too, so I figured it couldn't hurt to throw it on, haha.

I had an incident with my old thrust plate (haha), so I had to buy a new stock one already. I did like the idea of the torrington one, but I think I'm going to stick with the stock one since it's new and all.

I'll post again after I spend some more time with this. I think I'm actually starting to get it, haha.
 
Hi, Glad that’s working out for you! The actual oil Slinger is the Washer mounted on the face of the Crank Gear (which you toss). My bad on the other piece I’d viewed as the 360 Deg.Eccentric & not noted as being that 1/5th radius part that’s raised eyebrows for decades.
There’s no data proving it helps anything as It can be run, or not run, with no ill effect...
Good luck!!
 
Haha, well, I guess that's how i found my old one, so that's how I'll leave it.

Did some more farting around with this over the past few days. Experimented with the other keyways and stuff. Looks like I'm getting about 104 in the straight up position and about 111 in the retarded position. So, I'm not getting that sweet spot this way. What do you think I should do?

I'm pretty sure as the chain wears we'll get closer. I'd much rather have it too advanced than too retarded.
 
Hi, That’s Cool, you’re at the point of choice! You have a 9 position Crank Gear? 2 Degrees of retard is @ 111? The relevance is whether it’s going to be a DD, or a weekend warrior- or the “in between” type? lol!
I have a feeling you want the latter..but thought to ask to be certain..
You don’t want to factor in timing stretch, trust me. What Cam is this, I can give some insight based off of that..? Do you have plans to Dynotune this afterwards, or going with a 4 Bank chip from SCT/Bama? Some good low end grunt can be regained with a good tune.
I’ll await your response & throw a few options your way. No worries, you’ll be happy with it!
John

It's a 3 position crank sprocket. The 111 was in the 4 degrees retarded slot. I'd like it to be a near-DD. Much more so than a race car. I have no plans to race it at the moment, actually, haha. It has A/C and will sit in traffic sometimes.

The cam is a Flowtech GT40. Other bits include P heads with enlarged intake valves to 1.9, Explorer intake, 24 lb injectors, Cobra ECU and MAF. I do plan on having it dynotuned, probably with Moates stuff.
 
:lol: <~~ Applause for not running an alphabet Cam!!
Hi, that’s what I was going to suggest, a 9 position 2 Degree increment Lower Timing Gear. Well, the largest reason we degree them is to pick up anomalies in Cam grinds, even gear sets..
I’ve never run this Cam in any of the builds I’ve done, but it’s strikingly similar to a Lunati Cam I’d recently installed.This Cams events and spec’s are great for a hot Street Car, also a reliable DD.. Seek out & run that Cam’s 108 Degree spec to achieve that combination you’re seeking...
Who says you can’t have your Cake & eat it, too?, lol! I suggest performing a Claytest prior to bolting your Heads up for good, even if you’re positive it will work. ANY new combo should be claytested. Lift, Duration & altering events with Cam timing all play into why. Your Degree wheel should come with light springs. You’re doing a great job by questioning things- stay the course..
Just a Friendly FYI: The bottleneck in flow is the Explorer’s Lower. For the heck of it- put your Intake Gasket up to the lower’s ports (keeping in mind it fits to your Head’s Intake ports perfectly).. You can Gasket match it with a Dremel to free up a few ponies for your Pony...With a good Porting, people pick up 15-25 RWHP running STOCK 1.85 Int. Valved GT40/40P’s. With a 1.900 Intake Valve, would likely realize even greater gains.
Good Luck!!
John
 
I do plan to check piston to valve clearance. Both the heads and pistons have a "bump in compression" baked into them, so that kind of made up my mind on that one, haha.

I do like the idea of having my lower intake ported. We'll see how it goes. I know the guy who put my heads together for me recommended that too.
Zephyr, very smart move. There’s a few general methods of porting that Lower..
1) Getting in there the Original way, sometimes adding material & removing other Material for reshaping with extended flex Mandrel Burrs & polishing with Tootsie-rolls, Flapwheels, Polishing Tip diving into different Grit Compound Sticks...
2) Other method is combining the above with cutting specific areas of the base open, going to Town & TIG Welding them back together while purging internally with Argon (keeps 02 from attacking internally, ensuring nonporous, flat internal Welds, while Welding external Root pass), or Welding plate(s) on, initially so you need not worry about break through. (Can get rather thin in some areas where removal is important, easier than trying to repair later).
3) Then there’s Extrusion Honing, which I don’t recommend. Don’t have 100% control over the process like the 1st method. Ports open smoothly, but may be deformed in both shape & direction.
Some use a Flowbench with a Jig, to reference flow before & after the process. Others Eyeball it. If the latter- they have learned over time what works best, and have scrapped 1 or 2 early in the learning process. I do both, use #1 for a Street Port.
Not advertising, but can certainly help you negotiate through, what to, not to look out for.
A Moates Quarterhorse is also a great direction, there’s actually an area on Stangnet dedicated to Tuning. I’m overwhelmed with Local Tuning & builds, since I incorporated OBD2 requests, originally OBD-0, OBD-1, all makes & models. Not complaining, lol.
You made the right choice with the site as well. Tell me more about the C-4, you prefer it to a 5 or 6 speed, or are you pondering?
Best! -John

Yeah, that's actually why I rejoined was because of the Tuning section! I get overwhelmed with too much "noise" and tangents trying to research stuff on forums without asking my own questions relevant to my own situation. And forums are about the only places to learn about EEC-IV tuning that I've been able to find. I'm probably going to drive the "Did you run a search?" nazis crazy, haha. Although it does seem like people are pretty friendly here.

I was probably more just looking at gasket matching my lower. While learning is fun, I prefer to have my car driveable as much as possible in the summer, for better or worse.

I have a stock '91 GT T-5 for a trans and an 8.8 with 4.10 gears. I'm reserving judgment on that until I get this new setup going. Probably won't change anything.
 
Hi! Gasket Matching is helpful for certain, removing Casting flash will also provide that smooth transition, help against turbulent airflow. I agree with the drivability & you should note that Ports # 2 and #5 are the most restrictive running the Exploder Intake.
They can be cleaned up a bit, I’ll send some pics of what I’d done with a Gasket match, rough Casting removal, and those to Ports so you can mimic it.
Felpro 1320’ Intake Gaskets, I use “Hi Tack”
to position them to stay in place, or 5/16-18 threaded Rod cut longer in Intake bolt holes & Lower Intake on, catch a few Intake Bollts- Gasket installed. I suggest a small Borescope- not expensive, to run from upper to Valves, then you can view any restrictions.
Many have SDR Cards to record with to slow down the views, view a little later. Want a recommendation for one that’s quality & cheap- just ask.
I’d expect your combo should nail 270-285 RWHP, a good Tune will actually also increase Mileage along with Power gains.
4:10’s with that setup will place you into the 12’s, solidly. Have an Performance Trends Pro engine analyzer 3.9, Drag strip, Chassis, and Port flow programs. Can plug in your specs and email them to you, if you want. Pretty accurate.
Here it is:
Talk soon!
John
 
Hi, I see no reason why you wouldn’t be in the high 12’s based on Cam & the platform you’ve got so far, continuing with a 70-75mm TB, Pro-M MAF Calibrated to Injectors, tell MFG what Filter type you run (programming changes if differences exist from Conical, to Straight Filters), BBK CAI, TUNED 1.625 L.T. Headers, H or X pipe, free flowing 2.5” Exhaust (or uncorked Headers). 180-225 Pump (Walboro).Adjustable Fuel Pressure Regulator (Aeroquip).etc..Once the Suspension’s dialed in for launch, good Tires, your Gameface on, 12’s? Sure!
Borescope is fine using your Phone, but may serve you better to have a stand-alone Unit w/removable screen, SD Ram Card, don’t want your phone to get damaged around working on a Car..Standalone, IMO, is just better.
Amazon’s got a bunch, cheap price, high quality. Follow the reviews, Tip should be 1/4”-3/8”, Smaller tip the better, get a longer one, 6-8’,so many uses! Case & Tips like a Magnet, Mirror, etc are also helpful.’ in certain instances.
It’s all good!
- John
 
I've got some of those things, haha. The throttle body is the Explorer 65mm unit, the MAF is the '93 Cobra 70mm one. The Cobra X3Z ECU is already programmed for 24 lb injectors. I have a K&N flat filter in the stock cold air setup. I just don't like the way aftermarket cold air kits look. It's all about selling "stock" appearance with this car. Exhaust is Ford Racing P shorties (not as good, i know), 2.5" h-pipe and Flowmaster Super 44 catbacks. Fuel pump is a Walbro 190. I didn't trust the drainback valve in the adjustable fuel pressure regulator I had, so I went back to a stock one. Tires are Continental Extreme Contact summers.
 
Hi Zephyr, The “stock” biased appearing engine compartment is a great idea. The T.B. is also the same as the 93’ Cobra @ 65mm, upper Intake bore is 70mm. Regarding CAI’s, the OE Intake Tubes Have supported near 500HP. That 90 Deg. turn @ the T.B.is handled better with the OE Tube.
Your running the Cobra’s Intake Tunes, too?
Think the GT’s are only 55mm..
Just be sure to remove that infernal, internal air box silencer.lol.
Adjustable Regulators can be very helpful, many on the market. Which one did you not trust?
The MAF is Calibrated for each specific Injector size & offsets signal to the ECU, getting the idle hunt out is difficult within a Tune, matched incorrectly. You’re good- Cobra MAF is Calibrated for #24’s.
L.T.’s are certainly better, Shorties have little power advantage over stock., but very good you have the “P” type, if without, one plug wire (it’s #6 or #7)melts on the Header & is quite the knuckle bleeder to remove #8 Plug.
Consider, while it’s apart- adding a Wideband 02 Sensor. Easy. Punch a hole in one Pipe a bit downstream from the Header, weld in a threaded Bung. Use a Pillar mount, Useful for Tuning & keeping an eye on mixture, or adding Mod’s later. Not absolutely necessary- but great to have..
I don’t trust Digital Oil Pressure Gauges; Mechanical is personal preference. They don’t lie. If desired, Remove an Oil galley Plug & install one for accuracy- Gauge in the same Pillar mount.
Use a Catted H or X pipe, you’ll have no difference in power Gains, and its inspectable.. Glad it’s coming along, you get that 9 position Timing Gear yet?
- John
 

Attachments

  • 1559941664101.jpeg
    1559941664101.jpeg
    455 KB · Views: 277
(SIGH), got a tangent for you.

dWGRv4Y.jpg


What is this washer for? Why didn't my other timing set come with one?

Edit: nevermind, I guess. I found my answer. Info says brass thrust washer MUST be fitted. So, I'll fit it. And my thing about requiring a torrington thrust plate was wrong. I don't have the part number I thought I did.

Man, this set is SUPER nice....
 
Last edited:
Hi, I LIVE for Tangents!
The Bronze washer you have is actually a Thrust washer, performs the same function of a Torrington Thrust setup, which are Needle Bearings, internally. (Most ALL Torrington setups require the engine Blocks OE Bolt circle of the Thrust plate to be enlarged, slightly.(Machine Shop Job))The purpose of the plate is for a few reasons.
It’s AKA; Cam Button.
1) Prevents the hardened Billet Cam Timing Gear from rubbing into the Hardened Cam retaining Plate. One part always has to be sacrificial, 2 hardened surfaces at significant RPM’s spells trouble, heat, warpage, worse..
2) Prevents the Cam from “walking” forward or backwards.
3) Maintains proper Timing Gear/Chain alignment for longevity.

The bushing installs on the Timing Gear, note one side of the Thrust washer has a larger chamfer on its I.D. to clear the Gears radius ground in where it sits.
Washers are generally too thick, measure the area where the Washer sits on the Gear, and the thickness of the Washer. The remaining amount need be removed. If you were to install it now, gear on- bolted up- you would find the Cam won’t rotate.. needs to move smoothly.
If you had a Lathe with an internal Collet, even a Mill- that’s great- most do not...
Decent Dial Calipers can measure +/-0.005, You are fine doing it with these.
1) You can also measure the step in the Gear with Calipers, using the end opposite the Dial for Depth.
2) Use Clay, apply it 360 Degrees around the Bushing step where the Washer fits, apply about 1/4” thick.
Bolt Gear to Cam tight, carefully remove- measure Clay thickness.
3) Get in there with feeler gauges- Cam Sprocket tight- keep adding until it’s snug.
Whatever number you come up with, remove material per the following:
So, you need to place a piece of sandpaper (180 Grit) on a relatively flat surface, thumb, 1st & 2nd Finger on Washer, medium pressure- move the washer in Circles around the Paper, to get a level surface (one side only).
Take the paper off & flick it to get rid of excess Bronze buildup. Use a small File to flat file a Chamfer in it, or sand the side with the smaller Chamfer.
Don’t want that radius in the Gear to make it appear too thick, when the radius is the issue- just be aware of that inner Radius.
As you get closer, remember you should be about 0.010 under max on the Washers thiskness. Doorsnt need be it’s the Tenths, or even a Couple thousandths. As close as you can get it- testing it frequently as you get close. Make sure it’s super clean, and a light coat of Oil on it when you’re testing it.
Keep measuring the Washer to ensure material is removed equally. Gentle pressure while twisting & rotating will yield excellent results. Once you’re almost there, cut back to 220-240 Grit.
Cover your Motor up, or do it in another room, not lots of Dust, but some tiny particles can become airborne.
Should take 30 Minutes- max., but it’s not a race. That’s it!
Once it’s in & the Cam spins freely, you’re good to go!
Good luck!!
-John