

You are using an out of date browser. It may not display this or other websites correctly.
You should upgrade or use an alternative browser.
You should upgrade or use an alternative browser.
Build Thread 1978 Mercury Cyclone. The pig is in the pen.
- Status
- Not open for further replies.

- Dec 19, 2010
- 5,721
- 4,244
- 224
Thanks. I was on a sn hiatus for a while. Last page I remember reading was mike shaving his cat with an e-fan.Page 99


Gila Monsters have a stupid tail.
I cant tell you why a G monster drags that lump of meat around behind him.
Maybe it makes him seem longer.
Maybe it makes him seem more intimidating.
Maybe it serves some unseen benefit.
I just don't know.
My G monster has a tail.
It does make him seem longer.
I do think it'll be more intimidating w/ the thing on ther.
While I cant say that it'll add much of any benefit, it might.
Maybe it'll create additional down force.
Maybe it'll add to the cool factor.
Maybe it's just another stupid tail on a Gila Monster.
I just don't know.
When you are a Gila Monster you naturally live in the desert. There is no McDonalds around and even if there was, you don't have any money, and you are too low to the ground to get to the pick up window.
So you forage for yourself; in the desert that can be a tiresome thing because of the limited resources and lack of water. That's why they call it a desert.
Start foraging and you soon learn that you are only slightly faster than a sundial on a cloudy day.
You have to try to sneak up on your prey, which is difficult when you are bright orange and black. Or you find something that doesn't move, like eggs, or almost dead or blind. As a consequence, you don't get to eat very often, maybe 5 -10 times a year. So you really pig out when you get the chance; up to 30% of your body weight in one meal. All those extra calories have to pile up somewhere. On women it's their hips and tummy; on Gila Monsters it's their tails.
Now you know more that you really wanted to know about Gila Monsters, back to the madmike1157 and the feature presentation...
Last edited:

It was a good day.
(It's always a good day when you accomplish what you set out to do)
As I said earlier, the stuff to finish the remote trunk release came in yesterday. Today I made that stuff into something.
That started w/ modifying the lock mechanism.

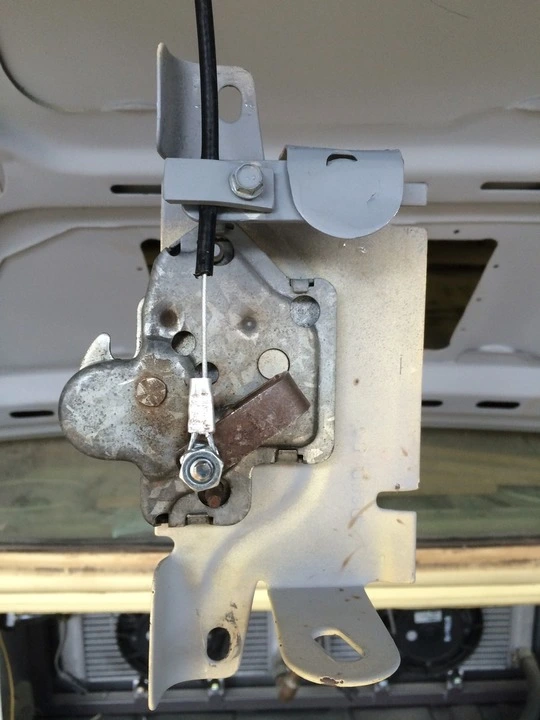
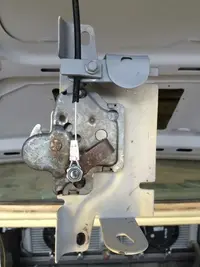
I drilled a 1/4" hole straight through the center where a little metal "key" used to fit which in turn was attached to the lock cylinder. Since I'm not using the lock cylinder, it makes sense that that little metal key was of no use to me, hence the decision to make a rectangular slot round.
I put the bolt in there w/ lock washers on both sides and cranked the things mega tight so that it wouldn't spin.
I made an actuator lever that was then nutted to that 1/4" bolt and bent it 180 degrees so that I'd have a mount point for the cable that I'm gonna use to "actuate" the latch mechanism.
The cable is made by Auto Loc, and it's just that. No brackets, cable lock, no nothin. I had to make a mount to hold the cable end secure. It's just a glorified choke cable, but teflon lined. It's 96" long, and originally I was worried if that would be long enough to put the other end where I wanted it.
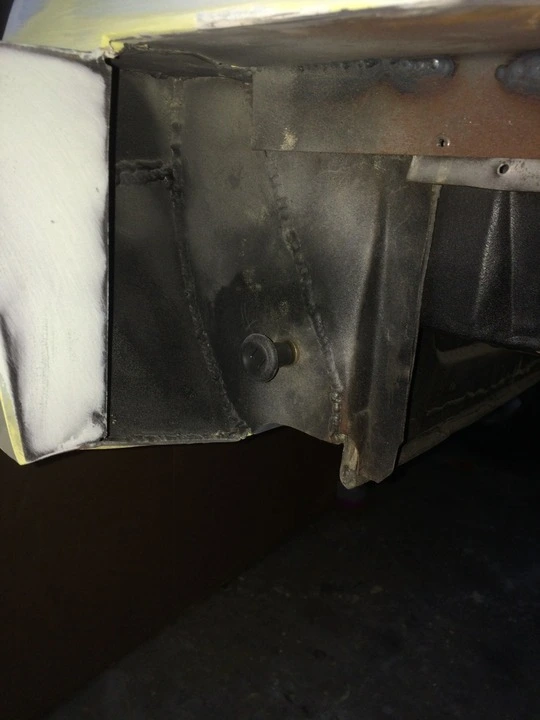
Which, coincidentally just happens to be here.
The thing works beautifully. You only have to pull that lever about an inch and the trunk releases.
But that presented another problem.
While the trunk latch would now "open," the weight of the trunk kept the thing on the latch. If I let go of the lever, it would close the latch.
But then, I knew that would happen. That's why I also bought these little thingys.
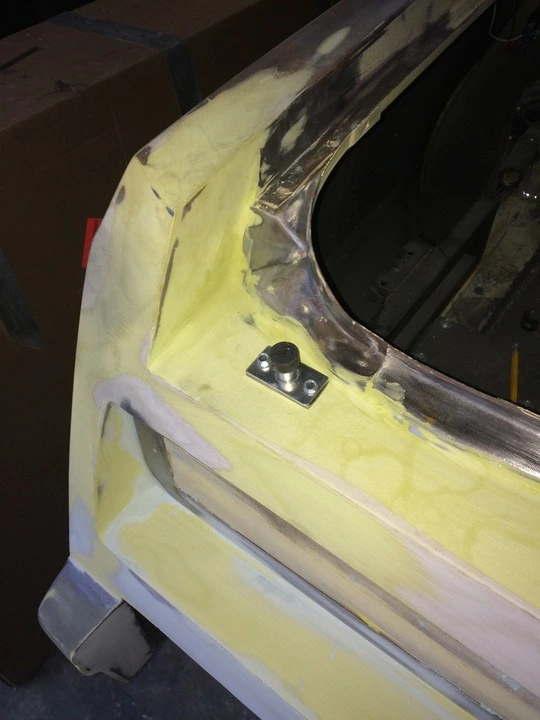
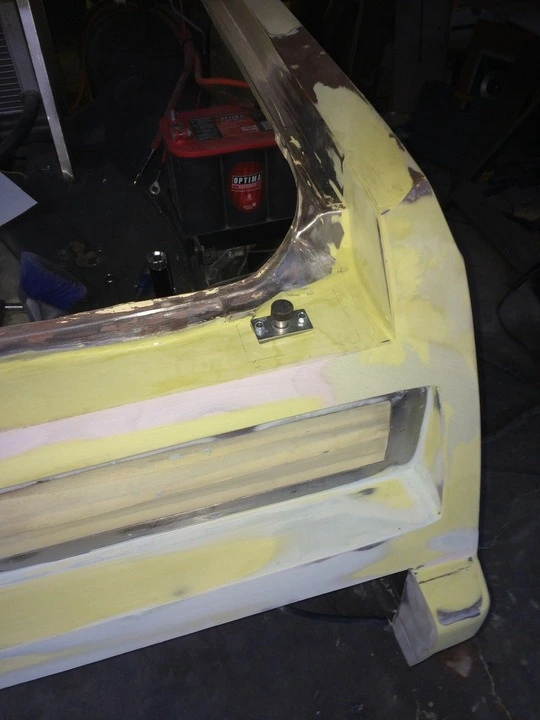
One on each side, they are rated at 25 lbs lift force. They only compress about 1/2", so they lift just enough to get the trunk off the latch when you pull the lever. Just screwed down now for fitment, they'll get riv-u-lated after paint.
Works perfect.
I also cut the bumper free from the rear, and did some more body work.
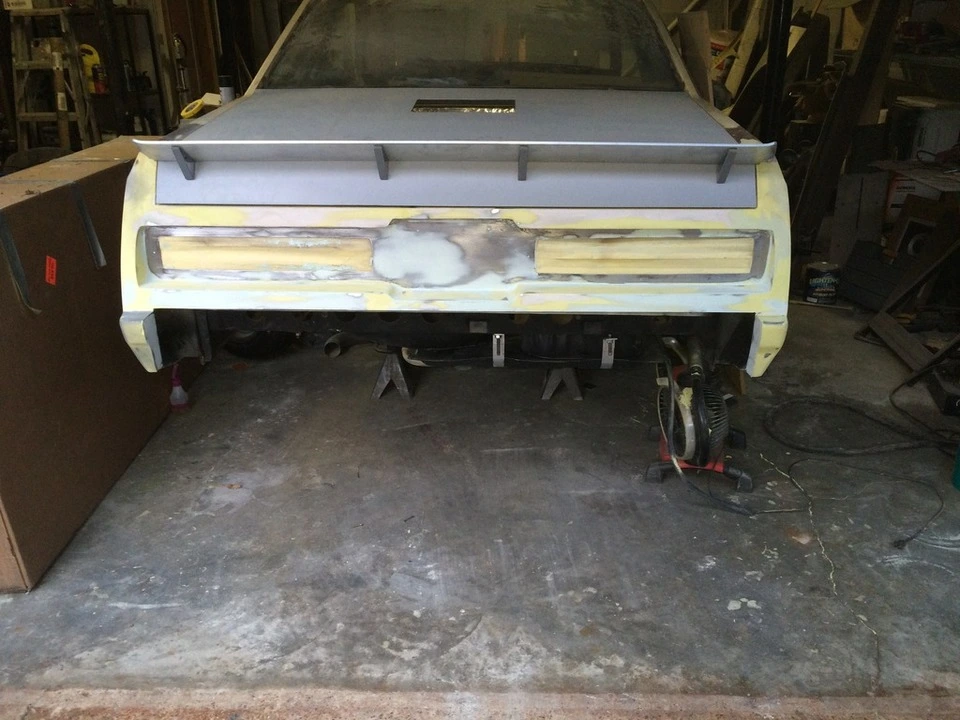
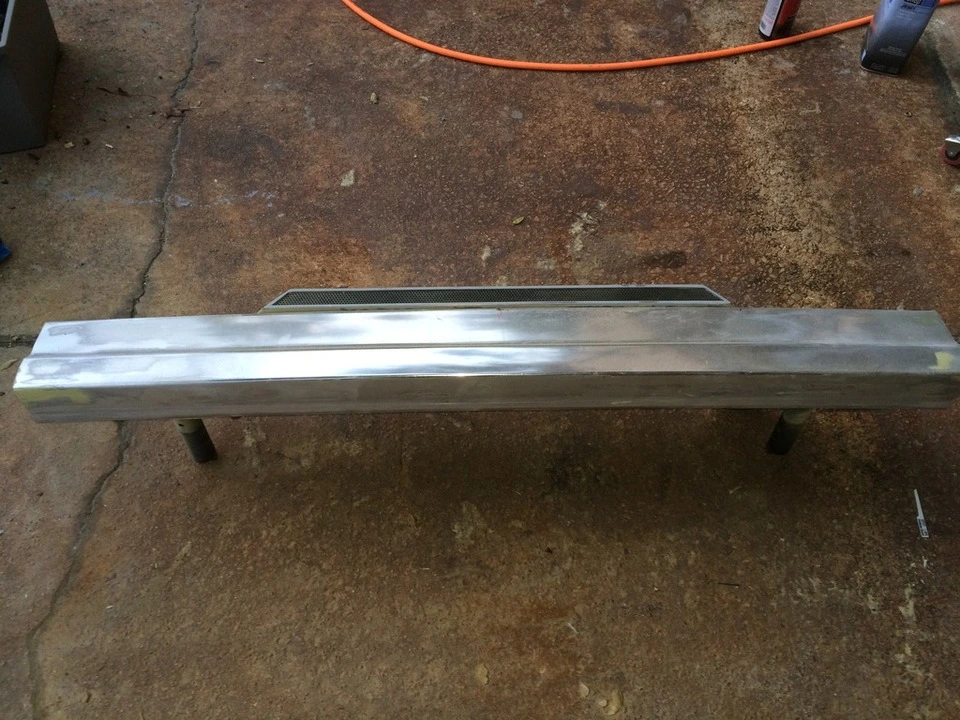
So far I've ran through about 2 gallons of filler. Not that there is that much on the car, I'm just a terrible body man. I'll either sand off too much, and have to reapply, or I'll add too much hardener and the stuff will cook off before I get the chance to get it all on, and smoothed out.
This has turned out to be an expensive learning curve, because I'm using Rage Gold body filler. At 60 dollars a gallon, it's 3 times more expensive than your typical "Bondo" brand. The upside to using the stuff was that it was supposed to be so good that you didn't need to use a glazing putty, as this stuff didn't "pinhole" like the cheap junk. Additionally, it doesn't clog the paper and wont tack up like Bondo does. Lastly it's supposed to be easy to sand.
I don't know about any of that.
It still was a pain in the ass to work with. While it didn't pinhole, it didn't spread for crap. While I'll take credit for over hardening the stuff initially, by the second gallon, I was familiar enough by then to know how much to add. A 5" glop of that stuff only needs about about a "chocolate chip" worth of hardener. Even at that sparse ratio, the stuff still required that I move like a madman to get it on the panel before it started to harden.
I'm not a fan of Rage Gold.
So when I bought my resupply, I bought this junk.
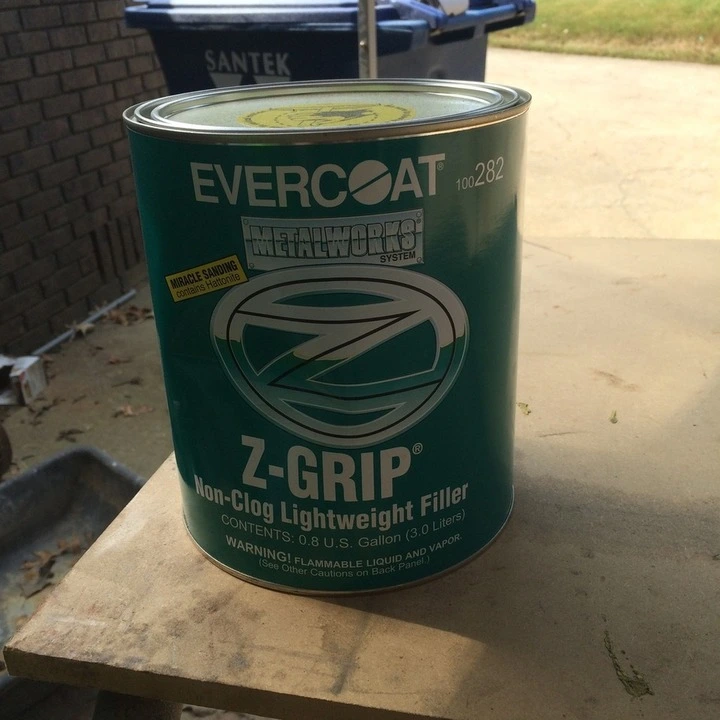
Made by the same guys that make Rage, this stuff is like cream. It spreads beautifully, and sands way nicer than the gold. It still takes very little hardener, but evidently, more than the gold. My first smear took over an hour to harden. This stuff costs half of what Rage Gold does.
While I waited for that, I opened the new valve cover, and put it in pl;ace to be sure that it was gonna fit. ( see, it's real close to the firewall back there, and I was worried that I might have to smack the thing to gain some clearance.
But that was needless worrying.
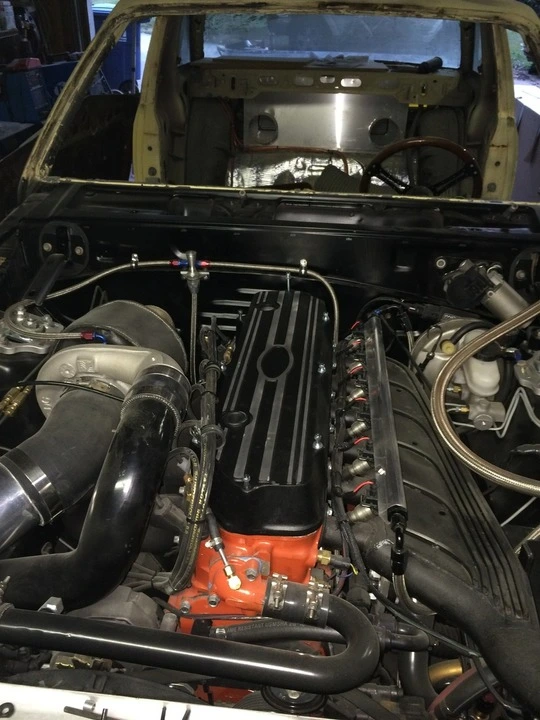
I am gonna have to get creative when it comes to putting the thing on though, that rear bolt will have to go on with the valve cover, because it won't go on after it's in place.
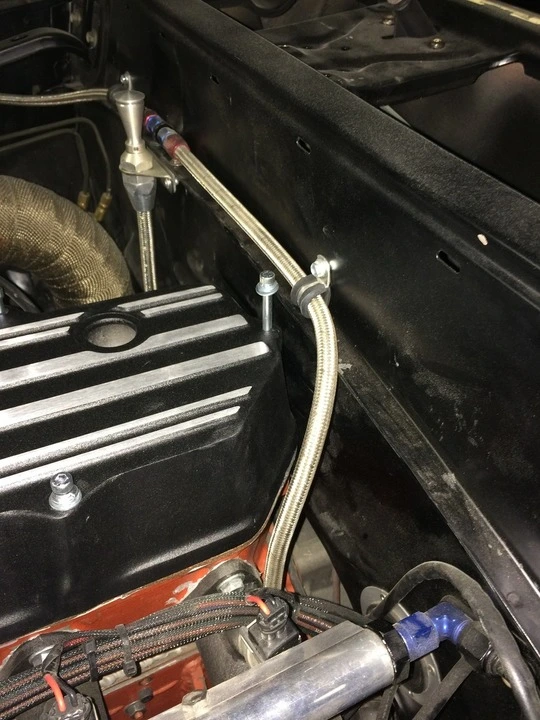
I have to admit, I like my valve cover better,.....I'm emotionally attached to it since I built the damn thing. But this one is so nice, The bolts pass through tunnels so you just drop them in after you'ved lined it up, and all of the rest just go in. Unlike the homemade unit that I had to dick with to get the bolts in. Since the bolt holes are sealed, I don't have to worry about oil getting past the bolts like I did w/ the HM unit.
It's for the best really. I'd be screwed if that thing came apart on the road somewhere.
The other thing I get is a dedicated oil fill hole whereas the old one had none. I have to figure out how to get a dash 12 fitting in the rear hole for the vent w/o welding something, I don't want the paint to burn. The thing did come w/ a grommet,...wonder if I can get a -12 male fitting to stay in a rubber grommet?
(It's always a good day when you accomplish what you set out to do)
As I said earlier, the stuff to finish the remote trunk release came in yesterday. Today I made that stuff into something.
That started w/ modifying the lock mechanism.
I drilled a 1/4" hole straight through the center where a little metal "key" used to fit which in turn was attached to the lock cylinder. Since I'm not using the lock cylinder, it makes sense that that little metal key was of no use to me, hence the decision to make a rectangular slot round.
I put the bolt in there w/ lock washers on both sides and cranked the things mega tight so that it wouldn't spin.
I made an actuator lever that was then nutted to that 1/4" bolt and bent it 180 degrees so that I'd have a mount point for the cable that I'm gonna use to "actuate" the latch mechanism.
The cable is made by Auto Loc, and it's just that. No brackets, cable lock, no nothin. I had to make a mount to hold the cable end secure. It's just a glorified choke cable, but teflon lined. It's 96" long, and originally I was worried if that would be long enough to put the other end where I wanted it.
Which, coincidentally just happens to be here.
The thing works beautifully. You only have to pull that lever about an inch and the trunk releases.
But that presented another problem.
While the trunk latch would now "open," the weight of the trunk kept the thing on the latch. If I let go of the lever, it would close the latch.
But then, I knew that would happen. That's why I also bought these little thingys.
One on each side, they are rated at 25 lbs lift force. They only compress about 1/2", so they lift just enough to get the trunk off the latch when you pull the lever. Just screwed down now for fitment, they'll get riv-u-lated after paint.
Works perfect.
I also cut the bumper free from the rear, and did some more body work.
So far I've ran through about 2 gallons of filler. Not that there is that much on the car, I'm just a terrible body man. I'll either sand off too much, and have to reapply, or I'll add too much hardener and the stuff will cook off before I get the chance to get it all on, and smoothed out.
This has turned out to be an expensive learning curve, because I'm using Rage Gold body filler. At 60 dollars a gallon, it's 3 times more expensive than your typical "Bondo" brand. The upside to using the stuff was that it was supposed to be so good that you didn't need to use a glazing putty, as this stuff didn't "pinhole" like the cheap junk. Additionally, it doesn't clog the paper and wont tack up like Bondo does. Lastly it's supposed to be easy to sand.
I don't know about any of that.
It still was a pain in the ass to work with. While it didn't pinhole, it didn't spread for crap. While I'll take credit for over hardening the stuff initially, by the second gallon, I was familiar enough by then to know how much to add. A 5" glop of that stuff only needs about about a "chocolate chip" worth of hardener. Even at that sparse ratio, the stuff still required that I move like a madman to get it on the panel before it started to harden.
I'm not a fan of Rage Gold.
So when I bought my resupply, I bought this junk.
Made by the same guys that make Rage, this stuff is like cream. It spreads beautifully, and sands way nicer than the gold. It still takes very little hardener, but evidently, more than the gold. My first smear took over an hour to harden. This stuff costs half of what Rage Gold does.
While I waited for that, I opened the new valve cover, and put it in pl;ace to be sure that it was gonna fit. ( see, it's real close to the firewall back there, and I was worried that I might have to smack the thing to gain some clearance.
But that was needless worrying.
I am gonna have to get creative when it comes to putting the thing on though, that rear bolt will have to go on with the valve cover, because it won't go on after it's in place.
I have to admit, I like my valve cover better,.....I'm emotionally attached to it since I built the damn thing. But this one is so nice, The bolts pass through tunnels so you just drop them in after you'ved lined it up, and all of the rest just go in. Unlike the homemade unit that I had to dick with to get the bolts in. Since the bolt holes are sealed, I don't have to worry about oil getting past the bolts like I did w/ the HM unit.
It's for the best really. I'd be screwed if that thing came apart on the road somewhere.
The other thing I get is a dedicated oil fill hole whereas the old one had none. I have to figure out how to get a dash 12 fitting in the rear hole for the vent w/o welding something, I don't want the paint to burn. The thing did come w/ a grommet,...wonder if I can get a -12 male fitting to stay in a rubber grommet?
Attachments
Last edited:
- Dec 19, 2010
- 5,721
- 4,244
- 224
@madmike1157
I've been using rage gold as well on my son's car, only it's closer to 90 a gallon over here at O'Reilly. Where are you buying the z grip? I must get some!
I've been using rage gold as well on my son's car, only it's closer to 90 a gallon over here at O'Reilly. Where are you buying the z grip? I must get some!
Summit. They have 3- separate MFG's full lines. It's where all of my paper, (now body filler) primers, and paint comes from.@madmike1157
I've been using rage gold as well on my son's car, only it's closer to 90 a gallon over here at O'Reilly. Where are you buying the z grip? I must get some!
- Dec 19, 2010
- 5,721
- 4,244
- 224
Sweet! Thank you!Summit. They have 3- separate MFG's full lines. It's where all of my paper, (now body filler) primers, and paint comes from.
When you are a Gila Monster you naturally live in the desert. There is no McDonalds around and even if there was, you don't have any money, and you are too low to the ground to get to the pick up window.
So you forage for yourself; in the desert that can be a tiresome thing because of the limited resources and lack of water. That's why they call it a desert.
Start foraging and you soon learn that you are only slightly faster than a sundial on a cloudy day.
You have to try to sneak up on your prey, which is difficult when you are bright orange and black. Or you find something that doesn't move, like eggs, or almost dead or blind. As a consequence, you don't get to eat very often, maybe 5 -10 times a year. So you really pig out when you get the chance; up to 30% of your body weight in one meal. All those extra calories have to pile up somewhere. On women it's their hips and tummy; on Gila Monsters it's their tails.
Now you know more that you really wanted to know about Gila Monsters, back to the madmike1157 and the feature presentation...
Well then......That is some good Gila info.
I can tell you this. The tail on the real lizard, and the one on mine now share exactly zero things in common.
Pffft,.......How could I possibly store enough fat to last me for months in a 1/4" thick piece of aluminum?
- Dec 19, 2010
- 5,721
- 4,244
- 224
Summit. They have 3- separate MFG's full lines. It's where all of my paper, (now body filler) primers, and paint comes from.
Oh, btw, check these guys out for sandpaper. Hard to find it cheaper. Good stuff.
Online Industrial Supply Corporation - Sandpaper, Sanding Supplies, Abrasives, Sanding Discs, Sanding Belts, Sanding Sheets, Sanding Rolls
Thanks for that, I just did. Prices look to be the same as the Summit branded stuff I buy though,...and I can get it in a day because Summit is one state over.Oh, btw, check these guys out for sandpaper. Hard to find it cheaper. Good stuff.
Online Industrial Supply Corporation - Sandpaper, Sanding Supplies, Abrasives, Sanding Discs, Sanding Belts, Sanding Sheets, Sanding Rolls
Summit!
Summit!
Summit!
Those guys should pay me.
- Dec 19, 2010
- 5,721
- 4,244
- 224
Thanks for that, I just did. Prices look to be the same as the Summit branded stuff I buy though,...and I can get it in a day because Summit is one state over.
Summit!
Summit!
Summit!
Those guys should pay me.
I'm not sure which products you are comparing, but a standard size pack of paper from summit is 30 to 50% more....???
I don't buy packs. I was looking at the 2.75" x 25 yd 80 grit adhesive roll pricing as a reference.
Yours:
Platinum Self-Adhesive (PSA) Long Board Roll (2 3/4" x 25 Yds), P80D Grit.
Mine:
http://www.summitracing.com/parts/sum-ab514c3srp80
Your stuff is in fact two dollars cheaper, but they list the abrasive as "platinum aluminum oxide" whereas my paper uses standard aluminum oxide abrasive. I say all this because of this:
What the hell is "platinum aluminum oxide"?
Yours:
Platinum Self-Adhesive (PSA) Long Board Roll (2 3/4" x 25 Yds), P80D Grit.
Mine:
http://www.summitracing.com/parts/sum-ab514c3srp80
Your stuff is in fact two dollars cheaper, but they list the abrasive as "platinum aluminum oxide" whereas my paper uses standard aluminum oxide abrasive. I say all this because of this:
What the hell is "platinum aluminum oxide"?
- Dec 19, 2010
- 5,721
- 4,244
- 224
Ah.. yeah I don't buy adhesive backed. Too expensive.I bought non adhesive singles for my air file, as well as 50 count packs of standard sheets and it was about half the cost anyone had it.
... and not sure what platinum oxide is.
... and not sure what platinum oxide is.
Bull doogersAh.. yeah I don't buy adhesive backed. Too expensive.I bought non adhesive singles for my air file, as well as 50 count packs of standard sheets and it was about half the cost anyone had it.
... and not sure what platinum oxide is.
From what I read, it's a hybrid of aluminum oxide, and ceramic oxide maybe,...I think.
Anyway, I don't like it.
Ah.. yeah I don't buy adhesive backed. Too expensive.I bought non adhesive singles for my air file, as well as 50 count packs of standard sheets and it was about half the cost anyone had it.
... and not sure what platinum oxide is.
And.......it's too expensive?
Aren't you the guy that just built an aircraft hangar in your back yard?
- Dec 19, 2010
- 5,721
- 4,244
- 224
And.......it's too expensive?
Aren't you the guy that just built an aircraft hangar in your back yard?
Why do you think I'm broke?

- Dec 19, 2010
- 5,721
- 4,244
- 224
Just "thrifty"
Right? Why pay 50% more for something that does the same job, and goes in the trash? Aw well.. enough thread jacking. Carry on.

Hmmm, sand paper. Good talk guys. Now about the rear end of the Gila lookin like a big Chevrolet emblem... Oh, and what do you thing about closing in your spoiler brackets? Im sure its just me, but the hollow triangles just look a little funny for some reason.
- Status
- Not open for further replies.