

You are using an out of date browser. It may not display this or other websites correctly.
You should upgrade or use an alternative browser.
You should upgrade or use an alternative browser.
Build Thread '83 T-top Coupe - Welding Holes in My Rear
- Thread starter Davedacarpainter
- Start date
- Status
- Not open for further replies.


- Dec 19, 2010
- 5,721
- 4,244
- 224
- Dec 19, 2010
- 5,721
- 4,244
- 224
Anybody old enought to know what the who called themselves before they were the who?
Wasn't it the detours?
@madmike1157 I was never a big fan of whitesnake... but by the time this song hits the end of the chorus, if you aren't tapping your foot something is wrong with you...
View: https://m.youtube.com/watch?v=b9uFNHvDBVg

Oh just you wait Mikey. The unveiling of Robby on the road will make for an interesting experience. I have a few other things planned besides music. Some might doubt my total grip on sanity at that stage......mayhaps......That's it,...I'm unliking everything I ever liked about you.
Motley Crue, Poison,...every freaking band with the word "white" in the name should have their master tapes demagnetized.


That stage?Some might doubt my total grip on sanity at that stage......mayhaps......
Hell, I doubt it now....

here @Davedacarpainter......Here's an Oklahoma boy that will broaden you horizons. JJ Cale.
He's the man that gave Eric Clapton "After Midnight"
Gave Lynyrd Skynerd "Call me the Breeze"
Put on a pair of headphones and turn it up.....This is music that lasts
He's the man that gave Eric Clapton "After Midnight"
Gave Lynyrd Skynerd "Call me the Breeze"
Put on a pair of headphones and turn it up.....This is music that lasts
here @Davedacarpainter......Here's an Oklahoma boy that will broaden you horizons. JJ Cale.
He's the man that gave Eric Clapton "After Midnight"
Gave Lynyrd Skynerd "Call me the Breeze"
Put on a pair of headphones and turn it up.....This is music that lasts
Won't play for me Mike
Awww C'mon Dave!! What kind of Nazi-restricto internet browser are you using? Don't tell me that you are using I.E. or Edge.Won't play for me Mike
Step into the light Carol Ann,....it's the 21st Century. Download Chrome Dave,....either that or just Google
JJ Cale where the sun don't shine.
I hate to drift off into car stuff here, but during all of this banter i've been studying my wiring manual and looking at pictures of my car at the same time.
Here's what i've discovered about my engine bay. Some dumb bastard has changed a few things before i purchased said vehicle.
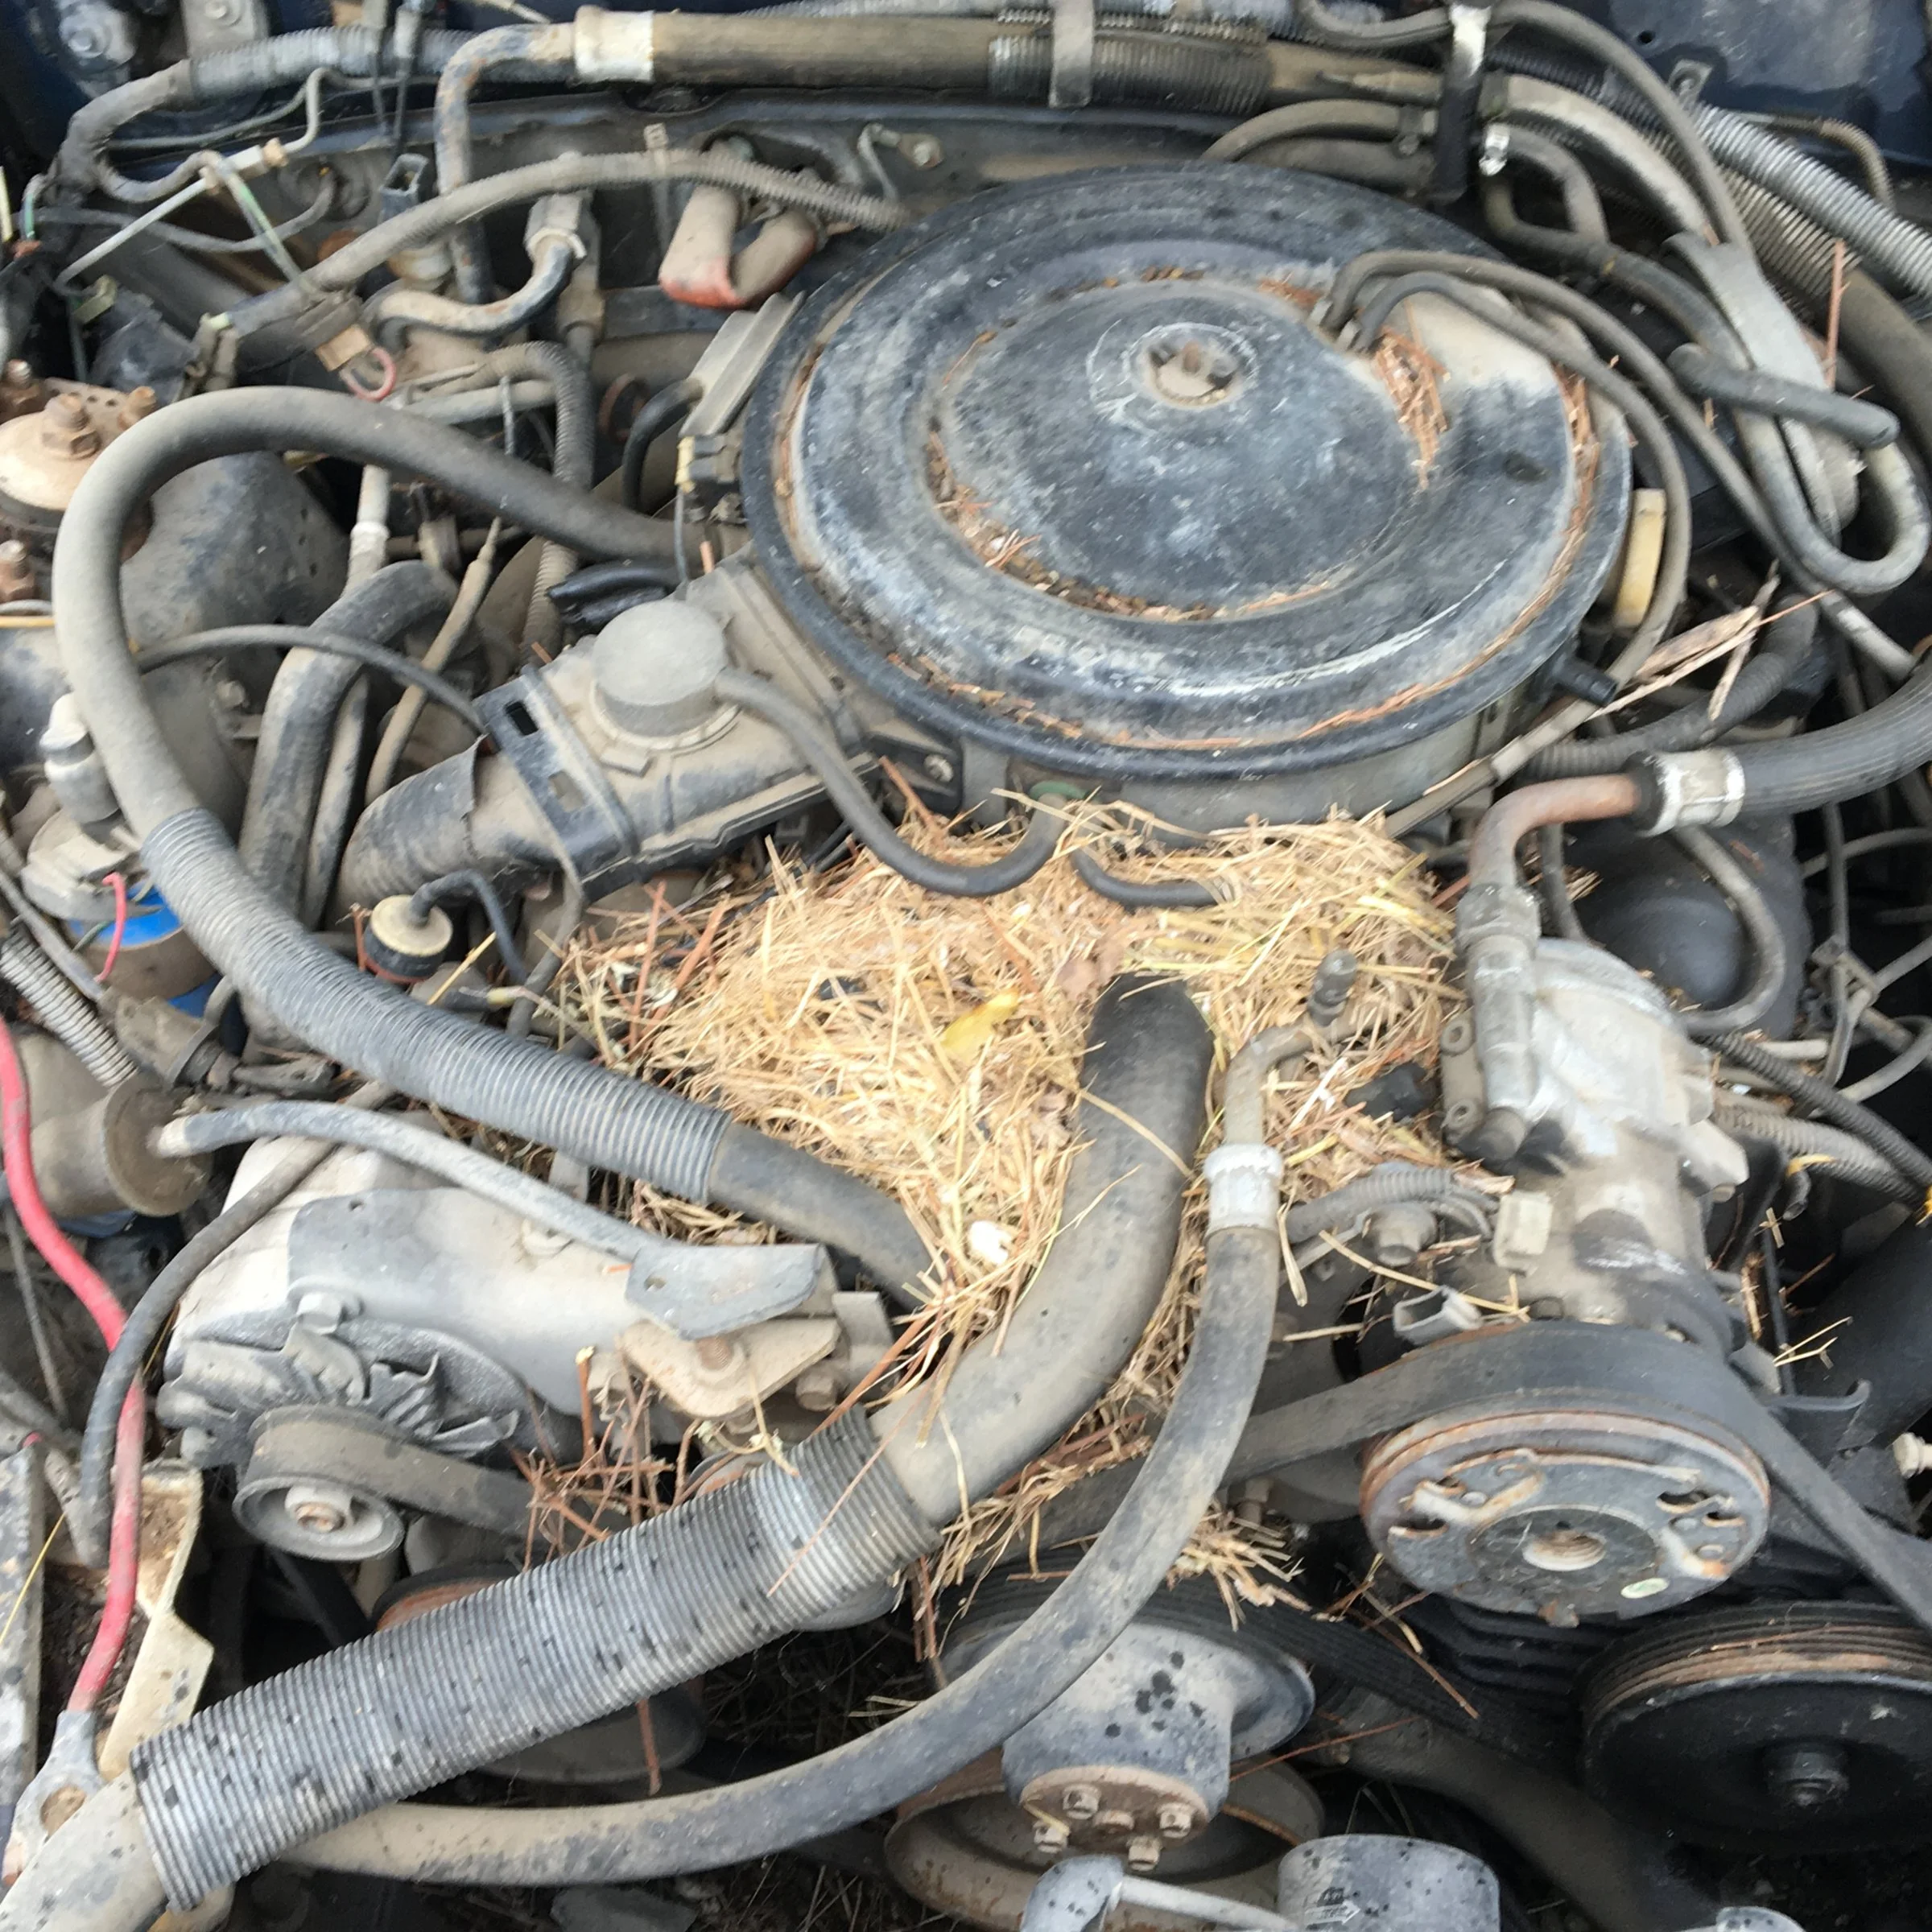
I'm all excited about it though! I can fix the wiring harness and all of those silly vacuum lines! Dang i can't wait to have Robby home!!
I'm going to take a bunch more detailed photos tomorrow evening so i can be ready for it. Like i've mentioned, I'm going to go back to the yard tomorrow night. I have to get a few smalls and LOTS of pictures.
Here's what i've discovered about my engine bay. Some dumb bastard has changed a few things before i purchased said vehicle.
I'm all excited about it though! I can fix the wiring harness and all of those silly vacuum lines! Dang i can't wait to have Robby home!!
I'm going to take a bunch more detailed photos tomorrow evening so i can be ready for it. Like i've mentioned, I'm going to go back to the yard tomorrow night. I have to get a few smalls and LOTS of pictures.

- Jul 7, 2005
- 1,563
- 1,110
- 164
I hate to drift off into car stuff here, but during all of this banter i've been studying my wiring manual and looking at pictures of my car at the same time.
Here's what i've discovered about my engine bay. Some dumb bastard has changed a few things before i purchased said vehicle.
I'm all excited about it though! I can fix the wiring harness and all of those silly vacuum lines! Dang i can't wait to have Robby home!!
I'm going to take a bunch more detailed photos tomorrow evening so i can be ready for it. Like i've mentioned, I'm going to go back to the yard tomorrow night. I have to get a few smalls and LOTS of pictures.
Are you going to be doing any wire tucking when you rebuild your wire harness or are you sticking to the "restoration" of all original?
Idk yet really. I like a nice wire tuck, right now I'm just studying the crap out of it so I'll know what and where all of those wires go to.Are you going to be doing any wire tucking when you rebuild your wire harness or are you sticking to the "restoration" of all original?

Judging by that heater core bypass, you might want to get a new core back in there before you start putting the interior back together
I've already got that and the a\c evaporator. I'll be messing with that box in the next couple weeks.Judging by that heater core bypass, you might want to get a new core back in there before you start putting the interior back together
Ok, another small repair, just need to primer then paint. Not perfection, but these will be silicon glued to the front door channel seal, the repairs won't be seen again for a long, long time. Before and after repair
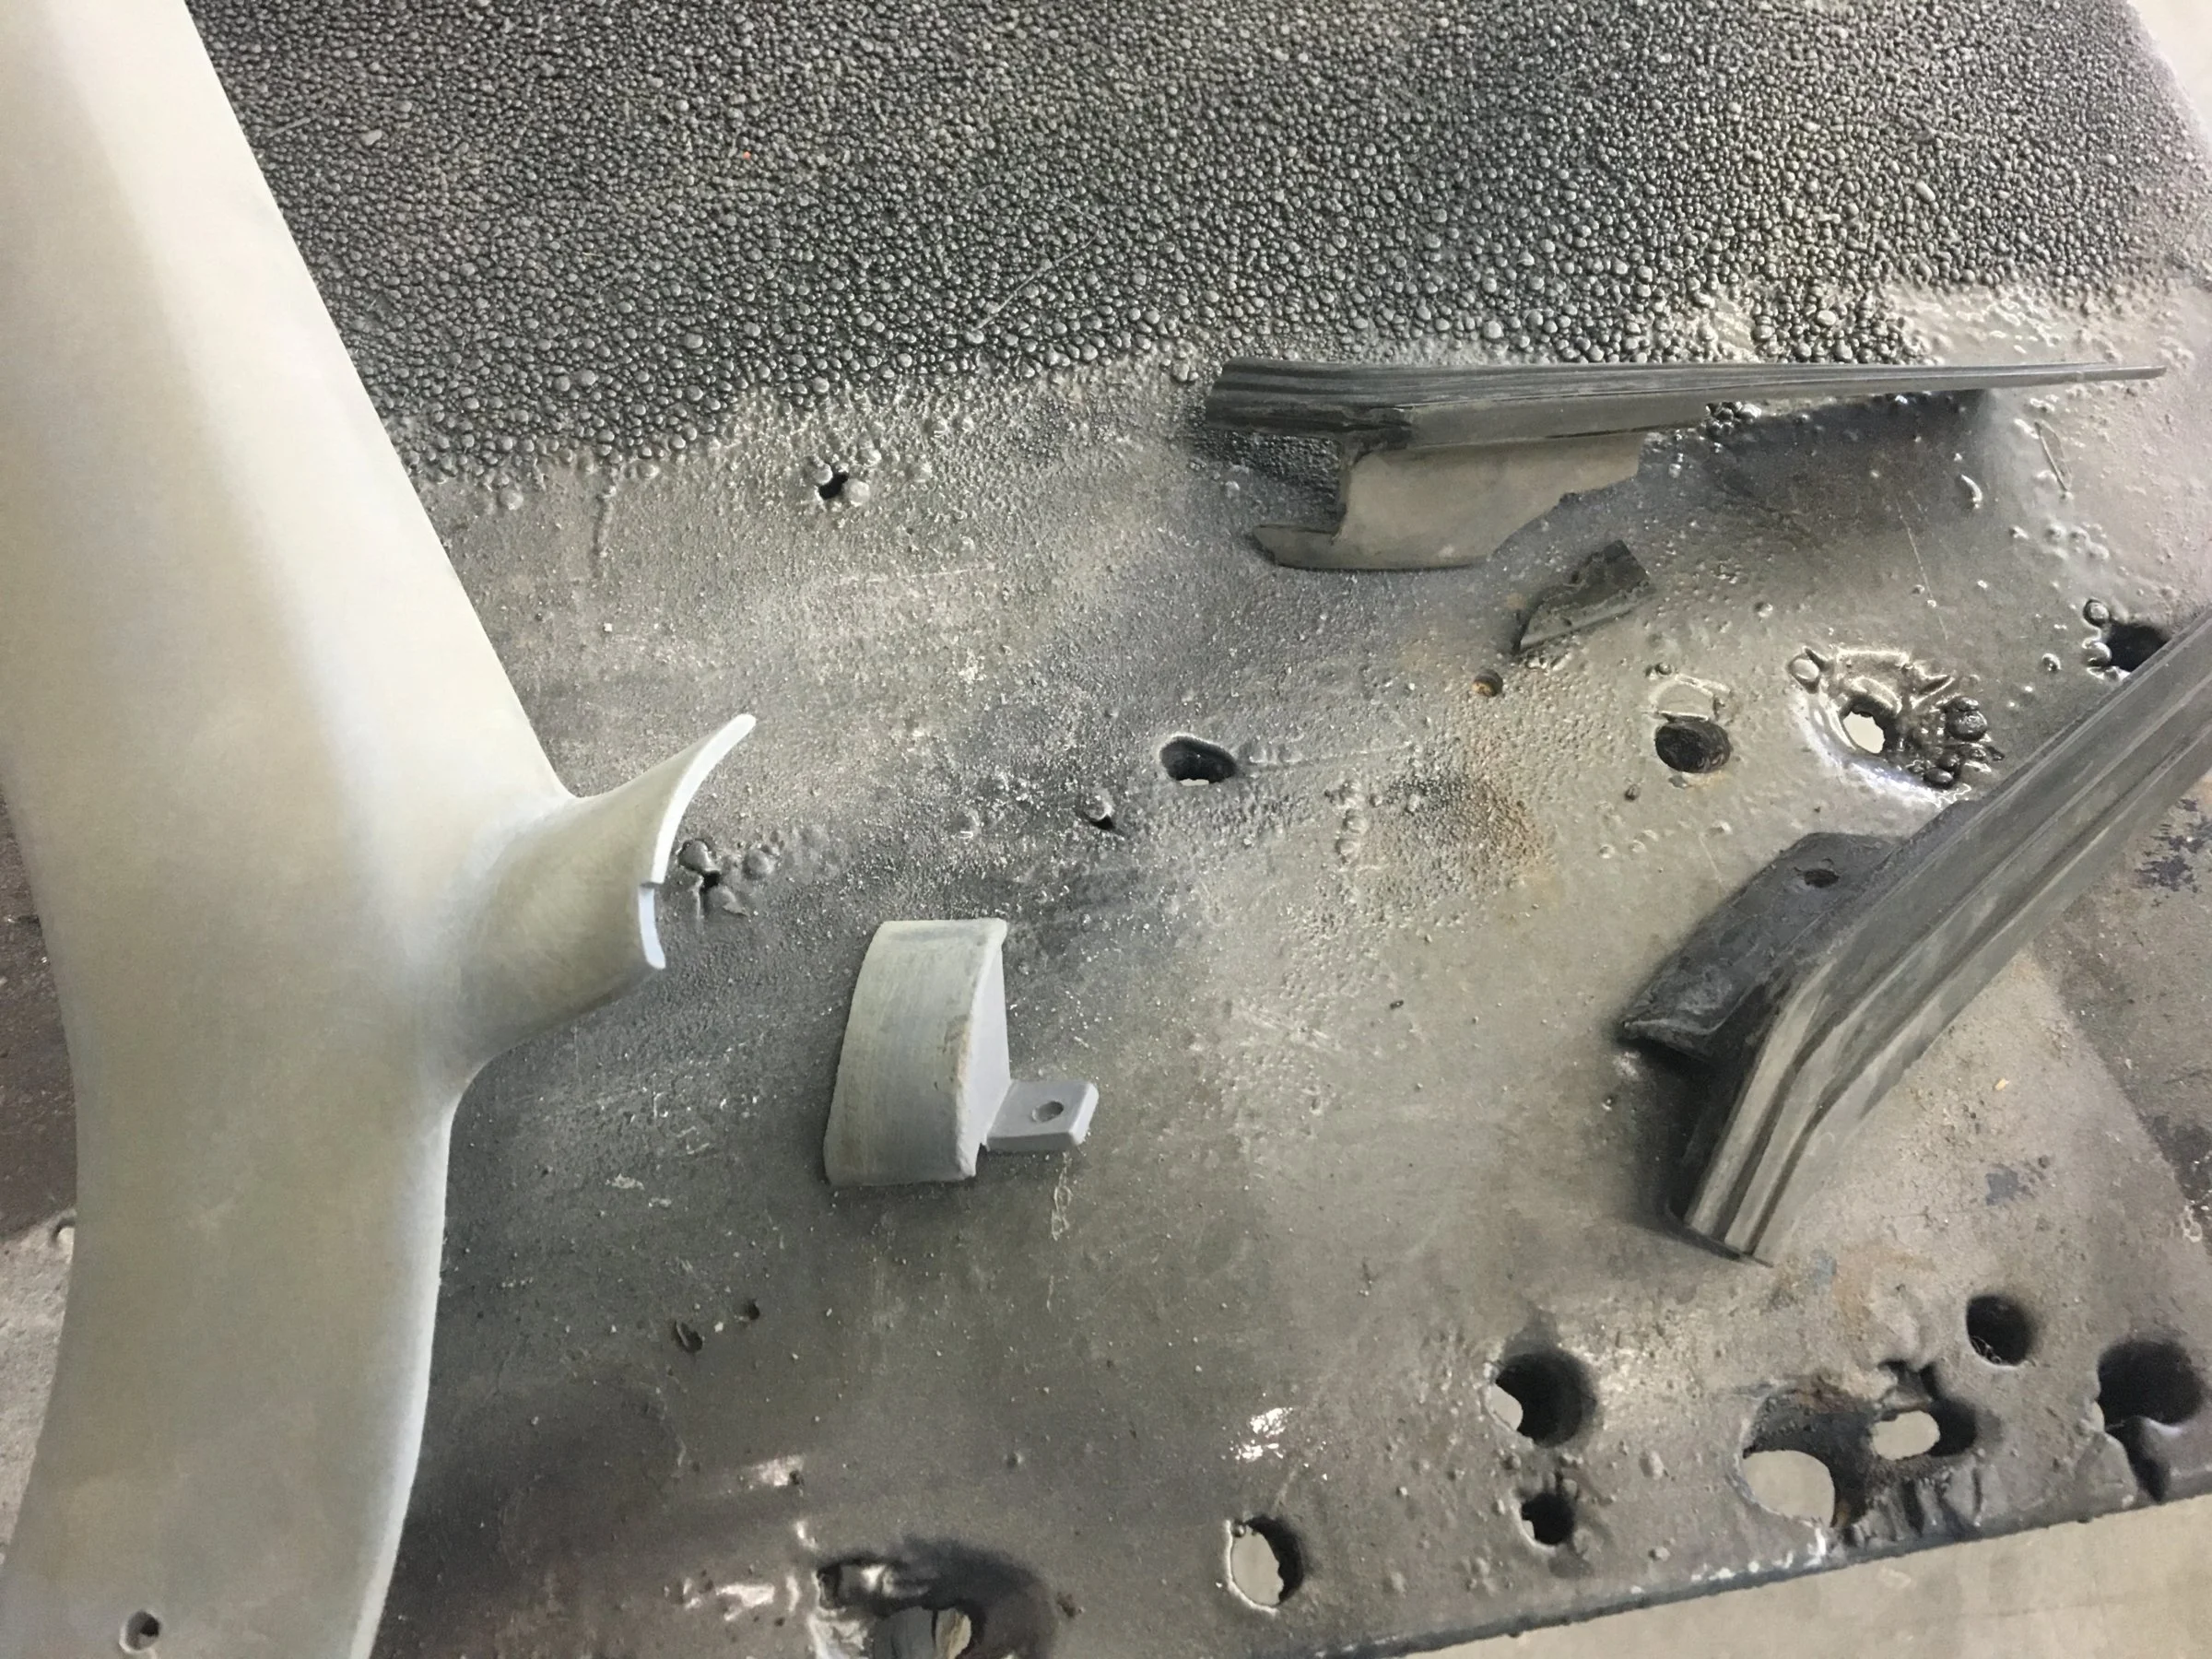
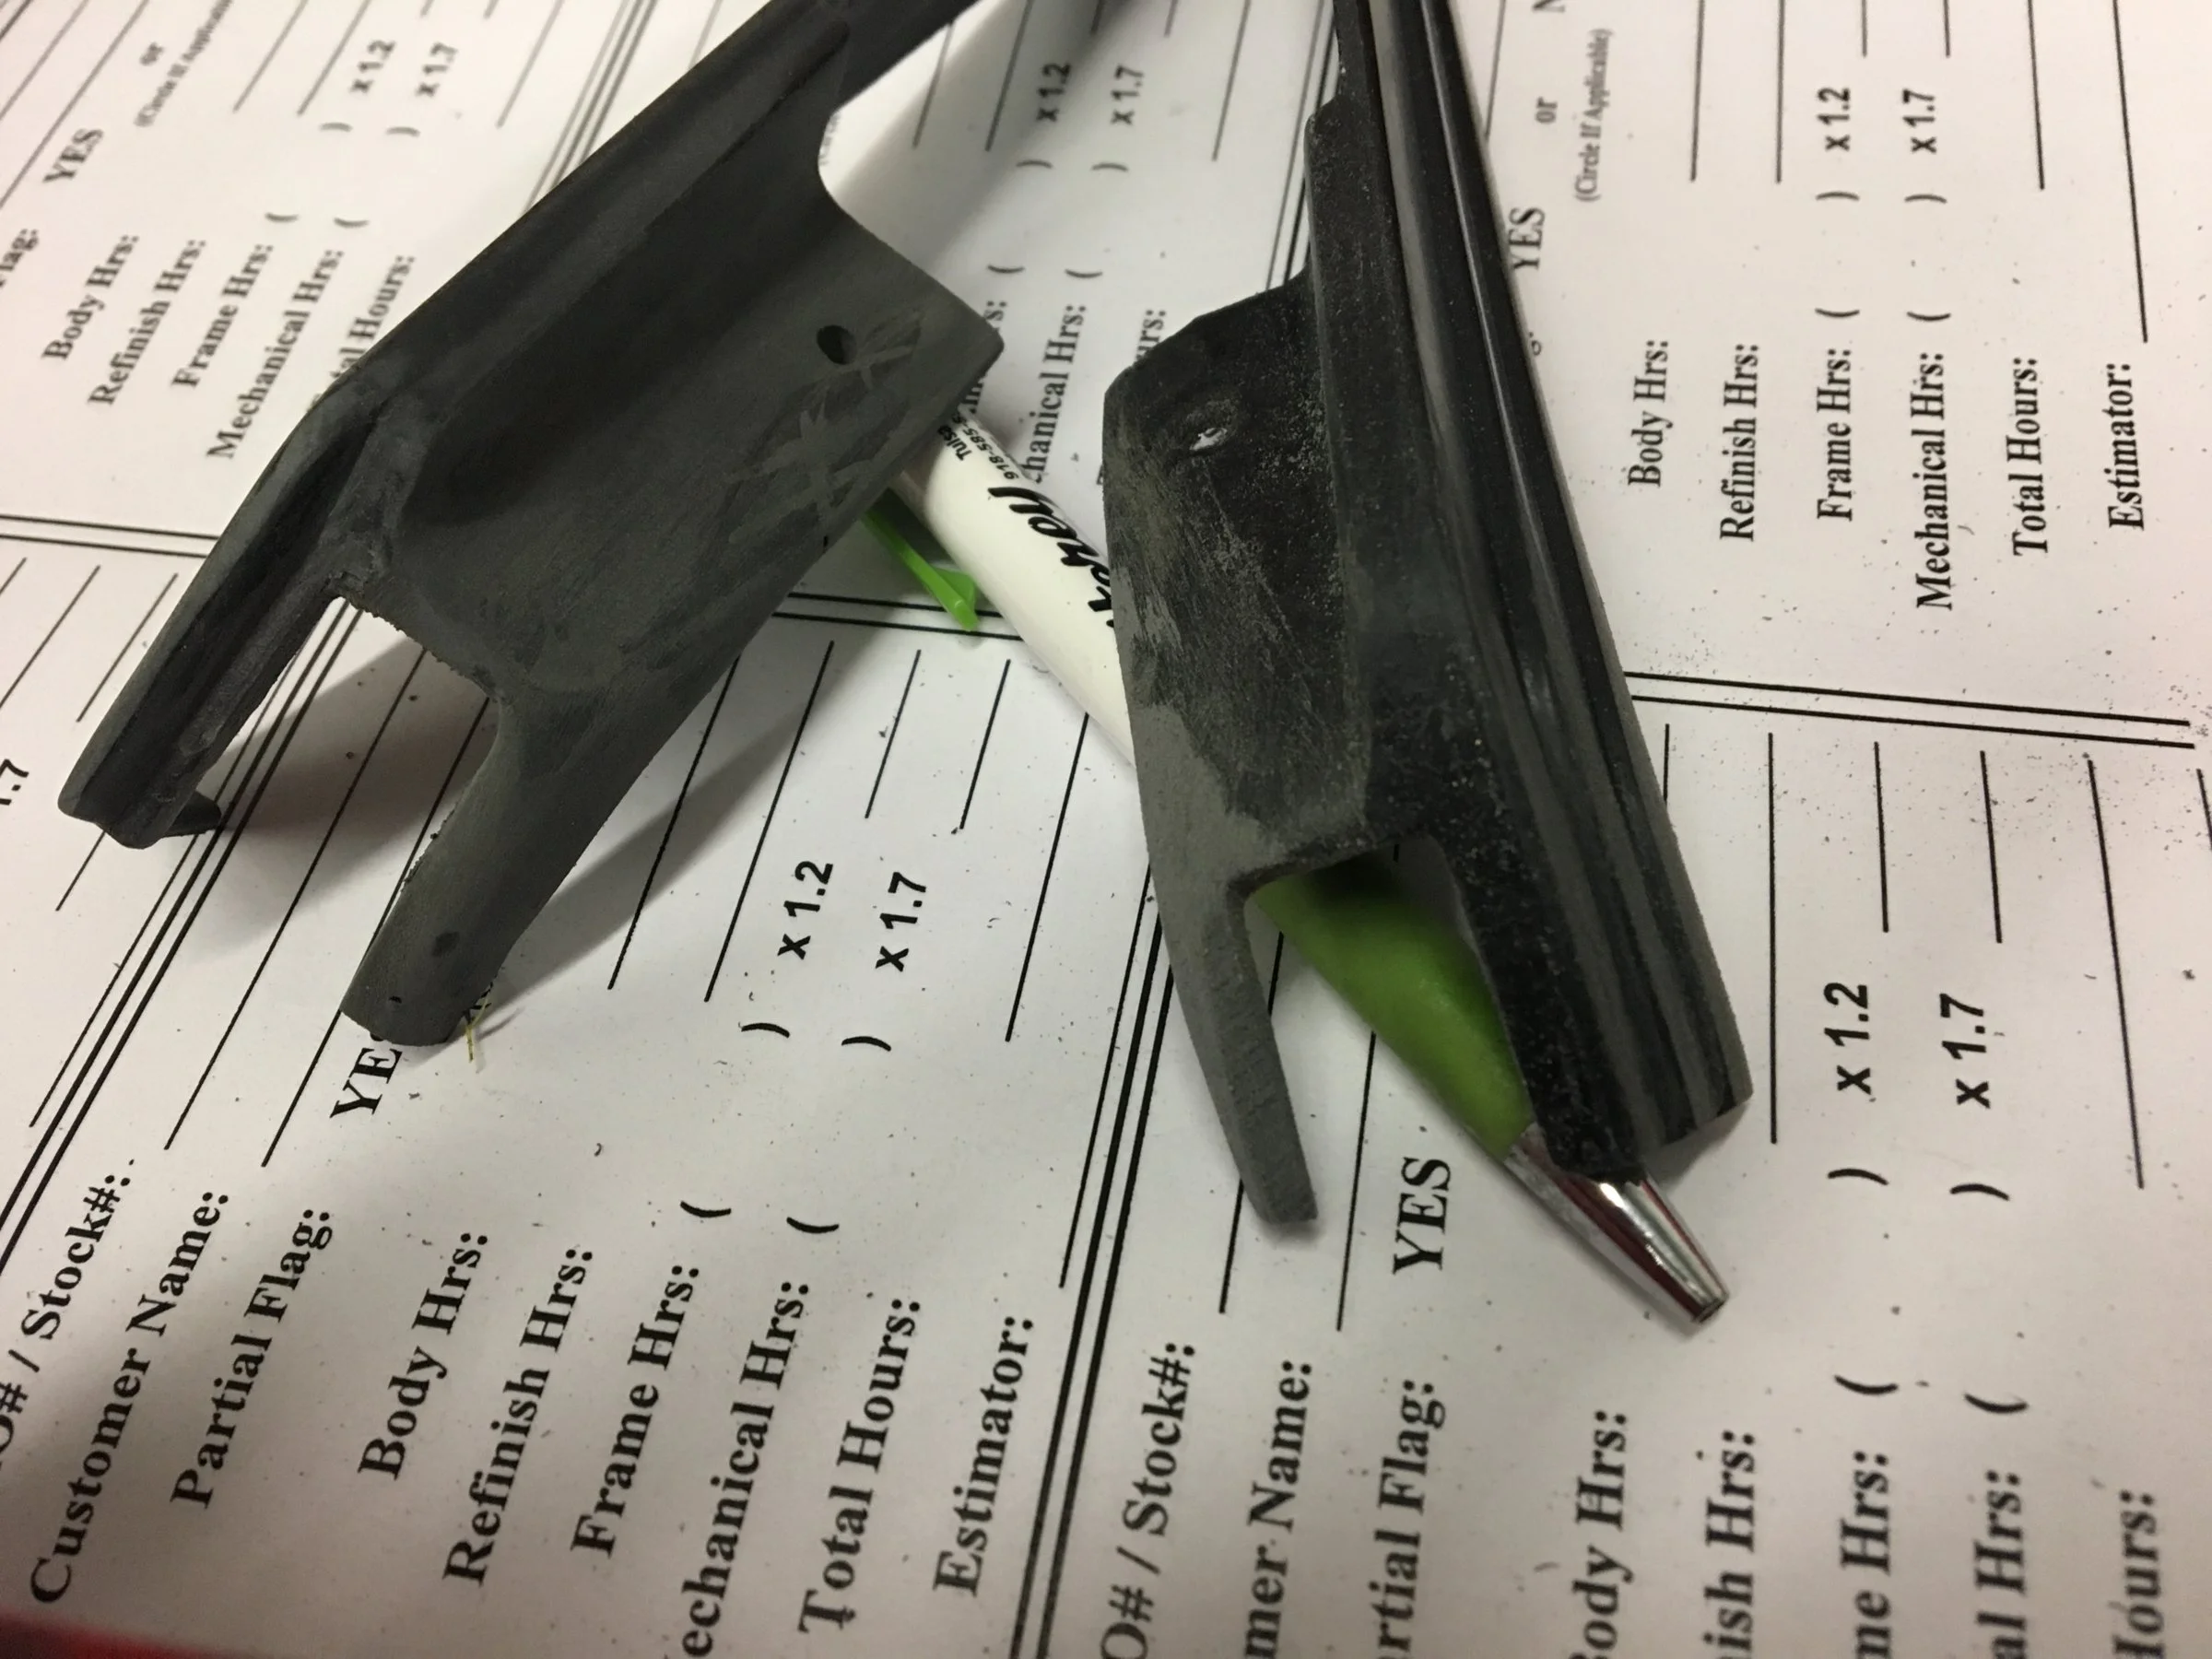
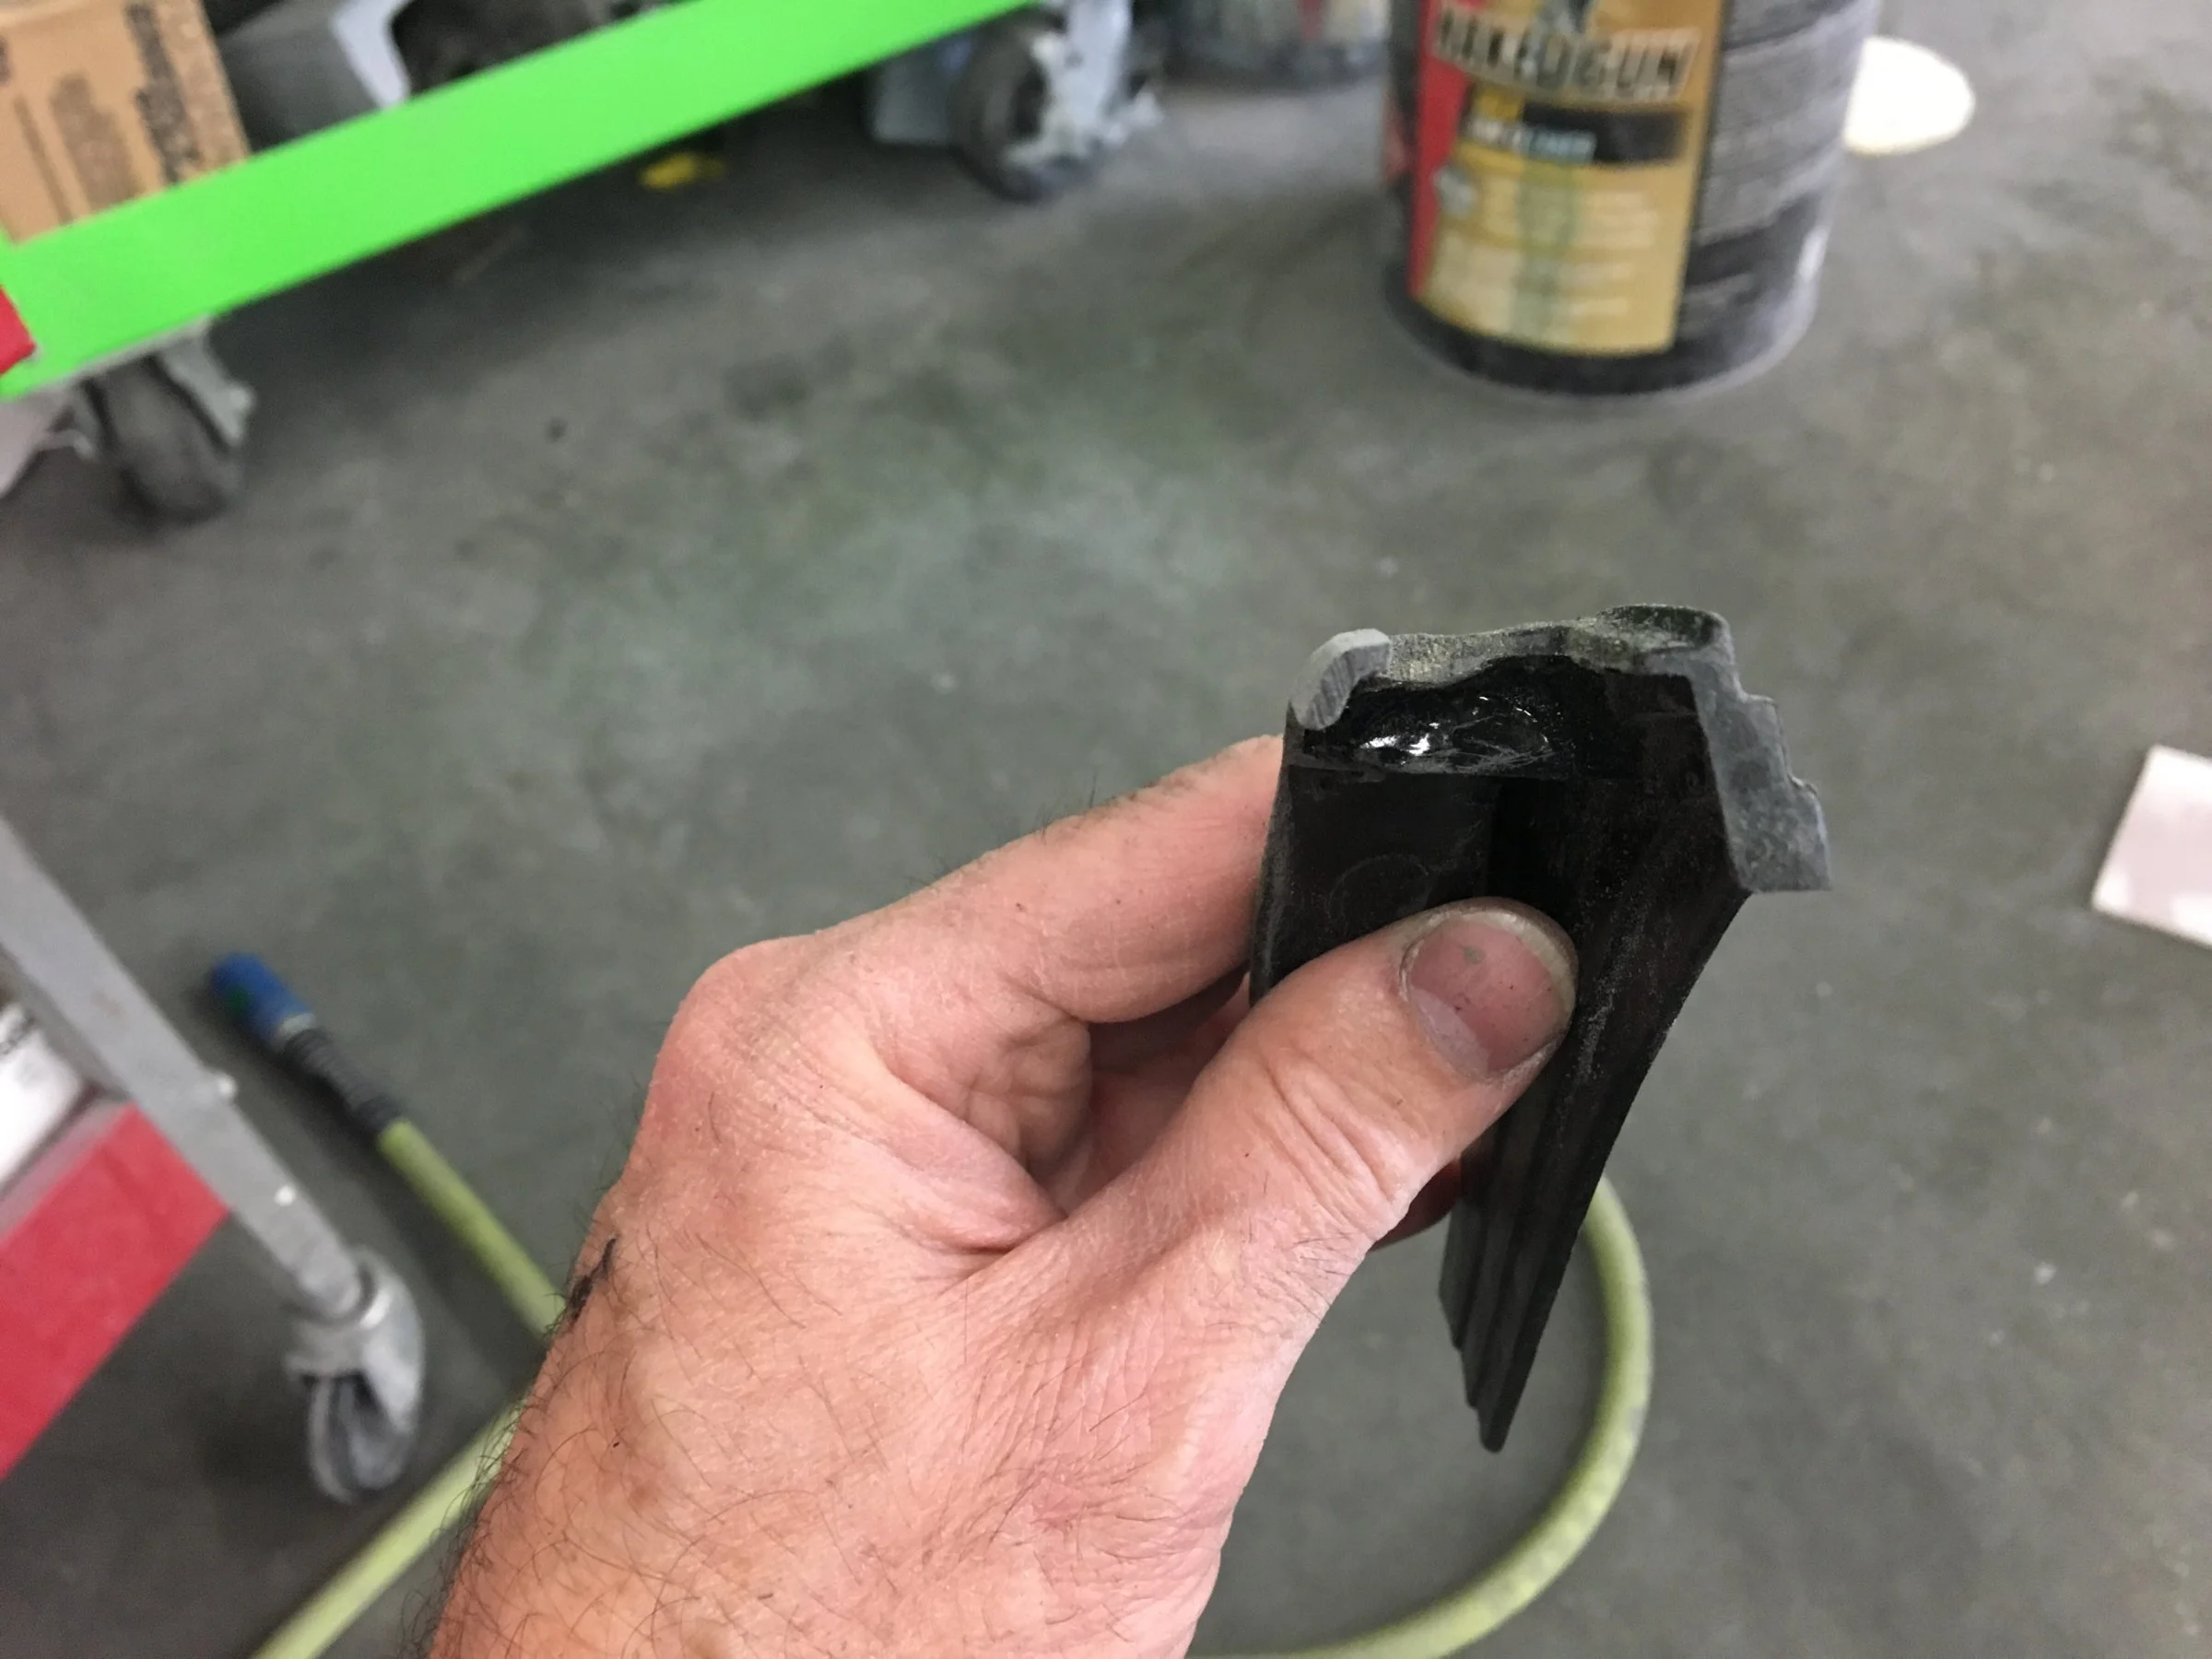

I'm pretty sure that bird's nest is OEM Dave. It helps to keep the top radiator hose from heat soaking the motor. 
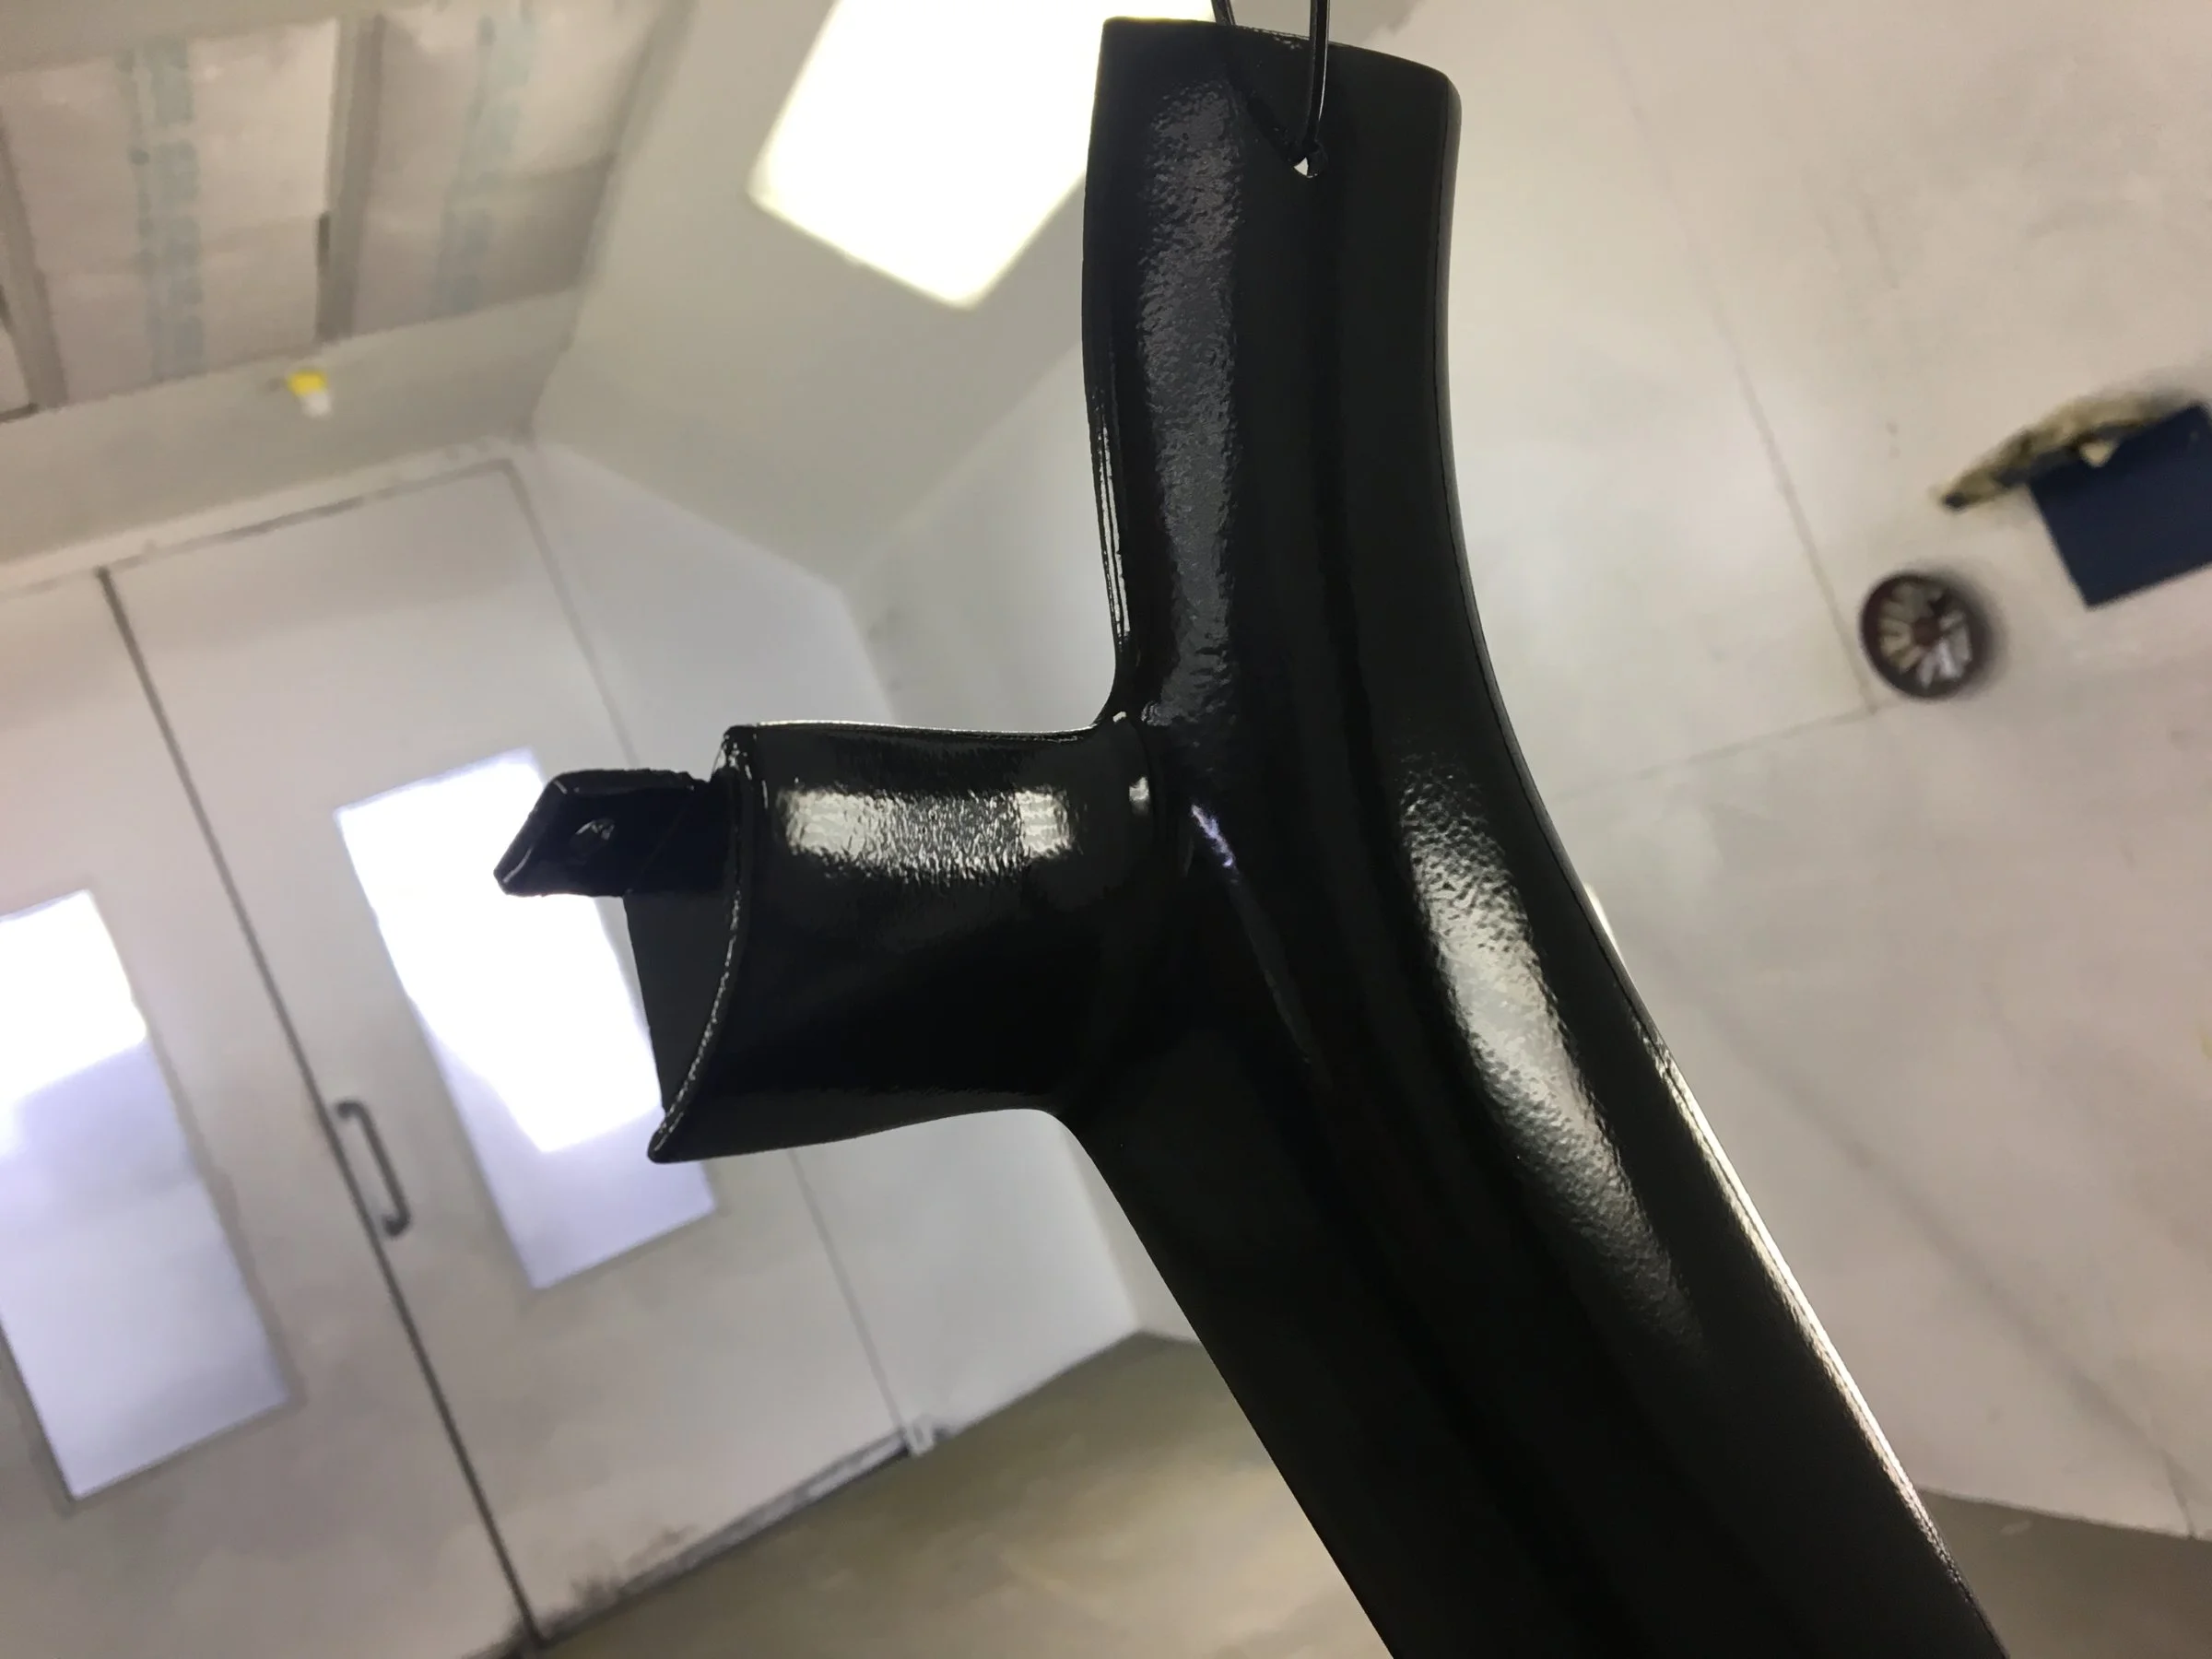
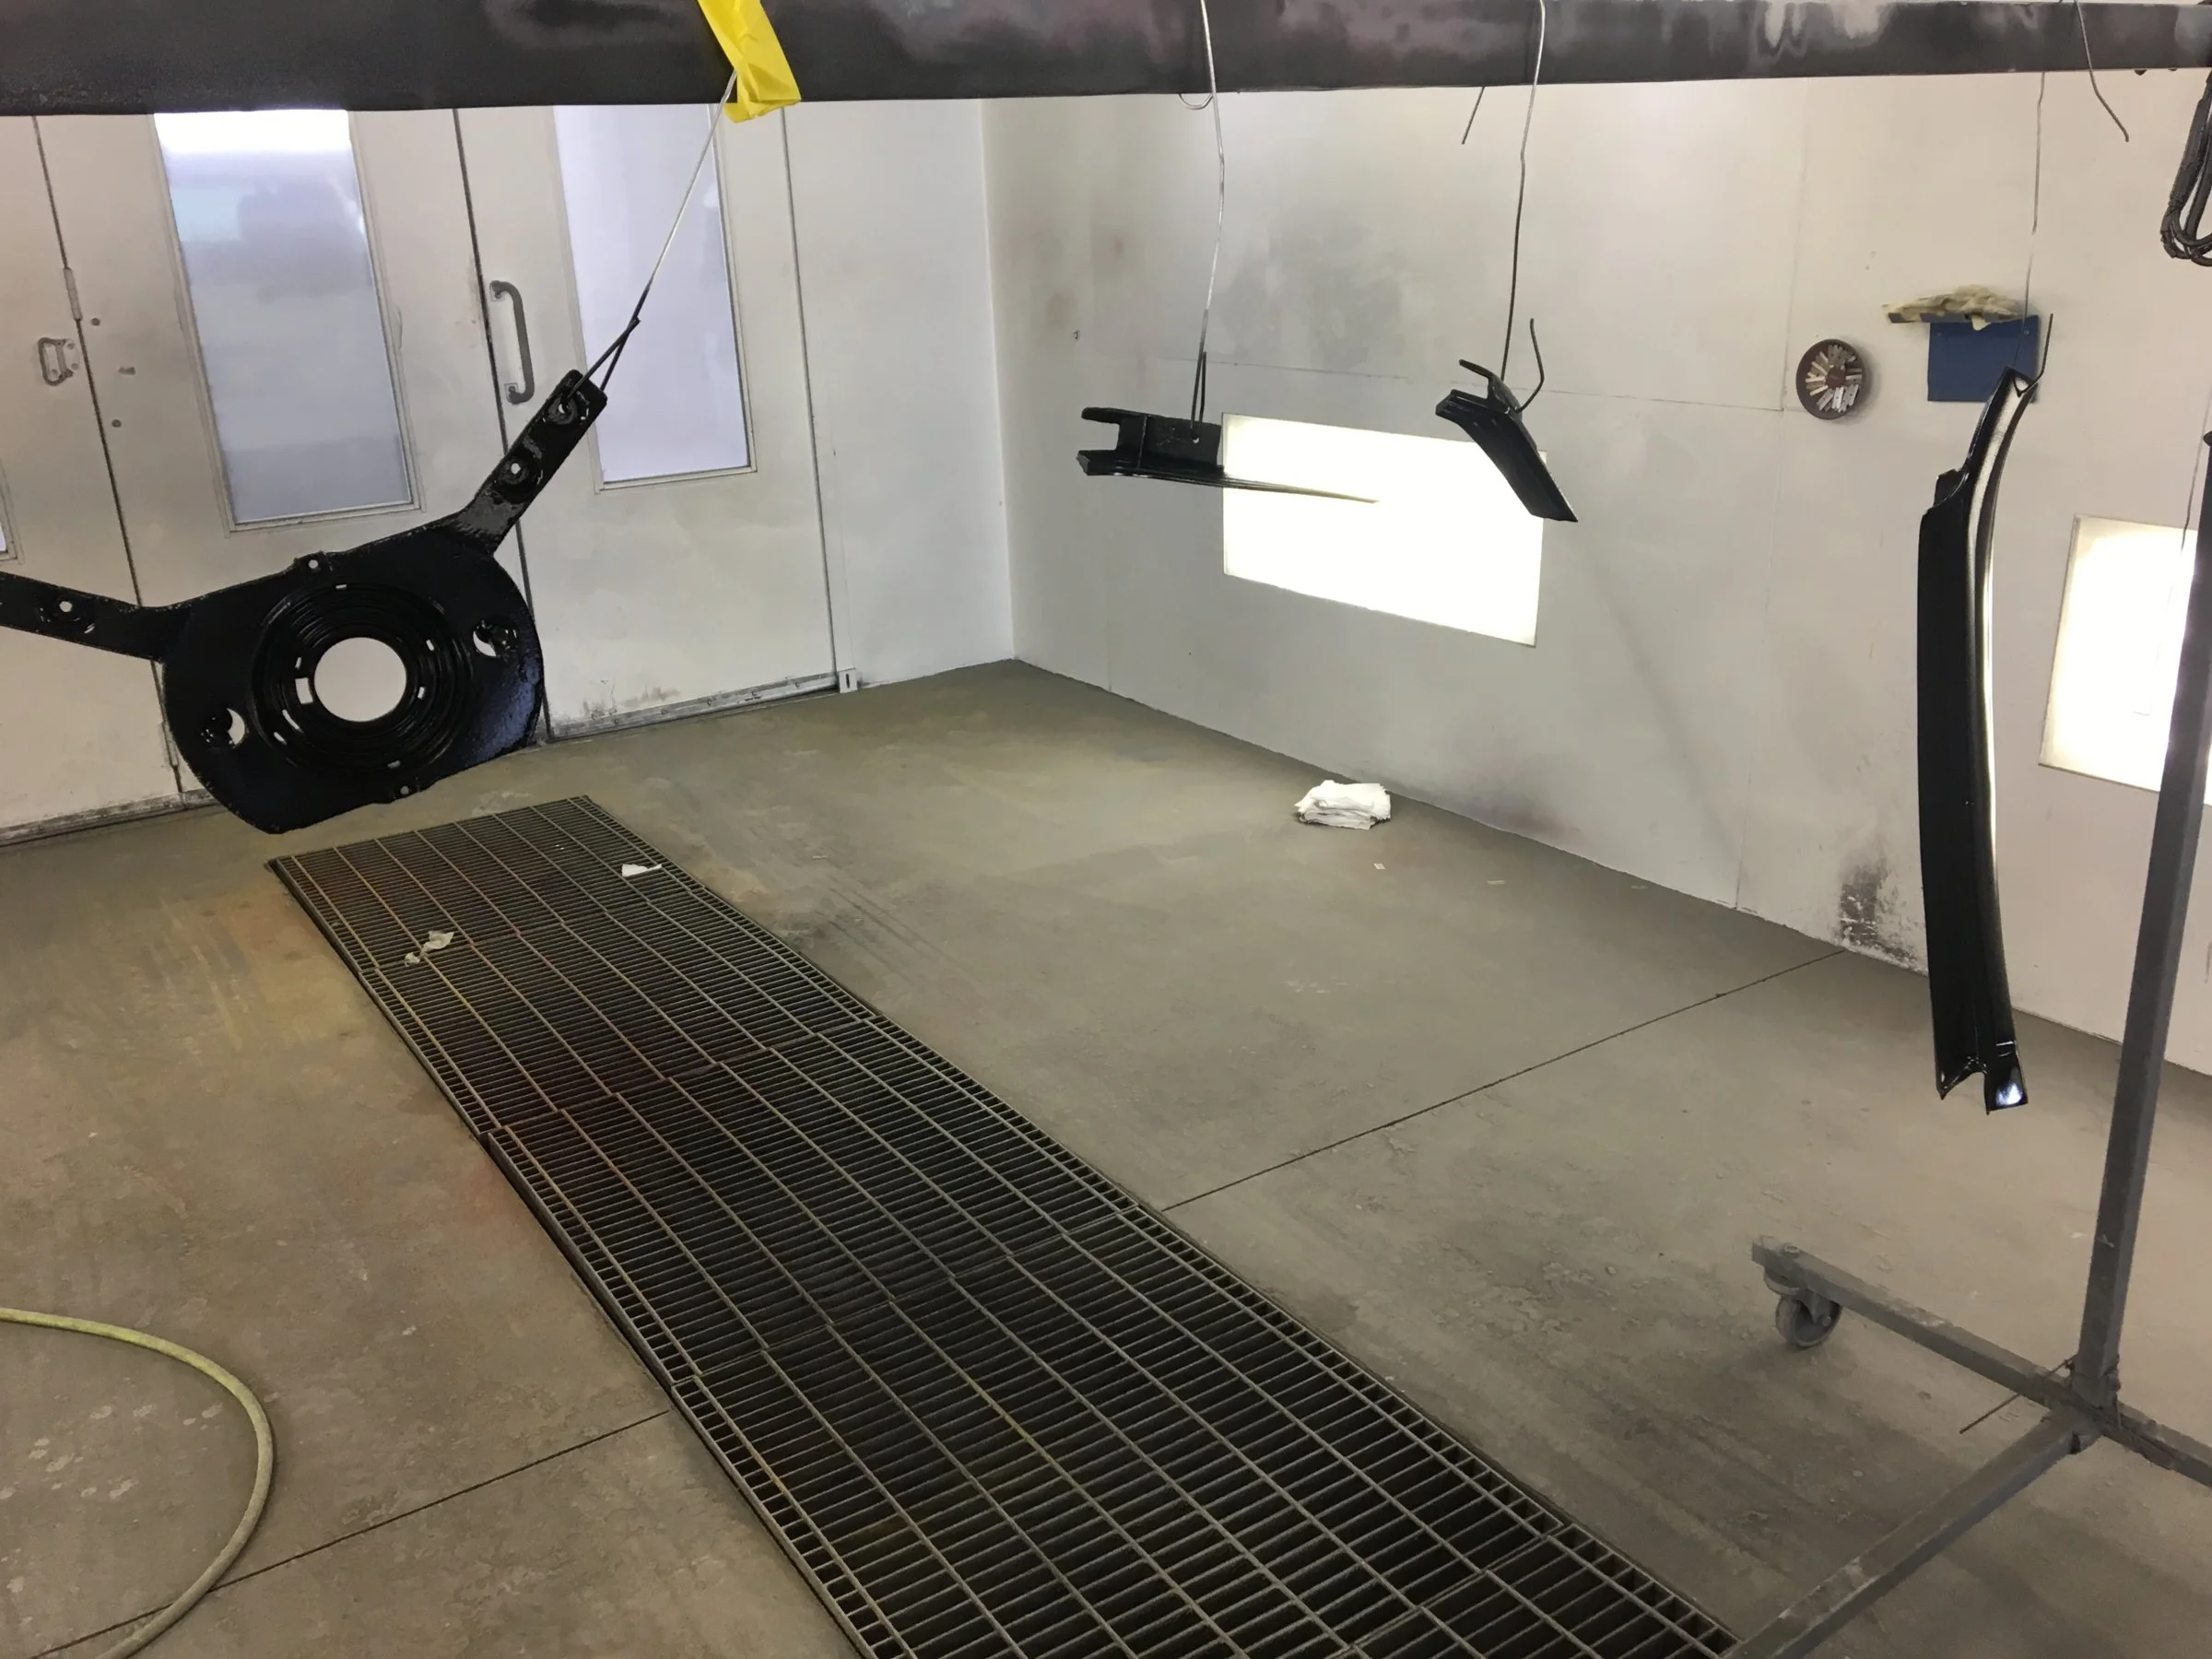
So, I did a little more stuff. I finished off the repair on the interior windshield trim and primered it and the mirror trim pieces and the backing plate for the steering wheel.
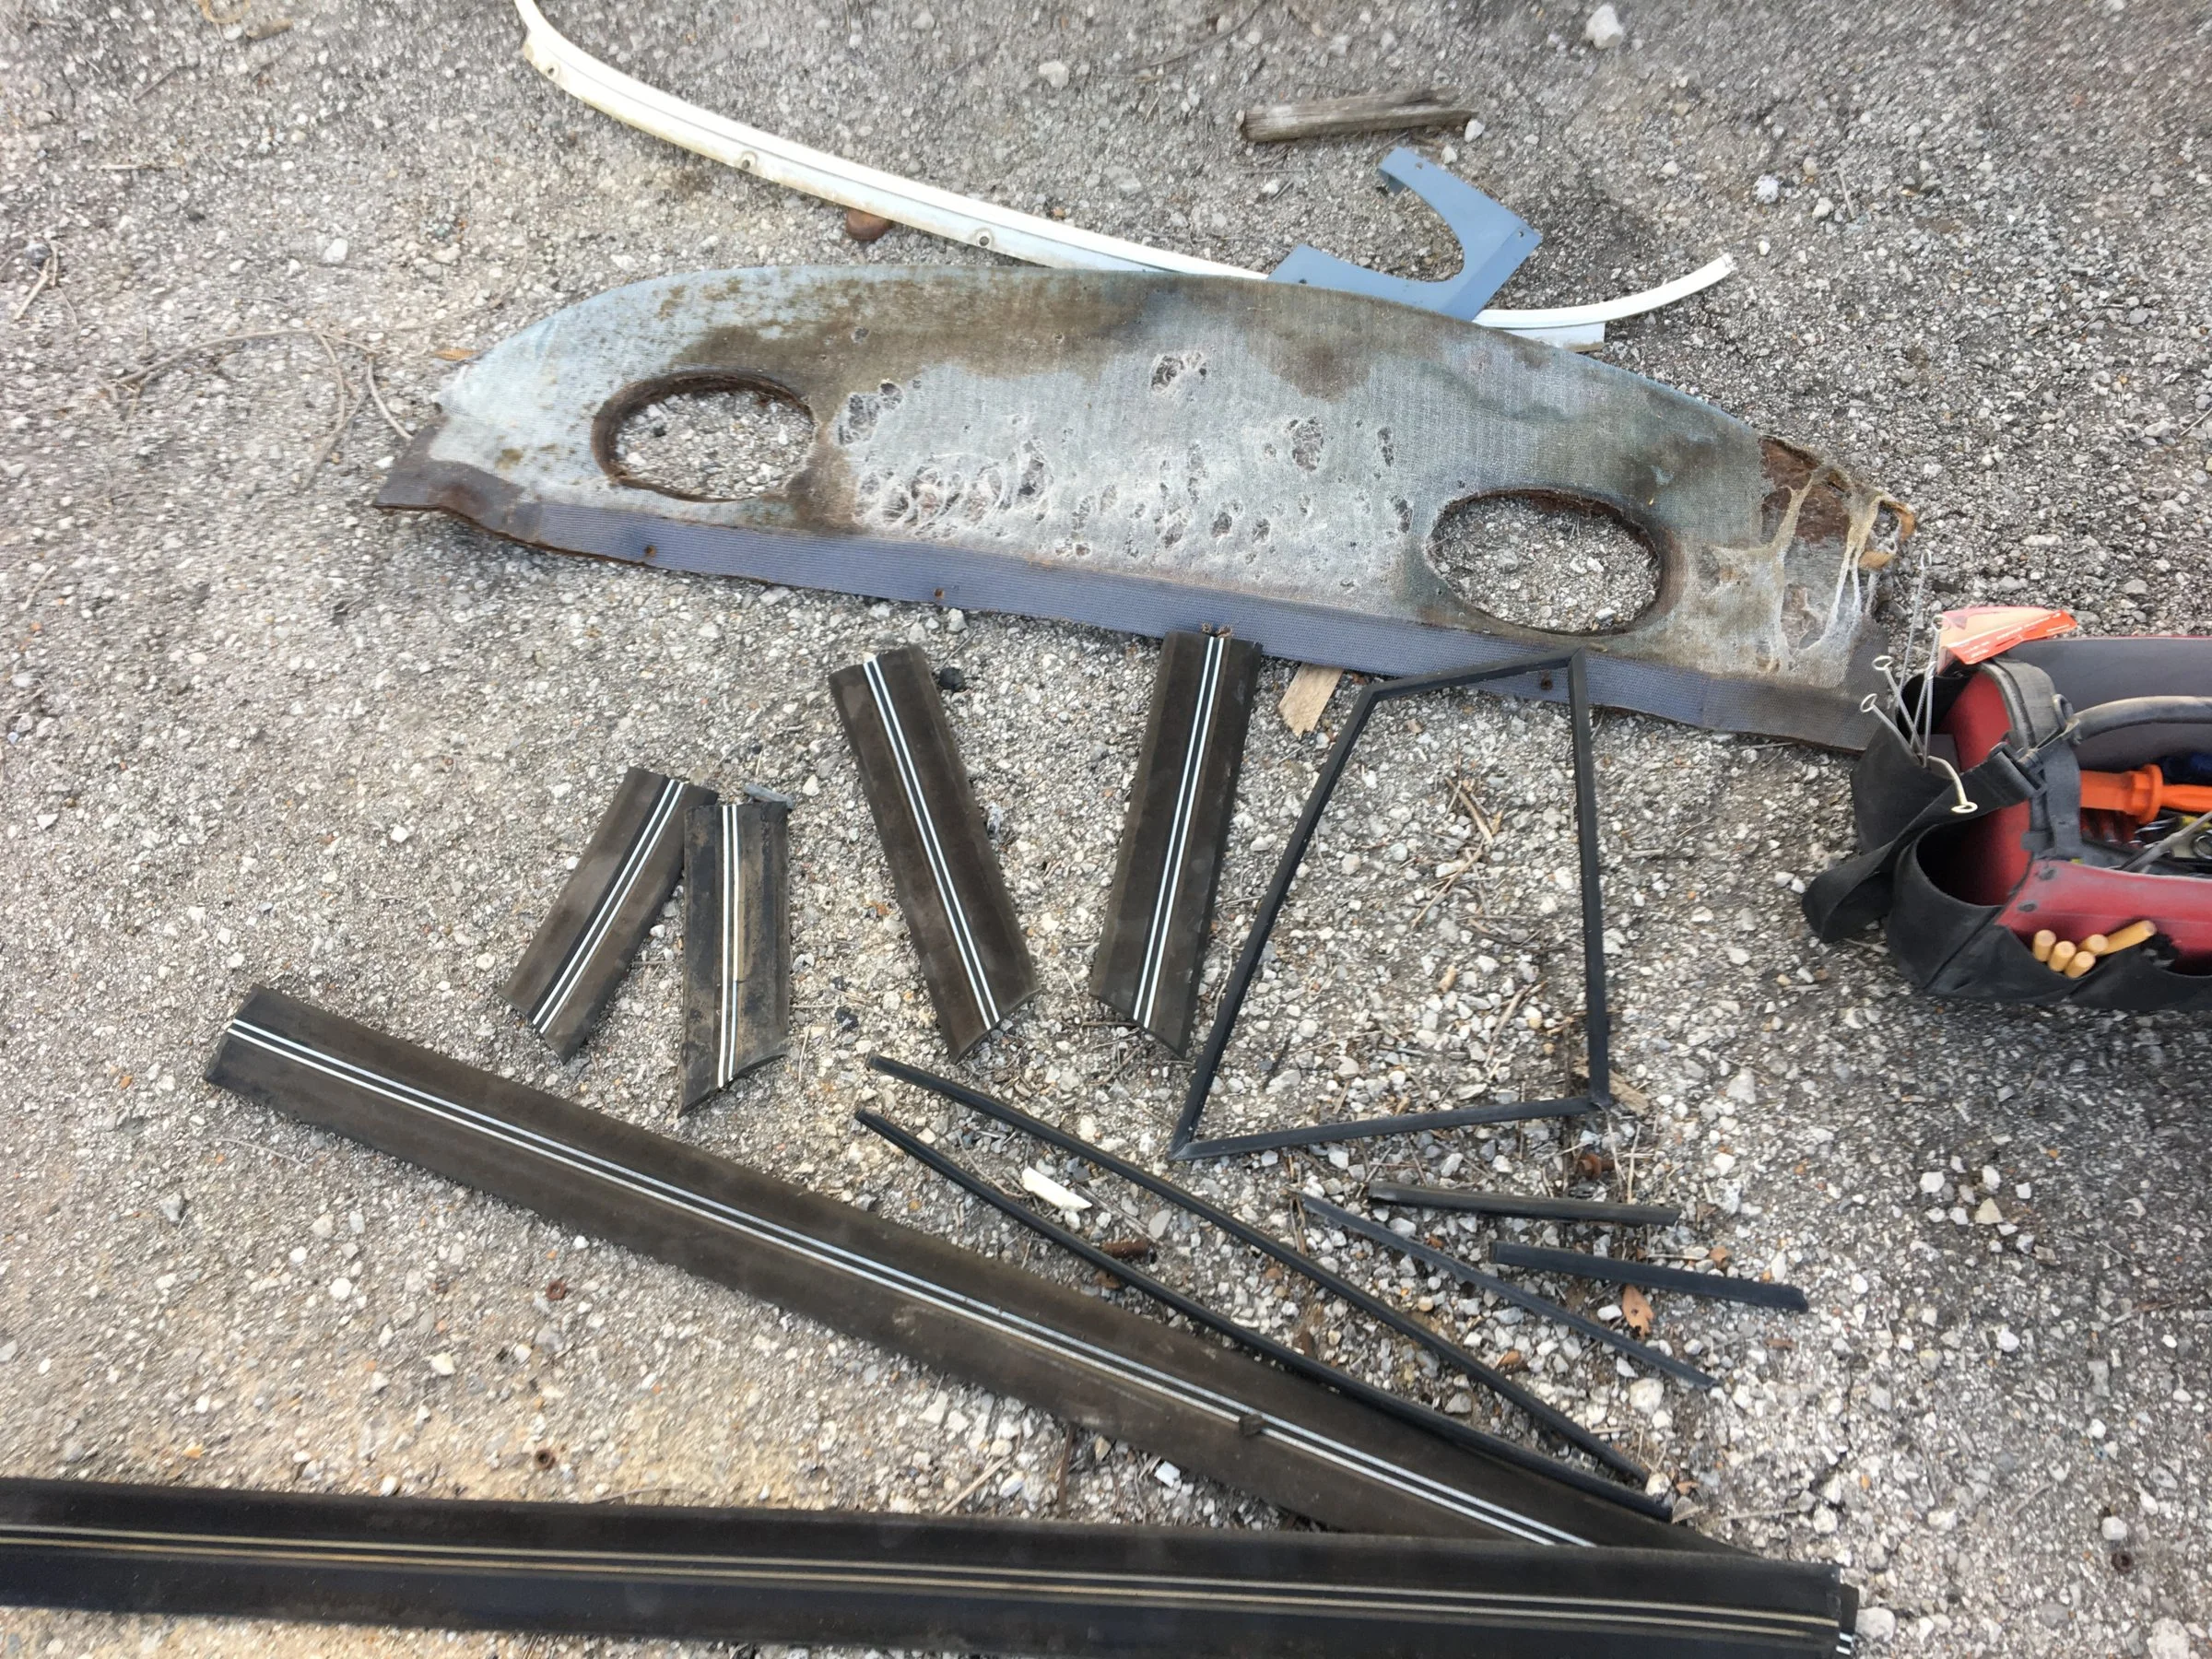
I went back to the yard after work. I got all of the bodyside mouldings the trim around the right 1/4 glass. Drip rail mouldings from both sides and the package tray.
The package tray is interesting in it's structure. First off, it's semi-flexible. It looks like it's just jute padding that has been compressed around the perimeter to give it structure and covered with a mesh like cloth. This will take a little thought to replace. The only thing salvageable part from it will be the clip attached on the middle rear of it.
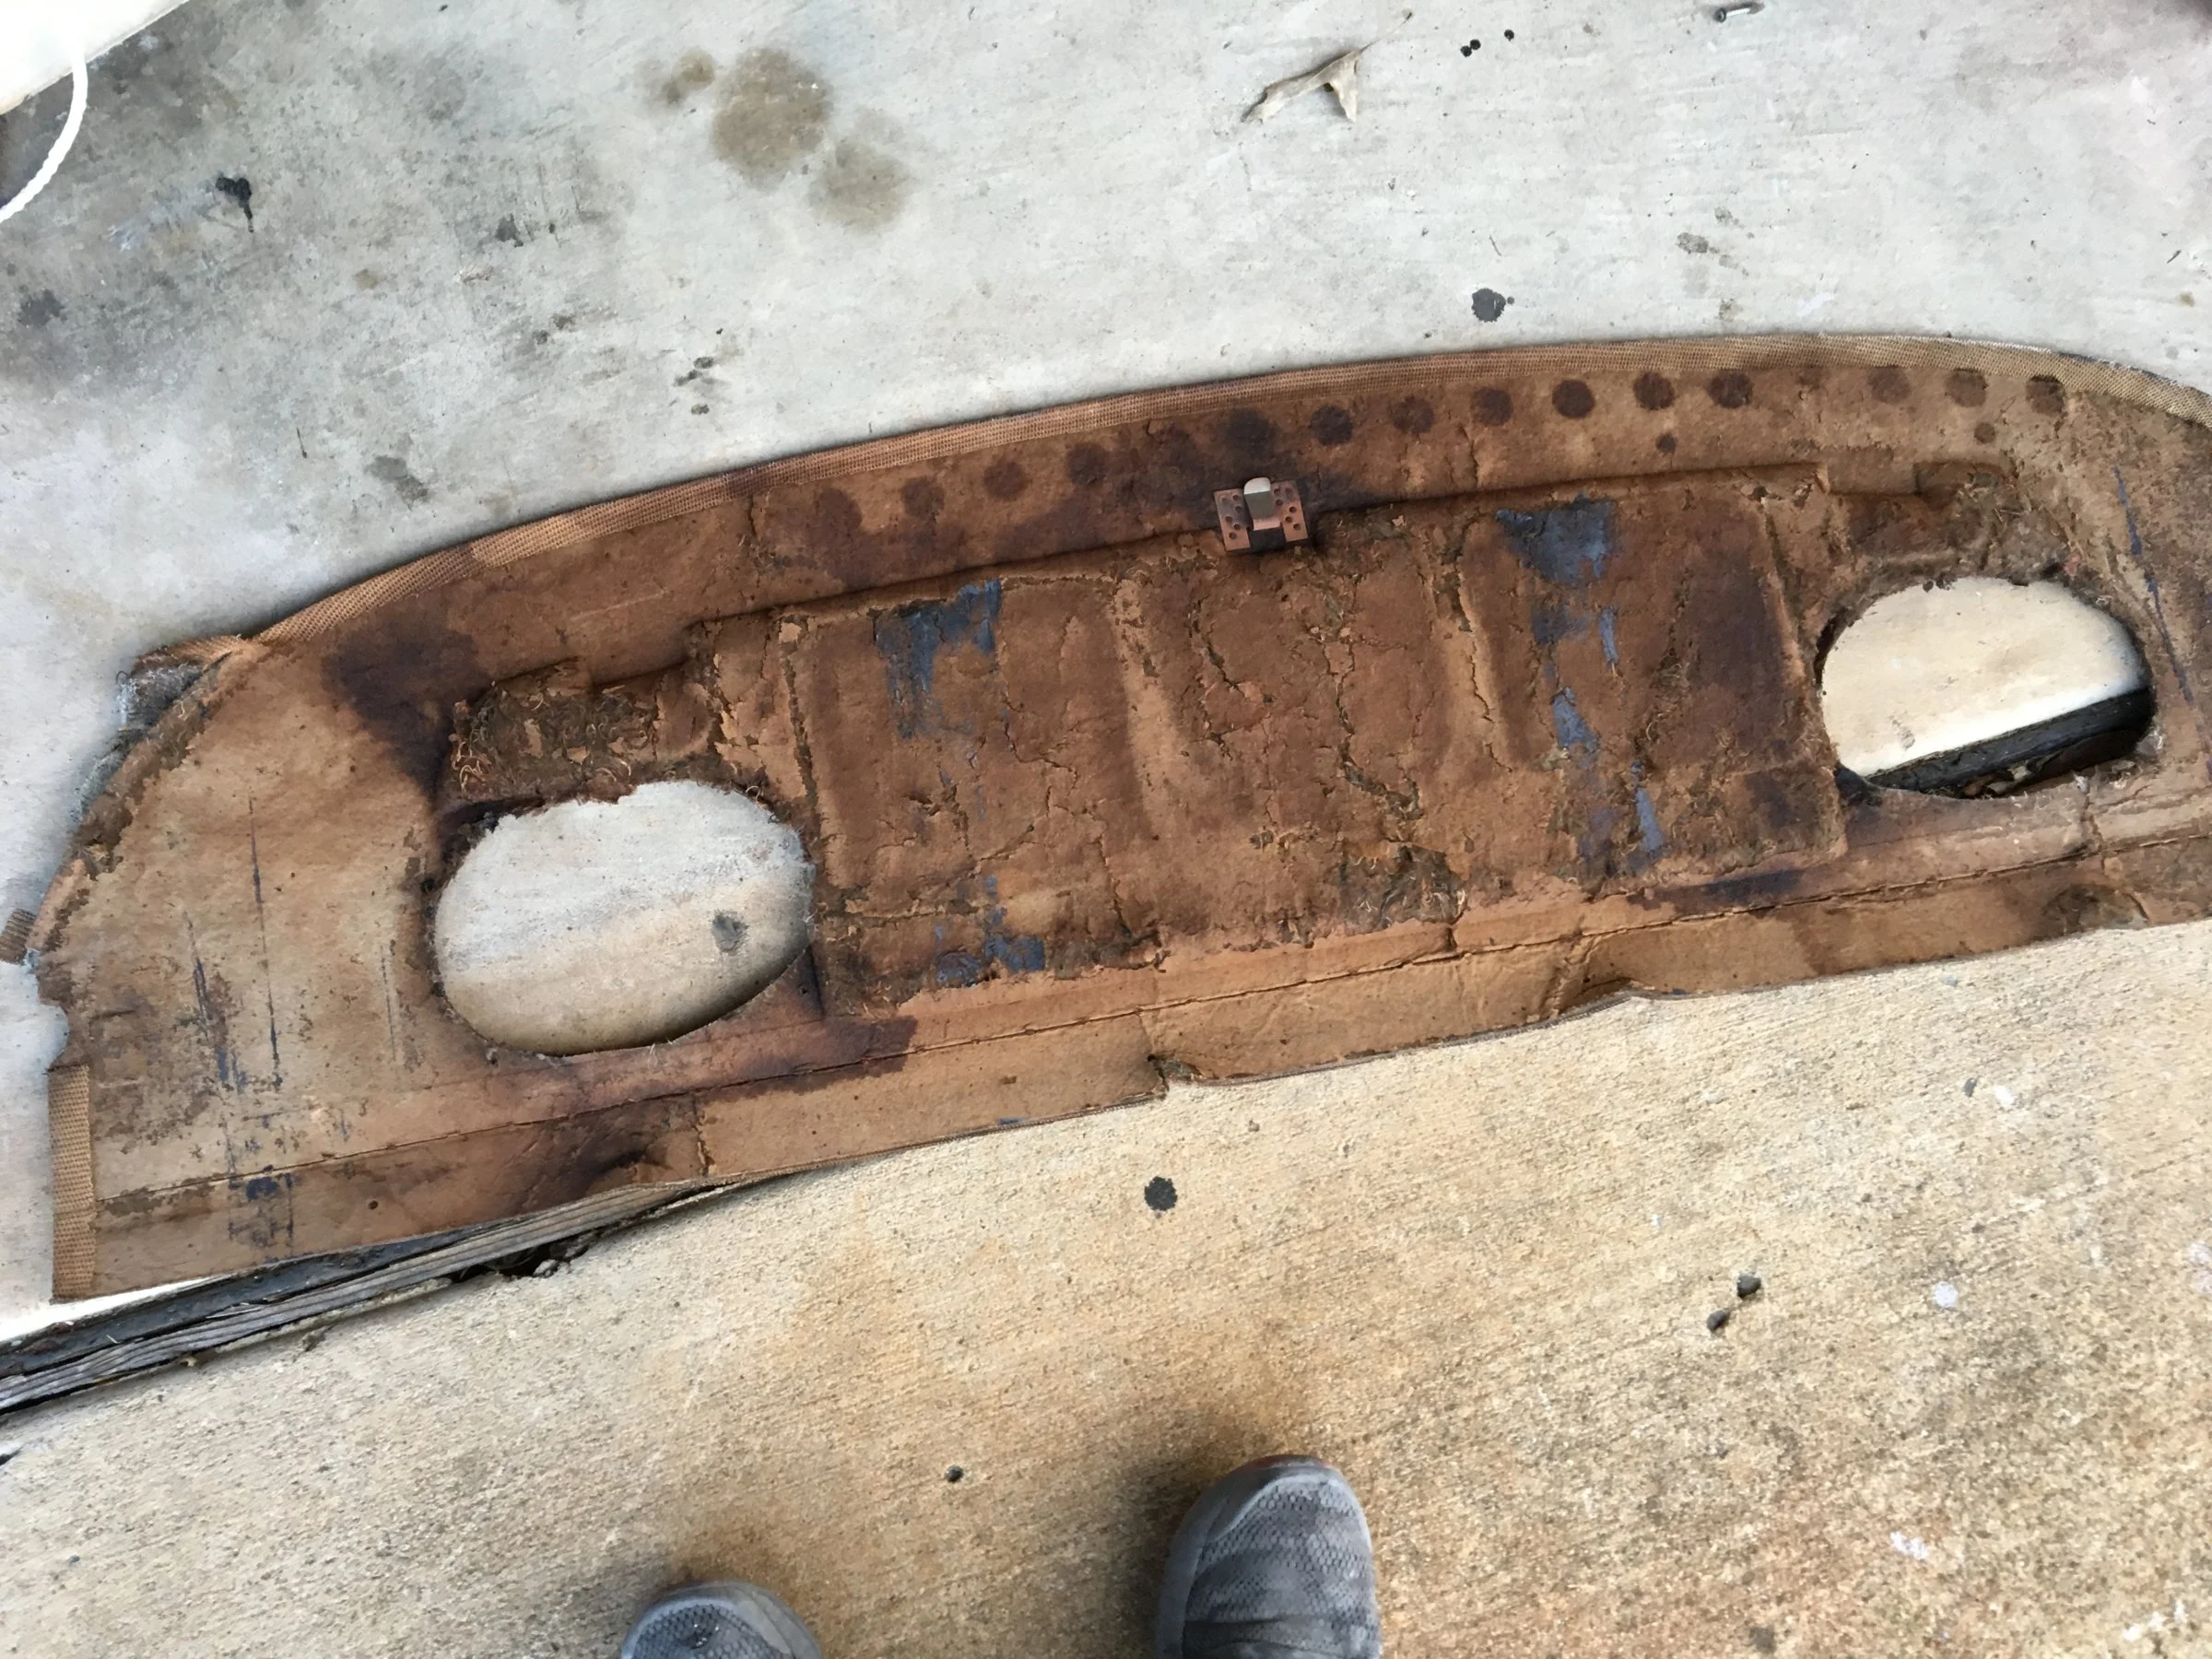
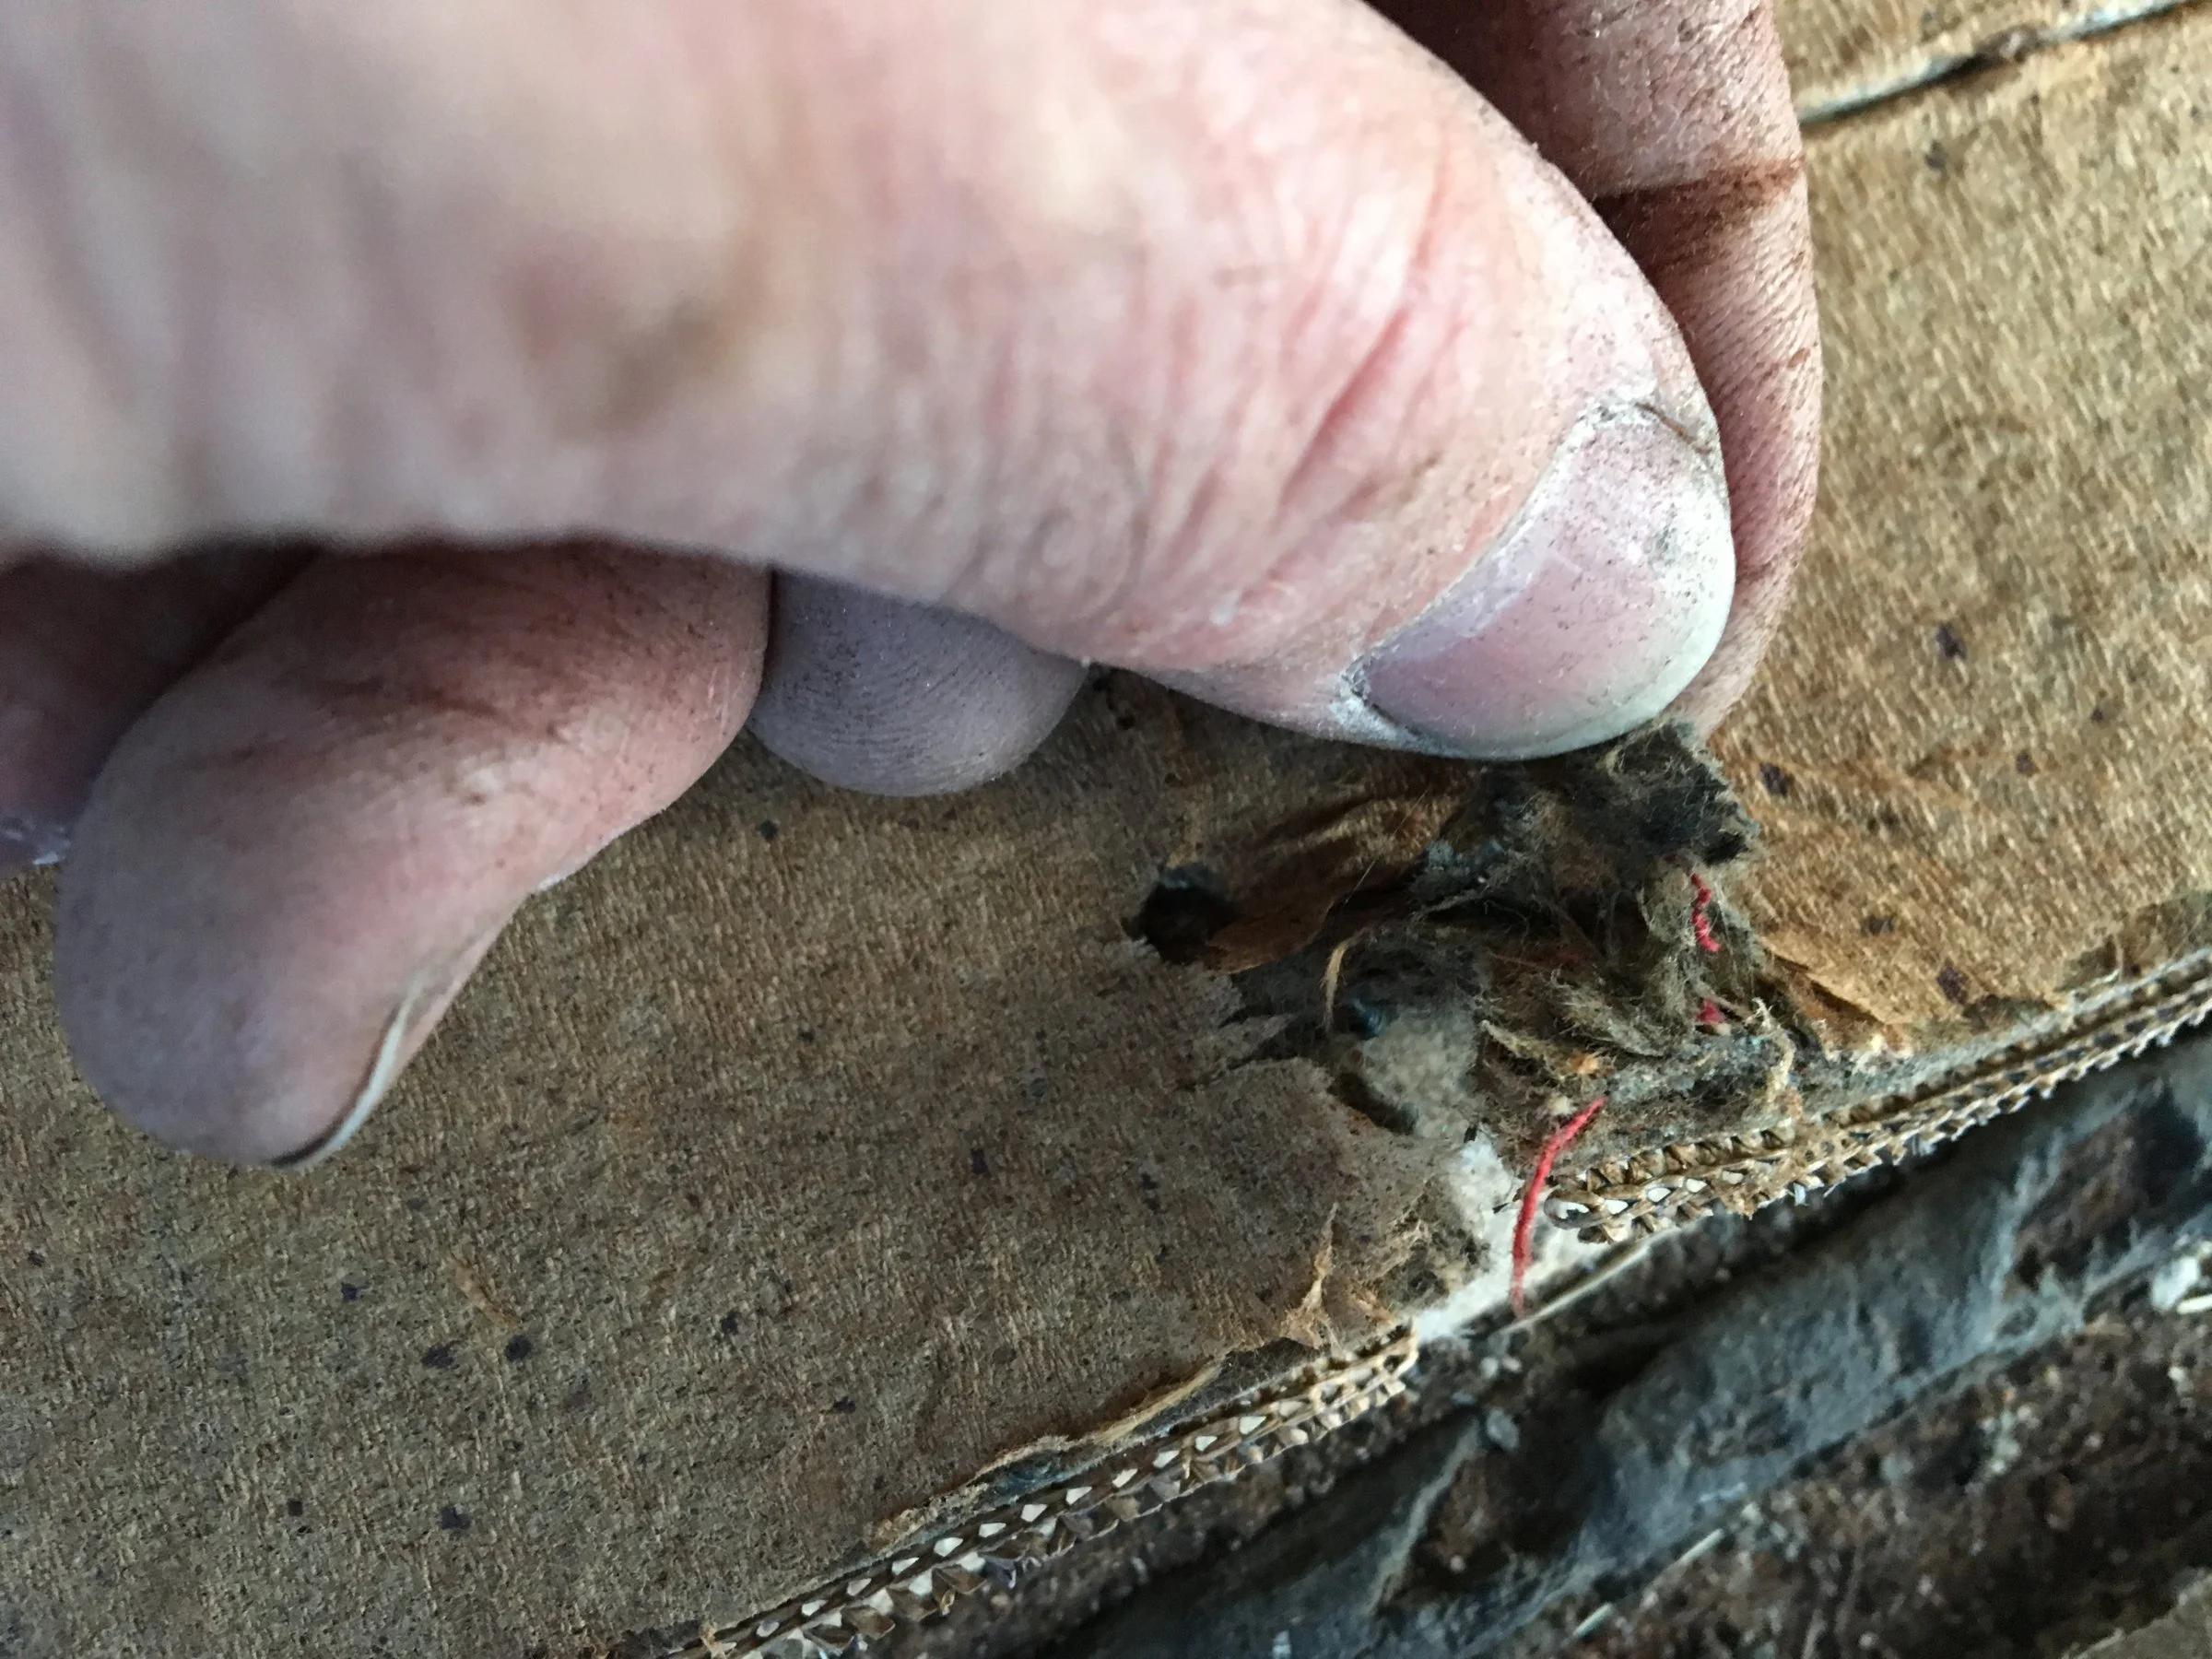
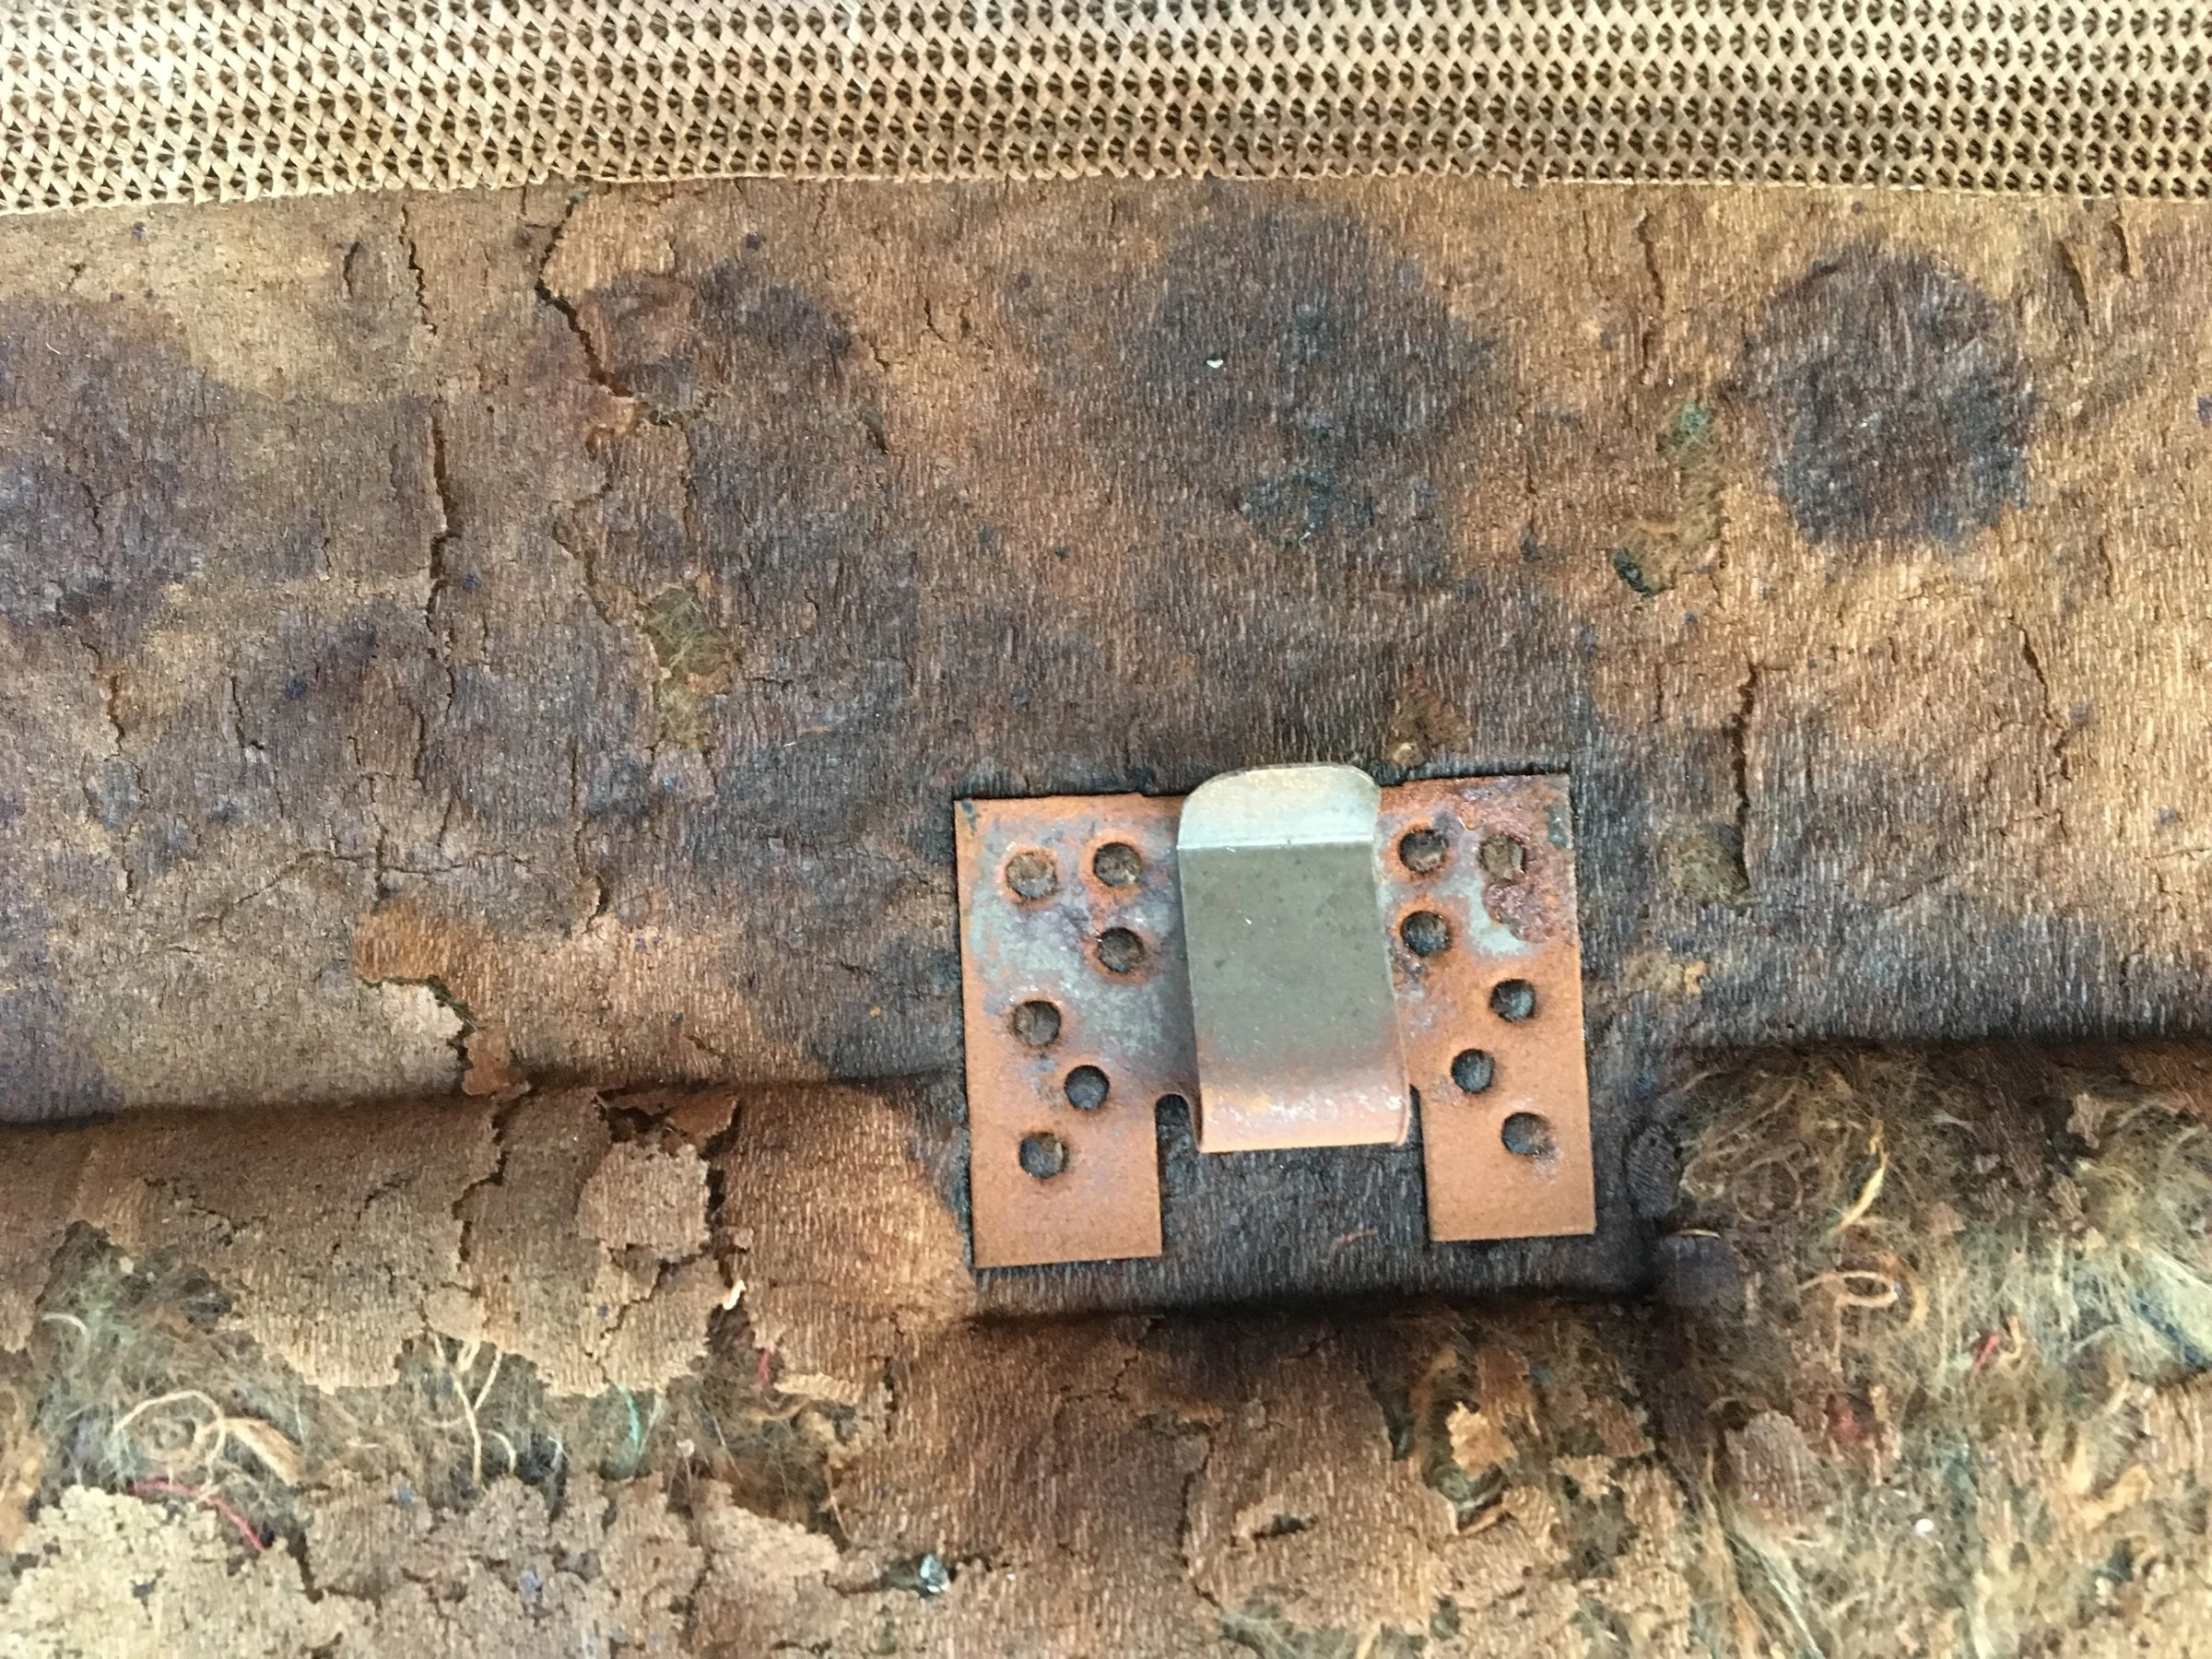
I've read of others using a board to replace the backing panel, but this seems to me that it would be too rigid and possibly cause a vibration noise due to its rigidity. Hum........Any one with ideas, throw them out there for me please.
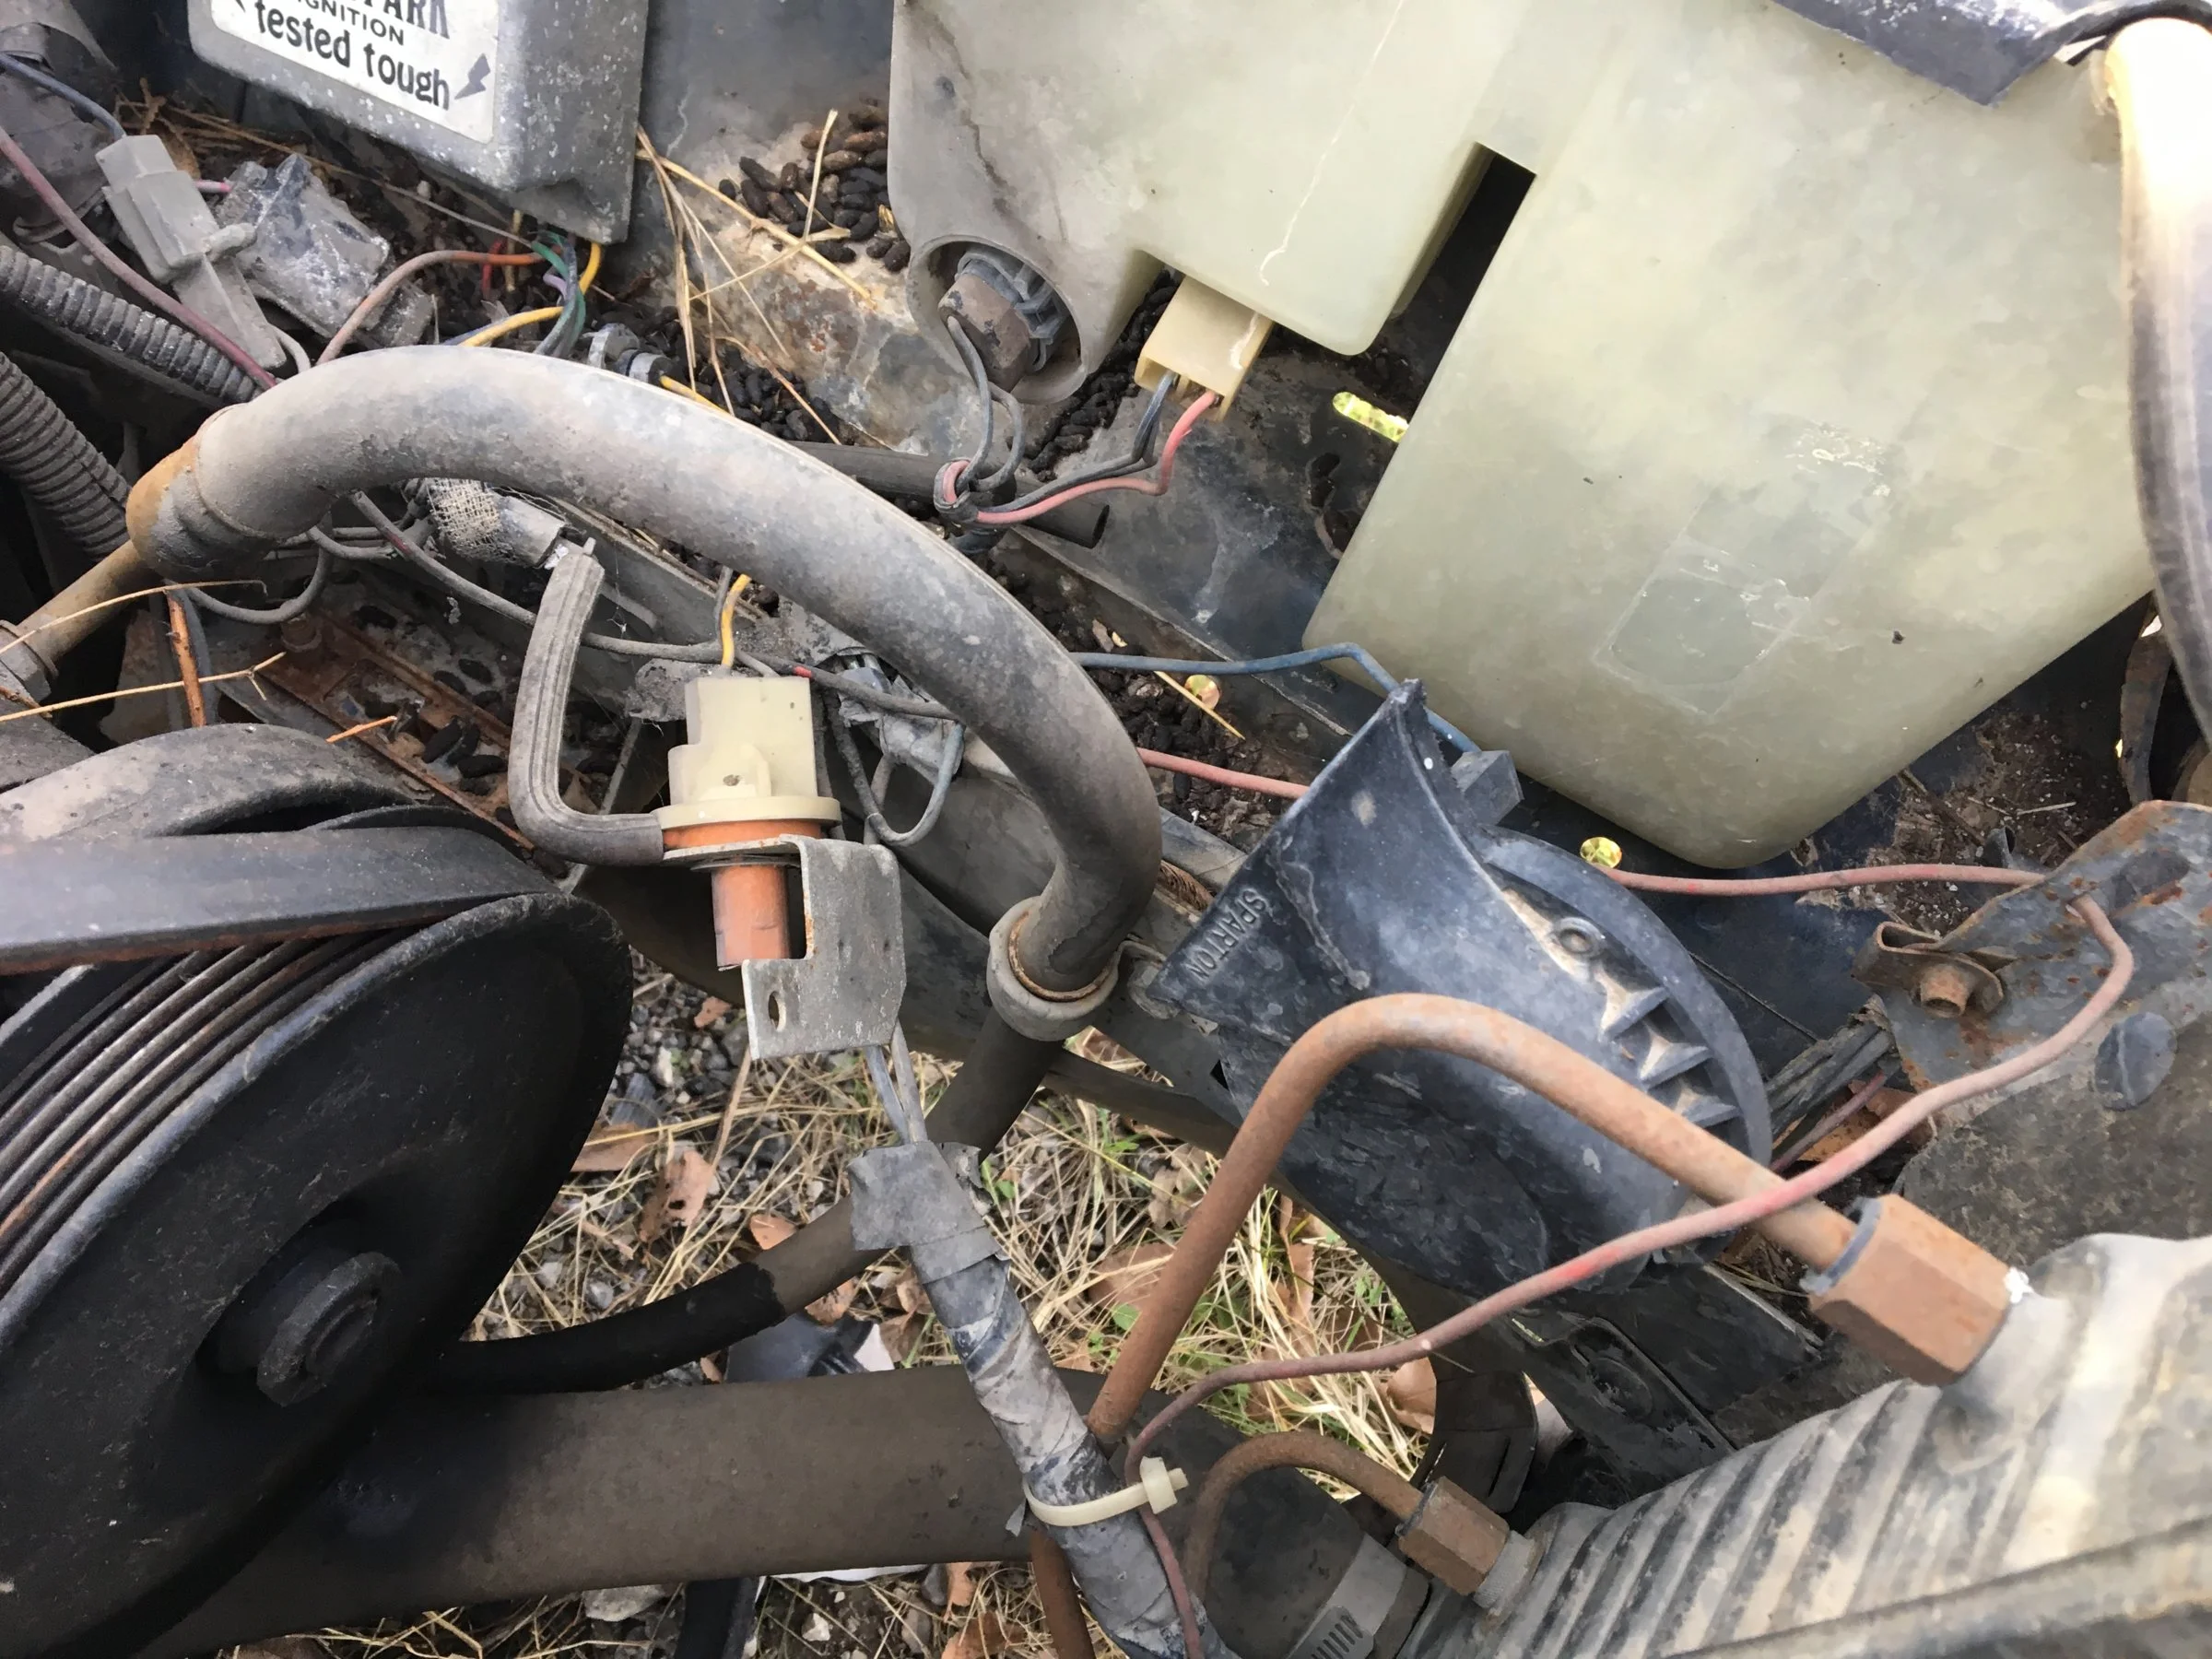
I took a lot of pictures of the engine bay, i'm glad i did. It looks like someone got creative with their wiring skills. I need to spend some serious time going through them with my electrical/vacuum manual. I'll include one for your enjoyment.
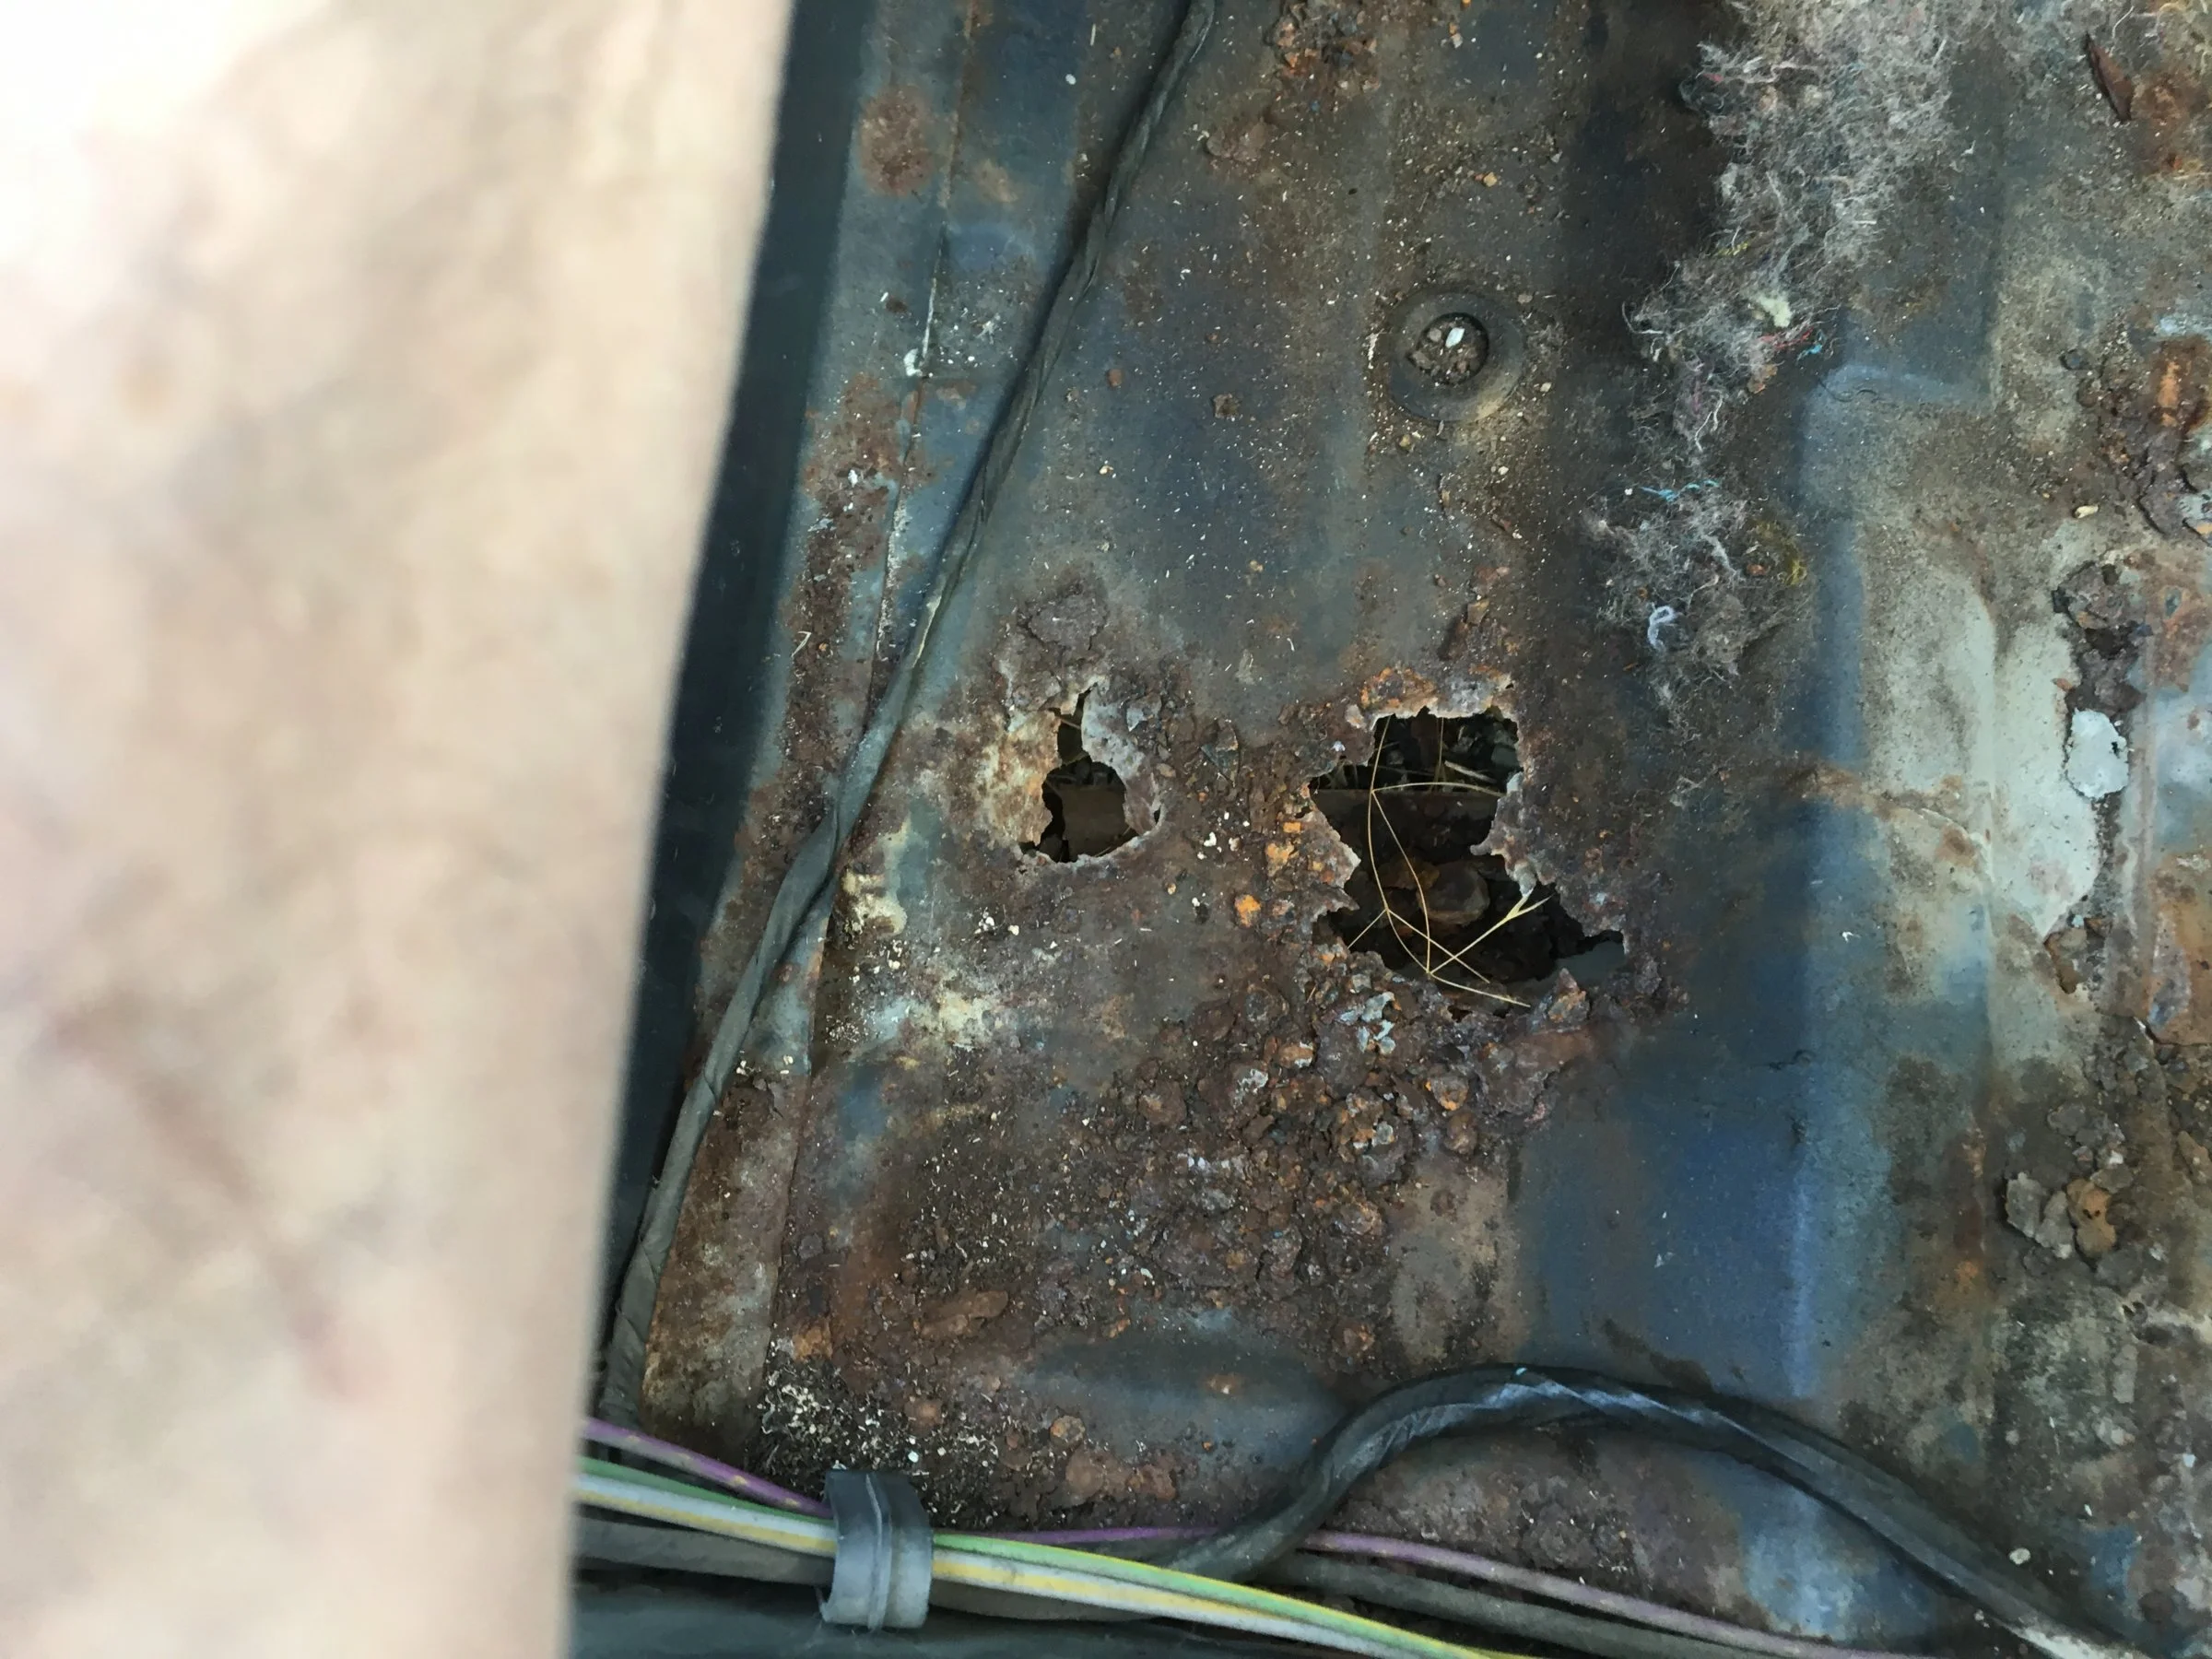
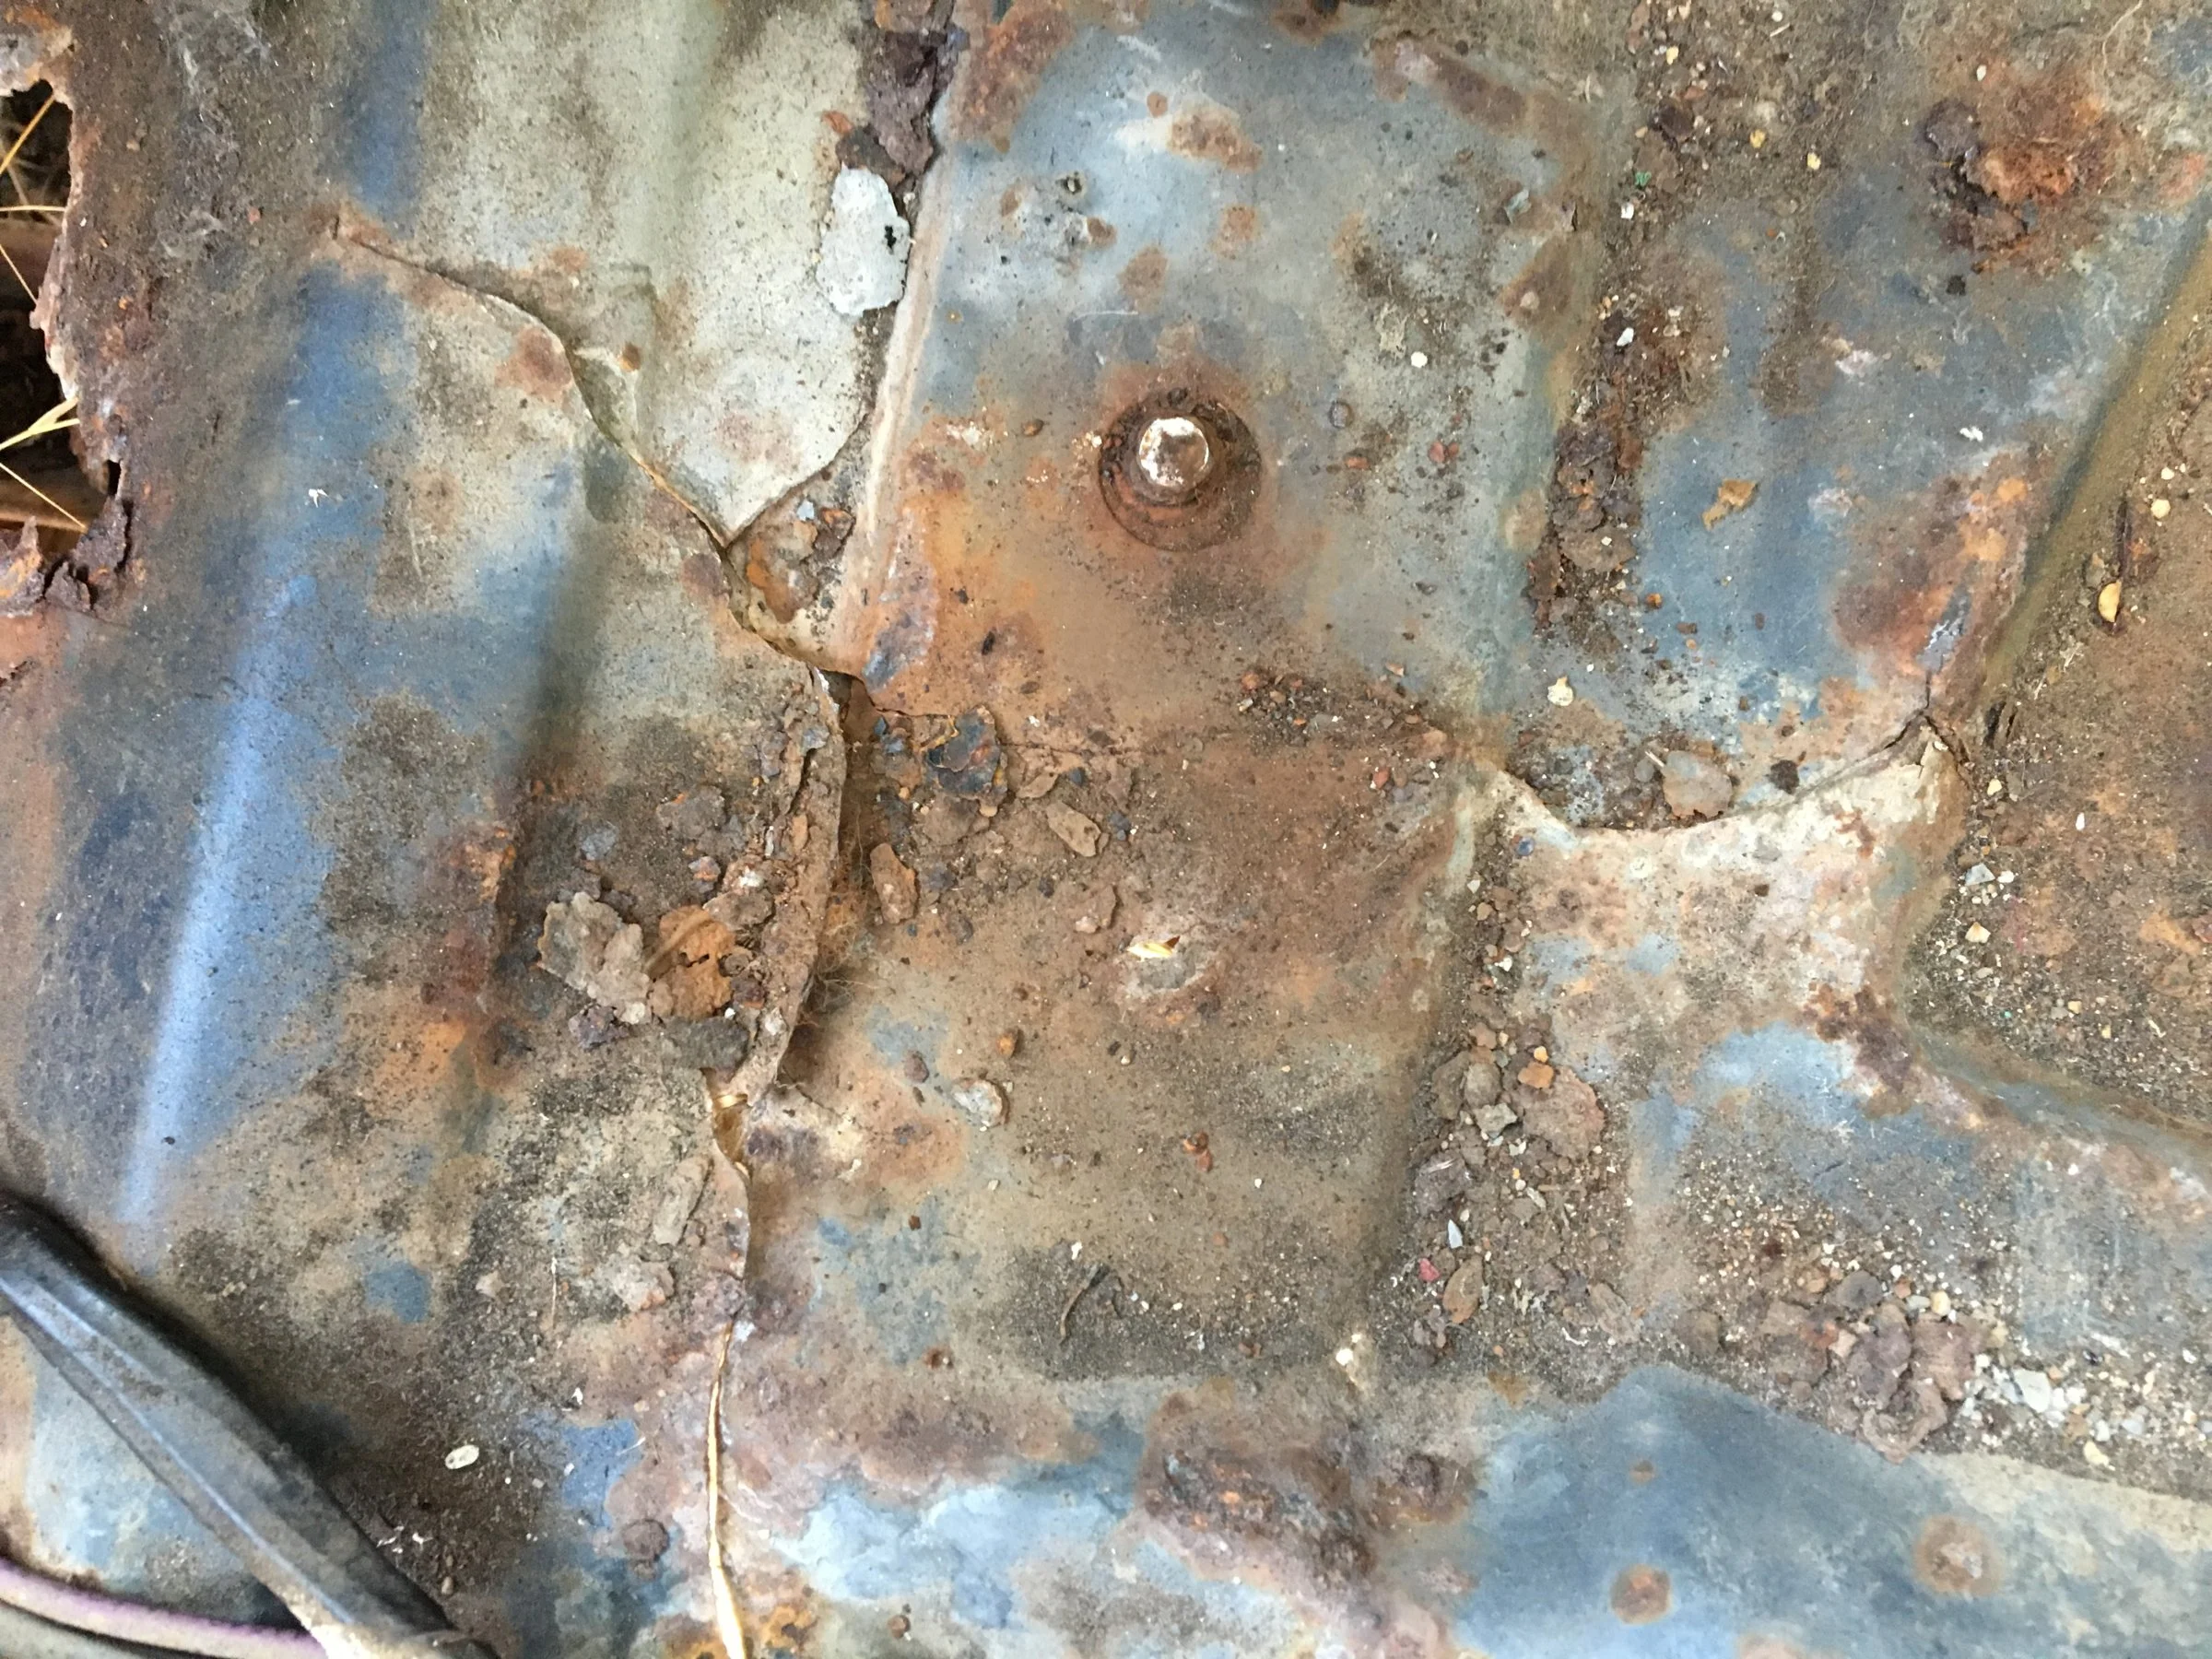
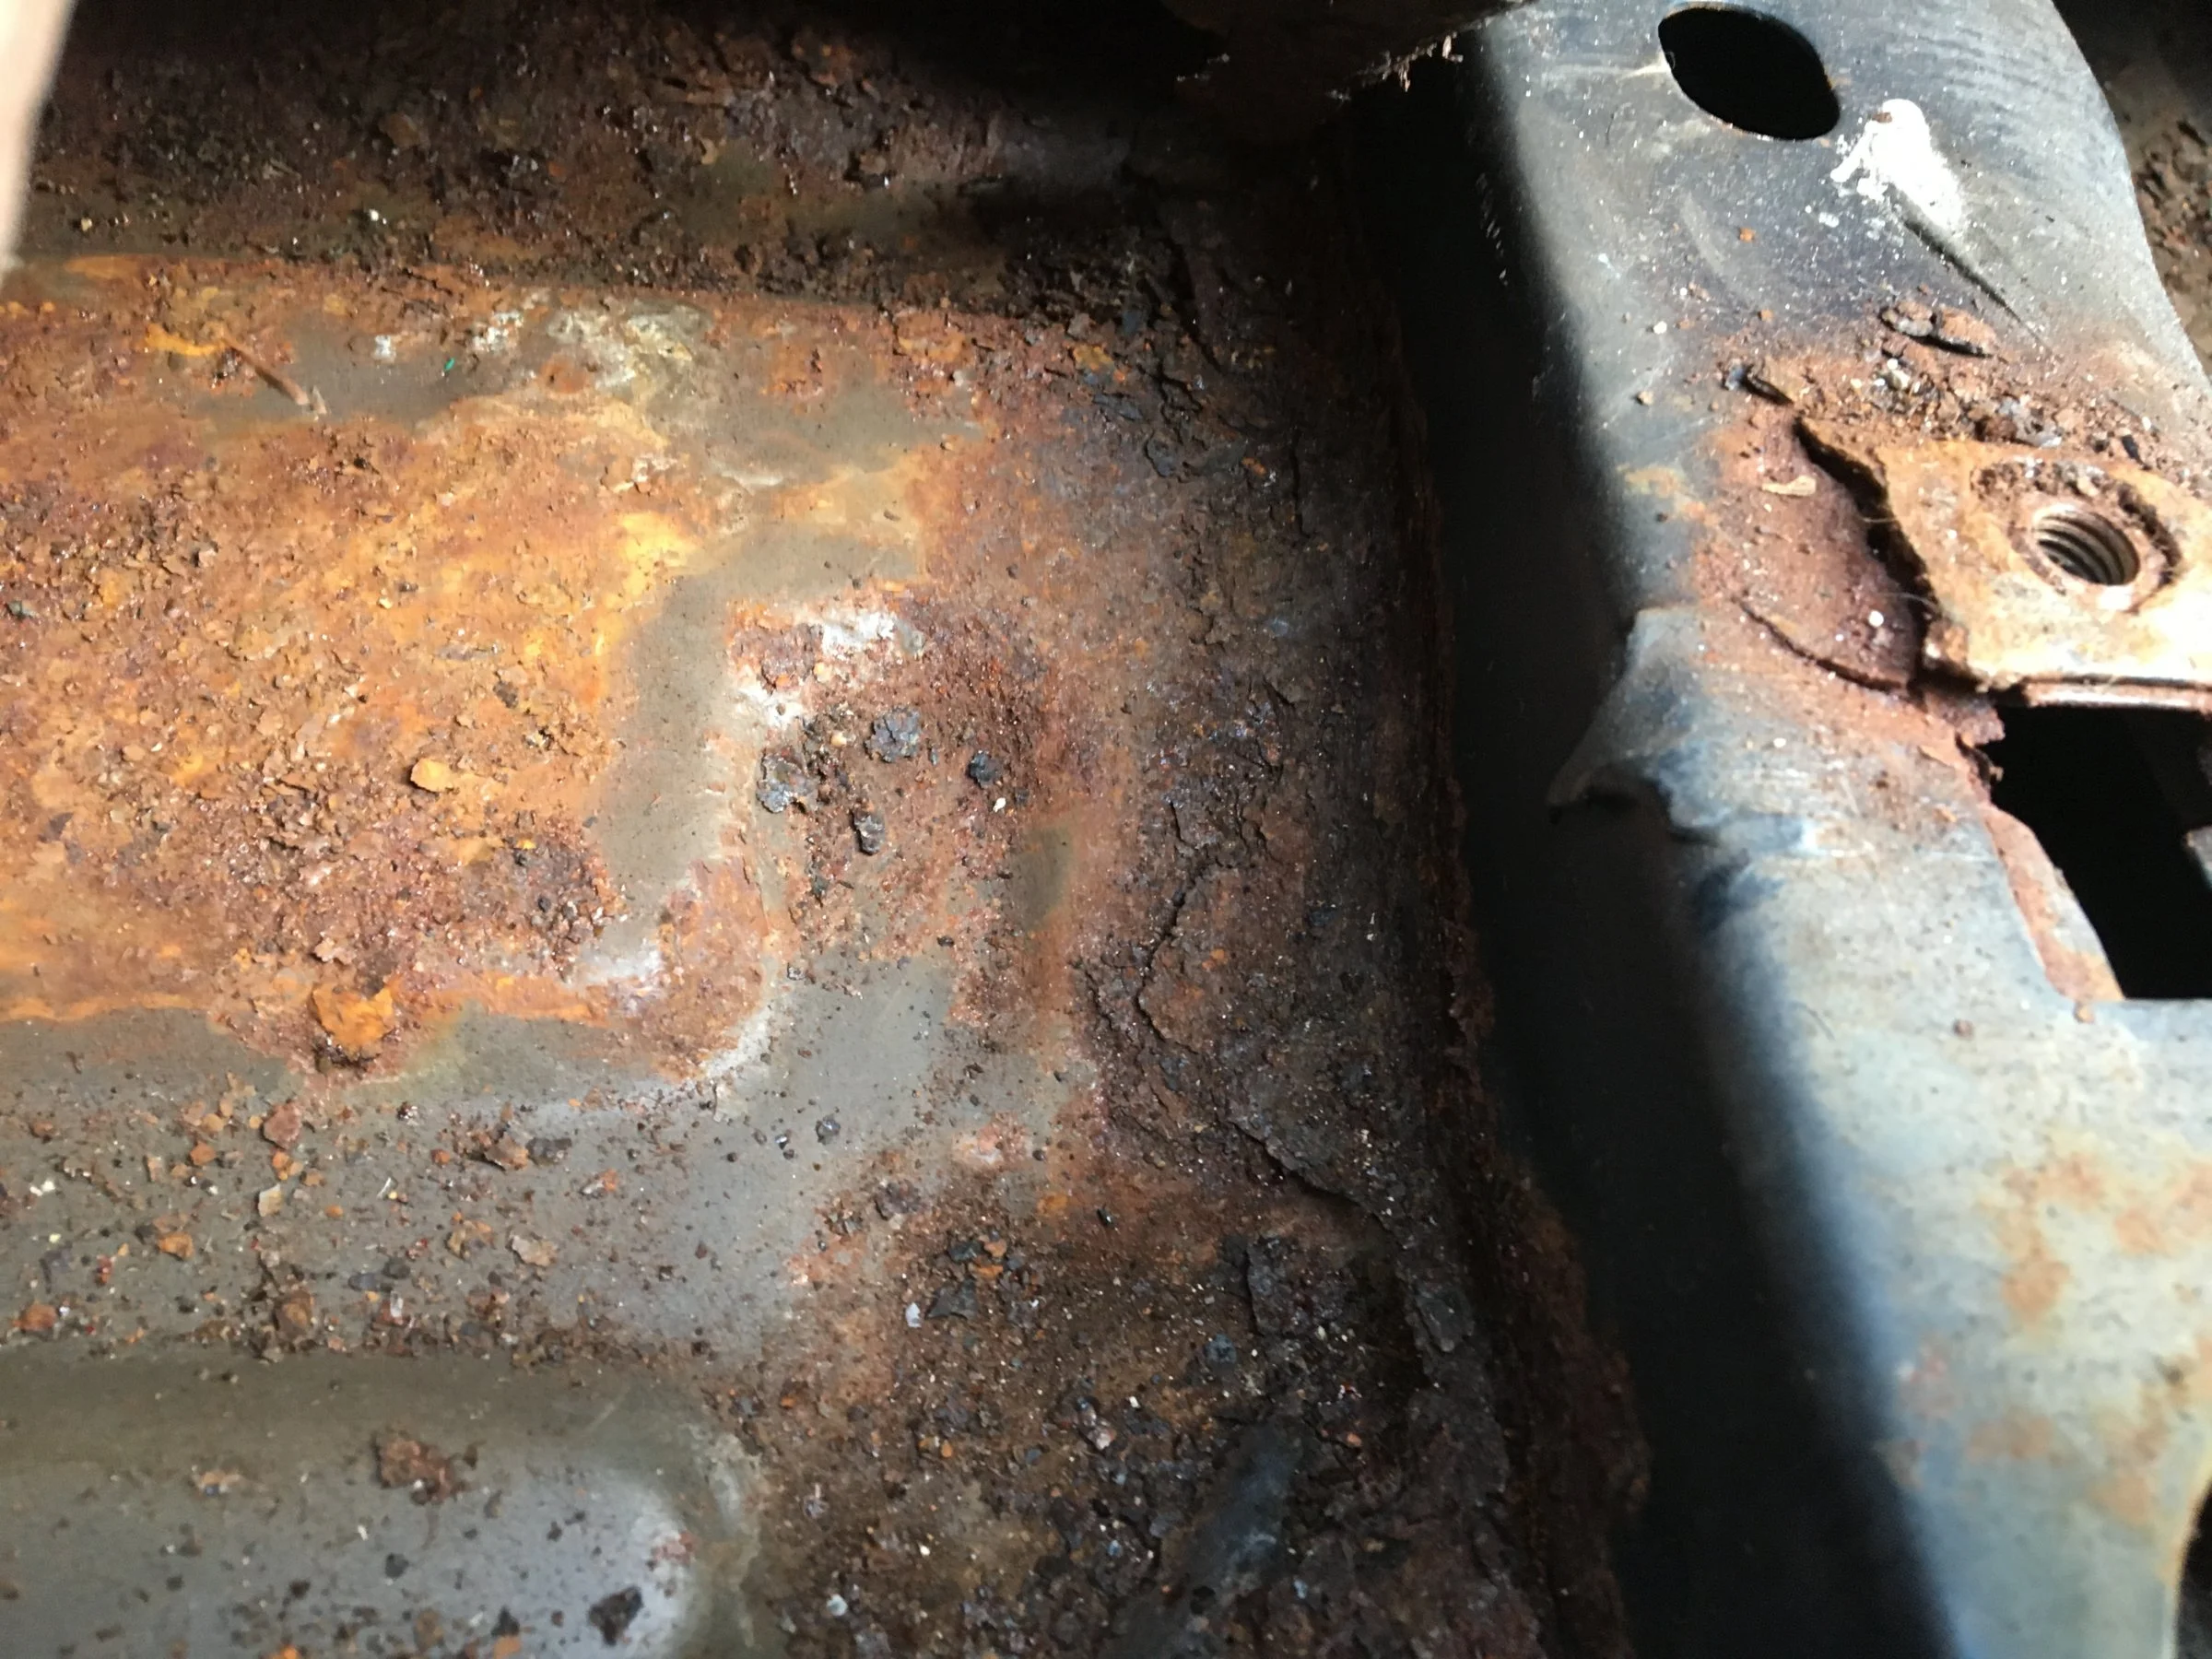
I got pictures of the floor board. I definitely need a driver's floor pan, you'll like these pictures. I don't think I've ever seen cracks in the floorboard that big. I might also need to replace the crossmember as well. It is pretty ugly on the driver's side. The passenger's side might need a small patch panel.
I went back to the yard after work. I got all of the bodyside mouldings the trim around the right 1/4 glass. Drip rail mouldings from both sides and the package tray.
The package tray is interesting in it's structure. First off, it's semi-flexible. It looks like it's just jute padding that has been compressed around the perimeter to give it structure and covered with a mesh like cloth. This will take a little thought to replace. The only thing salvageable part from it will be the clip attached on the middle rear of it.
I've read of others using a board to replace the backing panel, but this seems to me that it would be too rigid and possibly cause a vibration noise due to its rigidity. Hum........Any one with ideas, throw them out there for me please.
I took a lot of pictures of the engine bay, i'm glad i did. It looks like someone got creative with their wiring skills. I need to spend some serious time going through them with my electrical/vacuum manual. I'll include one for your enjoyment.
I got pictures of the floor board. I definitely need a driver's floor pan, you'll like these pictures. I don't think I've ever seen cracks in the floorboard that big. I might also need to replace the crossmember as well. It is pretty ugly on the driver's side. The passenger's side might need a small patch panel.
- Status
- Not open for further replies.
Similar threads

- Replies
- 13
- Views
- 947


- Replies
- 24
- Views
- 2K


- Replies
- 37
- Views
- 1K

- Replies
- 48
- Views
- 3K
Progress Thread
LTD-ing
- Replies
- 8
- Views
- 464