I started this project last weekend, but didn't really get to doing anything until yesterday and today, so heres what I got so far! 
Up on jack stands ready to go

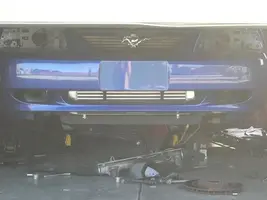
What it looked like before.

Bumper cover removed/piping removed.

Bumper off and cut.

Mocking up the IC to bumper for mounting holes.

IC and bumper remounted.

Mocked plumbing from blower to IC.

Mocked pluming IC to engine bay.

Going into the engine bay/BPV pipe.

Relocated rear coolant expansion tank mount for more room routing the SC->IC pipes.

Engine bay now.

Everything is done as far as plumbing is concerned; now, all thats left to be done is take everything apart (actually I already did that lol), tighten the blower screws, debur and wash the pipes, then reassemble.
I got everything on ebay, siliconeintakes.com (amazing job, got my couplers overnight), and local hardware store.
http://stores.ebay.com/Just-Intercoolers Nice pipe+clamp+coupler kits for little coin.
I test fitted the bumper on earlier, fits like a glove (a snug glove ). I had to remove the fog lights because the GT bumper is so damn narrow and short. For instance, the inside bottom of the bumper is flush with the bottom of the IC, but because of our "tippy nosed" design there is about 1.5" of core below the fascia. Also I trimmed the foam crash bumper into a concave shape so it won't overlap the IC, but act as a shroud and force air into it. I'm probably going to add two pieces of aluminum stock to the bottom of the IC also, and just rivet them onto the core support so it'll be all stout and w/not.
If anybody wants more detailed info, or particular pics just let me know and I'll post em up. :SNSign:
Up on jack stands ready to go
What it looked like before.
Bumper cover removed/piping removed.
Bumper off and cut.
Mocking up the IC to bumper for mounting holes.
IC and bumper remounted.
Mocked plumbing from blower to IC.
Mocked pluming IC to engine bay.
Going into the engine bay/BPV pipe.
Relocated rear coolant expansion tank mount for more room routing the SC->IC pipes.
Engine bay now.
Everything is done as far as plumbing is concerned; now, all thats left to be done is take everything apart (actually I already did that lol), tighten the blower screws, debur and wash the pipes, then reassemble.
I got everything on ebay, siliconeintakes.com (amazing job, got my couplers overnight), and local hardware store.
http://stores.ebay.com/Just-Intercoolers Nice pipe+clamp+coupler kits for little coin.
I test fitted the bumper on earlier, fits like a glove (a snug glove
). I had to remove the fog lights because the GT bumper is so damn narrow and short. For instance, the inside bottom of the bumper is flush with the bottom of the IC, but because of our "tippy nosed" design there is about 1.5" of core below the fascia. Also I trimmed the foam crash bumper into a concave shape so it won't overlap the IC, but act as a shroud and force air into it. I'm probably going to add two pieces of aluminum stock to the bottom of the IC also, and just rivet them onto the core support so it'll be all stout and w/not.If anybody wants more detailed info, or particular pics just let me know and I'll post em up. :SNSign:
 .
. 


 When I went into boost I popped the coupler from the piece that connects to the blower and the piece that runs across to the IC though, I forgot to roll the that one pipe
 Although I put the death grip on all the clamps...they are TIGHT and will NOT come off for anything LOL.
") If I have any problems on the tuning side I'll just hitup Alternative Auto in Detroit, they are turning out some 'mazing cars!
If I have any problems on the tuning side I'll just hitup Alternative Auto in Detroit, they are turning out some 'mazing cars! I'm probably going to be attaching it to either the core support and get rid of the crash bumper all together, or cut the crash bumper more and mount it to that. I still haven't put the foam back in there, or anything else, but it's running great aside from some minor tuning issues that need to be worked out.

") )
)