Progress Thread 1963 Falcor GT?

I have a Mustang II front end under it. I eliminated the shock towers along with the braces.
I'm running an aftermarket plastic 12 gal tank that I mounted the Explorer fuel pump plate in. The 2" Le Mans fuel fill has a 3/32" vent hole I drilled on the underside for venting. It works
 

Attachments

  • Gas Cap 3 (1).jpg
    Gas Cap 3 (1).jpg
    769.4 KB · Views: 75
  • Gas Cap 3 (5).jpg
    Gas Cap 3 (5).jpg
    496.1 KB · Views: 74
  • Gas Cap 3 (6).jpg
    Gas Cap 3 (6).jpg
    666.9 KB · Views: 81
  • Gas Cap 3 (2).jpg
    Gas Cap 3 (2).jpg
    753.2 KB · Views: 73
  • Like
Reactions: 1 user
  • Sponsors (?)


I have a Mustang II front end under it. I eliminated the shock towers along with the braces.
I'm running an aftermarket plastic 12 gal tank that I mounted the Explorer fuel pump plate in. The 2" Le Mans fuel fill has a 3/32" vent hole I drilled on the underside for venting. It works
I do like that gas cap. Fancy s@#t there! What did you do with the old gashole? I don't have a back seat so the thought of looking back and seeing the gas tank there would take some getting used to!
 
The stock tank has a vent line that attaches at the filler neck hidden by the trunk latch support. It's a tube that is tucked under the trunk rail. It runs over to the right turn signal bucket, then turns down and exit below the bumper seal hidden behind the bumper.
 
Update
So it turns out I have a bad distributor. The pickup magnet was pulling the sensor into the vanes and dragging when it turned. These things happen and I'm glad I found it now rather than later and trying to figure out whats wrong! I might have a line on a new one seems there on short supply too! Who knew there would be a run on old distributors! Here's a pic from the other thread I started showing the parts crashed together.
distributor.jpg

The show goes on. I have the engine cleaned and prepped for the downhill side of this project. Here is the lifter galley prior to cleaning it but after cleaning away gasket material from the heads. As much carbon was built up in the egr passages I am surprised how clean the galley is. I am ok with that!
galley horiz.jpg

Here is test fit of manifold just to make sure all is going the right way.
man.jpg

Notice the locating pins I made to center the manifold. Just some extra long bolts with shoulders and the heads cut off and rounded. This way worked really well as compared to just setting it in there. Here is a closer look.
pin.jpg

I was so confident in how things fit I went ahead and glued her down! Torqued in 3 steps and before I knew it I had the manifold installed. I read and watched alot about doing this job specifically about the gaskets. I decided to not use the silicone gaskets for the walls and just piled on the Ultra Black Silicone instead.

So onward ho. A few more parts to gather and a repair to the idle screw and were good. Seems I need a new distributor and throttle body gaskets being I ordered the wrong ones. I got 65 to 70mm gaskets instead of the stock size. Whoops, I'll use them next time.

Just as a fyi, this job may seem like it's takin a while...cuz it is. This has been a test for me as I can only stand for so long due to pain. My back is fused with metal rods and screws. I can only be up for a little while and this stretch was a doozy! Starting with cleaning the galley and chasing all the threads with a tap leaning over and torquing the bolts. I have to plan what I do in chunks of time (and around meds) so I don't end up in the middle of a job I can't leave and have to leave! Every day a little bit more. I try to balance my time working between standing and sitting so I get the most mileage of my time. I may be slow but the job gets done and done well.
 
  • Like
Reactions: 2 users
and the saga continues....

As it goes things are kinda in limbo. I have a new distributor coming, I ordered from Bronco Graveyard. Seems either the ones I would find elsewhere are shaky junk or they just don't have any. At least the ones in my price range. I would like to have got a nice MSD but really, it's just the housing itself that is different offering no performance or better build quality I can discern. Pretty Red cap. (that costs $50) They even state they use quality OEM parts inside! I can't believe the turmoil surrounding such a simple part. Many cheap ones I read about have crooked shafts in them causing the oil pump shaft to bind and then break! I find it odd too that there are Sooo many people out there buying distributors for 89' Mustangs that there all gone. Even places like Auto Zone or Parts plus I think even Napa, either had cheap junk ones or there on order. Many sell the Cardone rebuilt one's. Seems their a 50/50 chance they come with a bent shaft. I think they rebuild oem parts with cheap stuff they use to build cheap ready to run units! They both have bent shaft problems. So anyway. I got mine where it was available and can return it easy if it all goes to......it is a bad part.

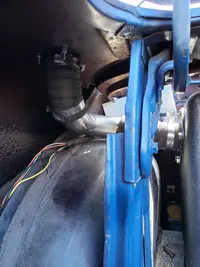
I have had some issues I kid you not. I have decided I don't like old aluminum manifolds.....So I think it's smart, while I have the manifold exposed and to minimize all sources of vacuum or water leaks to pull all the T's, water fittings and sensors in the manifold. Well that went to hell, inna bucket real quick! Seems when you start disturbing these pieces when they leave the manny, they like to BRING THE FRIKKIN THREADS WITH THEM!!!!

Now I'm pissed again.....gimmie a minute.

Ok..so I tried to remove this plug thing in the upper and reseal it. Would NOT budge. And...it threatened to strip out the socket if I was to push it too far. So I stripped it to raw metal and covered it with epoxy. I hate half assed work. Everything else removed just ok. The T took like the last thread with it. So I cleaned it up and reinstalled it. The real problem lay with the water passage to the egr spacer. It took half the threads with it! Not in one spot either, all randomly. I couldn't even feel it when I broke it loose. I thought it was going ok. Then I seen the carnage the two fusing together caused.
I did this with the manifold installed in the car figured just as good as any time to re-seal these places and what could go wrong? Right? Wellll....If it was not installed I would have handled this problem a nuther way. But it is and I really feel good about how the manifold is installed and I don't want to rip it out to fix it properly. And I do hope to change manifolds sometime in the future anyway. So the best next thing I could come up with was good ol' fashioned JB Weld.
So's what I did was clean it too raw metal and clean up the threads. I tried to use a tap to clean things up but felt it was doing more damage than good. Getting the aluminum out of the steel threads was about impossible. They become one. Won't even pick out. I had to remove two threads from the end to get to half way decent threads to grab ahold. I managed to get it in to about 3 full threads. I filled the threads with jb inserted the piece and cranked it in until I felt it hit a spot where if I kept going would be bad. Then I covered it just in case and let dry. It feels really good (nok on wood) but I don't like it. But...
Here it is cleaned up.
clean.jpg

This is how far I was able to get it to go in before committing epoxy to it.
threads.jpg

Then the glue...this is wet and before I cleaned it up a little.
dirty deed.jpg


So that's that. What else? O I took the throttle body to the machine shop and had them fix the idle screw for me. It was broke off and mangled from po so they milled it off and drilled and tapped me a new hole. Came out real well.
I also am waiting for parts to assemble the heater hose routing. Brass elbo's so I can bring the hose out and around the back of the engine to connect to the water on the manifold. I probably will eliminate all that and the egr in the future version. But waiting for those parts, didn't realize they were gonna have to cast them! (joke bout how long it's been haha...) :-I
All along I have been trying to find a good way to install the new gas pedal and linkage. Not happy with any possibility. Where it needs to go is directly behind the engine. There is probably less than 2 inches between the firewall and the block. Makes a 90 degree turn, not good. Other places it is on a angle way to high for comfort. So I keep plodding along until the right way shows itself. I may have to result to some kind of mechanical way to pull the cable outside of the parts given for the job. Something like being able to attach a bracket to the end of the pedal rod to extend where the cable connects putting it in a different area from where it's mounted. Not sure what but working on it. Maybe incorporate the old linkage somehow. I did get the 36" cable in case I need to go around the upper and it can be shortened to fit the install...however that will be.
In the meantime I wait for parts and chip away a little at a time when I have time that is. Everything has gone all wonky lately. I had my backup car die, my lawn tractor died. Found out I had a freeze plug leak in my boat, inside the bellhousing.....that means pull the motor. And in there I had surgery and await one on my elbo soon! So I need to wrap up some of these jobs as I will be out of commission a while.
As a side note, Men. Do NOT delay your "special" checkup, when your 50+. I did and they had to remove an obstruction that turned out to be benign. I believe they changed the thoughts on when to do this checkup from like 50 to 55. I am 55 and would have found this sooner if I did it sooner. Just sayin, it's a thing. Pride is a bad thing in this situation so bend over and cough.
 
  • Like
Reactions: 1 user
Guess what? I'm back! Got stuff to report and bring things up to speed here. I had a surgery yesterday, Fri 25 21, to fix my elbow. Damaged nerve, spur and a extra muscle nobody else has........uh wut? Thats what the Dr said. Didn't help me none...so hopefully it's better than b4. Prolly just remnants of all the damage done to myself on the assembly lines most of my life, you got the same :poo: I bet. If not you will. So it did NOT stop me from working on my car!

I didn't keep up with posts and taking pics to focus on more important life stuff that has become tougher. To get to this spot, where I can throw it all out at once! Naw, I'll go slow, I have time to kill as it is, although I already been out messin with the car, (don't tell my wife!).

Today I leave you a picture of where I am at and will later drop some more of how I gots there.

20210925_124511.jpg


I did get it to run. Not long though, about 8 secs worth, uh sounded good what I could hear. .....until the starter locked up!

Yep, gonna leave ya there. The starter locked up? And killed it?....the starter locked up and killed it. More and pics in the next post!

Thanks for chekin my post, if there are things I can do to make it a easier read please tell me, are the pics to big? I like big pics you can dig in. Format wonky? (as I figure it out). Everybody have a good day and peace on you.
 
A bit of time was spent waiting for a new distributor. I had one coming but was informed days after ordering it they couldn't get it. I ended up getting one from ebay, here. What I got was better than expected and came in a fancy box, if you like fancy boxes.

box.jpg

Here's what was in the box.

dist.jpg

I also checked the gear with a magnet so I believe it's the correct steel geared one required for these engines.

rotor.jpg

Much smoother than the old one that's for sure! Look forward to the difference it will make. Here in it's new home. It's hard to get on the camera, but this is about as good a pic I got of the upper after it was painted. I used a krackle finish on it to cover up hack marks from po. It did what I wanted too! I think it came out looking real good and it does seem durable. Either way it a world better looking than the peeling blue it was! You also may notice I spent a little time on the wiring harnesses too. Wrapped with cloth tape, cleaned all terminals as I went and protected them with thermoeletric grease so oxygen can't make it's way in and corrode the connections. I only want to do this once.

dist.jpg
Next time I got pics of the failed starter that went out so gloriously! Same bat channel...
 
  • Like
Reactions: 1 user
Like I said I did get the car to run. For the short time it ran, near as I can tell it ran pretty good. What seems to have happened is the starter got stuck engaged. Would not withdraw the starter gear and when it did start the starter went, wheeeee higher and higher then seized up killing the engine with it! Now I will tell you that after doing all this work then to hear this was a bit unsettling! I could tell it was coming from the starter but I couldn't relax until the starter was out and verified that was the culprit! I assume the starter rusted sittin there and could not withdraw after started. Everything else checks out fine just need a new starter now.

starter mess.jpg

Now I have to wait again. Too many other expenses lately so a new starter will have to wait a little. I do consider it a successful start nonetheless.
 
  • Surprised
Reactions: 1 user
When I pulled the intake I also committed to straightening the area of the throttle, heater hoses and some kinda pedal repair. What I got was a nice set of aluminum ones of ebay. I drilled the shaft area and put in a grease zerk hoping grease will extend the life of the chinesium their made of. They do seem well built I gotta say. I crafted a adjustable bracket to adapt the pedal assembly to the floor. A piece of angle iron and some smaller aluminum angle pieces were drilled with extra adjusting holes, I can go up, down and left and right to find the sweet spot.

pedal.jpg

I don't remember what the pully wheel is from, something I found in the junk box, but it's hard nylon and just the right shape. The cable glides so smooth.
Pully.jpg


The springs I used on the throttle feel just right. I used the original throttle bracket to mount everything, like it was meant to be! I added a Allen bolt with locknut for the idle stop. Before it didn't work at all.
Springs.jpg


This shows the bend in the throttle cable. It's not as sharp as it looks here because as it it turning toward the firewall it's also dropping to a more open area.The reason I had to use a pully type system is that the cable is hard mounted to the firewall at a angle to the firewall itself. I used the sidewall of the transmission bump-out to mount on because coming straight out the firewall would hit the block with only an inch clearance between the two. So I came out at about a 30-35 degree angle and used the difference in height to add more curve to the cable.
adjuster.jpg
Also here you can see from the top, how I dealt with the heater valve. It also works real smooth after metal straightening and oil to free it back up. You can see how I had to come out and around to go back in. Better pic later.
 
  • Like
Reactions: 1 user
Been doing more work to get the old falcon going. I do have it running...decently. It doesn't cold idle for beans. After the temp gets up around 110-120 it will start to idle on it's own. Then the temp comes up to about 140 and doesn't go any higher. The thermostat opens, fans come on maybe the temp gauge is reading inaccurate seems 140 is kinda low.
I have fixed all the issues pertaining to sensors. The O2 drivers side header collector was not attached and when this was fixed (not fixed) it ran a little better. When I fixed the 180 off distributor...it ran a little better. I dropped it in where it was before. I started the surge list and fixed the timing first off. I tried to give it 2 degrees but insisted on 10. It occasionally popped in the manifold at 12.
I reset tps. Fixed the vacuum leak (forgot to re-attach pcv). Gettin where it runs pretty good. Just not cold. I re-did codes and have the same as before. But, there is this - the codes all pertain to emissions stuff that is gone. The one thing that is there is the IAC and it gets 2 codes. But is there. Looks very new. And when I unplug it ..... it quits surging. If I unplug the tps and the iac, use the idle screw to set the idle it runs pretty good. I don't know what this means. I read you can run it without the iac but can you run without the tps? I would like to be able to start it and have it warm itself and idle down proper. If I wanted to frog the gas for 5 min till it ran I'd put a quadra-junk on it!
Maybe it has a bad iac. It seems to be working. At least doing something. There was no carbon in it. Like I said I think it's new. But I think thats really the last hurdle to this being a good running car.
I have got more wiring done. Cleaned up a lot of mess. But now I have to focus on winter! I decided to build an addition to the garage and move the woodworking tools in there and storage space. Then I can move the falcon into the garage and prepare for the winter jobs....like floors and sub-frame connectors.
I will be working on the brakes directly, seems ALL the brake fluid has leaked out leaving me with NO brakes! Hurray for one bowl master cylinders! So when I do have to move the car I throw a chunk of firewood front and back to stop me if I go too far! So yeah, get me some brakes! Then I can take this thing out before the snow flies and see how it REALLY runs! ( fyi-it may be time to leave the snow behind and head to warmer climes. O and leave that govn'r behind too)
Any suggestions? Places to move (with water), or more importantly about the car. Really would like to hear them. Maybe just to find out if anybody even reads this! haha (besides karthief of course, my number 1 fan haha). Sorry no pic's this time dude!
 
Try flipping the IAC, oh, before that did you do the 'base idle reset' per instructions?
Flip? Hmm ok. It does seem like it works..backwards? Base idle, yes. I did and re-did till I worked through proper. The O2 sensors are in the pipes but the pipes are kinda wonky. But as I read 6inches after collector and 18 from exit. So there in there. I taped a piece of pvc pipe to the maf and got it out of the engine compartment and idle increases greatly. Maybe the in side is too short? Is that a thing? I will report back can't say when atm.