351 Cleveland swapped MII

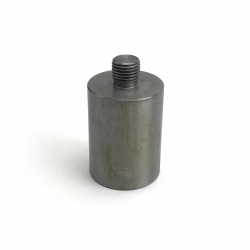
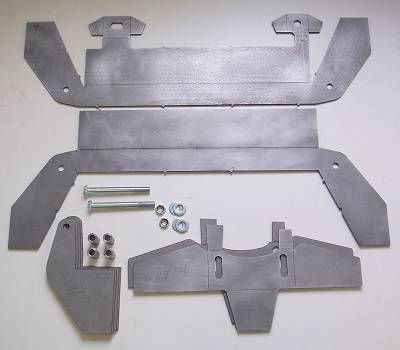
They make rack extenders that would probably get you there.
Yep. I did see those when researching a hot rod thread where a guy installed MIi rack and pinion in his Chevy truck. So getting the additional 1” on the passengers side to correct the pivot pint will be easy. But how do I remove 1” from the drivers side? I don’t see where I can remove anything from the factory inner rack shaft. Does anyone know if there is a way to do this?
 
  • Like
Reactions: 2Blue2
You could install a 2" extender on the passenger side to equalize the distances. :shrug:


As far as shortening them, I know my inner tie rods have plenty of threads where I could cut them down to make them work if the tie rod end didn't work out.
 
Last edited:
  • Like
Reactions: 2Blue2
My thought is to use offset bushings to create this angle. By clocking the front and rear offset bushing 180 degrees from each other (front down, back up) then drilling the middle out to create a smooth consistent hole, this would rotate the rack slightly back causing the rack steering shaft to move at a more downward angle. This would create the most clearance. But I obviously am limited by how much I can rotate it to not put the shaft at too extreme of an angle. I just haven’t found anywhere online where anyone else has done this. So I’m questioning if there is a reason no one has done it. Will it cause any steering issues.
I see no issue from an engineering point of view, because you have spherical bearings on the rack.
If you look to all the aftermarket k-members for Mustang II front suspension swaps, you will see, that most of them have mounting tabs for the steering rack that are in an angle (so it is a common solution):
M2-coilover-end-.webp
 
  • Like
Reactions: 2Blue2
I did a mock up using some 5/8” all thread. I bent the all thread at angle. Inserted the straight end through the cross member and mounted my rack to the angled end. This gave me plenty of clearance for the steering shaft. It obviously put the joint of the steering shaft at a sharper angle, but doesn’t seem so bad that it’s not workable. The steering wheel turns smoothly with no binding that I can feel. So now I currently have headers bolted in and a functioning steering.

I had to cut a pretty good section of the passenger frame rail out. So now the engine needs to come back out and weld up and reinforce that section of frame rail. Once that is done, I’ll finally be to the point of starting this thing.
 
  • Hell Yeah!
  • Like
Reactions: 2Blue2 and LILCBRA
Engine is back out and time to reinforce where I had to cut for header clearance. Drivers side is very minimal so that is where I am starting. Have to reroute the brake lines because they originally ran right next to the header.
IMG_1515.webp

Brake lines are now done. Just need to clean up the cuts and put new metal back in. Will most likely go with a piece of angle to fill the gap. This side I’m not too worried about because the amount of cutting needed for clearance was minimal. Passenger side is a different story. But I’ll get this side done and then worry about the passenger side.
 
Here’s the passenger side frame. I had to cut more out of this side.
IMG_1516.webp


I patched in a piece of angle iron flipped upside down to add strength back into the frame.
IMG_1531.webp


Then put another piece of angle iron flipped up to the topside of that. With a wedge at the spring perch for additional strength.
IMG_1533.webp


Maybe difficult to see all the work in the pictures. But even though this area of frame is physically smaller now, it is actually stronger than factory.
 
Here is both sides painted and completely finished.
IMG_1536.webp
IMG_1535.webp

At this point in time, the plan is to leave the fender aprons open to allow easy access to the header collector bolts. I’ll decide later if I want to close them off. Here’s what the engine bay looks like now from the front.
IMG_1537.webp

Once the motor goes back in, you’ll hardly notice the cut out fender aprons.
 

Attachments

  • IMG_1537.webp
    IMG_1537.webp
    718.6 KB · Views: 104
  • IMG_1537.webp
    IMG_1537.webp
    718.6 KB · Views: 106
Bracket painted and installed with the steering rack in its final location.
IMG_1603.webp
IMG_1605.webp


Here is the final steering shaft angle. Doesn’t seem to severe. Car turns just as easy as it ever did with no binding. I assume that’s as good of a test as you could expect.
IMG_1604.webp
I was also very concerned about the possibility of the joint coming loose, could the shaft pop off the rack and I lose all steering control. So I made the shaft just long enough that even if the lock nut came lose, that shaft can not be pulled off. The steering rack literally has to be loosened and moved forward for the shaft to come off. I felt good about that. Because the lock nut would have to come lose plus the steering rack would have to come lose and move 1” forward before the steering shaft could ever separate. I like that insurance.
 
I’ve been working on the little things lately. Wiring, transmission cooler lines, etc… Funny how those little things tend to take the longest. I did get the battery relocation fully completed as well as the electric fuel pump wired up. Progress feels like it’s moving slower when dealing with all the peripheral things. But we are getting there.
IMG_1673.webp
IMG_1674.webp
 
I discovered my radiator is junk today. Anyone have any recommendations on a good aluminum radiator? I remember putting one in my 65 Mustang that had larger diameter tubes in the core instead of going more cores. That one worked really good and didn’t limit my space because it was still single core and not thicker. But I can’t remember where I bought it from.
 
I discovered my radiator is junk today. Anyone have any recommendations on a good aluminum radiator? I remember putting one in my 65 Mustang that had larger diameter tubes in the core instead of going more cores. That one worked really good and didn’t limit my space because it was still single core and not thicker. But I can’t remember where I bought it from.

It seems like @MustangIIMatt had an aluminum Ebay radiator in ElSuperPinto, but I could be wrong. :shrug: