
You are using an out of date browser. It may not display this or other websites correctly.
You should upgrade or use an alternative browser.
You should upgrade or use an alternative browser.
Progress Thread 74 Mustang II - Build as semi-daily driver
- Thread starter extra_stout
- Start date
I looked again trough all aluminium wheels, but they are all 8kg and more. I don't see why I should spend money on that, if I get only little weight savings. And honestly I like the black steelies. Perhaps I could pep them up with some chrome rings. But I think this looks odd with low profile semi slick... First I need to wear the installed tires down, till I open the tire/wheel topic again.Keep looking. Eventually you'll find the right stuff.
I think I will have more from DIY adjustable sway bar and all the little things I can optimize which are already on my bench.

Big burn outs! Then you'll be needing them new tires and RIMS by next weekFirst I need to wear the installed tires down, till I open the tire/wheel topic again.


")
")
I finally got my refund via paypal customer service of the  ty wheels...
 for paypal
 for Maxilite wheels
Did another google search. And my eye was caught by the basset D-shape wheels... again
https://www.speedwaymotors.com/Bass...x4-25-4-Inch-Backspace-Black-Wheel,72597.html
I also found info about the wheel weight: http://www.bassettwheel.com/dhole_lightweight.html
16 lbs are 7,2kg, which is a weight saving of around 1,5kg compared to what I have now. Also an offset of 0mm (BS4'') will be a very nice fit on the car.
ty wheels... for paypal for Maxilite wheelsDid another google search. And my eye was caught by the basset D-shape wheels... again
https://www.speedwaymotors.com/Bass...x4-25-4-Inch-Backspace-Black-Wheel,72597.html
I also found info about the wheel weight: http://www.bassettwheel.com/dhole_lightweight.html
16 lbs are 7,2kg, which is a weight saving of around 1,5kg compared to what I have now. Also an offset of 0mm (BS4'') will be a very nice fit on the car.
Backorder till end of september... 
ToDo list:
Do all the stuff I have laying around and which is more necessary than new wheels -> Burn the tires this seasons of the wheels -> buy wheels when in stock
ToDo list:
Do all the stuff I have laying around and which is more necessary than new wheels -> Burn the tires this seasons of the wheels -> buy wheels when in stock
Man, this year sucks so bad... I did nothing, except getting the II three times out, to burn some fuel and load the battery with the alternator. Don't have electricity in the garage where it is sitting.Backorder till end of september...
ToDo list:
Do all the stuff I have laying around and which is more necessary than new wheels -> Burn the tires this seasons of the wheels -> buy wheels when in stock
Next week I have on week vacation, is should be dry and mostly sunny. So I hope to get some things done:
- burn the whole fuel tank nearly empty to get new fuel into it before wheater is getting bad
- tacho conversion from 6 to 8 cylinders
- installation of new used fuel level and water temp gauge (the old ones get stuck, the new used ones worked fine in a bench test)
- reverse light is not working; look up where the error is
- maintanance
Things I want to do, but will more likely a thing for next year (hopefully):
- remove DB killers from exhaust (measure before and after to see if it is nearly legal)
- install new u-joints on driveshaft (+ paint); check drive line angles
- custom adjustable front sway bar
- wheels?!

is there a place over there that you can have the driveshaft balanced?install new u-joints on driveshaft (+ paint); check drive line angles
They were kinda wonky from the factory.
There is a good but expensive company. I have the u-joints already here, so I will install and see what the outcome is. I also know how to balance with weights or with hose clamps. And I didn't check driveline angles...
Do you think, that balancing is needed, if u-joints are replaced anyway?
U-joints need replacement because the are the original ones and the seals are brittle and partial gone.
U-joints need replacement because the are the original ones and the seals are brittle and partial gone.
Normally I would say balancing is not needed. You do mention the rubber on the u joints is deteriorated. My question is what type of driveshaft do you have? Does it have the dampner on the yoke? If so that rubber is probably in as bad or worse shape as the u joint rubber. If it looks like it's coming apart I would have it cut off and rebalanced. Most likely it's dried out and not doing any dampening at this point anyway.
I did the t5 install and to shorten, balance and replace u joints was $120.
I did the t5 install and to shorten, balance and replace u joints was $120.
I cut the dampener off, when I did the V8+transmission swap, cause I read what you said already here around. Vibration is currently not a big issue. I thought, that new U-joints and measuring of the drive line angles is the most useful.
I had my 66 drive shaft completely overhauled by the company (paint stripping, new u joints, balancing and painting) that was 240€. For ~550€ you get a drive shaft built to your specs. But with inflation you will now pay very likely more.
I try to do it myself. Noise from the diff, when warm is the most annoying issue... right now. But I still have the option to remove the DB killer
Hmmm... Had yesterday a very nice drive around here with all the colors autumn is showing. I will post some pics. Sadly starting the car was harder every stop. Today I measured the voltage of the battery... 11,8V. Alternator is not working. More luck than brains, that I made it back home.
I hope it was a loose contact of the wire that goes to the I terminal... If not I need to buy a new one or read trough what else the issue could be.
I hope it was a loose contact of the wire that goes to the I terminal... If not I need to buy a new one or read trough what else the issue could be.
You had a nice drive and made it home. Success!!!
I did not go back through the thread. Are you running stock alternator? If so this may be an opportunity vs a failure! Might be a time to upgrade to a 100 + amp alternator and get rid of the stock voltage regulator.
If you have and want to keep a stock setup I would check the voltage regulator. They seem to fail a little more frequently in my experience vs the alternators of the era. Regulators are $20 to $30 around here and you should replace it when replacing the alternator anyway. I don't know if there is an easy test for regulators. We always used to throw a new regulator at them if they came in not charging. More often then not it would fix the problem.

I have a 130A 3G from Ford (Ford part number F3DZ-10346-B). I think it was an issue with the exciter wire (I terminal). The battery is charging with an external device.I need to wait till it is full, to check my new wiring of the exciter wire. I have an 500 Ohm resistor there, because this is what the wiring diagrams for this swap are telling, but it seems you do not need the resistor. I measured only 2V after the resistor; 12V before. I need to recheck that, and get rid of the resistor. It seems it is not needed with an internal voltage regulator of the modern alternators. The old voltage regulator is removed from the car.
I hate wiring, as many other do...
I hate wiring, as many other do...
Removed the resistor. Than it was at 15.1V; with resistor 15V. Then I stepped at the throttle and voltage dropped to battery voltage (12.5v). Seems that the alternator is toast. That sucks. Good thing, everything works as usually, when the battery is loaded.
Does someone understand what the light green/red wire does? I know this is the exciter wire. But I do not understand why there are two options (see chart below):
- wiring with switched 12V
- wiring with bulb/resistor in parallel (or just a resistor without bulb)
My voltage drops from 12V to 9V after the resistor (without running engine, just key on ignition). Can this be the root cause for the failure? The big difference in voltage keeps the alternator fully charging the battery, even if it is near fully loaded. I also had the impression, that the alternator takes a lot of torque from the engine, when cold or at idle.
I measured the resistance of around 400 Ohm. That is near the recommendation... But I don't think that a regular idiot light has such a big voltage drop. Did I mess something up and do I have the wrong resistor?
If I remove the resistor there is still around 0,1V less on the exciter wire than on the battery itself. Is this voltage drop enough and can I leave the resistor away?
Do I need a new alternator in any way?
Sorry... wiring, DC electrics, AC electrics... that is all devils work.
So you're upgrading to a 3g? I don't know the answers to your questions or anything, but I went with this and followed the included directions.
 lmr.com
There was also a writeup from Motor Trend magazine about using salvaged wiring as your illustration shows.

 www.motortrend.com
Hopefully you can find some answers through one of these links.....
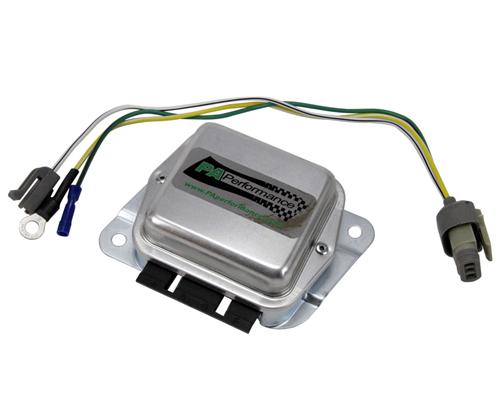
PA Performance Mustang 1G to 3G Plug Upgrade 462802C1
Upgrade from factory 1G alternator to 3G style and retain your factory wiring and gauges.
lmr.com
There was also a writeup from Motor Trend magazine about using salvaged wiring as your illustration shows.
How-to Install a High-Output Ford 3G Alternator into Older Fords
A Ford 3G integrally regulated alternator is the best choice for replacing old 1G externally regulated alternators on amped-up muscle cars.
Hopefully you can find some answers through one of these links.....

Similar threads
- Replies
- 15
- Views
- 295
- Replies
- 34
- Views
- 2K
- Replies
- 11
- Views
- 396
- Replies
- 6
- Views
- 333
Progress Thread
1978 Mustang II Rallye Overhaul (302, C4, T-Tops)
- Replies
- 99
- Views
- 3K