King Cobra Build in Oregon

I am not certain but from my understanding the gear height is slightly different as well on a roller motor. Just changing to a bronze gear will not work long term. The placement of the gear on the dizzy shaft is different.

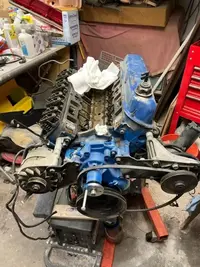
Is the engine together currently? Has the intake manifold been off?

Can you pull one valve cover, loosen one rocker arm and lift out the push rod? Shouldn't take long. If valve covers have not been off this is a great time to replace the valve cover gaskets. Get the modern felpro gaskets that have the metal spine. You will need the valve covers off anyway to prime the engine if it's been sitting for a while. Measure how long the pushrod is and we can figure out which engine you have.

If you have had the intake off did you see what is called the spider in the lifter valley?
 
  • Like
Reactions: 1 user
  • Sponsors (?)


Hello from rainy Oregon. Finally decided it was easier to just install the bronze gear on my MSD distributor. Took the new gear and distributor to a machine ship Friday. Should have it back in a few days. Been cleaning up some bad paint in the engine compartment and will repaint Monday or Tuesday if the rain stops. Have been doing some sanding. Watched a video from a painter in Australia (OZ) regarding getting ride of runs in the clear. Showed using a razor blade with tape on both ends, as shown. Will I'll be, it really worked. Had a bad run on the right door, and others, but tested on the door. Took it right out. Then used some 400 to finish the repair. Just need to finish polishing. Going to use on my fender next. Took the mirrors apart and will paint them when painting the engine compartment. Starting to take engine apart tomorrow and installing new heads and electric water pump, brackets and all new parts. Everything is black Going to sand blast the intake and paint with aluminum engine paint. Did that on another engine and it worked out very nice. Next Sunday going to the movies to see the 40th anniversary of the movie "The thing"...........great movie. Should be playing everywhere. Later
 

Attachments

  • Blade.jpg
    Blade.jpg
    28.5 KB · Views: 45
  • Mirrors.jpg
    Mirrors.jpg
    63.1 KB · Views: 40
  • Side Sanded.jpg
    Side Sanded.jpg
    62.1 KB · Views: 47
  • Like
Reactions: 3 users
The paint run planer is a good old painter trick,
Glad it worked for you!

That big bright yellow is gonna be really neat when done.
 
  • Like
Reactions: 1 users
Getting ready to put engine/T-5 Trans together. Has anyone done this? Did you need a new clutch disc? I have not gotten the trans out but was reading that I may need to get a new disc. How about installing a hydraulic T/O bearing? Been looking on line for information but does not seem to be any ideas who has this. Can find clutch kits for a 2.3 but not 5.0. Just need a street clutch kit.
 
  • Like
Reactions: 1 user
Getting ready to put engine/T-5 Trans together. Has anyone done this? Did you need a new clutch disc? I have not gotten the trans out but was reading that I may need to get a new disc. How about installing a hydraulic T/O bearing? Been looking on line for information but does not seem to be any ideas who has this. Can find clutch kits for a 2.3 but not 5.0. Just need a street clutch kit.
You should get your flywheel resurfaced and balanced first. Then, yes you should get both the friction plate and the pressure plate. (you don't want to be doing this over in a year) If you're using the stock bellhousing you can get both from MDL.
There are several different options for hydraulic. I went with Malwood USA. For the T/O bearing I used a Tilton.
 
  • Like
Reactions: 1 user
Do not use the old clutch disc. Even if it looks okay but is old it may wear extremely fast. MDL carries the stock style for us made with modern materials. They also carry a lighter flywheel if you need one. The springs on the pressure plate have to be weaker due to time and were designed for a 140hp engine.

What bell housing are you using? The rad4 bell bolts up but is not plug and play. The input shaft on the t5 is shorter and will need either a different input shaft or a custom pilot bushing. Both is the preferred method. The bearing carrier is a larger diameter and will need machined or replaced to fit into the rad4 bell. MDL carries both the longer input and the machined bearing carrier. The crossmember will need modified or purchase the T5 conversion one. Driveshaft will need to be shortened about an inch.

Be leary of their pilot bushing though. It did not fit the input shaft of the new trans I bought from them. Caused me some issues and had to pull the trans again to replace it. May have been a machining error affecting my build only. Do not just throw it together before making sure the pilot bushing turns freely on the input shaft and is tight in crank.

I originally used the longer pilot bushing and machined bearing carrier. I had a local machine do the work. It took a few calls to find one willing to do it. They made the bushing out of Oillite. It comes in 4" round stock so I had them make me a long and short version fo either input shaft. This saved me when the MDL pilot bushing failed me. I posted a PDF in the stickied thread about II info that has the specs the machine shop will need. Then I replaced the trans with a new one from Modern DriveLine that has the right bearing carrier and longer input shaft. . Their pilot bushing was way too tight on the input shaft and too loose in the crank so I am now using a shorter bushing made by the machine shop.

I highly recommend the II shifter from MDL. It places the shifter handle in the factory spot without cutting the tunnel at all. They recommended the taller handle. I returned that and got the 6" which fits much better. It places the knob in the factory spot.
 
OUCH I am beginning to think I should have kept the OEM 4 speed. Flywheel is at the shop getting resurfaced now. Be ready this afternoon. I did get the shifter from MDL along with the transmission support. will be getting a new pressure plate, T/O bearing and disc. May ask to buy back the OEM four speed and sell the T-5.................Thought this would be a bit easier.
 
IICrew: Just picked up my flywheel.....sure is pretty and shiny.....Machinist said he can make the extension you spoke about. Can you send the PDF with details. He said he can make one, no problem. Just in case, does anyone else need/want of of these. About $90 each. Thanks muchly Oh, using the OEM bell housing. Just need to have the driveshaft shorten.
 
  • Like
Reactions: 1 user
You will never know how much better the T5 is if you back out. It is so worth it.

I have a Mach I with Rad4 and my T Top with a t5. Night and day. I am chasing vibration problems on the t top car but would do it over again and again to get a better 1st gear and overdrive. I have another Rad 4 from my old Cobra that was rebuilt twice for 2nd gear breaking and it now needs third gear. It was over a span of 30 years and less than 20,000 miles between all 3 failures. That was a stock 302 with just a 4 bbl, headers and duals. That trans is why I swapped in the T5 from the start on this build. T5 is easily repairable where the Rad4 is not. My transmission guy is about to retire and he could not find the right gears for the rad4. The fist 2 rebuilds were not a parts nightmare where this time is. He needed some parts to rebuild the old t5 and had them the next day.

You already have most of what you need.

Driveshaft is a measurement and having a shop shorten, balance and replace u joints. In case they ask, you most likely have the big caps u joint on the pinion side. Under $100 at driveline shop near me.

Machine work was under $100 to turn the bearing carrier and make the bushings. This way you use the current input shaft and only have to remove bearing carrier and reinstall that. I took my bell housing and the bearing retainer and told them to fit them together. You can have the bell machined but I did not want to change such a rare part.

You can get the steel bearing retainer, pilot bushing and input shaft from MDl. Unless you have a Z rated T5 it is aluminum anyway and is a weak point in the trans. You will need to know what 1st gear your t5 has. The 2.95 input was a few hundred but the 3.35 was around $100. If you replace these parts you should reshim the trans. It is not hard.

Enzio used the MDL parts and did not have issues. I had some fitment issues but this engine has powered 4 vehicles for me using a different transmission each time. 1 install was an auto the others were an old truck 4 speed, rad 4 and now t5. T5 is by far the best.

You have made it this far along. May as well do this right too. The difference is huge and makes a much better driving experience.
 
  • Like
Reactions: 1 user
On the front page is stickied the Best of MII tech page. 2nd post has a pdf labeled Butches T5. It is a write up I found somewhere along the line. The bottom of the post is a couple pdf's. Use the longer bushing for shorter input and shorter bushing for the longer one.
 
Couple things I would add to the pdf's. They work as is but could make it easier on you. Have the machinist bevel the edge of the hole. Makes inserting the input shaft a bit easier vs a squared off edge. Do not taper the hole just bevel the edge so the shaft aligns itself and slides in easier. I would add a bit to overall diameter. Just a bit though. It may be my crankshaft but the fit is a little loose at the crank. It stays in place but I can insert and remove it by hand where as it should take a little force. Once machined make sure the pilot slides onto the input shaft and spins easily.
 
Worked on the engine today. Pulled the intake manifold. Sand blasted the dirt and crude off then painted using aluminium (for anyone in England or OZ, I painted the AL A MINEUM) Came out nice. Pulled the all the extra stuff, water pump, power steering and alternator off along with brackets. For some reason I now have a box full of alternators.....Replacing all this with my CVF Racing stuff. All black. Painting the block yellow. Started thinking about headers again. Any suggestions? Looked up some, but don't think the $600 or more is worth it. Just a street and car show Mustang. OEM headers are in good shape. May sandblast them and paint with hi temp yellow. Or may just leave All "Na tur el" Primed the engine Pulled the distributor and used the oil pump thingie and electric drill. Oil flowed everywhere so all looks good. Putting a new high pressure oil pump in. Gota go, Holy Molly is on......
 

Attachments

  • Engine Old.jpg
    Engine Old.jpg
    72.9 KB · Views: 43
  • Intake Dirty.jpg
    Intake Dirty.jpg
    89 KB · Views: 48
  • Intake Clean.jpg
    Intake Clean.jpg
    54.1 KB · Views: 41
  • Like
Reactions: 2 users
I have the old Black Jack headers, they fit like a glove except one spot around the RAD bellhousing. The problem is that they're not made anymore unless someone knows something that I don't.
 
The oem manifolds do not flow as well as a set of headers. If your after performance you need the headers. If your after a daily driver and not doing other engine changes like heads or a cam it's not gonna make a huge difference for you. The manifolds are very heavy where as headers reduce the weight on the front axle. Weight was a significant factor on my build.

Headers are hard to seal up properly. Some headers will not seal and you get that tick. Using the layered header gaskets can help but some are just not made well enough and will invariably leak. You will need the longer header bolts using the layered gasket. I think standard is 3/4" but you need the 1". Or standard is 1" and you need the 1.5". You will also need the smaller head on the bolts. I prefer the 3/8 12 point header bolts.

I have 3 versions of headers here now. The old blackjacks, headman and the Hookers. Avoid the ones that go under the front crossmember (Hedmans). They are usually cheaper at 300 to 400 bucks. You want the heavier walled ones that fit correctly and do not go under cross member(Hooker). CAR has them for 700 or so. I got lucky and found an unused set on craigslist for $100. Some headers you have to cut about an inch off the passenger strut rod for clearance (Hedman). Some headers will need adjusted with a BFH to get clearance at the steering shaft (Blackjack).

If you do get headers get them powdered coated unless you want rusty headers. I prefer to install the headers with the engine as a package. Leave the headers loose on the engine so you can wiggle them into place. The hedmans I had to remove the passenger side and lay it in engine bay as I was installing. The others go in neatly as a package.

Now that the intake is off we can also see this is a non roller motor.
 
Do you have a plan for engine mounts? If you are reusing the old ones be prepared to rebuild them. Even if they look good now that rubber is old and will tear sooner vs later. The kit is about $100 from CAR. Much easier to just do them now.
 
  • Like
Reactions: 1 user
I see you went with bronze for the dizzy gear. You will need to keep an eye on it. The bronze is supposed to wear without damaging the cam gear. It will wear much faster then a cast gear. I have no personal experience with bronze but have read it needs replaced frequently. One place I was reading they had to replace it about once a year on a weekend driver with a just few drag strip passes.
 
  • Like
Reactions: 1 user
Your Intake is looking nice!
How will it fit under the hood is the question. Will the right air cleaner make it all fit?
Excited to see the CVS front dress stuff.
 
How long has this engine been sitting? If it's been any length of time check the valve seals. They dry out and turn hard. This leads to smoke. You can take a small screw driver or similar and poke at the seals. If they are soft you should be okay but that is not a guarantee they wonk leak.

Are you replacing the timing chain? If you do not know the history I would certainly replace it before installing the front dress.

Oil down the cylinders before turning it over. If it's been sitting I would do that now as your going to be rotating the engine as you service it. If you do this make sure you crank it over before installing the spark plugs. Do not want too much oil left which fouls plugs or worse cause it to hydrolock. It will smoke on startup but better some smoke for a test drive then dry cylinder walls.

A new rear main seal is a good idea but that's getting a little more complicated.

I love the felpro one piece oil pan gaskets. I have noticed they can be hard to keep in place at the timing cover if you do the pan last. It's better to install the timing cover then oil pan. You need a little silicone where the tabs meet the block front and rear.

Since we now know this is a flat tappet engine I would get the Lucas 10w40 hot rod oil and Wix oil filters. Enough for two oil changes. I would treat as a new engine and run a short breakin period on it. Get it hot, check dipstick for metal and if it's okay do a test drive then change the oil. Cut the filter open and see if you find anything concerning.