'88 GT Convertible - Croatia, Europe

Howdy!

After a few days of hesitation, reading all those spooky AOD fluid change myths I've decided (since there is no burning smell) that I actually can't do much worse.
IMHO If AOD is at it's tiptoes to blow or mechanical damage already done, it will blow either way....

So, I dropped the pan and filter, spun TC and drain the black stuff out of them for 24 hours. Was not looking like red trans oil, but more like used engine oil. Black as a black hole. In pan I also found a plastic plug, so I may assume (If the PO's didn't do what I will :), read later in the text) that AOD has 140k km (87.5k miles) with factory oil.

It is not so messy job, but if You use a manual syphon pump before taking pan off. You don't have to pump all out, just enough it won't pour on Your face when You unbolt screws.

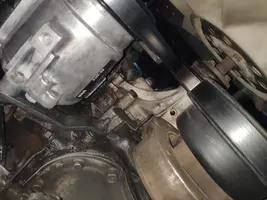
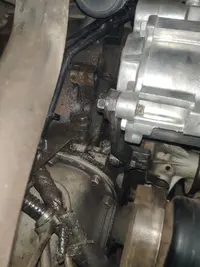
Guys, You should warn people that actually the hardest part and 1/2 of the labor time was used by driving the ******* AOD pan out of the ******* PITA trans mount crossmember. Clearance is very tight and pulling the pan down is actually PITA but WAY EASIER than installing back up with the rubber gasket on top just waiting to move :-(
I managed to keep the gasket in place placing all pan bolts to their place thru rubber gasket.
Don't know if I have something done/bolted wrong on this car trans mount but this part was a major issue for me with AOD fluid change.

Anecdote:
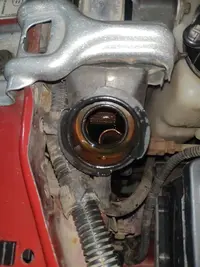
I did not follow recommendations from here (to pour 4 + crank few secs + 4 + run engine + 4 qt's), which cost me ~0.2qt of ATF fluid. Instead of that smart head poured 5 litres, cranked 5-6 seconds and within pouring another ~2 litres I got overflow under the AOD.
Quickly started the engine and topped up. So, in future I WILL FOLLOW recommendations from experienced STANGNET crew!!!!!
It was not too much that went out, but made me angry I did not follow good advices from here.


Cranked the car, run thru all gears few times. AOD shifts a bit easier I think, quite noticeable in shifting to reverse. Now I can just hope it wont slip or other spooky stuff from intro stories :)

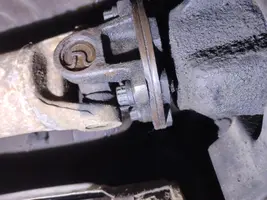
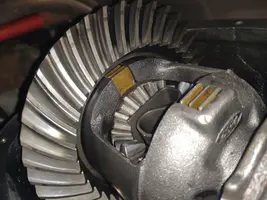
Test drive still to be done, as I left the car raised to change differential fluid also.... maybe I will try to carefully pull O2 sensors out (don't have a proper tool, but I have 2 brand new Bosch O2's)....

EDIT: ohh, I put the plastic part back in pan as on picture, just to keep authenticity and original state of the car :)
 

Attachments

  • IMG_20210116_114019.jpg
    IMG_20210116_114019.jpg
    495.9 KB · Views: 100
  • IMG_20210117_145654.jpg
    IMG_20210117_145654.jpg
    372.4 KB · Views: 84
Last edited:
  • Sponsors (?)


Luck in trouble....
So, I unloosed differential cover screws and went to take out diff fill screw.
LUCKILY I took large light and therefore I saw pretty fresh oil traces above and in line with pinion flange.
The mushroom had traces of old leak at the bottom, but this one is new I would say. I have a leak which I didn't even see, and just a luck spared me loosing a new diff liquid.
I need pinion seal. Waiting for parcel.
 

Attachments

  • IMG_20210121_201817.jpg
    IMG_20210121_201817.jpg
    291.5 KB · Views: 73
  • IMG_20210121_201820.jpg
    IMG_20210121_201820.jpg
    406.1 KB · Views: 62
  • IMG_20210121_201808.jpg
    IMG_20210121_201808.jpg
    514 KB · Views: 66
  • Like
Reactions: 1 user
Still waiting for pinion seal from rockauto, but a few things were done on between:
- diff gears blasted with brake clean and protected with WD40 afterward (when I wait for seal)
- diff cover and diff balancer upper holder black powder coated
- diff balancer, bolts, mushroom painted from below and rear sway bar all in black
- cleaned rear u joint, polished pinion flange surfaces
- replaced o2 sensors for new ones (3 days od pulling PITA passanger side, finally done with torch)
- installed new hood to firewall seal
I have attached pic of my diff gear. Looks good (to me like beginner), should it be?
Should I turn and clean all teeths more detailed with rags, or makes no sense?
 

Attachments

  • IMG_20210130_121936.jpg
    IMG_20210130_121936.jpg
    422.8 KB · Views: 61
  • IMG_20210130_121928.jpg
    IMG_20210130_121928.jpg
    396.7 KB · Views: 56
And today a surprise :-(
Puddle of coolant under front passanger side of the car. BTW I saw few drops a day after heating engine to check AOD level as a part of AOD service, but nothing severe... Today, radiator is empty.
I can't find and pinpoint exactly the source as I must dry front left part of the engine.
Remember, intakes were off, all seals changed. I did not check torque after 3 heat cycles.
Coolant was tested, showed -36°F. Ambient temp 28, low 20's in last few days

Hoses are dry, water pump hole dry, the leak starts at first picture location... Right of blue gasket I think...
Few pictures attached.
Any clue/experience where it could leak from and why does it leak, why when it was not started 2 weeks?!?

Thank You guys.
 

Attachments

  • IMG_20210201_175409.jpg
    IMG_20210201_175409.jpg
    344.9 KB · Views: 66
  • IMG_20210201_180144.jpg
    IMG_20210201_180144.jpg
    318.3 KB · Views: 55
  • IMG_20210201_175234.jpg
    IMG_20210201_175234.jpg
    339.2 KB · Views: 58
  • IMG_20210201_175216.jpg
    IMG_20210201_175216.jpg
    371.1 KB · Views: 53
  • IMG_20210201_175155.jpg
    IMG_20210201_175155.jpg
    395.7 KB · Views: 63
You need to grab a coolant pressure tester. It allows you to pump pressure in to the radiator to force coolant or water out of the leaking area. Over here in the states the parts stores lend them for free..just have to give them identification.

Common places for leaks on that side are the coolant heater pipes, thermostat housing, water pump gasket, timing cover gasket, and hoses from water pump.

Your thermostat housing looks dry in the pic. I just had to do my thermostat housing because of a coolant leak.
 
  • Like
Reactions: 1 users
sorry for the late comment on the AOD , but if you can find a small flat strong magnet, place it on the bottom rear of the AOD pan if you don't already have a pan magnet on the inside. You can also get magnetic oil drain bolts. They will trap and hold any small metal fragments.
 
  • Like
Reactions: 1 users
Common places for leaks on that side are the coolant heater pipes, thermostat housing, water pump gasket, timing cover gasket, and hoses from water pump.

Checked everything except gaskets. Need to dry engine and try to find that pressure tool....

sorry for the late comment on the AOD , but if you can find a small flat strong magnet, place it on the bottom rear of the AOD pan if you don't already have a pan magnet on the inside. You can also get magnetic oil drain bolts. They will trap and hold any small metal fragments.

Honestly? I took one from old hard drive for that purpose. When wrestling with putting pan with gasket back on I put it aside on exhaust pipe.
Don't smile now, but I left it there and when I finished torquening, I saw it on pipe....

The rear diff gears look good to me. Make sure you add friction modifier to the new gear oil.

Great to hear that. I took motorcraft oil and friction modifier also. I am worried more about that pinion nut stories, but I counted turns and also measured distance from top of bolt to bit within .1mm.
I hope I will put it back correctly, and I will be fast enough for red loctite :)
 
Here is what I found. Hope it helps

20210203_181525.jpg

20210203_181734.jpg

20210203_182451.jpg


It also said under no circumstances should the bearing preload be reduced to get to the specified torque reading.
 
  • Like
Reactions: 1 user
@JMGlasgow I was done today, just before I saw Your post.
Pinion nut clearly stops when it is back on old position, checked with counting back turns and with micrometer (measured before disassembly). You WILL feel it. I gave it just a tiny bit tension with wrench to compensate wear. IMHO You must be a Hulk to crush that crush preload washer.
Wish I had that before tearing apart...
But, beware, I did not have objections on differential, I just made fluid and pinion seal change.

I only messed up with red loctite which I found dried out. I used blue...

Pinion flange has a play like 1/8" in clockwise and half of that in CCW looking from front of the car. I watched gears carefully when checking play: 50% of that play is from smaller gears, and 50% from biggest. I suppose it should be like that. That is probbably also why I can turn driveshaft ~1/4" with handbrakes applied.
U-joints looking good, must check when I put driveshaft back on.

Now I will let it cure (RTV on pinion seal outer ring and diff cover) for some 24h before new oil and fric. modifier.

Cheers!!!!

Final result picture:
 

Attachments

  • IMG_20210204_202529.jpg
    IMG_20210204_202529.jpg
    265.4 KB · Views: 62
  • Like
Reactions: 2 users
Found leak point. Left side behind water pump, there are two bolts. Upper bolt at the point where it is joint with block. Water pump gasket looks bad but it is not source of leak.
Jacks removed from back, front raised, topped up coolant. Dripping.
Started the car, few drips went out and it stoped leaking, completely.

This should be timing cover gasket, right?
 

Attachments

  • IMG_20210206_105201.jpg
    IMG_20210206_105201.jpg
    411.4 KB · Views: 69
It could be the timing cover gasket, the heat expansion difference between the iron block and the aluminum cover is different and can leak when cold, temp expansion can seal the leak but it is temporary, it will get worse, also electrolysis can eat at aluminium and metal (bolts mostly) parts,
Time for a tear down and inspection of the timing cover.
JMO and not based on any real automotive knowledge.
 
  • Like
Reactions: 1 user
@General karthief it should be TC gasket. This would be a strange point for (let's hope not) crack in TC/block, would it?

Anyways, front part ordered: gaskets, clutch, water pump, timing chain set, harmonic balancer.

And I would say I had pure luck that I had a coolant leak at timing cover, cause I noticed the other day that balancer has it's gentle dance... today's inspection clearly shows it's going south....picture attached.
Without the leak I would have a hole in a hood.
And that may have been a reason of misterious occassional metal chirping sound with warm engine.
 

Attachments

  • Screenshot_2021-02-08-20-16-16-645_com.miui.gallery.jpg
    Screenshot_2021-02-08-20-16-16-645_com.miui.gallery.jpg
    274.2 KB · Views: 73
  • Like
Reactions: 1 user
I've never dealt with a cracked timing cover on a mustang. Over the years I've heard some stories though. The water pump studs that go through the timing cover are known to break off though. Usually there is enough to remove the broken piece with a torch and vice grip pliers.

Glad you saw the balancer before it was too late and damaged something else. Probably wouldn't have flown off but could've torn up the timing pointer and caused some bad vibrations.
 
  • Like
Reactions: 1 user
Glad you saw the balancer before it was too late and damaged something else. Probably wouldn't have flown off but could've torn up the timing pointer and caused some bad vibrations.

Yeah, but scary story for yall is that I checked timing few weeks ago, it was perfectly fine. Didn't check balancer ruber for cracks though...
BUT God knows when would I check it next time in normal circumstances....
It went south in less than 80 miles and 30 minutes drive...
Tearing accessories is less worry than crankshaft damage that may happen due to bad balancer.
LUCKILY to be honest, there was a coolant leak and I saw it.
CHECK YOUR BALANCER! (I will now, regulary with all other fluids)
 
I have a race style balancer on mine. No rubber insulator to worry about. You are lucky. It will tear a crank and bearings up if left too long. Now you have a reason to make the timing cover and the balancer as beautiful as you've made everything else you touched. I like the color of the rear cover. Looks very professional and clean. You are doing good work. The car wants you to fix it up. It keeps helping you find more and more stuff before it would break in a bad situation. When you are done you'll be able to drive anywhere.
 
  • Like
Reactions: 1 users
While waiting for Rockauto's parcel with complete front part of the engine and new chain set, I turned my attention to passenger side doors window issues and lock actuator. The door lock was stuck, the window would not open every time, or opening just occasionally. On one drive it would work, other not....

Door insulation:
The first thing I found is insulation between door panel and door metal missing.
I believe there WAS something from Ford factory. There is only PVC "bag-like" material stapled to back of door cardboard.
I got a ~3/8" sponge and double sided tape to fix it to back of the door liner and some drywall vapor barrier with aluminium foil to "powertape" it to door metal. This will be a first aid kit.
My final plan is to coat the door liner back side with either 1/4" Armaflex with alu foil OR "alubutyl" dampening. Thin alu side to outside, if I recall correctly... the point of alu/pvc foil is to block moisture/vapor/water entering inside the vehicle and/or insulation, correct?

Window:
The passenger side motor was clicking this time, not driving. After a few tries (ignition on-off) it got the window down slowly. Every time I pushed it again, it was going with less effort. So I played like a child for a few minutes... got a flashback when dad left us to play in their car barely walking...
This got it actually fixed. Now it goes with every ignition on and single click.
Rear quarter behind the driver is no-go. It only click's in up or down direction, no effort to move. Motor has blown?
BUT this is valid only for controls from the drivers side. Same goes for lock/unlock, it unlocked only once from pass side, after that nothing, 0.
Passenger armrest controls are semi-dead. The switch works itself, tested with MM for contiuinity. Controls from driver's side working. I need to find gremlins... clean contacts, check wires... closing and opening doors do not change things.

Locking:
I also swapped stuck passenger locking actuator with the new one (I ordered in December). Now I can finally lock passenger doors with the key from outside, woohoo! Same thing like for windows... but now on the drivers side, it was hardly sticky going up with unlock. Few times unlocked with my help, now it locks and unlocks like a new car with a THUMP! Is this a known issue, or is a drivers side actuator dying also?

Speakers:
Stock passenger speaker in awful condition. Almost rotten textile membrane. Vibrating on slightly higher volume. As a temporary fix went to closest superstore and took almost cheapest JVC CS-J610XU (6.5" doors) and CS-J420XU (4" dash). I will deal with hi-fidelity speakers later... too much stuff before that. First, I noticed stock 5-3/4" speaker was way heavier than new 6.5", and I may have noticed a slight loss of low bass with new 2-way speakers.
Disconnecting 3.5" premium dash speaker I saw door speaker stopped working, meaning they are in parallel. If stock's are 6ohm that means 3ohm for Ford HU, now I am driving aftermarket 4ohm which means 2ohm for HU. I hope it won't blow....
I took 4" speaker and I will easily dremel edge, I need something like 1/8" to fit 4" full range in there. Also, there is capacitor in stock speaker 47uF, IMO meant to block bass. First, I will try this cheap speaker without that.
Sound is decent with this JVC's, but when parked in the garage. I will try to keep all stock as possible, dremeling for 4" is a sin for me, but couldn't get normal 3.5" speakers here - either total crap or super-pro-car-audio 400$ ones.
Now, when testing balance and fade I also heard rear speakers not working (or not existing - to be checked)... this is '88 so they should be under the rear quarter liner. I am also not sure if there is amplifier behind HU, but as I read, with speakers in the doors, it should be premium with amp. Maybe someone messed with the wiring...

A lot's of things I covered with just one simple door lock fix :)
A lot's of questions if anyone has will to help ;-)
 

Attachments

  • IMG_20210210_201954.jpg
    IMG_20210210_201954.jpg
    344.2 KB · Views: 60
  • IMG_20210210_201826.jpg
    IMG_20210210_201826.jpg
    408.5 KB · Views: 59
  • Like
Reactions: 1 users